


一、准备
1、环境
因为要在 nacos 中配置,要求安装并启动 nacos 。可以参考这篇博客。
我的 nacos 版本是 2.2.1 ,演示安装的 seata 版本是 1.6.1 。
2、下载
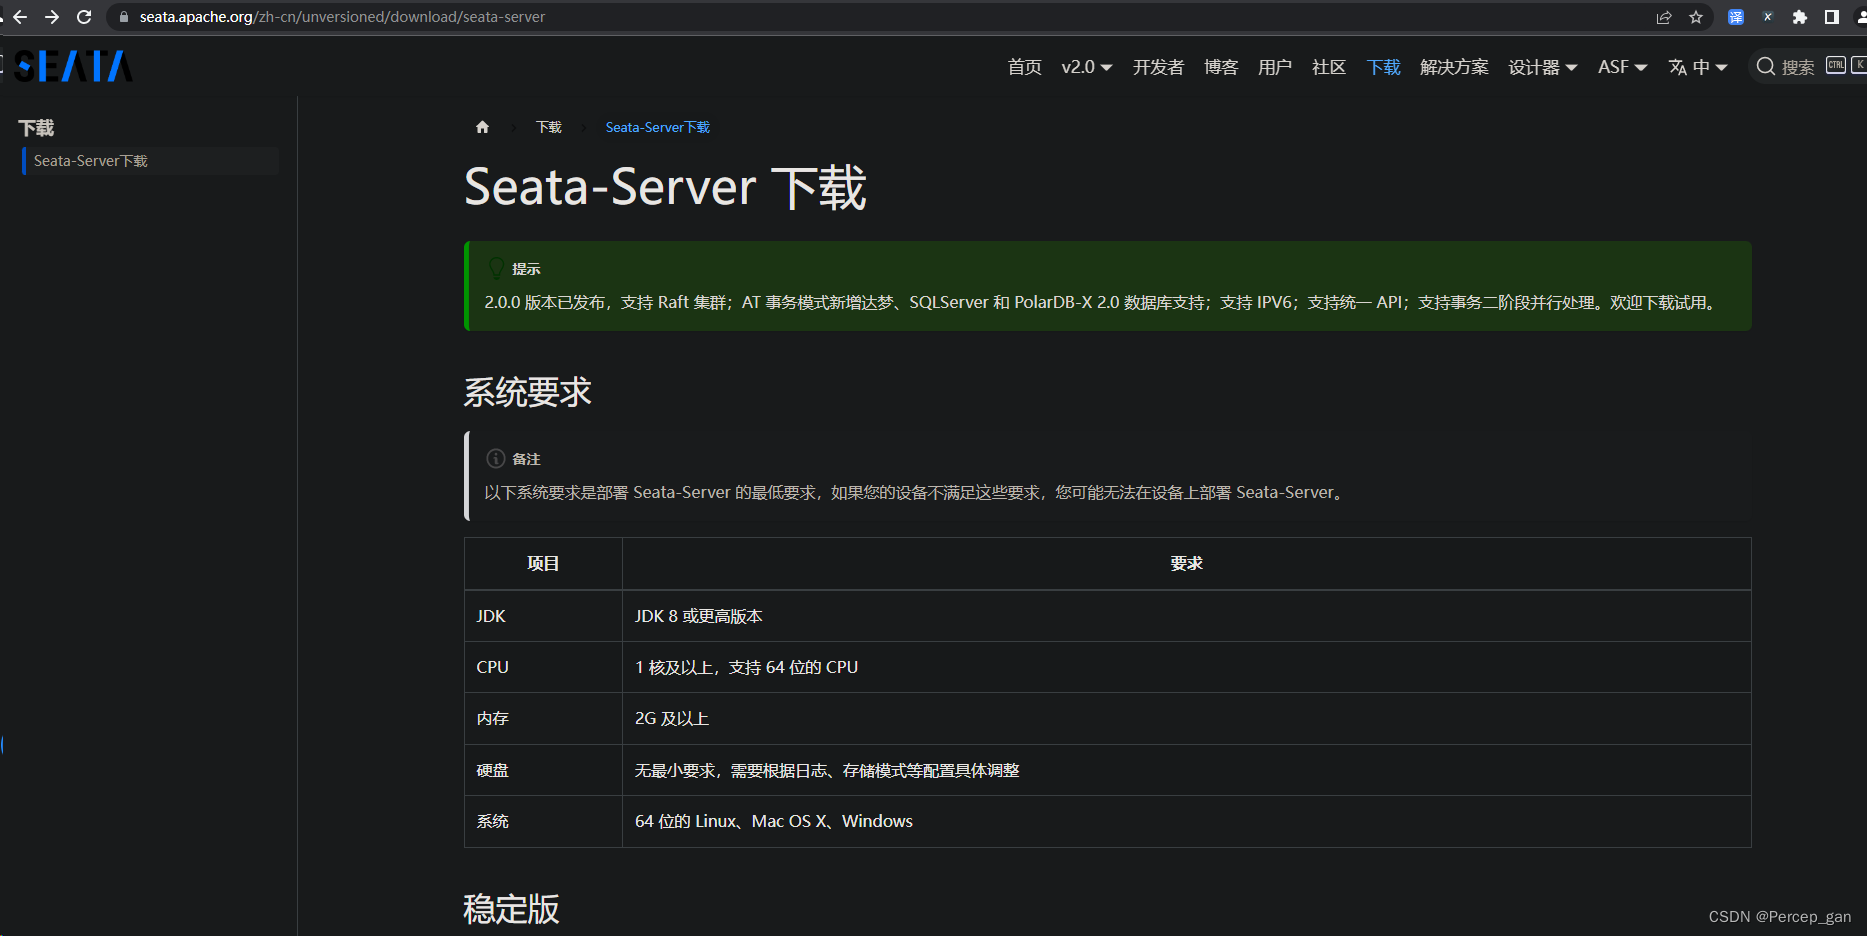
seata的下载地址如下:
https://seata.apache.org/zh-cn/unversioned/download/seata-server
开发环境的 seata 的版本为 1.6.1 ,为了保证版本一致,这里也下载 1.6.1 版本。
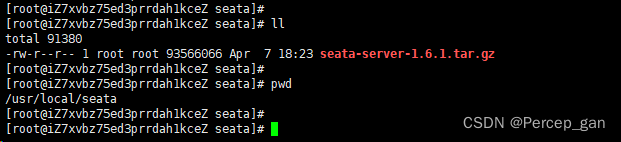
3、上传到服务器
这里上传到 /usr/local/seata 目录
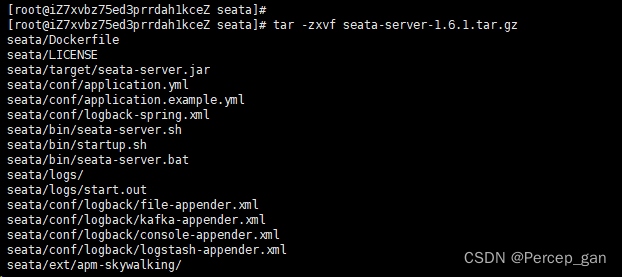
4、解压
解压 seata ,使用如下命令:
tar -zxvf seata-server-1.6.1.tar.gz
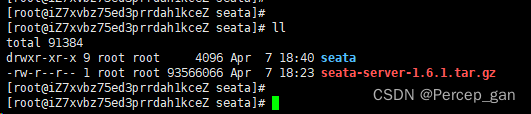
解压后的目录为 seata ,这里将它修改为 seata-1.6.1 ,命令如下:
mv seata seata-1.6.1

二、配置
配置文件在根目录的 conf 文件夹下,这里是 /usr/local/seata/seata-1.6.1/conf 目录
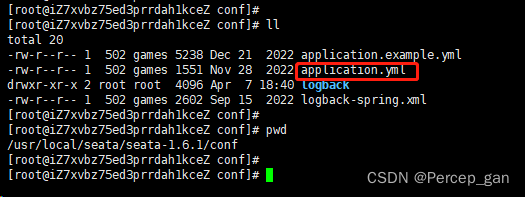
1、备份配置文件
先备份一下配置文件,防止误修改,命令如下:
cp application.yml application_bk.yml

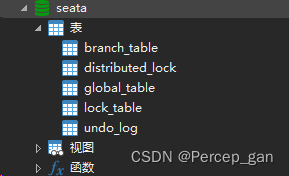
2、导入sql
这里选用 mysql 存储模式,所以导入 mysql 的sql,数据库脚本的地址如下:
https://github.com/apache/incubator-seata/tree/master/script/server/db
先创建一个数据库,名称可以自定义,这里为 seata ,命令如下:
CREATE DATABASE `seata`
然后再执行sql,这是对应的sql:
-- -------------------------------- The script used when storeMode is 'db' --------------------------------
-- the table to store GlobalSession data
CREATE TABLE IF NOT EXISTS `global_table`
(
    `xid`                       VARCHAR(128) NOT NULL,
    `transaction_id`            BIGINT,
    `status`                    TINYINT      NOT NULL,
    `application_id`            VARCHAR(32),
    `transaction_service_group` VARCHAR(32),
    `transaction_name`          VARCHAR(128),
    `timeout`                   INT,
    `begin_time`                BIGINT,
    `application_data`          VARCHAR(2000),
    `gmt_create`                DATETIME,
    `gmt_modified`              DATETIME,
    PRIMARY KEY (`xid`),
    KEY `idx_status_gmt_modified` (`status` , `gmt_modified`),
    KEY `idx_transaction_id` (`transaction_id`)
) ENGINE = InnoDB
  DEFAULT CHARSET = utf8mb4;

-- the table to store BranchSession data
CREATE TABLE IF NOT EXISTS `branch_table`
(
    `branch_id`         BIGINT       NOT NULL,
    `xid`               VARCHAR(128) NOT NULL,
    `transaction_id`    BIGINT,
    `resource_group_id` VARCHAR(32),
    `resource_id`       VARCHAR(256),
    `branch_type`       VARCHAR(8),
    `status`            TINYINT,
    `client_id`         VARCHAR(64),
    `application_data`  VARCHAR(2000),
    `gmt_create`        DATETIME(6),
    `gmt_modified`      DATETIME(6),
    PRIMARY KEY (`branch_id`),
    KEY `idx_xid` (`xid`)
) ENGINE = InnoDB
  DEFAULT CHARSET = utf8mb4;

-- the table to store lock data
CREATE TABLE IF NOT EXISTS `lock_table`
(
    `row_key`        VARCHAR(128) NOT NULL,
    `xid`            VARCHAR(128),
    `transaction_id` BIGINT,
    `branch_id`      BIGINT       NOT NULL,
    `resource_id`    VARCHAR(256),
    `table_name`     VARCHAR(32),
    `pk`             VARCHAR(36),
    `status`         TINYINT      NOT NULL DEFAULT '0' COMMENT '0:locked ,1:rollbacking',
    `gmt_create`     DATETIME,
    `gmt_modified`   DATETIME,
    PRIMARY KEY (`row_key`),
    KEY `idx_status` (`status`),
    KEY `idx_branch_id` (`branch_id`),
    KEY `idx_xid` (`xid`)
) ENGINE = InnoDB
  DEFAULT CHARSET = utf8mb4;

CREATE TABLE IF NOT EXISTS `distributed_lock`
(
    `lock_key`       CHAR(20) NOT NULL,
    `lock_value`     VARCHAR(20) NOT NULL,
    `expire`         BIGINT,
    primary key (`lock_key`)
) ENGINE = InnoDB
  DEFAULT CHARSET = utf8mb4;

INSERT INTO `distributed_lock` (lock_key, lock_value, expire) VALUES ('AsyncCommitting', ' ', 0);
INSERT INTO `distributed_lock` (lock_key, lock_value, expire) VALUES ('RetryCommitting', ' ', 0);
INSERT INTO `distributed_lock` (lock_key, lock_value, expire) VALUES ('RetryRollbacking', ' ', 0);
INSERT INTO `distributed_lock` (lock_key, lock_value, expire) VALUES ('TxTimeoutCheck', ' ', 0);
如果是AT模式,AT模式也是seata建议的模式,需要加上这张事务回滚表,具体sql如下:
DROP TABLE IF EXISTS `undo_log`;
CREATE TABLE `undo_log`  (
  `branch_id` bigint(0) NOT NULL COMMENT 'branch transaction id',
  `xid` varchar(100) CHARACTER SET utf8mb4 COLLATE utf8mb4_0900_ai_ci NOT NULL COMMENT 'global transaction id',
  `context` varchar(128) CHARACTER SET utf8mb4 COLLATE utf8mb4_0900_ai_ci NOT NULL COMMENT 'undo_log context,such as serialization',
  `rollback_info` longblob NOT NULL COMMENT 'rollback info',
  `log_status` int(0) NOT NULL COMMENT '0:normal status,1:defense status',
  `log_created` datetime(6) NOT NULL COMMENT 'create datetime',
  `log_modified` datetime(6) NOT NULL COMMENT 'modify datetime',
  UNIQUE INDEX `ux_undo_log`(`xid`, `branch_id`) USING BTREE
) ENGINE = InnoDB CHARACTER SET = utf8mb4 COLLATE = utf8mb4_0900_ai_ci COMMENT = 'AT transaction mode undo table' ROW_FORMAT = Dynamic;
3、修改配置前
主要修改这部分:
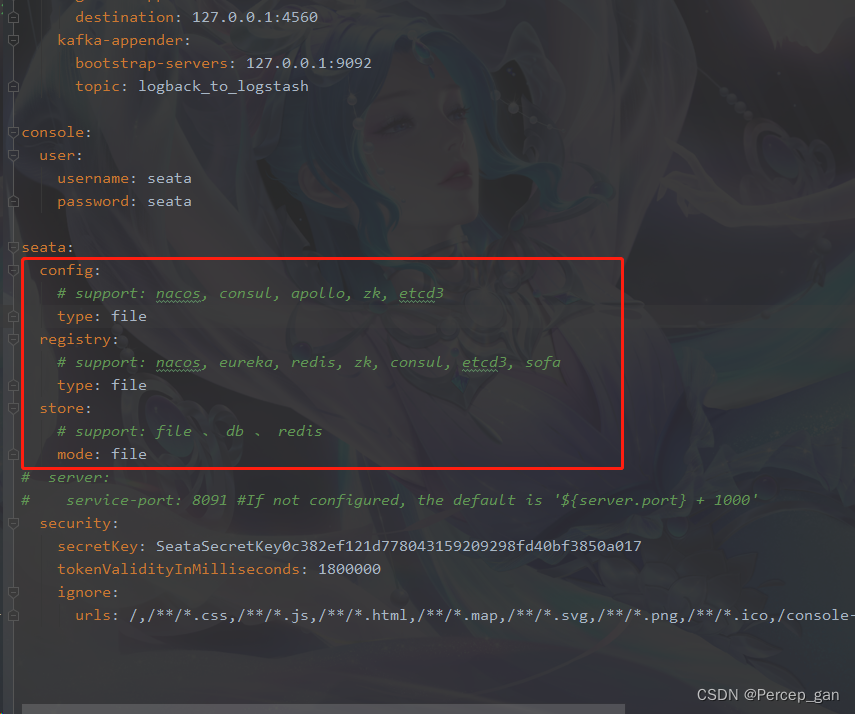
这是原来的完整配置:
#  Copyright 1999-2019 Seata.io Group.
#
#  Licensed under the Apache License, Version 2.0 (the "License");
#  you may not use this file except in compliance with the License.
#  You may obtain a copy of the License at
#
#  http://www.apache.org/licenses/LICENSE-2.0
#
#  Unless required by applicable law or agreed to in writing, software
#  distributed under the License is distributed on an "AS IS" BASIS,
#  WITHOUT WARRANTIES OR CONDITIONS OF ANY KIND, either express or implied.
#  See the License for the specific language governing permissions and
#  limitations under the License.

server:
  port: 7091

spring:
  application:
    name: seata-server

logging:
  config: classpath:logback-spring.xml
  file:
    path: ${user.home}/logs/seata
  extend:
    logstash-appender:
      destination: 127.0.0.1:4560
    kafka-appender:
      bootstrap-servers: 127.0.0.1:9092
      topic: logback_to_logstash

console:
  user:
    username: seata
    password: seata

seata:
  config:
    # support: nacos, consul, apollo, zk, etcd3
    type: file
  registry:
    # support: nacos, eureka, redis, zk, consul, etcd3, sofa
    type: file
  store:
    # support: file 、 db 、 redis
    mode: file
#  server:
#    service-port: 8091 #If not configured, the default is '${server.port} + 1000'
  security:
    secretKey: SeataSecretKey0c382ef121d778043159209298fd40bf3850a017
    tokenValidityInMilliseconds: 1800000
    ignore:
      urls: /,/**/*.css,/**/*.js,/**/*.html,/**/*.map,/**/*.svg,/**/*.png,/**/*.ico,/console-fe/public/**,/api/v1/auth/login
4、修改配置后
已经在修改的地方做好了注释,初次配置不建议跳过
#  Copyright 1999-2019 Seata.io Group.
#
#  Licensed under the Apache License, Version 2.0 (the "License");
#  you may not use this file except in compliance with the License.
#  You may obtain a copy of the License at
#
#  http://www.apache.org/licenses/LICENSE-2.0
#
#  Unless required by applicable law or agreed to in writing, software
#  distributed under the License is distributed on an "AS IS" BASIS,
#  WITHOUT WARRANTIES OR CONDITIONS OF ANY KIND, either express or implied.
#  See the License for the specific language governing permissions and
#  limitations under the License.

server:
  port: 7091

spring:
  application:
    name: seata-server

logging:
  config: classpath:logback-spring.xml
  file:
    path: ${user.home}/logs/seata
  extend:
    logstash-appender:
      destination: 127.0.0.1:4560
    kafka-appender:
      bootstrap-servers: 127.0.0.1:9092
      topic: logback_to_logstash

console:
  user:
    username: seata
    password: seata

seata:
  config:
    # support: nacos, consul, apollo, zk, etcd3
    type: nacos
    nacos:
      server-addr: 127.0.0.1:8848   # nacos的访问地址,因为是在docker中,ip地址改为宿主机地址
      namespace:
      group: SEATA_GROUP  # nacos的分组
      username: nacos     # nacos的用户名
      password: nacos     # nacos的密码
      context-path:
      ##if use MSE Nacos with auth, mutex with username/password attribute
      #access-key:
      #secret-key:
      data-id: seata.properties  # nacos中的配置文件名称
  registry:
    # support: nacos, eureka, redis, zk, consul, etcd3, sofa
    type: nacos
    nacos:
      application: seata-server       # seata启动后在nacos的服务名
      server-addr: 127.0.0.1:8848  # nacos的访问地址,如果是在docker中,ip地址改为宿主机地址
      group: SEATA_GROUP   # nacos的分组
      namespace:
      cluster: default     # 这个参数在每个微服务seata时会用到
      username: nacos      # nacos的用户名
      password: nacos      # nacos的密码
      context-path:
      ##if use MSE Nacos with auth, mutex with username/password attribute
      #access-key:
      #secret-key:
  store:
    # support: file 、 db 、 redis
    mode: db
    db:
      datasource: druid
      db-type: mysql
      driver-class-name: com.mysql.jdbc.Driver
      url: jdbc:mysql://127.0.0.1:3306/seata?characterEncoding=utf8&connectTimeout=10000&socketTimeout=30000&autoReconnect=true&useUnicode=true&useSSL=false
      user: root
      password: 123456
      min-conn: 10                # db 模式数据库初始连接数
      max-conn: 100               # db 模式数据库最大连接数
      global-table: global_table  # db 模式全局事务表名
      branch-table: branch_table  # db 模式分支事务表名
      lock-table: lock_table      # db 模式全局锁表名
      distributed-lock-table: distributed_lock  # db 模式 Sever 端事务管理全局锁存储表名
      query-limit: 1000    # db 模式查询全局事务一次的最大条数,默认100
      max-wait: 5000   # db 模式获取连接时最大等待时间,默认5000
#  server:
#    service-port: 8091 #If not configured, the default is '${server.port} + 1000'
  security:
    secretKey: SeataSecretKey0c382ef121d778043159209298fd40bf3850a017
    tokenValidityInMilliseconds: 1800000
    ignore:
      urls: /,/**/*.css,/**/*.js,/**/*.html,/**/*.map,/**/*.svg,/**/*.png,/**/*.ico,/console-fe/public/**,/api/v1/auth/login
5、在nacos中配置
需要在 nacos 中创建 SEATA_GROUP 分组,增加名为 seata.properties 的配置:

具体配置如下:
store.mode=db
store.db.datasource=druid
store.db.dbType=mysql
store.db.driverClassName=com.mysql.cj.jdbc.Driver
store.db.url=jdbc:mysql://127.0.0.1:3306/seata?useUnicode=true
store.db.user=root
store.db.password=123456
store.db.minConn=5
store.db.maxConn=30
store.db.globalTable=global_table
store.db.branchTable=branch_table
store.db.queryLimit=100
store.db.lockTable=lock_table
store.db.maxWait=5000
三、使用
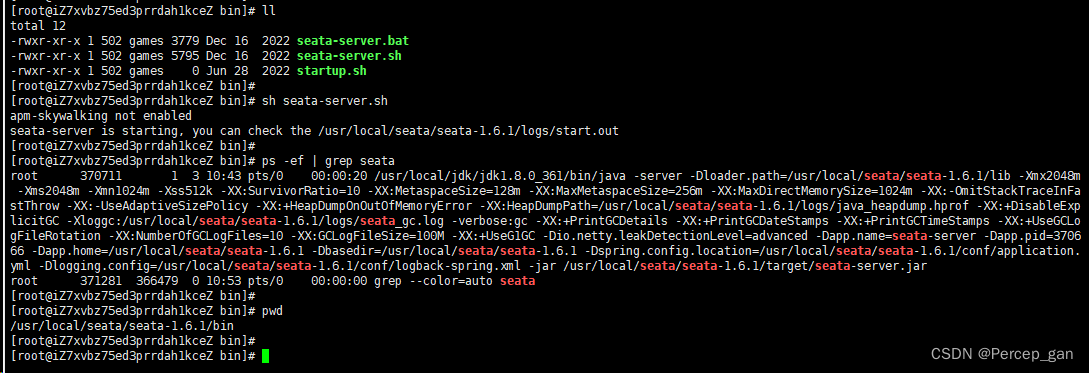
1、启动
启动 seata ,需要到根目录下的 bin 目录,这里是 /usr/local/seata/seata-1.6.1/bin ,使用如下命令:
sh seata-server.sh
然后到 nacos 中查看:
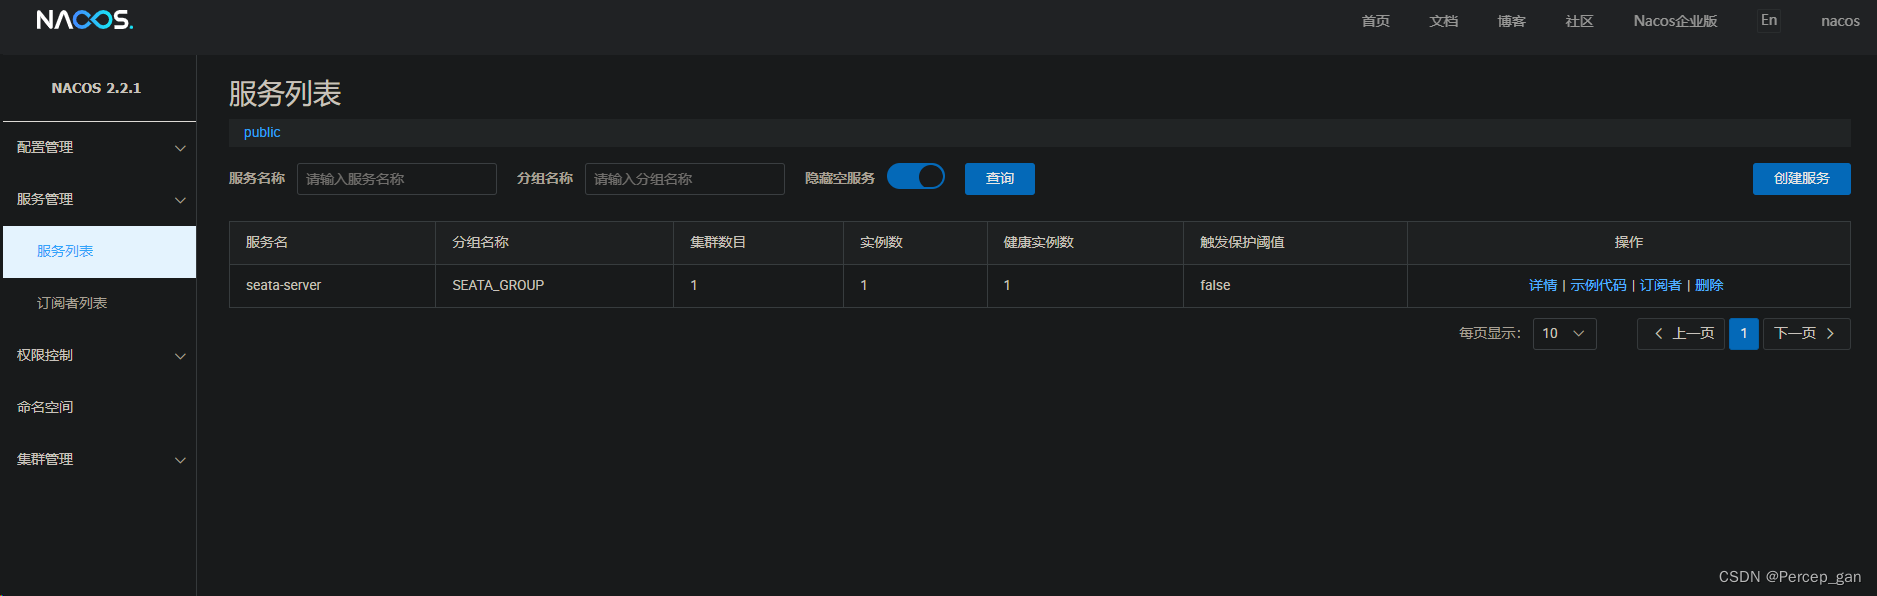
在浏览器中访问
可以看到 seata 已经启动。
2、关闭
因为 seata 没有提供关闭的命令,至少我这版本没有,先查询 seata 的进程id,命令如下:
ps -ef | grep seata

然后再杀掉这个进程,命令如下:
kill -9 370711

回到 nacos 发现 seata 服务也消失了
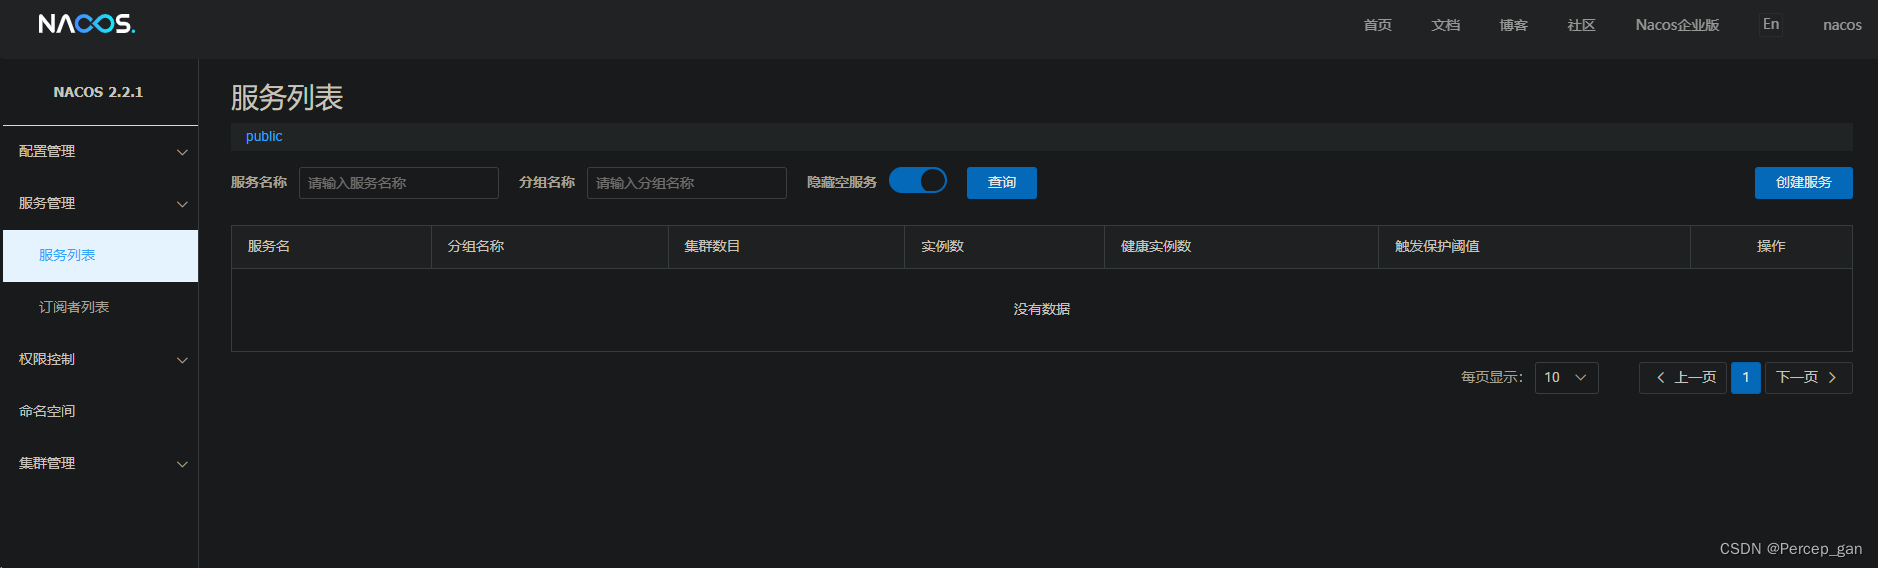
成功关闭。


 1839
1839


 被折叠的 条评论
为什么被折叠?
被折叠的 条评论
为什么被折叠?
 到【灌水乐园】发言


