我做的项目是在网页中嵌入基于WorldWind的三维地球,所以呢,代码基本是由Java Applet为基准进行编写
本章就开始我们的第一个WorldWind Java Applet
一、新建Java项目WWJMFS
在src文件夹中新建包esi.oceanPlatform,在包中新建Class文件WWJMFS.java。
在WorldWindJava源码中,我们在包gov.nasa.worldwindx.examples.applet中可以看到NASA提供的两个Applet示例,我们鉴于此构建我们的Applet。
详细代码如下:
package esi.oceanPlatform;

import java.awt.BorderLayout;
import java.awt.Cursor;
import java.awt.Panel;
import java.beans.PropertyChangeEvent;
import java.beans.PropertyChangeListener;
import java.util.ArrayList;

import esi.control.FlatWorldPanel;
import esi.control.MeasureToolPanel;
import gov.nasa.worldwind.Configuration;
import gov.nasa.worldwind.Model;
import gov.nasa.worldwind.WorldWind;
import gov.nasa.worldwind.WorldWindow;
import gov.nasa.worldwind.avlist.AVKey;
import gov.nasa.worldwind.awt.WorldWindowGLCanvas;
import gov.nasa.worldwind.geom.Angle;
import gov.nasa.worldwind.geom.LatLon;
import gov.nasa.worldwind.geom.Position;
import gov.nasa.worldwind.layers.Layer;
import gov.nasa.worldwind.layers.LayerList;
import gov.nasa.worldwind.layers.WorldMapLayer;
import gov.nasa.worldwind.util.StatusBar;
import gov.nasa.worldwind.util.measure.MeasureTool;
import gov.nasa.worldwind.util.measure.MeasureToolController;
import gov.nasa.worldwind.view.orbit.BasicOrbitView;
import gov.nasa.worldwind.view.orbit.OrbitView;
import gov.nasa.worldwindx.examples.ClickAndGoSelectListener;

import gov.nasa.worldwindx.examples.util.LayerManagerLayer;

import javax.swing.*;

public class WWJMFS extends JApplet{
    protected WorldWindowGLCanvas wwd;
    private StatusBar statusBar;
    private MeasureToolPanel measureToolPanel;
    private PropertyChangeListener measureToolListener;
    private MeasureTool measureToolObject;
    private FlatWorldPanel flatWorldPanel;

    public WWJMFS()
    {
    }

    public void init(){
        try
        {
            // Check for initial configuration values
            String value = getParameter("InitialLatitude");
            if (value != null)
                Configuration.setValue(AVKey.INITIAL_LATITUDE, Double.parseDouble(value));
            value = getParameter("InitialLongitude");
            if (value != null)
                Configuration.setValue(AVKey.INITIAL_LONGITUDE, Double.parseDouble(value));
            value = getParameter("InitialAltitude");
            if (value != null)
                Configuration.setValue(AVKey.INITIAL_ALTITUDE, Double.parseDouble(value));
            value = getParameter("InitialHeading");
            if (value != null)
                Configuration.setValue(AVKey.INITIAL_HEADING, Double.parseDouble(value));
            value = getParameter("InitialPitch");
            if (value != null)
                Configuration.setValue(AVKey.INITIAL_PITCH, Double.parseDouble(value));

            // Create World Window canvas.
            this.wwd = new WorldWindowGLCanvas();
            this.getContentPane().add(this.wwd, BorderLayout.CENTER);

            // Create the default model as defined in the current worldwind configuration file.
            Model m = (Model) WorldWind.createConfigurationComponent(AVKey.MODEL_CLASS_NAME);
            this.wwd.setModel(m);

            // Setup a select listener for the worldmap click-and-go feature
            this.wwd.addSelectListener(new ClickAndGoSelectListener(this.wwd, WorldMapLayer.class));

            //起始定位
            try {
                InitLocation(35.9501, 120.2133, 30000.0, 0.0, 0.0);
            } catch (Exception e) {
                System.out.println(e.toString());
            }

            Panel pageEndPanel=new Panel();
            pageEndPanel.setLayout(new BoxLayout(pageEndPanel,BoxLayout.X_AXIS));
            //Flat/Round World
            flatWorldPanel=new FlatWorldPanel(wwd);
            pageEndPanel.add(flatWorldPanel);
            this.setFlatWorldVisible(isVisible());
            //状态栏
            this.wwd.setCursor(new Cursor(0x1));
            this.statusBar=new StatusBar();
            pageEndPanel.add(this.statusBar);
            this.statusBar.setEventSource(wwd);
            this.statusBar.setShowNetworkStatus(false);
            //测量面板
            measureToolObject=new MeasureTool(wwd);
            measureToolObject.setController(new MeasureToolController());
            measureToolPanel=new MeasureToolPanel(this.wwd, measureToolObject);
            measureToolListener=new MeasureToolListener();
            switchMeasureTool();
            pageEndPanel.add(measureToolPanel);
            this.setMeasureToolVisible(isVisible());
            this.getContentPane().add(pageEndPanel, BorderLayout.PAGE_END);

            LayerManagerLayer layerManagerLayer=new LayerManagerLayer(wwd);
            layerManagerLayer.setName("图层控制");
            layerManagerLayer.setEnabled(true);
            m.getLayers().add(layerManagerLayer);
        }
        catch (Throwable e)
        {
            e.printStackTrace();
        }
    }

    public void stop()
    {
        WorldWind.shutDown();
    }
    /**
     * 插入图层位置
     * */
    public void insertBeforeLayerName(WorldWindow wwd, Layer layer, String targetName)
    {
        // Insert the layer into the layer list just before the target layer.
        LayerList layers = wwd.getModel().getLayers();
        int targetPosition = layers.size() - 1;
        for (Layer l : layers)
        {
            if (l.getName().indexOf(targetName) != -1)
            {
                targetPosition = layers.indexOf(l);
                break;
            }
        }
        layers.add(targetPosition, layer);
    }

    /**
     * 初始图层定位
     */
    public void InitLocation  ( Double Lat, Double Lon , Double zoom , Double heading , Double patch ){
        Position position = new Position(Angle.fromDegrees(Lat), Angle.fromDegrees(Lon),zoom);
        this.wwd.getView().setEyePosition(position);
        this.wwd.getView().setHeading(Angle.fromDegrees( heading));
        this.wwd.getView().setPitch(Angle.fromDegrees(patch));
        this.wwd.redraw();
    }

    /**
     * 测量面板
     * */
    public class MeasureToolListener implements PropertyChangeListener{
        public void propertyChange(PropertyChangeEvent event){
            if(event.getPropertyName().equals(MeasureTool.EVENT_POSITION_ADD)||event.getPropertyName().equals(MeasureTool.EVENT_POSITION_REMOVE)||event.getPropertyName().equals(MeasureTool.EVENT_POSITION_REPLACE)){
                updateProfile(((MeasureTool)event.getSource()));
            }
        }
    }
    private void updateProfile(MeasureTool mt){
        ArrayList<? extends LatLon>positions=mt.getPositions();
        if(positions!=null&&positions.size()>1){
        }else{}
        this.wwd.redraw();
    }

    private void switchMeasureTool(){
        MeasureTool measureTool=measureToolPanel.getMeasureTool();
        measureTool.addPropertyChangeListener(measureToolListener);
        updateProfile(measureTool);
    }

    // ============== Public API - Javascript ======================= //


    /**
     * 指定经纬度、视野范围、方向定位
     */
    public void gotoLatLon(double lat, double lon, double zoom)
    {
        this.gotoLatLon(lat, lon, zoom, 0.0, 60.0);
    }
    public void gotoLatLon(double lat, double lon, double zoom, double heading, double pitch)
    {
        BasicOrbitView view = (BasicOrbitView) wwd.getView();
        if (!Double.isNaN(lat) || !Double.isNaN(lon) || !Double.isNaN(zoom))
        {
            lat = Double.isNaN(lat) ? view.getCenterPosition().getLatitude().degrees : lat;
            lon = Double.isNaN(lon) ? view.getCenterPosition().getLongitude().degrees : lon;
            zoom = Double.isNaN(zoom) ? view.getZoom() : zoom;
            heading = Double.isNaN(heading) ? view.getHeading().degrees : heading;
            pitch = Double.isNaN(pitch) ? view.getPitch().degrees : pitch;
            view.addPanToAnimator(Position.fromDegrees(lat, lon, 0),
                Angle.fromDegrees(heading), Angle.fromDegrees(pitch), zoom, true);
        }
    }

    /**
     * 设置视野范围
     */
    public void setHeadingAndPitch(double heading, double pitch)
    {
        BasicOrbitView view = (BasicOrbitView) wwd.getView();
        if (!Double.isNaN(heading) || !Double.isNaN(pitch))
        {
            heading = Double.isNaN(heading) ? view.getHeading().degrees : heading;
            pitch = Double.isNaN(pitch) ? view.getPitch().degrees : pitch;

            view.addHeadingPitchAnimator(
                view.getHeading(), Angle.fromDegrees(heading), view.getPitch(), Angle.fromDegrees(pitch));
        }
    }

    public void setZoom(double zoom)
    {
        BasicOrbitView view = (BasicOrbitView) wwd.getView();
        if (!Double.isNaN(zoom))
        {
            view.addZoomAnimator(view.getZoom(), zoom);
        }
    }

    /**
     * Get the WorldWindowGLCanvas
     */
    public WorldWindowGLCanvas getWW()
    {
        return wwd;
    }

    /**
     * Get the current OrbitView
     */
    public OrbitView getOrbitView()
    {
        if (this.wwd.getView() instanceof OrbitView)
            return (OrbitView) this.wwd.getView();
        return null;
    }

    /**
     * Get a reference to a layer with part of its name
     */
    public Layer getLayerByName(String layerName)
    {
        for (Layer layer : this.wwd.getModel().getLayers())
        {
            if (layer.getName().indexOf(layerName) != -1)
                return layer;
        }
        return null;
    }

    /**
     * 显示/隐藏测量面板
     */
    public void setMeasureToolVisible ( boolean isVisible){
        this.measureToolPanel.setVisible(isVisible);
    }
    public void setFlatWorldVisible(boolean isVisible) {
        this.flatWorldPanel.setVisible(isVisible);
    }
}
因为我的主要任务是在网页中嵌入三维地球,所以我把上述代码大致分为两块。以
// ============== Public API - Javascript ======================= //
分割
分割线以上部分为球体正常运行所需代码,分割线以下主要去写一些在网页中,通过JavaScript调用函数的接口。
上述代码中仅是比NASA提供的Applet实例多了两个功能,
一个是初始图层定位问题,另一个是测量面板的加载问题,这方面比较简单,就不在进行详解。
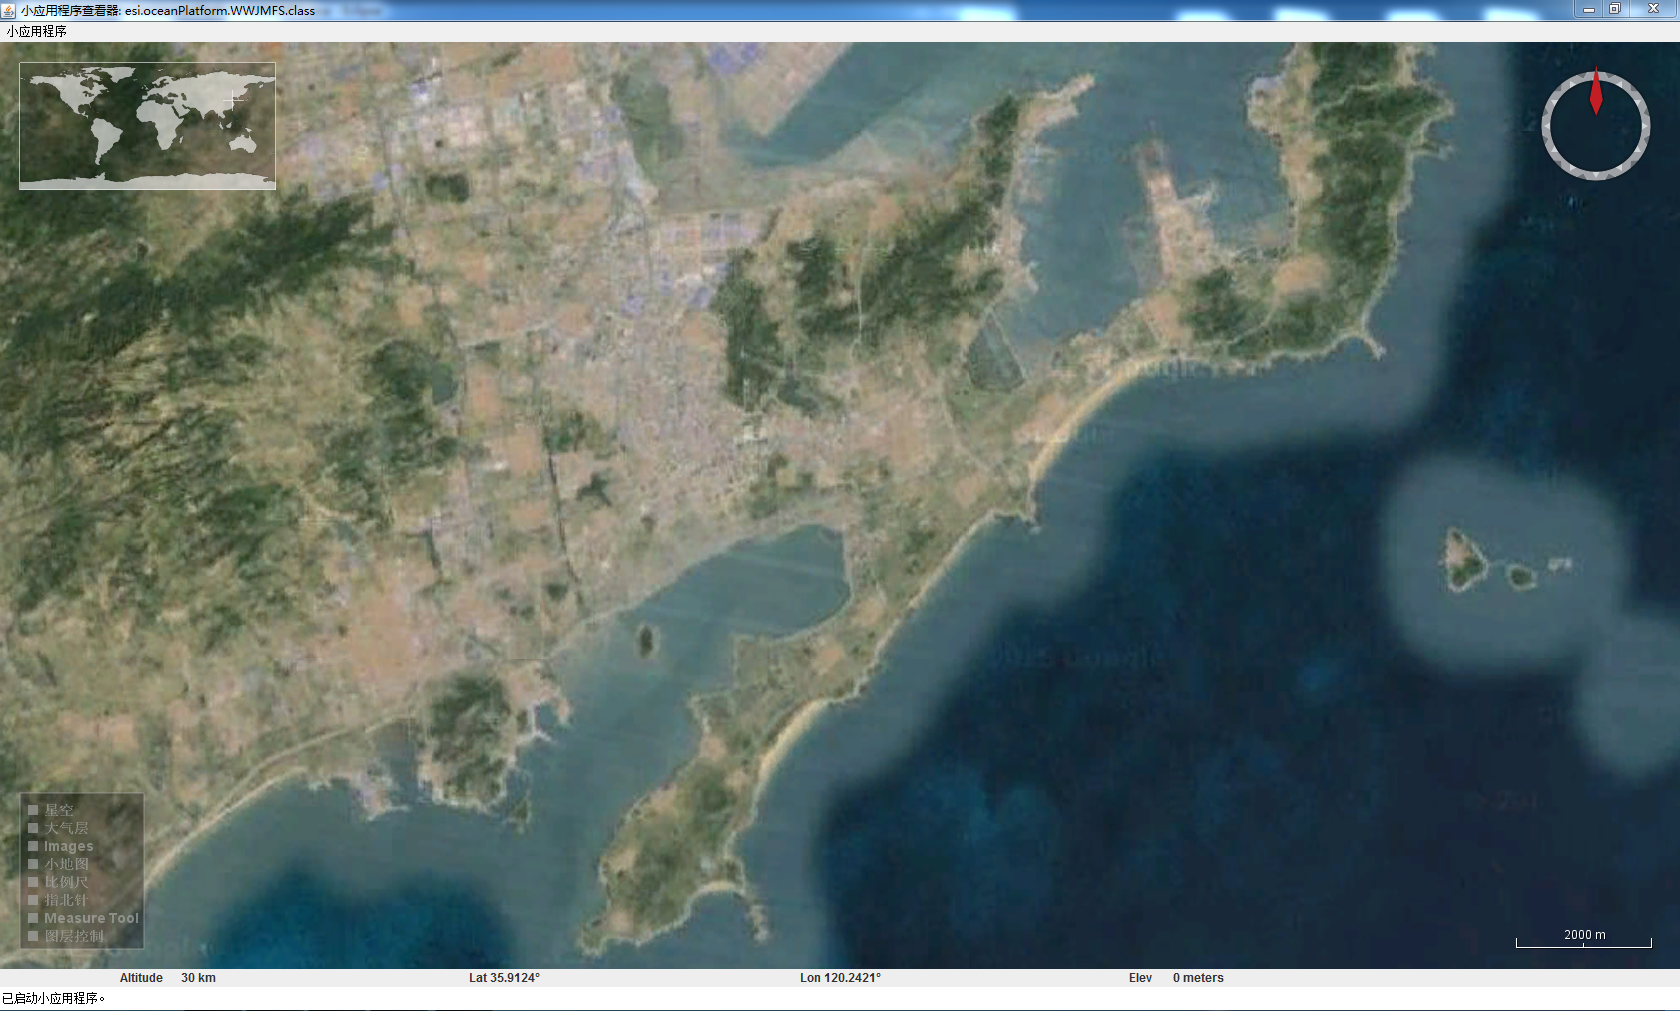
二、运行WWJMFS.java可以得到如下图所示
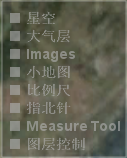
三、本实例中,图层控制面板(左下角)的选择
图层控制面板可以控制各图层的打开关闭,代码如下:
LayerManagerLayer layerManagerLayer=new LayerManagerLayer(wwd);
            layerManagerLayer.setName("图层控制");
            layerManagerLayer.setEnabled(true);
            m.getLayers().add(layerManagerLayer);
得到如下图这样
我们看到图中所列这些,可以在WorldWindJava项目中进行更改。
选择src->config->worldwind.layers.xml文件
更改该xml文件如下:
<?xml version="1.0" encoding="UTF-8"?>
<!--
  ~ Copyright (C) 2012 United States Government as represented by the Administrator of the
  ~ National Aeronautics and Space Administration.
  ~ All Rights Reserved.
  -->

<!--$Id: worldwind.layers.xml 1382 2013-05-31 00:37:46Z tgaskins $-->
<!--This document specifies the initial layers to load in World Wind-->
<!--This list can be overridden by specifying an alternate list in worldwind.xml, or by specifying an-->
<!--alternate configuration document-->
<!--See the javadoc for the Configuration class for details-->
<LayerList>
    <!-- 星空 -->
    <Layer className="gov.nasa.worldwind.layers.StarsLayer">
        <!--Individual properties can be specified within Layer entries, like this:-->
        <Property name="Name" value="星空"/>
    </Layer>
    <!-- 大气层 -->
    <Layer className="gov.nasa.worldwind.layers.SkyGradientLayer">
        <Property name="Name" value="大气层"/>
    </Layer>
    <!-- 默认影像 -->
    <!-- <Layer className="gov.nasa.worldwind.layers.Earth.BMNGOneImage">
        <Property name="Name" value="NASAIMAGE"/>
        <Property name="MinActiveAltitude" value="3e5"/>
    </Layer> -->
    <!-- 自定义影像 -->
    <Layer href="config/Earth/CustomImage.xml" actuate="onLoad">
        <Property name="Name" value="Images"></Property>
    </Layer>
    <!-- 影像 -->
    <!-- <Layer href="config/Earth/BMNGWMSLayer2.xml" actuate="onLoad"/>
    <Layer href="config/Earth/LandsatI3WMSLayer2.xml" actuate="onLoad"/>
    <Layer href="config/Earth/USDANAIPWMSImageLayer.xml" actuate="onRequest"/>
    <Layer href="config/Earth/USDANAIPUSGSWMSImageLayer.xml" actuate="onRequest"/>
    <Layer href="config/Earth/MSVirtualEarthAerialLayer.xml" actuate="onRequest"/>
    <Layer href="config/Earth/BingImagery.xml" actuate="onRequest"/>
    <Layer href="config/Earth/USGSTopoLowResLayer.xml" actuate="onRequest"/>
    <Layer href="config/Earth/USGSTopoMedResLayer.xml" actuate="onRequest"/>
    <Layer href="config/Earth/USGSTopoHighResLayer.xml" actuate="onRequest"/>
    <Layer href="config/Earth/USGSUrbanAreaOrthoLayer.xml" actuate="onRequest"/> -->

    <!--<Layer className="gov.nasa.worldwind.layers.Earth.OSMMapnikLayer" actuate="onRequest"/>-->
    <!--<Layer className="gov.nasa.worldwind.layers.Earth.OSMCycleMapLayer" actuate="onRequest"/>-->

    <!-- 官方边界 -->
    <!-- <Layer className="gov.nasa.worldwind.layers.Earth.CountryBoundariesLayer" actuate="onRequest"/>-->

    <!-- 街道地图 -->
    <!-- <Layer href="config/Earth/OpenStreetMap.xml" actuate="onRequest"/> -->
    <!-- 夜景 -->
    <!-- <Layer href="config/Earth/EarthAtNightLayer.xml" actuate="onRequest"/> -->
    <!-- 地名 -->
    <!-- <Layer className="gov.nasa.worldwind.layers.Earth.NASAWFSPlaceNameLayer"/> -->
    <!-- 小地图 -->
    <Layer className="gov.nasa.worldwind.layers.WorldMapLayer">
        <Property name="Name" value="小地图"/>
    </Layer>
    <!-- 比例尺 -->
    <Layer className="gov.nasa.worldwind.layers.ScalebarLayer">
        <Property name="Name" value="比例尺"/>
    </Layer>
    <!-- 指北针 -->
    <Layer className="gov.nasa.worldwind.layers.CompassLayer">
        <Property name="Name" value="指北针"/>
    </Layer>
</LayerList>
红色字体为注释掉的部分。
其中自定义影像部分以后在进行总结。
本章就到此结束。


 192
192

 被折叠的 条评论
为什么被折叠?


