


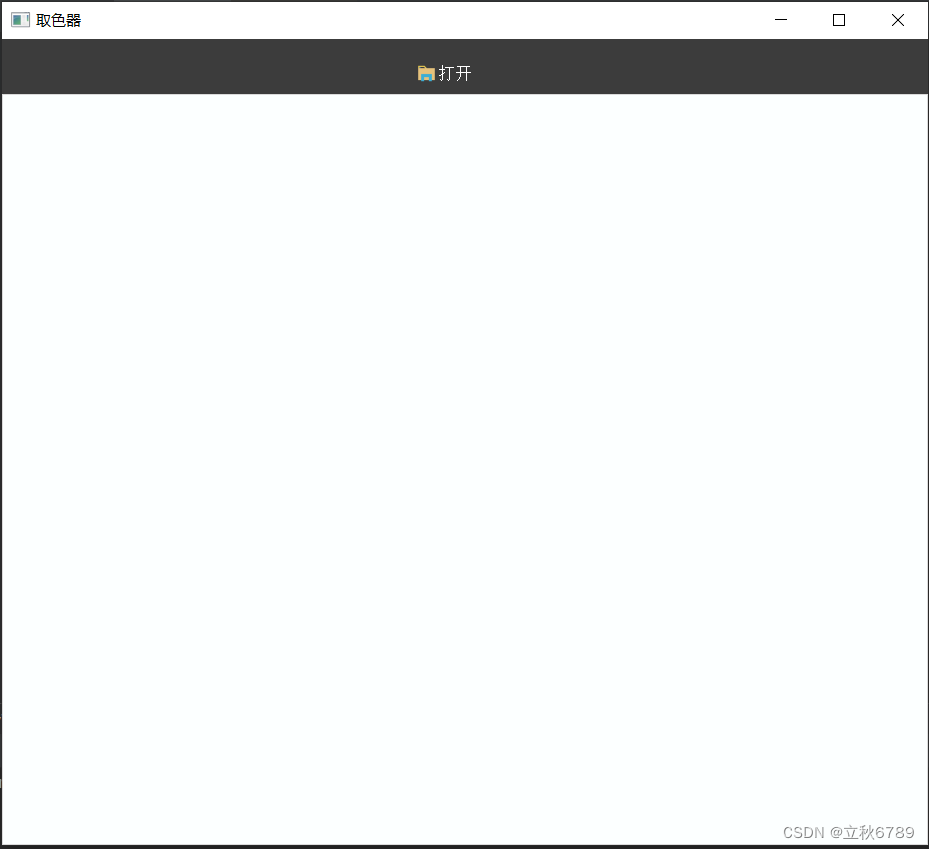
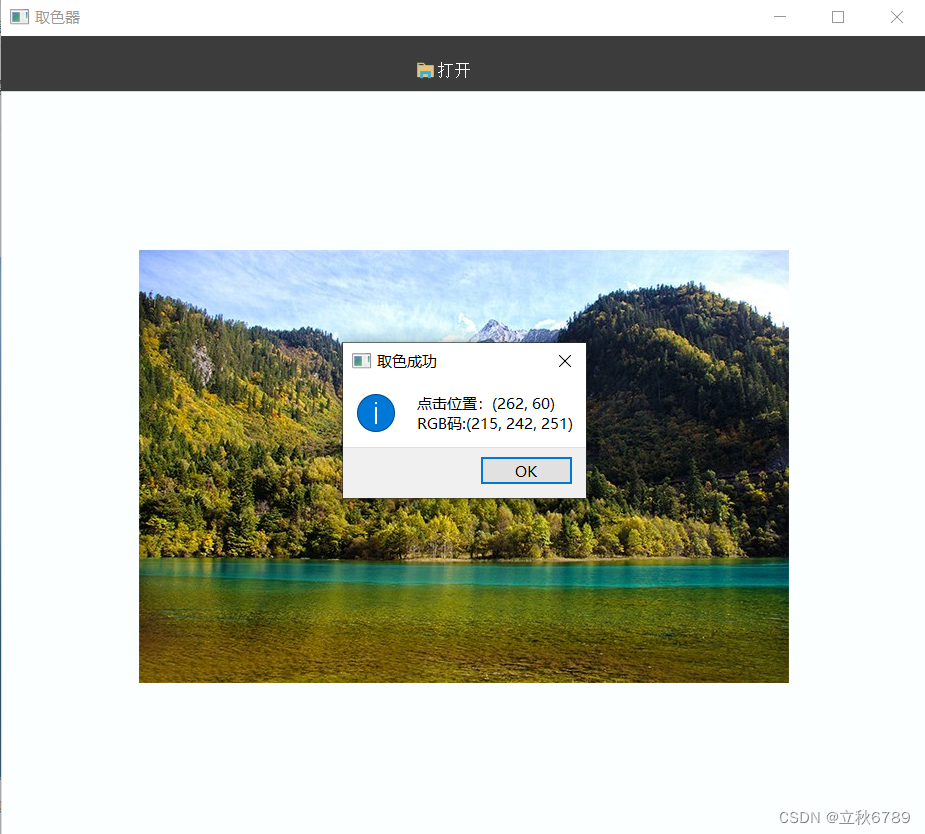
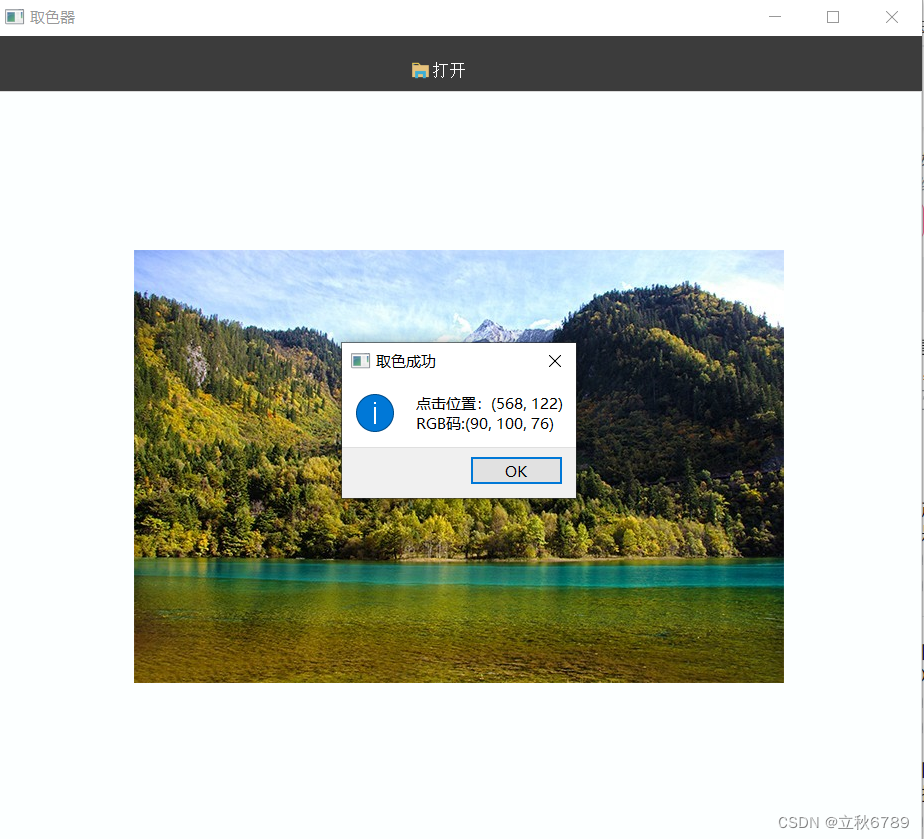
功能
读入图片后,输出鼠标点击位置的RGB码
效果
代码
import copy
import cv2
import sys
from PyQt5 import QtCore, QtGui, QtWidgets
from PyQt5.QtGui import QImage, QPixmap, QIcon
from PyQt5.QtWidgets import QFileDialog, QMessageBox, QLabel, QApplication, QMainWindow
from PyQt5.QtCore import Qt, QSize


class ImageLabel(QLabel):
    """"
    用于显示图片的 Label
    """

    def __init__(self, parent=None):
        super().__init__(parent)
        self.x0 = 0
        self.y0 = 0
        self.x1 = 0
        self.y1 = 0
        self.img = None
        self.flag = False  # 标记是否能够绘制矩形
        self.__isClear = False  # 标记是否是清除矩形
        self.setAlignment(Qt.AlignCenter)  # 居中对齐
        self.setFrameShape(QtWidgets.QFrame.Box)  # 设置边框
        self.setStyleSheet("border-width: 1px;border-style: solid;border-color: rgb(218, 218, 218)")
        self.setText("")
        self.__w, self.__h = 0, 0
        self.pixmap_width, self.pixmap_height = 0, 0  # pixmap 的宽度、高度
        self.pixmap_x_start, self.pixmap_y_start = 0, 0  # pixmap 在 label 中的起点位置
        self.pixmap_x_end, self.pixmap_y_end = 0, 0  # pixamp 在 label 中的终点位置
        self.img_x_start, self.img_y_start = 0, 0  # 图片中选择的矩形区域的起点位置
        self.img_x_end, self.img_y_end = 0, 0  # 图片中选择的矩形区域的终点位置
        self.autoFillBackground()

    # 鼠标点击事件
    def mousePressEvent(self, event):
        # self.flag = True
        # 鼠标点击,相当于开始绘制矩形,将 isClear 置为 False
        self.__isClear = False
        self.x0 = event.x()
        self.y0 = event.y()
        # 计算 Pixmap 在 Label 中的位置
        self.__w, self.__h = self.width(), self.height()
        self.pixmap_x_start = (self.__w - self.pixmap_width) / 2
        self.pixmap_y_start = (self.__h - self.pixmap_height) / 2
        self.pixmap_x_end = self.pixmap_x_start + self.pixmap_width
        self.pixmap_y_end = self.pixmap_y_start + self.pixmap_height
        color_x, color_y = self.x0 - int(self.pixmap_x_start), self.y0 - int(self.pixmap_y_start)
        rgb = self.get_pix_bgr(color_x, color_y)

    def setPixmap(self, pixmap, img):
        super().setPixmap(pixmap)
        self.pixmap_width, self.pixmap_height = pixmap.width(), pixmap.height()
        self.img = img

    # 获取图片坐标bgr值
    def get_pix_bgr(self, x: int, y: int):
        if self.img is None:
            self.__show_warning_message_box("未选择图片")
            return
        img = self.img
        blue = img[y, x, 0]
        green = img[y, x, 1]
        red = img[y, x, 2]
        msg_box = QMessageBox(QMessageBox.Information, '取色成功',
                              "点击位置:" + str((x, y)) + "\n" + "RGB码:" + str((red, green, blue)))
        msg_box.exec_()

    def __show_warning_message_box(self, msg):
        QMessageBox.warning(self, "警告", msg, QMessageBox.Ok)
class MyWindow(QMainWindow):

    def __init__(self):
        super(MyWindow, self).__init__()
        self.current_img = None
        self.setupUi()

    def setupUi(self):
        self.resize(926, 806)
        self.setWindowTitle("取色器")
        # self.central_widget:主窗口
        self.central_widget = QtWidgets.QWidget(self)
        self.central_widget_layout = QtWidgets.QVBoxLayout()
        self.central_widget.setLayout(self.central_widget_layout)
        # 主窗口布局间隙
        self.central_widget_layout.setContentsMargins(0, 0, 0, 0)
        self.central_widget_layout.setSpacing(0)
        #  self.title:横向菜单栏
        self.title = QtWidgets.QFrame(self.central_widget)
        self.title.setMinimumSize(QtCore.QSize(0, 55))
        self.title.setMaximumSize(QtCore.QSize(188888, 55))
        self.title.setFrameShape(QtWidgets.QFrame.StyledPanel)
        self.title.setFrameShadow(QtWidgets.QFrame.Raised)
        # self.title_layout:横向菜单栏布局
        self.title_layout = QtWidgets.QHBoxLayout()
        self.title.setLayout(self.title_layout)
        self.operation = QtWidgets.QFrame(self.title)
        self.operation.setMinimumSize(QtCore.QSize(450, 45))
        self.operation.setMaximumSize(QtCore.QSize(450, 45))
        self.operation.setFrameShape(QtWidgets.QFrame.StyledPanel)
        self.operation.setFrameShadow(QtWidgets.QFrame.Raised)
        # title_button_layout:title的按钮横向布局
        self.title_button_layout = QtWidgets.QHBoxLayout()
        self.operation.setLayout(self.title_button_layout)
        self.btn_open = QtWidgets.QToolButton(self.operation)
        self.title_button_layout.addWidget(self.btn_open)
        self.title_layout.addWidget(self.operation)
        # 主窗口布局添加标题菜单控件
        self.central_widget_layout.addWidget(self.title)
        self.img_display = ImageLabel(self)
        self.central_widget_layout.addWidget(self.img_display)
        self.setCentralWidget(self.central_widget)
        # 按钮显示文字
        self.btn_open.setText("打开")
        self.btn_open.setIcon(QIcon("./icon/open.png"))
        self.btn_open.setIconSize(QSize(36, 36))
        self.btn_open.setToolButtonStyle(Qt.ToolButtonTextBesideIcon)
        # 按钮绑定事件
        self.btn_open.clicked.connect(self.open_img)
        # 字体统一定义
        font = QtGui.QFont()
        font.setPointSize(10)
        self.setFont(font)
        self.btn_open.setFont(font)
        # 格式设置
        self.central_widget.setStyleSheet("background: rgb(252, 255, 255)")
        self.title.setStyleSheet("background: rgb(60, 60, 60)")
        self.btn_open.setStyleSheet("background: rgba(0, 0, 0, 0);\n"
                                    "color: rgb(255, 255, 255)")

    def open_img(self):
        """
        “打开” 按钮的点击事件
        """
        img_name, img_type = QFileDialog.getOpenFileName(self, "打开图片或json", "", "*.jpg;*.png;*.jpeg")
        if (img_name == "") or (img_name is None):
            self.__show_warning_message_box("未选择图片")
            return
        img = cv2.imread(img_name)  # 读取图像
        self.showImage(img)
        self.current_img = img
        self.last_img = self.current_img
        self.original_img = copy.deepcopy(self.current_img)
        self.original_img_path = img_name

    def showImage(self, img, is_grayscale=False):
        x = img.shape[1]  # 获取图像大小
        y = img.shape[0]
        self.zoomscale = 1  # 图片放缩尺度
        bytesPerLine = 3 * x
        if len(img.shape) == 2:  # 判断是否为灰度图,如果是灰度图,需要转换成三通道图
            img = cv2.cvtColor(img, cv2.COLOR_GRAY2BGR)
        frame = QImage(img.data, x, y, bytesPerLine, QImage.Format_RGB888).rgbSwapped()
        pix = QPixmap.fromImage(frame)
        self.img_display.setPixmap(pix, img)
        self.img_display.repaint()

    def __show_warning_message_box(self, msg):
        QMessageBox.warning(self, "警告", msg, QMessageBox.Ok)

    def __show_info_message_box(self, msg):
        QMessageBox.information(self, "提示", msg, QMessageBox.Ok)


if __name__ == '__main__':
    app = QApplication(sys.argv)
    window = MyWindow()
    window.show()
    sys.exit(app.exec_())


 660
660


 被折叠的 条评论
为什么被折叠?
被折叠的 条评论
为什么被折叠?
 到【灌水乐园】发言


