


1、Swagger简介
Swagger 是一个规范和完整的框架,用于生成、描述、调用和可视化 RESTful 风格的 Web 服务。
官网:
(
https://swagger.io/
)
主要作用是:
1. 使得前后端分离开发更加方便,有利于团队协作
2. 接口的文档在线自动生成,降低后端开发人员编写接口文档的负担
3. 功能测试
Spring已经将Swagger纳入自身的标准,建立了Spring-swagger项目,现在叫
Springfox。通过在项目中引入Springfox ,即可非常简单快捷的使用Swagger。
2、整合步骤
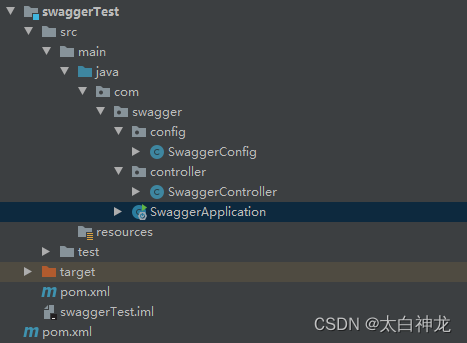
项目整体架构如下:
2.1 首先构建一个maven项目,添加依赖,我本项目只是一个子模块,所以相应的版本都是依赖于父版本的,看不到版本号,swagger使用的是2.9.2版本
<dependencies>
        <dependency>
            <groupId>io.springfox</groupId>
            <artifactId>springfox-swagger2</artifactId>
        </dependency>
        <dependency>
            <groupId>io.springfox</groupId>
            <artifactId>springfox-swagger-ui</artifactId>
        </dependency>
        <dependency>
            <groupId>org.springframework.boot</groupId>
            <artifactId>spring-boot-starter</artifactId>
        </dependency>
        <dependency>
            <groupId>org.springframework.boot</groupId>
            <artifactId>spring-boot-starter-web</artifactId>
        </dependency>
        <dependency>
            <groupId>org.springframework</groupId>
            <artifactId>spring-webmvc</artifactId>
        </dependency>
</dependencies>
2.2 创建Swagger配置类SwaggerConfig
package com.swagger.config;

import org.springframework.boot.autoconfigure.condition.ConditionalOnProperty;
import org.springframework.context.annotation.Bean;
import org.springframework.context.annotation.Configuration;
import org.springframework.web.servlet.config.annotation.ResourceHandlerRegistry;
import org.springframework.web.servlet.config.annotation.WebMvcConfigurer;
import springfox.documentation.builders.ApiInfoBuilder;
import springfox.documentation.builders.PathSelectors;
import springfox.documentation.builders.RequestHandlerSelectors;
import springfox.documentation.service.ApiInfo;
import springfox.documentation.service.Contact;
import springfox.documentation.spi.DocumentationType;
import springfox.documentation.spring.web.plugins.Docket;
@Configuration
@ConditionalOnProperty(prefix = "swagger",value = {"enable"},havingValue = "true")
public class SwaggerConfig implements WebMvcConfigurer {

    @Bean
    public Docket buildDocket() {
        // 要扫描的API(Controller)基础包
        return new Docket(DocumentationType.SWAGGER_2)
                .apiInfo(buildApiInfo())
                .select()
                .apis(RequestHandlerSelectors.basePackage("com.swagger.controller"))
                .paths(PathSelectors.any())
                .build();
    }

    private ApiInfo buildApiInfo() {
        Contact contact = new Contact("开发者", "", "");
        return new ApiInfoBuilder()
                .title("测试‐应用API文档")
                .description("")
                .contact(contact)
                .version("1.0.0")
                .build();
    }

    /*** 添加静态资源文件,外部可以直接访问地址 ** @param registry */
    @Override
    public void addResourceHandlers(ResourceHandlerRegistry registry) {
        registry
                .addResourceHandler("/**")
                .addResourceLocations("classpath:/static/");
        registry
                .addResourceHandler("swagger‐ui.html")
                .addResourceLocations("classpath:/META‐INF/resources/");
        registry
                .addResourceHandler("/webjars/**")
                .addResourceLocations("classpath:/META‐INF/resources/webjars/");
    }
}
2.3 在Controller层创建SwaggerController类方便测试,并添加swagger相应注解
package com.swagger.controller;

import io.swagger.annotations.Api;
import io.swagger.annotations.ApiImplicitParam;
import io.swagger.annotations.ApiOperation;
import org.springframework.web.bind.annotation.GetMapping;
import org.springframework.web.bind.annotation.RestController;

@Api(value = "测试平台 ",tags = "测试平台")
@RestController
public class SwaggerController {

    @ApiOperation("测试")
    @GetMapping(path = "/hello")
    public String hello(){
        return "hello";
    }

    @ApiOperation("测试2")
    @ApiImplicitParam(name = "name",value = "姓名",required = true,dataType = "string")
    @GetMapping("/hi")
    public String hi(String name){
        return "hi : "+name;
    }
}
常用Swagger注解如下:
@Api:修饰整个类,描述Controller的作用 @ApiOperation:描述一个类的一个方法,或者说一个接口
@ApiParam:单个参数的描述信息@ApiModel:用对象来接收参数@ApiModelProperty:用对象接收参数时,描述对象的一个字段@ApiResponse:HTTP响应其中1个描述@ApiResponses:HTTP响应整体描述@ApiIgnore:使用该注解忽略这个API@ApiError :发生错误返回的信息@ApiImplicitParam:一个请求参数@ApiImplicitParams:多个请求参数的描述信息
2.4 创建启动类SwaggerApplication
package com.swagger;

import org.springframework.boot.SpringApplication;
import org.springframework.boot.autoconfigure.SpringBootApplication;
import springfox.documentation.swagger2.annotations.EnableSwagger2;

@SpringBootApplication
@EnableSwagger2     //开启swagger
public class SwaggerApplication {
    public static void main(String[] args) {
        SpringApplication.run(SwaggerApplication.class,args);
    }
}
2.5 启动SwaggerApplication ,访问http://localhost:8080/swagger-ui.html
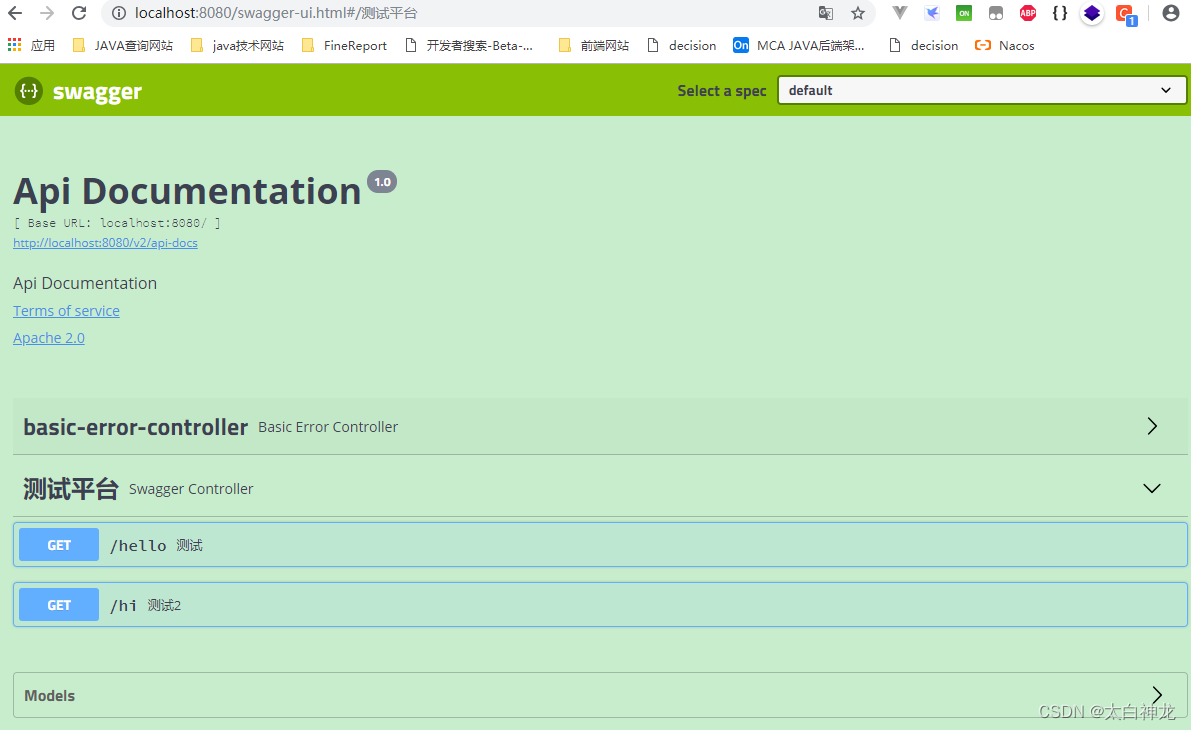
即可以查看接口文档了......
路漫漫其修远兮,吾将上下而求索,希望此篇文章对大家有所帮助......


 2万+
2万+


 被折叠的 条评论
为什么被折叠?
被折叠的 条评论
为什么被折叠?
 到【灌水乐园】发言


