


Windows系统搭建环境,首先到官网XAMPP download | SourceForge.net下载XAMPP应用程序,安装时勾选下面选项进行安装。
- Apache
- MySQL
- PHP
- Perl
- Phpmyadmin:数据库管理工具,点击下图的XAMPP控制面板中MySQL行对应的“Admin”按钮,就会自动打开跳转到phpmyadmin管理页面。
安装完成后,会运行弹出XAMPP的控制面板,如下图

可以点击Apache和MySQL的启动按钮:如下图,如果程序端口没有被占用都是可以正常运行的
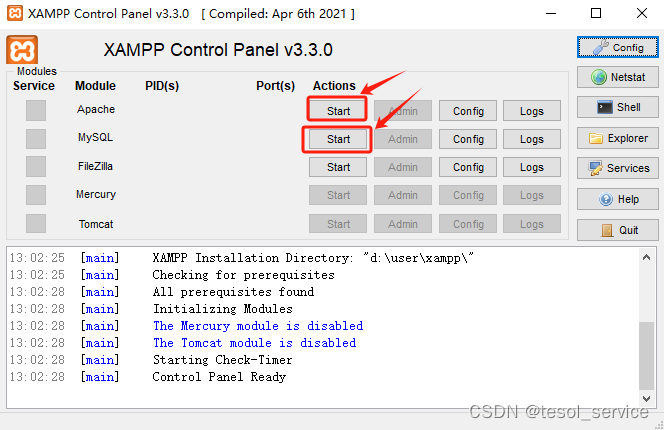
成功运行如下:

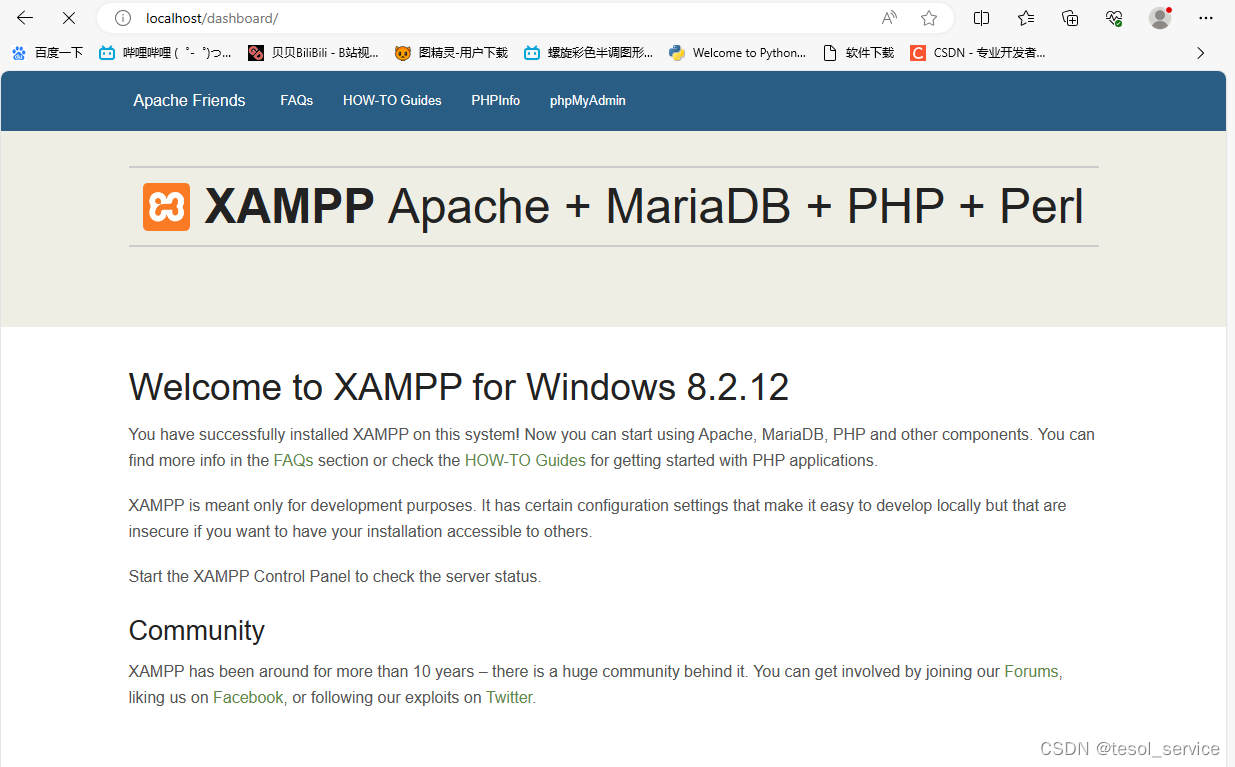
此时验证,可以在浏览器中输入localhost:80,会显示如下网页界面,说明你的程序正常运行。
并且在你指定的目录中会有如下XAMPP文件夹:
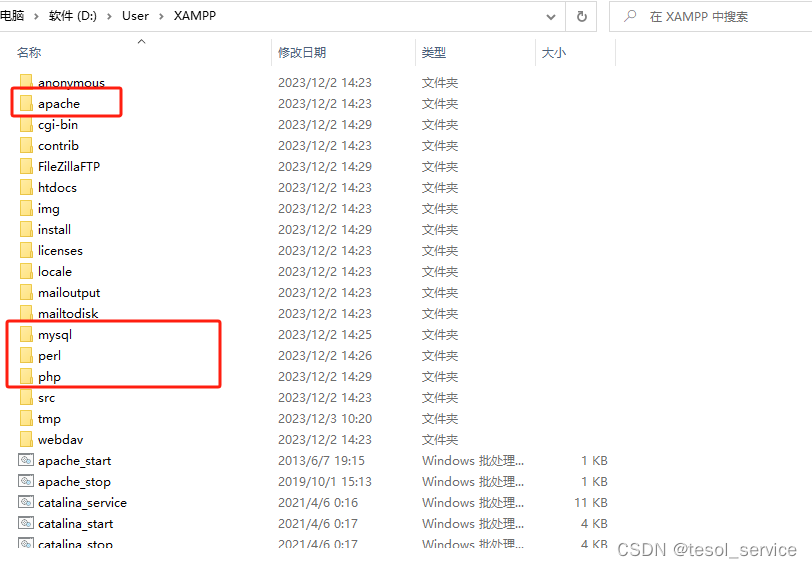
注意XAMPP安装解压后,自动整合安装了MySQL和PHP、Apache服务程序,你不用在绞尽脑计想着再去对应的官网下载相应的应用程序了。只需要添加环境变量即可。
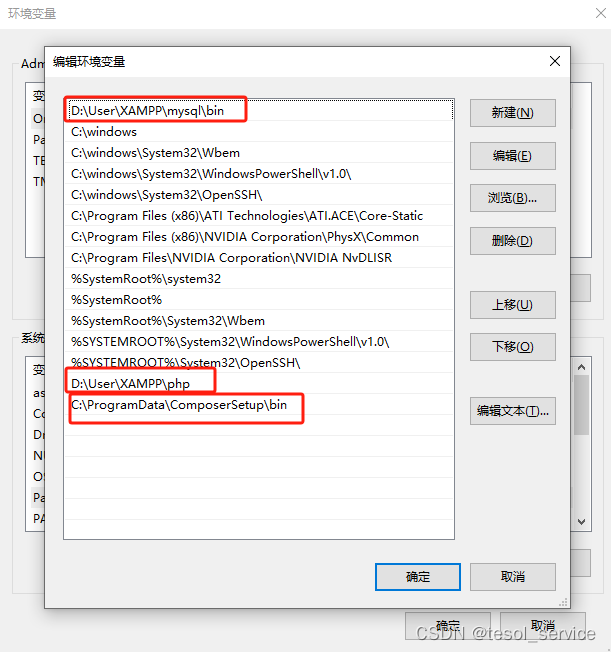
为XAMPP文件夹中的MySQL和PHP程序添加系统环境变量,在path中添加:
使用Phpmyadmin:数据库管理工具,点击下图的XAMPP控制面板中MySQL行对应的“Admin”按钮,就会自动打开跳转到phpmyadmin管理页面。
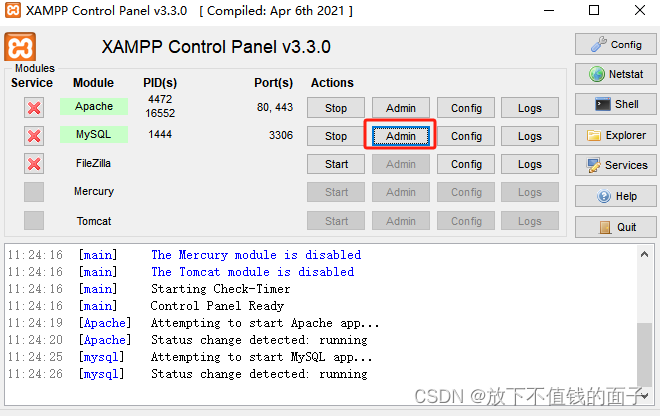
如图:

另外通过XAMPP安装的MySQL数据库的默认密码是空,也就是没有密码,使用命令行进入MySQL时,提示输入密码,直接按回车键即可进入:
C:\Users\Administrator>mysql -u root -p
Enter password:
Welcome to the MariaDB monitor.  Commands end with ; or \g.
Your MariaDB connection id is 57
Server version: 10.4.32-MariaDB mariadb.org binary distribution

Copyright (c) 2000, 2018, Oracle, MariaDB Corporation Ab and others.

Type 'help;' or '\h' for help. Type '\c' to clear the current input statement.

MariaDB [(none)]>
上图最后一行是Composer包依赖管理工具,可以到官网下载安装,composer安装后会自动添加此环境变量,无需手动添加。另外需要注意的是安装Composer应用程序之前,一定要配置好XAMPP文件夹中的PHP应用程序的环境变量,composer应用需要自动添加PHP应用程序的文件夹的路径。
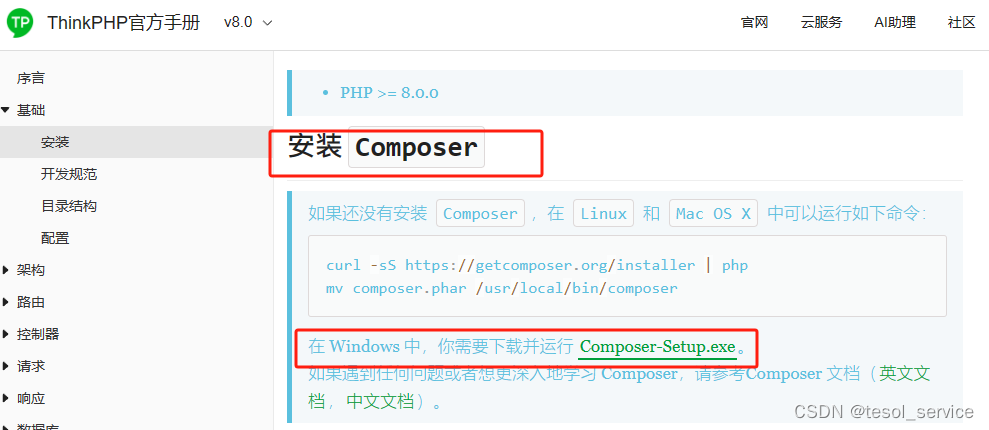
Composer的官网:Composer (getcomposer.org)
或者在这里下载安装(你可以暂时不看,先按照我的文章进度走):安装 - ThinkPHP官方手册
 安装完composer后,运行在命令行中输入composer -v即可查看版本号。
D:\phpdev\www>composer -v
   ______
  / ____/___  ____ ___  ____  ____  ________  _____
 / /   / __ \/ __ `__ \/ __ \/ __ \/ ___/ _ \/ ___/
/ /___/ /_/ / / / / / / /_/ / /_/ (__  )  __/ /
\____/\____/_/ /_/ /_/ .___/\____/____/\___/_/
                    /_/
Composer version 2.6.5 2023-10-06 10:11:52

Usage:
  command [options] [arguments]

Options:
  -h, --help                     Display help for the given command. When no command is given display help for the list command
  -q, --quiet                    Do not output any message
  -V, --version                  Display this application version
      --ansi|--no-ansi           Force (or disable --no-ansi) ANSI output
  -n, --no-interaction           Do not ask any interactive question
      --profile                  Display timing and memory usage information
      --no-plugins               Whether to disable plugins.
      --no-scripts               Skips the execution of all scripts defined in composer.json file.
  -d, --working-dir=WORKING-DIR  If specified, use the given directory as working directory.
      --no-cache                 Prevent use of the cache
  -v|vv|vvv, --verbose           Increase the verbosity of messages: 1 for normal output, 2 for more verbose output and 3 for debug

Available commands:
  about                Shows a short information about Composer
  archive              Creates an archive of this composer package
  audit                Checks for security vulnerability advisories for installed packages
  browse               [home] Opens the package's repository URL or homepage in your browser
  bump                 Increases the lower limit of your composer.json requirements to the currently installed versions
  check-platform-reqs  Check that platform requirements are satisfied
  clear-cache          [clearcache|cc] Clears composer's internal package cache
  completion           Dump the shell completion script
  config               Sets config options
  create-project       Creates new project from a package into given directory
  depends              [why] Shows which packages cause the given package to be installed
  diagnose             Diagnoses the system to identify common errors
  dump-autoload        [dumpautoload] Dumps the autoloader
  exec                 Executes a vendored binary/script
  fund                 Discover how to help fund the maintenance of your dependencies
  global               Allows running commands in the global composer dir ($COMPOSER_HOME)
  help                 Display help for a command
  init                 Creates a basic composer.json file in current directory
  install              [i] Installs the project dependencies from the composer.lock file if present, or falls back on the composer.json
  licenses             Shows information about licenses of dependencies
  list                 List commands
  outdated             Shows a list of installed packages that have updates available, including their latest version
  prohibits            [why-not] Shows which packages prevent the given package from being installed
  reinstall            Uninstalls and reinstalls the given package names
  remove               [rm] Removes a package from the require or require-dev
  require              [r] Adds required packages to your composer.json and installs them
  run-script           [run] Runs the scripts defined in composer.json
  search               Searches for packages
  self-update          [selfupdate] Updates composer.phar to the latest version
  show                 [info] Shows information about packages
  status               Shows a list of locally modified packages
  suggests             Shows package suggestions
  update               [u|upgrade] Updates your dependencies to the latest version according to composer.json, and updates the composer.lock file
  validate             Validates a composer.json and composer.lock
然后我们通过Composer来下载ThinkPHP框架构建的网站应用程序:
下载ThinkPHP程序框架也是看这(你可以暂时不看,先按照我的文章进度走):安装 - ThinkPHP官方手册
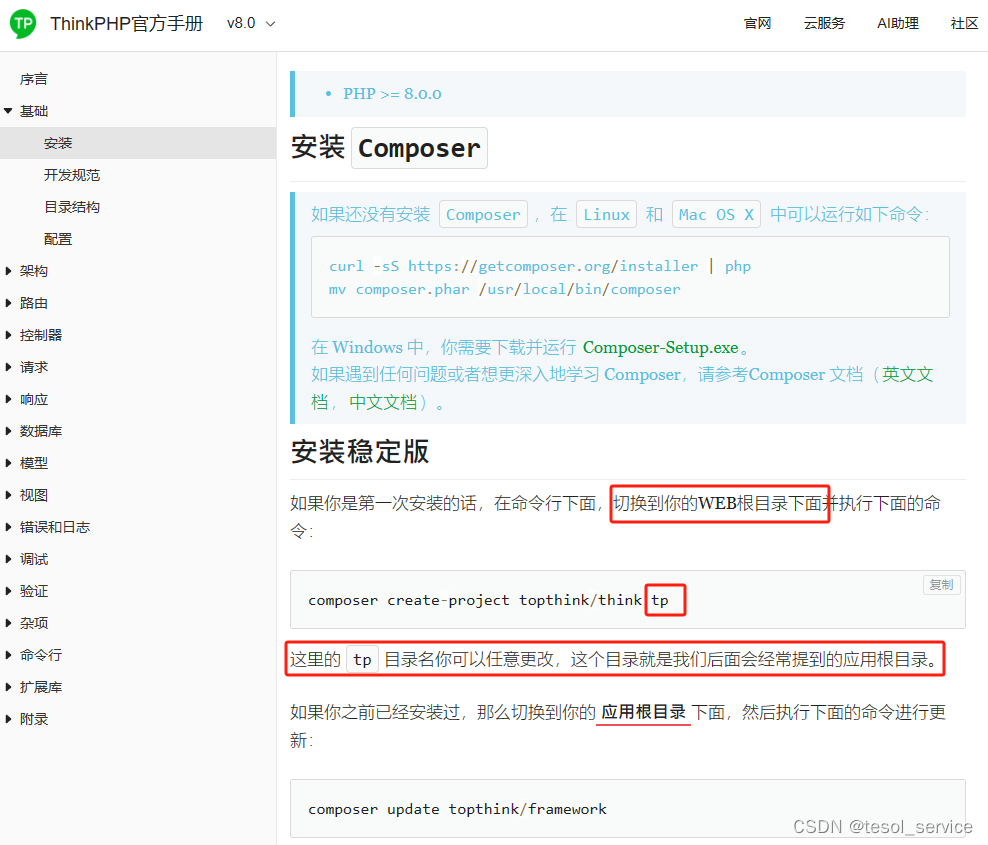
文档这里说的WEB根目录就是XAMPP文件夹中的htdocs目录,这个地址也就是我们网站在浏览器中访问的本地地址,如下:

进入htdocs文件夹中,单击直接选中这个文件夹地址,输入cmd后回车,这样就在当前文件夹目录中进入cmd命令行模式:

执行如下命令行:其中newsite就是通过ThinkPHP框架构建的应用所在的文件夹名(命令行会自动创建):
composer create-project topthink/think newsite
如果此时,你的下载报错说php没有开启zip和unzip/7z的压缩解压功能的话,提示中说我们的XAMPP文件夹中的PHP程序的没有开启压缩和解压功能,需要通过php.ini配置开启解压功能,用记事本打开配置文件 D:\User\XAMPP\php\php.ini,按住Ctrl+F搜索zip,把前面的分号删掉,即可启用解压功能,启用其他功能也是类似操作去掉分号报错即可,如下:

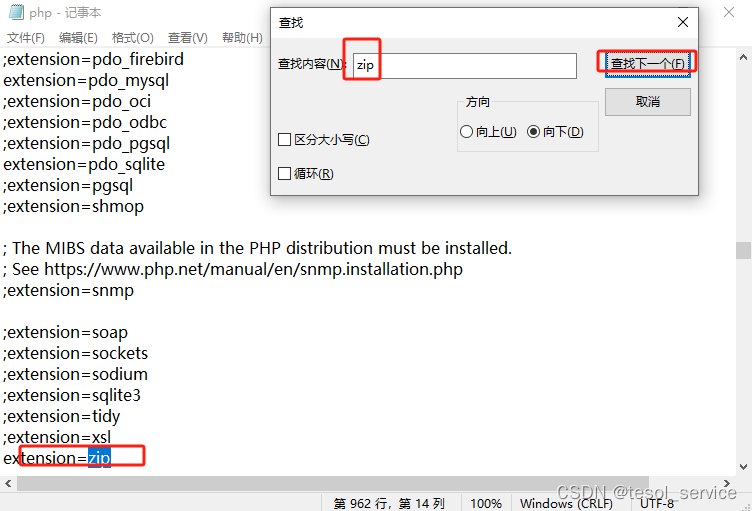
此时在网站根目录下再次执行命令行:composer create-project topthink/think newsite

下载成功!
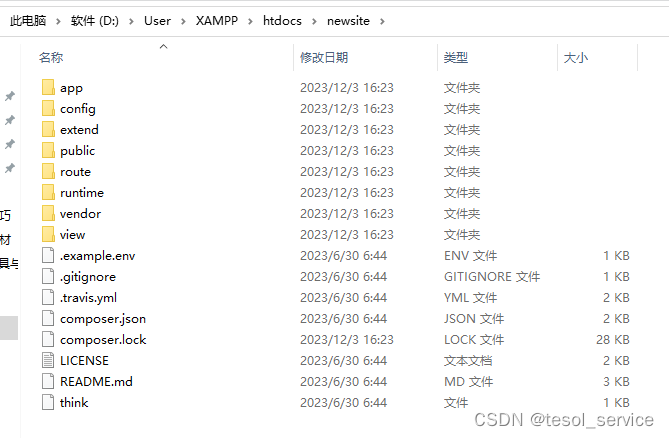
打开htdocs目录,你会看到composer构建的网站应用程序:

进入newsite文件夹如下:
在浏览器中验证一下,构建的项目是否成功,需要在浏览器中访问:localhost/newsite/public
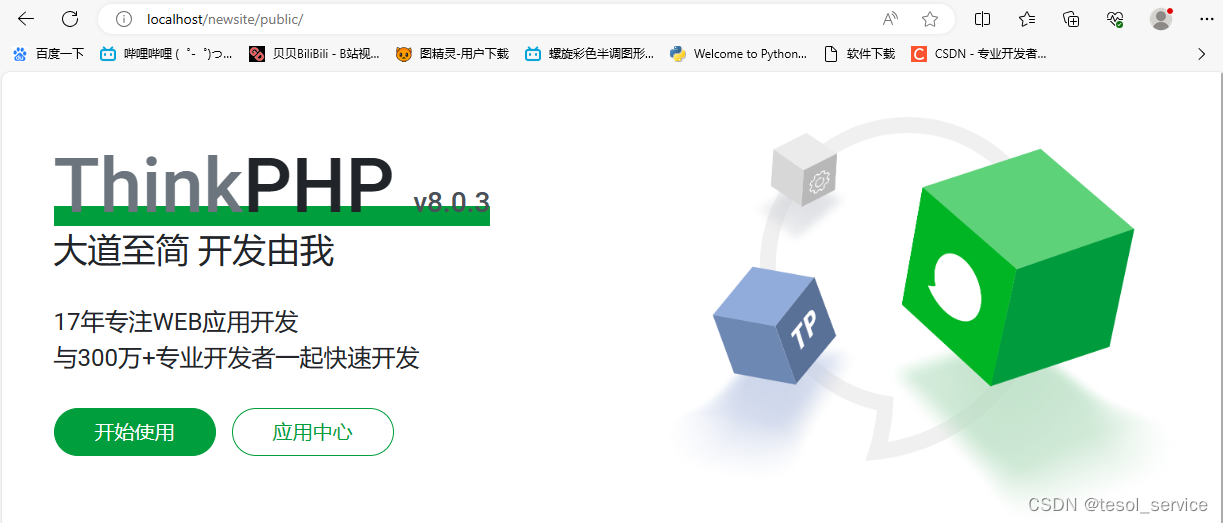
看到此页面说明我们的服务器搭建成功,网站应用程序也创建成功!
下面就是开发任务了!


 3153
3153


 被折叠的 条评论
为什么被折叠?
被折叠的 条评论
为什么被折叠?
 到【灌水乐园】发言


