


转载自: https://blog.csdn.net/chen_lian_/article/details/51031331
Handler是开发人员在面试过程中最常见的问题之一了,这篇文章将较为全面地对Handler进行解读,包括源码层,以及使用方法。
如果看完文章有疑问,欢迎在评论中一起探讨
基本内容包括:

看完文章之后,可以用这个图片进行复习。
一、什么是Handler
Handler是Android提供用来更新UI的一套机制,也是一套消息处理机制,可以用它来发送消息,也可以用它来接收消息。
二、为什么使用Handler
Android在设计之时,就封装了一套消息的创建、传递、处理机制,若不遵循这样的处理机制,就没办法更新UI信息,并且会抛出异常
三、Handler用法
1、postdelayed()延时发送执行子线程
文字轮询Demo(实现每隔一秒钟更新一次Textview的功能)
public class MainActivity extends AppCompatActivity {


    private TextView mTextView;

    private Handler mHandler = new Handler(){
        @Override
        public void handleMessage(Message msg) {
            super.handleMessage(msg);
        }
    };

    private String[] str = new String[]{"傲慢","偏见","僵尸"};
    private int index = 0;
    MyRunnable myRunnable = new MyRunnable();

    private class MyRunnable implements Runnable{

        @Override
        public void run() {
            index = index % 3;
            mTextView.setText(str[index]);
            index ++;
            mHandler.postDelayed(myRunnable,1000);
        }
    }

    @Override
    protected void onCreate(Bundle savedInstanceState) {
        super.onCreate(savedInstanceState);
        setContentView(R.layout.activity_main);

        mTextView = (TextView) findViewById(R.id.tv);


        mHandler.postDelayed(myRunnable,1000);
    }
}
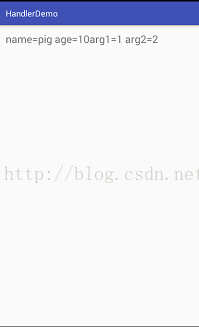
2、sendMessage()回调handleMessage()传递消息
Demo:在子线程中得到信息,发送至主线程,更新textview的内容
public class MainActivity extends AppCompatActivity {


    private TextView mTextView;

    Handler mHandler = new Handler(){
        @Override
        public void handleMessage(Message msg) {
	        Person p = (Person)msg.obj;
            mTextView.setText(p.toString() + "arg1="+msg.arg1 + " arg2=" + msg.arg2);
            super.handleMessage(msg);
        }
    };

    private  class Person{
        String name;
        int age;

        @Override
        public String toString() {
            return "name="+name+" age="+age;
        }
    }

    @Override
    protected void onCreate(Bundle savedInstanceState) {
        super.onCreate(savedInstanceState);
        setContentView(R.layout.activity_main);

        mTextView = (TextView) findViewById(R.id.tv);

        new Thread(){
            @Override
            public void run() {
                Message msg = new Message();
                msg.arg1 = 1;
                msg.arg2 = 2;
                Person person = new Person();
                person.name = "pig";
                person.age = 10;
                msg.obj = person;
                mHandler.sendMessage(msg);
            }
        }.start();

    }
}
3、sendToTarget()传递消息
与第二种用法原理一致
public class MainActivity extends AppCompatActivity {


    private TextView mTextView;

    Handler mHandler = new Handler(){
        @Override
        public void handleMessage(Message msg) {
	        Person p = (Person)msg.obj;
            mTextView.setText(p.toString()+ "arg1="+msg.arg1 + " arg2="+msg.arg2);
            super.handleMessage(msg);
        }
    };

    private  class Person{
        String name;
        int age;

        @Override
        public String toString() {
            return "name="+name+" age="+age;
        }
    }

    @Override
    protected void onCreate(Bundle savedInstanceState) {
        super.onCreate(savedInstanceState);
        setContentView(R.layout.activity_main);

        mTextView = (TextView) findViewById(R.id.tv);

        new Thread(){
            @Override
            public void run() {
                Message msg = mHandler.obtainMessage();//同样可以获取Message对象
                msg.arg1 = 1;
                msg.arg2 = 2;
                Person person = new Person();
                person.name = "pig";
                person.age = 10;
                msg.obj = person;
                msg.sendToTarget();
            }
        }.start();

    }
}
4、使用CallBack截获Handler的消息
public class MainActivity extends AppCompatActivity {


    private TextView mTextView;

	Handler mHandler = new Handler(new Handler.Callback() {
	    //传入CallBack对象,对于重载的返回值为bollean的handleMessage()
	    //返回值为false,将先执行这个方法,再执行返回值为void的handleMessage()方法
	    //返回值为true,只执行这个方法
	    @Override
	    public boolean handleMessage(Message msg) {
	        Toast.makeText(MainActivity.this, "截获消息", Toast.LENGTH_SHORT).show();
	        return false;
	    }
	}){
	    public void handleMessage(Message msg) {
	        Toast.makeText(MainActivity.this, "发出消息", Toast.LENGTH_SHORT).show();
		}
	};

    private  class Person{
        String name;
        int age;

        @Override
        public String toString() {
            return "name="+name+" age="+age;
        }
    }

    @Override
    protected void onCreate(Bundle savedInstanceState) {
        super.onCreate(savedInstanceState);
        setContentView(R.layout.activity_main);

        mTextView = (TextView) findViewById(R.id.tv);
        Button btn = (Button) findViewById(R.id.btn);
        btn.setOnClickListener(new View.OnClickListener() {
            @Override
            public void onClick(View v) {
                mHandler.sendEmptyMessage(0);
            }
        });


    }
}
四、为什么在Android中智能通过Handler机制在主线程中更新UI?
最根本的是
解决多线程并发问题。
假如在同一个Activity中,有多个线程同时更新UI,且没有加锁,那会导致什么问题呢?
UI更新混乱。
假如加锁呢?
会导致
性能下降。
使用Handler机制,我们不用去考虑多线程的问题,所有更新UI的操作,都是在 主线程消息队列中轮询去处理的。
五、Handler机制的原理
1、Handler封装了消息的发送(主要包括消息发送给谁)
Looper
(1)内部包含一个消息队列,即MessageQueue,所有Handler发送的消息都会进入这个队列
(2)Looper.loop方法,是一个死循环,不断从MessageQueue取出消息,如有消息就处理,没有就阻塞
2、MessageQueue,一个消息队列,可以添加消息,处理消息
3、Handler内部会跟Looper进行关联,也就是说,在Handler内部可以找到Looper,找到了Looper也就找到了MessageQueue,在Handler中发送消息,其实就是向MessageQueue发送消息,
总结:Handler负责发送消息,Looper负责接收消息,并把消息回传给Handler自己,而MessageQueue是一个存储消息的容器。
源码层:
Android的应用程序是通过ActivityThread进行创建,在ActivityThread默认创建一个Main线程,一个Looper,所有更新UI的线程都是通过Main线程进行创建的。
查看Looper.loop的源代码,发现确实是一个死循环
public static void loop() {
    final Looper me = myLooper();
    if (me == null) {
        throw new RuntimeException("No Looper; Looper.prepare() wasn’t called on this thread.");
    }
    final MessageQueue queue = me.mQueue;

    // Make sure the identity of this thread is that of the local process,
    // and keep track of what that identity token actually is.
    Binder.clearCallingIdentity();
    final long ident = Binder.clearCallingIdentity();

    for (;;) {
        Message msg = queue.next(); // might block
        if (msg == null) {
            // No message indicates that the message queue is quitting.
            return;
        }

        // This must be in a local variable, in case a UI event sets the logger
        Printer logging = me.mLogging;
        if (logging != null) {
            logging.println(">>>>> Dispatching to " + msg.target + " " +
                    msg.callback + ": " + msg.what);
        }

        msg.target.dispatchMessage(msg);

        if (logging != null) {
            logging.println("<<<<< Finished to " + msg.target + " " + msg.callback);
        }

        // Make sure that during the course of dispatching the
        // identity of the thread wasn’t corrupted.
        final long newIdent = Binder.clearCallingIdentity();
        if (ident != newIdent) {
            Log.wtf(TAG, "Thread identity changed from 0x"
                    + Long.toHexString(ident) + " to 0x"
                    + Long.toHexString(newIdent) + " while dispatching to "
                    + msg.target.getClass().getName() + " "
                    + msg.callback + " what=" + msg.what);
        }

        msg.recycleUnchecked();
    }
}
发现是通过msg.target.dispatchMessage()方法来处理消息,查看其源码
public void dispatchMessage(Message msg) {
    if (msg.callback != null) {
        handleCallback(msg);
    } else {
        if (mCallback != null) {
            if (mCallback.handleMessage(msg)) {
                return;
            }
        }
        handleMessage(msg);
    }
}
从源码看出,当有CallBack的时候,会截获消息,没有的话会回调handleMessage()来处理消息
而对于SendMessage()系列的方法,这里不再做过多解析,但从其源码可以看出,确实是最终把消息传入了消息队列中。
六、创建与线程相关的Handler
在子线程中创建Handler,需要通过Looper.prepare()获取Looper,且调用Looper.loop()方法对消息队列中的Message进行轮询
public class MainActivity extends AppCompatActivity {


    private TextView mTextView;

    public Handler mHandler = new Handler(){//主线程中的Handler
        @Override
        public void handleMessage(Message msg) {
            Log.d("CurrentThread",Thread.currentThread()+"");//打印Thread 的ID
        }
    };

    class MyThread extends Thread{
        private Handler handler;//子线程中的Handler
        @Override
        public void run() {
            Looper.prepare();//获取Looper
            handler = new Handler(){
                @Override
                public void handleMessage(Message msg) {
                    Log.d("CurrentThread",Thread.currentThread()+"");
                }
            };
            Looper.loop();//轮询消息队列
        }
    }


    @Override
    protected void onCreate(Bundle savedInstanceState) {
        super.onCreate(savedInstanceState);
        setContentView(R.layout.activity_main);

        MyThread thread= new MyThread();
        thread.start();
        try {
            thread.sleep(500);
        } catch (InterruptedException e) {
            e.printStackTrace();
        }
        thread.handler.sendEmptyMessage(1);
        mHandler.sendEmptyMessage(1);
    }
}
输出的结果
03-31 20:56:06.498 1804-1816/? D/CurrentThread: Thread[Thread-113,5,main]
03-31 20:56:06.578 1804-1804/com.lian.handlerdemo D/CurrentThread: Thread[main,5,main]
七、HandlerThread
HandlerThread本质是一个Thread,区别在于他在run()之后创建了一个含有消息队列的Looper,这样我们在子线程中创建Handler时候只需指定使用HandlerThread中的Looper,不用再调用Looper.prepare(),looper.loop()等,简化了操作。
Android系统提供的Handler使用的Looper默认绑定了UI线程的消息队列,所以我们在Handler中不能进行耗时操作,而对于非UI线程,若想使用消息机制,HandlerThread内部的Looper是最合适的,他不会阻塞UI线程。
public class MainActivity extends AppCompatActivity {


    private TextView mTextView;

    public HandlerThread mHandlerThread;


    @Override
    protected void onCreate(Bundle savedInstanceState) {
        super.onCreate(savedInstanceState);
        setContentView(R.layout.activity_main);

        mHandlerThread = new HandlerThread("handler thread");
        mHandlerThread.start();
        Handler handler = new Handler(mHandlerThread.getLooper()){//通过getLooper()获取Looper
            @Override
            public void handleMessage(Message msg) {
                Log.d("current thread","" + Thread.currentThread());
            }
        };
        handler.sendEmptyMessage(1);
    }
}
结果:
03-31 21:36:42.770 7225-7237/? D/current thread: Thread[handler thread,5,main]
八、主线程与子线程信息交互
主线程中的Handler与子线程中的Handler互相发送消息,只要调用对方的sendMessage()就可以了
public class MainActivity extends AppCompatActivity {


    public Handler mHandler = new Handler(){
        @Override
        public void handleMessage(Message msg) {
            Log.d("current thread", "" + Thread.currentThread());
            Message message = new Message();
            message.what = 1;
            handler.sendMessageDelayed(message,1000);//向子线程的Handler发送消息
        }
    };

    public HandlerThread mHandlerThread;
    public Handler handler;
    private Button btn1,btn2;


    @Override
    protected void onCreate(Bundle savedInstanceState) {
        super.onCreate(savedInstanceState);
        setContentView(R.layout.activity_main);

        btn1 = (Button) findViewById(R.id.btn);
        btn2 = (Button) findViewById(R.id.btn2);

        mHandlerThread = new HandlerThread("handler thread");//指定HandlerThread的名字
        mHandlerThread.start();
        handler = new Handler(mHandlerThread.getLooper()){//通过getLooper()获取Looper
            @Override
            public void handleMessage(Message msg) {
                Log.d("current thread", "" + Thread.currentThread());
                Message message = new Message();
                mHandler.sendMessageDelayed(message,1000);//向主线程中的Handler发送消息
            }
        };

        btn1.setOnClickListener(new View.OnClickListener() {
            @Override
            public void onClick(View v) {
                handler.sendEmptyMessage(1);//开始发送消息
            }
        });

        btn2.setOnClickListener(new View.OnClickListener() {
            @Override
            public void onClick(View v) {
                handler.removeMessages(1);//停止发送消息
            }
        });

    }
}
结果:
03-31 22:21:11.422 16748-16760/com.lian.handlerdemo D/current thread: Thread[handler thread,5,main]
03-31 22:21:12.422 16748-16748/com.lian.handlerdemo D/current thread: Thread[main,5,main]
03-31 22:21:13.422 16748-16760/com.lian.handlerdemo D/current thread: Thread[handler thread,5,main]
03-31 22:21:14.422 16748-16748/com.lian.handlerdemo D/current thread: Thread[main,5,main]
03-31 22:21:15.426 16748-16760/com.lian.handlerdemo D/current thread: Thread[handler thread,5,main]
03-31 22:21:16.426 16748-16748/com.lian.handlerdemo D/current thread: Thread[main,5,main]
03-31 22:21:20.414 16748-16760/com.lian.handlerdemo D/current thread: Thread[handler thread,5,main]
03-31 22:21:21.414 16748-16748/com.lian.handlerdemo D/current thread: Thread[main,5,main]
03-31 22:21:22.414 16748-16760/com.lian.handlerdemo D/current thread: Thread[handler thread,5,main]
03-31 22:21:23.418 16748-16748/com.lian.handlerdemo D/current thread: Thread[main,5,main]
九、四种更新UI的方法
1、Handler.post();
2、Handler.sendMessage();
第一二种方法事实上没有本质的区别,都是通过发送消息,在UI线程中更新UI,前面已经做过演示,不再赘述
3、runOnUIThread()
使用方法:
public class MainActivity extends AppCompatActivity {
    TextView mTextView;

    @Override
    protected void onCreate(Bundle savedInstanceState) {
        super.onCreate(savedInstanceState);
        setContentView(R.layout.activity_main);

        mTextView = (TextView) findViewById(R.id.tv);

        new Thread(){

            @Override
            public void run() {

                try {
                    Thread.sleep(1000);
                } catch (InterruptedException e) {
                    e.printStackTrace();
                }
                runOnUiThread(new Runnable() {
                    @Override
                    public void run() {
                        mTextView.setText("更新UI");
                    }
                });
            }
        }.start();

    }
}
我们查看runOnUIThread()的源代码
public final void runOnUiThread(Runnable action) {
    if (Thread.currentThread() != mUiThread) {
        mHandler.post(action);
    } else {
        action.run();
    }
}
可以发现,其本质上仍然是通过Handler.post()方法再UI线程中更新UI
4、View.post()
使用方法:
public class MainActivity extends AppCompatActivity {
    TextView mTextView;

    @Override
    protected void onCreate(Bundle savedInstanceState) {
        super.onCreate(savedInstanceState);
        setContentView(R.layout.activity_main);

        mTextView = (TextView) findViewById(R.id.tv);

        new Thread(){
            @Override
            public void run() {
                try {
                    Thread.sleep(1000);
                } catch (InterruptedException e) {
                    e.printStackTrace();
                }
                mTextView.post(new Runnable() {
                    @Override
                    public void run() {
                        mTextView.setText("更新UI");
                    }
                });
            }
        }.start();

    }
}
查看其源码,一样是采用Handler.post()方法更新UI
public boolean post(Runnable action) {
    final AttachInfo attachInfo = mAttachInfo;
    if (attachInfo != null) {
        return attachInfo.mHandler.post(action);
    }
    // Assume that post will succeed later
    ViewRootImpl.getRunQueue().post(action);
    return true;
}
十、在非UI线程中更新UI的方法
先看一个Demo
public class MainActivity extends AppCompatActivity {
    TextView mTextView;

    @Override
    protected void onCreate(Bundle savedInstanceState) {
        super.onCreate(savedInstanceState);
        setContentView(R.layout.activity_main);

        mTextView = (TextView) findViewById(R.id.tv);

        new Thread(){
            @Override
            public void run() {
                mTextView.setText("更新UI了");
            }
        }.start();

    }
}
结果:
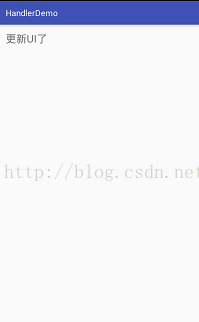
惊讶地发现,成功更新了UI,并没有抛出异常
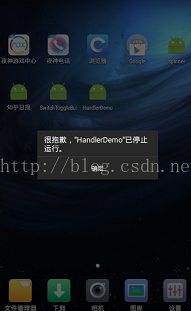
然而当我们先让线程休眠2s,再更新
public class MainActivity extends AppCompatActivity {
    TextView mTextView;

    @Override
    protected void onCreate(Bundle savedInstanceState) {
        super.onCreate(savedInstanceState);
        setContentView(R.layout.activity_main);

        mTextView = (TextView) findViewById(R.id.tv);

        new Thread(){
            @Override
            public void run() {

                try {
                    Thread.sleep(2000);
                } catch (InterruptedException e) {
                    e.printStackTrace();
                }

                mTextView.setText("更新UI了");
            }
        }.start();

    }
}
更新失败,抛出异常
这是什么原因呢?
在Activity中有一个ViewRootImpl类,这个类没有实例化的时候,系统不会检测当前线程是否UI线程,而这个类的实例化是在Activity的onResume()中实现,所以,当我们没有让子线程休眠时,直接更新UI,系统还来不及检测当前线程是否UI线程,于是我们成功更新了UI,
而休眠二秒中后,ViewRootImpl已经实例化,此时更新UI就会抛出异常。
当然,在实际开发中,这意义不大,我们还是要在UI线程中更新UI。
十一、常见的两个问题
使用Handler常遇到的两个异常:
1、非UI线程更新UI
也就是我们上面遇到的问题
抛出这个异常:
android.view.ViewRootImpl$CalledFromWrongThreadException: Only the original thread that created a view hierarchy can touch its views.
2、子线程中创建Handler缺少Looper
抛出这个异常:
java.lang.RuntimeException: Can't create handler inside thread that has not called Looper.prepare()
查看源码
mLooper = Looper.myLooper();
    if (mLooper == null) {
        throw new RuntimeException(
            "Can’t create handler inside thread that has not called Looper.prepare()");
    }
    mQueue = mLooper.mQueue;
    mCallback = callback;
    mAsynchronous = async;
}
发现,没有Looper,就会抛出这个运行时异常。


 1040
1040


 被折叠的 条评论
为什么被折叠?
被折叠的 条评论
为什么被折叠?
 到【灌水乐园】发言


