这篇文章主要介绍了在SpringBoot下读取自定义properties配置文件的方法,文中涉及到了Spring-boot中读取config配置文件的两种方式,需要的朋友可以参考下
SpringBoot工程默认读取application.properties配置文件。如果需要自定义properties文件,如何读取呢?
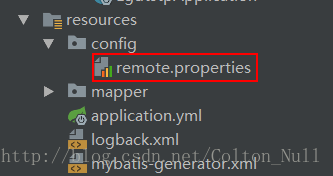
一、在resource中新建.properties文件
在resource目录下新建一个config文件夹,然后新建一个.properties文件放在该文件夹下。如图remote.properties所示
二、编写配置文件
?
| 1 2 | remote.uploadFilesUrl=/resource/files/
remote.uploadPicUrl=/resource/pic/
|
三、新建一个配置类RemoteProperties.java
?
| 1 2 3 4 5 6 7 8 9 | @Configuration
@ConfigurationProperties(prefix = "remote", ignoreUnknownFields = false)
@PropertySource("classpath:config/remote.properties")
@Data
@Component
public class RemoteProperties {
private String uploadFilesUrl;
private String uploadPicUrl;
}
|
其中
@Configuration 表明这是一个配置类
@ConfigurationProperties(prefix = "remote", ignoreUnknownFields = false) 该注解用于绑定属性。prefix用来选择属性的前缀,也就是在remote.properties文件中的“remote”,ignoreUnknownFields是用来告诉SpringBoot在有属性不能匹配到声明的域时抛出异常。
@PropertySource("classpath:config/remote.properties") 配置文件路径
@Data 这个是一个lombok注解,用于生成getter&setter方法,详情请查阅lombok相关资料
@Component 标识为Bean
四、如何使用?
在想要使用配置文件的方法所在类上表上注解EnableConfigurationProperties(RemoteProperties.class)
并自动注入
?
| 1 2 | @Autowired
RemoteProperties remoteProperties;
|
在方法中使用 remoteProperties.getUploadFilesUrl()就可以拿到配置内容了。
?
| 1 2 3 4 5 6 7 8 9 10 11 | @EnableConfigurationProperties(RemoteProperties.class)
@RestController
public class TestService{
@Autowired
RemoteProperties remoteProperties;
public void test(){
String str = remoteProperties.getUploadFilesUrl();
System.out.println(str);
}
}
|
这里str就是配置文件中的”/resource/files/”了。
PS:下面看下 Spring-boot中读取config配置文件的两种方式
了解过spring-Boot这个技术的,应该知道Spring-Boot的核心配置文件application.properties,当然也可以通过注解自定义配置文件的信息。
Spring-Boot读取配置文件的方式:
一.读取核心配置文件信息application.properties的内容
核心配置文件是指在resources根目录下的application.properties或application.yml配置文件,读取这两个配置文件的方法有两种,都比较简单。
核心配置文件application.properties内容如下:
?
| 1 | test.msg=Hello World SpringBoot
|
方式一:使用@Value方式(常用)
?
| 1 2 3 4 5 6 7 8 9 10 11 12 13 | package Solin.controller;
import org.springframework.beans.factory.annotation.Value;
import org.springframework.web.bind.annotation.RequestMapping;
import org.springframework.web.bind.annotation.RestController;
@RestController
public class WebController {
@Value("${test.msg}")
private String msg;
@RequestMapping("/index1")
public String index1(){
return "方式一:"+msg;
}
}
|
注意:在@Value的${}中包含的是核心配置文件中的键名。在Controller类上加@RestController表示将此类中的所有视图都以JSON方式显示,类似于在视图方法上加@ResponseBody。
访问:http://localhost:8088/index1时得到:"方式一:Hello World SpringBoot"
方式二:使用Environment方式
?
| 1 2 3 4 5 6 7 8 9 10 11 12 13 14 15 16 | package Solin.controller;
import org.springframework.beans.factory.annotation.Autowired;
import org.springframework.beans.factory.annotation.Value;
import org.springframework.core.env.Environment;
import org.springframework.web.bind.annotation.RequestMapping;
import org.springframework.web.bind.annotation.RestController;
@RestController
public class WebController {
@Autowired
private Environment env;
@RequestMapping("/index2")
public String index2(){
return "方式二:"+env.getProperty("test.msg");
}
}
|
注意:这种方式是依赖注入Evnironment来完成,在创建的成员变量private Environment env上加上@Autowired注解即可完成依赖注入,然后使用env.getProperty("键名")即可读取出对应的值。
访问:http://localhost:8088/index2时得到:"方式二:Hello World SpringBoot"
二.读取自定义配置文件信息,例如:author.properties
为了不破坏核心文件的原生态,但又需要有自定义的配置信息存在,一般情况下会选择自定义配置文件来放这些自定义信息,这里在resources目录下创建配置文件author.properties
resources/author.properties内容如下:
?
| 1 2 | author.name=Solin
author.age=22
|
创建管理配置的实体类:
?
| 1 2 3 4 5 6 7 8 9 10 11 12 13 14 15 16 17 18 19 20 21 22 23 24 25 | package Solin.controller;
import org.springframework.boot.context.properties.ConfigurationProperties;
import org.springframework.context.annotation.Configuration;
import org.springframework.stereotype.Component;
//加上注释@Component,可以直接在其他地方使用@Autowired来创建其实例对象
@Component
@ConfigurationProperties(prefix = "author",locations = "classpath:author.properties")
public class MyWebConfig{
private String name;
private int age;
public String getName() {
return name;
}
public void setName(String name) {
this.name = name;
}
public int getAge() {
return age;
}
public void setAge(int age) {
this.age = age;
}
}
|
注意:
在@ConfigurationProperties注释中有两个属性:
locations:指定配置文件的所在位置
prefix:指定配置文件中键名称的前缀(我这里配置文件中所有键名都是以author.开头)
使用@Component是让该类能够在其他地方被依赖使用,即使用@Autowired注释来创建实例。
创建测试Controller
?
| 1 2 3 4 5 6 7 8 9 10 11 12 13 14 15 | package Solin.controller;
import org.springframework.beans.factory.annotation.Autowired;
import org.springframework.stereotype.Controller;
import org.springframework.web.bind.annotation.RequestMapping;
import org.springframework.web.bind.annotation.ResponseBody;
@Controller
public class ConfigController {
@Autowired
private MyWebConfig conf;
@RequestMapping("/test")
public @ResponseBody String test() {
return "Name:"+conf.getName()+"---"+"Age:"+conf.getAge();
}
}
|
注意:由于在Conf类上加了注释@Component,所以可以直接在这里使用@Autowired来创建其实例对象。
访问:http://localhost:8088/test时得到:"Name:Solin---Age:22"


 1763
1763


 被折叠的 条评论
为什么被折叠?
被折叠的 条评论
为什么被折叠?
 到【灌水乐园】发言


