


CentOS环境查看
提示:这注意挂载目录的硬盘大小(确认安装的目录),内存大小(配置运行变量)。
参考地址:https://blog.csdn.net/oChengXuYuan88/article/details/134588554
- 使用root用户登录系统。
- 运行系统环境查看命令。
uname -a  # 系统环境 我的是x86_64
cat /proc/version  # 系统版本 我的是 centos Red Hat 4.8.5-44
cat /etc/redhat-release  # 红帽版本 我的是 Linux release 7.9.2009
ip a # 查看ip 我的ip是  192.168.88.47
free -h # 查看内存  根据内存大小配置运行大小内存 我的是 8G
df -h # 查看硬盘  根据硬盘挂载大小配置安装 我的挂载是 / (489G)
df -h /tmp/ # 查看临时挂载空间 我没有固定使用 默认使用 /
运行后才看到的
[root@dev2oracle ~]# uname -a
Linux dev2oracle 3.10.0-1160.el7.x86_64 #1 SMP Mon Oct 19 16:18:59 UTC 2020 x86_64 x86_64 x86_64 GNU/Linux
[root@dev2oracle ~]# cat /proc/version
Linux version 3.10.0-1160.el7.x86_64 (mockbuild@kbuilder.bsys.centos.org) (gcc version 4.8.5 20150623 (Red Hat 4.8.5-44) (GCC) ) #1 SMP Mon Oct 19 16:18:59 UTC 2020
[root@dev2oracle ~]# cat /etc/redhat-release
CentOS Linux release 7.9.2009 (Core)
[root@dev2oracle ~]# ip a
1: lo: <LOOPBACK,UP,LOWER_UP> mtu 65536 qdisc noqueue state UNKNOWN group default qlen 1000
    link/loopback 00:00:00:00:00:00 brd 00:00:00:00:00:00
    inet 127.0.0.1/8 scope host lo
       valid_lft forever preferred_lft forever
    inet6 ::1/128 scope host
       valid_lft forever preferred_lft forever
2: ens192: <BROADCAST,MULTICAST,UP,LOWER_UP> mtu 1500 qdisc mq state UP group default qlen 1000
    link/ether 00:50:56:ba:5a:a3 brd ff:ff:ff:ff:ff:ff
    inet 192.168.88.47/24 brd 192.168.88.255 scope global noprefixroute ens192
       valid_lft forever preferred_lft forever
    inet6 fe80::5e73:f67a:c99e:ca1a/64 scope link noprefixroute
       valid_lft forever preferred_lft forever
[root@dev2oracle ~]# free -h
              total        used        free      shared  buff/cache   available
Mem:           7.6G        727M        237M        2.3G        6.7G        4.4G
Swap:          7.9G         46M        7.8G
[root@dev2oracle ~]# df -h
文件系统                 容量  已用  可用 已用% 挂载点
devtmpfs                 3.9G     0  3.9G    0% /dev
tmpfs                    3.9G     0  3.9G    0% /dev/shm
tmpfs                    3.9G  8.9M  3.9G    1% /run
tmpfs                    3.9G     0  3.9G    0% /sys/fs/cgroup
/dev/mapper/centos-root  489G   19G  471G    4% /
/dev/sda1                2.0G  150M  1.9G    8% /boot
/dev/mapper/centos-home  1.2G   33M  1.1G    3% /home
tmpfs                    783M     0  783M    0% /run/user/1000
tmpfs                    783M     0  783M    0% /run/user/0
[root@dev2oracle ~]# df -h /tmp/
文件系统                 容量  已用  可用 已用% 挂载点
/dev/mapper/centos-root  489G   19G  471G    4% /
- 查看并设置主机名。
cat /etc/hosts #host查看
hostname #hostname 查看 我的是 dev2oracle
hostnamectl set-hostname dev2oracle #配置hostname
运行结果
[root@dev2oracle ~]# cat /etc/hosts
127.0.0.1   localhost localhost.localdomain localhost4 localhost4.localdomain4
::1         localhost localhost.localdomain localhost6 localhost6.localdomain6
[root@dev2oracle ~]# hostname
dev2oracle
[root@dev2oracle ~]# hostnamectl set-hostname dev2oracle
安装必要工具
- 安装必要工具。
sudo yum install wget #wget安装
sudo yum install vim  #文件编辑
sudo yum install net-tools   #网络检查
sudo yum install -y unzip zip  #zip解压
sudo yum -y install readline-devel ncurses-devel #sql翻页
# 安装依赖包
yum -y install binutils compat-libcap1 compat-libstdc++-33 compat-libstdc++-33*i686 compat-libstdc++-33*.devel compat-libstdc++-33 compat-libstdc++-33*.devel gcc gcc-c++ glibc glibc*.i686 glibc-devel glibc-devel*.i686 ksh libaio libaio*.i686 libaio-devel libaio-devel*.devel libgcc libgcc*.i686 libstdc++ libstdc++*.i686 libstdc++-devel libstdc++-devel*.devel libXext libXi libXi*.i686 libXtst libXtst*.i686 libX11 libXau libxcb make sysstat libnsl.x86_64 unixODBC unixODBC*.i686 unixODBC-devel unixODBC-devel*.i686
# 检查依赖包是否安装
rpm -q binutils compat-libcap1 compat-libstdc++-33 gcc gcc-c++ glibc glibc-devel ksh libaio libaio-devel libgcc libstdc++ libstdc++-devel libXext libXtst libX11 libXau libxcb libXi make sysstat
# 安装缺失的rpm包
yum -y install binutils compat-libcap1 compat-libstdc++-33 compat-libstdc++-33*.i686 elfutilslibelf-devel gcc gcc-c++ glibc*.i686 glibc glibc-devel glibc-devel*.i686 ksh libgcc*.i686 libgcc libstdc++ libstdc++*.i686 libstdc++-devel libstdc++-devel*.i686 libaio libaio*.i686 libaio-devel libaio-devel*.i686 make sysstat unixODBC unixODBC*.i686 unixODBC-devel unixODBCdevel*.i686 libXp
安装时有些安装包输入 y 进安装
安装结果这里就不做展示。
如果都已经安装成功 可以从新执行 # 安装依赖包 命令查看安装结果
****
软件包 unixODBC-2.3.1-14.el7.x86_64 已安装并且是最新版本
软件包 unixODBC-2.3.1-14.el7.i686 已安装并且是最新版本
软件包 unixODBC-devel-2.3.1-14.el7.i686 已安装并且是最新版本
软件包 unixODBC-devel-2.3.1-14.el7.x86_64 已安装并且是最新版本
软件包 unixODBC-devel-2.3.1-14.el7.i686 已安装并且是最新版本
无须任何处理
****
- 安装失败原因可能是 yum安装源有问题,可以使用国内安装源。
/etc/yum.repos.d/CentOS-Base.repo 文件修改
cp /etc/yum.repos.d/CentOS-Base.repo /etc/yum.repos.d/CentOS-Base.repo.backup #备份源
wget -O /etc/yum.repos.d/CentOS-Base.repo http://mirrors.aliyun.com/repo/Centos-7.repo #下载新的CentOS-Base.repo 到/etc/yum.repos.d/
##或
curl -o /etc/yum.repos.d/CentOS-Base.repo http://mirrors.aliyun.com/repo/Centos-7.repo
curl -O /etc/yum.repos.d/epel.repo  #添加EPEL
yum clean all
yum makecache
运行结果
[root@dev2oracle ~]# cp /etc/yum.repos.d/CentOS-Base.repo /etc/yum.repos.d/CentOS-Base.repo.backup
[root@dev2oracle ~]# wget -O /etc/yum.repos.d/CentOS-Base.repo http://mirrors.aliyun.com/repo/Centos-7.repo
--2024-05-26 22:38:25--  http://mirrors.aliyun.com/repo/Centos-7.repo
正在解析主机 mirrors.aliyun.com (mirrors.aliyun.com)... 123.129.238.233, 140.249.226.230, 123.129.238.231, ...
正在连接 mirrors.aliyun.com (mirrors.aliyun.com)|123.129.238.233|:80... 已连接。
已发出 HTTP 请求,正在等待回应... 200 OK
*******
*******
2024-05-26 22:38:55 (169 MB/s) - 已保存 “/etc/yum.repos.d/CentOS-Base.repo” [2523/2523])
关闭防火墙和selinux
- 关闭防火墙
systemctl start firewalld  #启动防火墙
systemctl stop firewalld   #关闭防火墙
systemctl status firewalld  #查看防火墙
运行结果
[root@dev2oracle ~]# systemctl start firewalld
[root@dev2oracle ~]# systemctl stop firewalld
[root@dev2oracle ~]# systemctl status firewalld
● firewalld.service - firewalld - dynamic firewall daemon
   Loaded: loaded (/usr/lib/systemd/system/firewalld.service; enabled; vendor preset: enabled)
   Active: active (running) since 三 2024-05-22 01:50:14 EDT; 4 days ago
     Docs: man:firewalld(1)
 Main PID: 744 (firewalld)
   CGroup: /system.slice/firewalld.service
           └─744 /usr/bin/python2 -Es /usr/sbin/firewalld --nofork --nopid

5月 22 01:50:13 dev2oracle systemd[1]: Starting firewalld - dynamic firewall daemon...
5月 22 01:50:14 dev2oracle systemd[1]: Started firewalld - dynamic firewall daemon.
5月 22 01:50:14 dev2oracle firewalld[744]: WARNING: AllowZoneDrifting is enabled. This is considered an insecure configuration option. It will be r...g it now.
5月 22 09:46:17 dev2oracle firewalld[744]: WARNING: AllowZoneDrifting is enabled. This is considered an insecure configuration option. It will be r...g it now.
Hint: Some lines were ellipsized, use -l to show in full.
- 关闭selinux
setenforce 0  # 临时关闭selinux
vim /etc/selinux/config   #永久关闭selinux 将 SELINUX 设置成:disabled
reboot # 需要重启服务器生效
getenforce # 查看生效
运行结果
[root@dev2oracle ~]# setenforce 0
setenforce: SELinux is disabled
#修改配置文件中的SELINUX=disabled
[root@dev2oracle ~]# vim /etc/selinux/config

# This file controls the state of SELinux on the system.
# SELINUX= can take one of these three values:
#     enforcing - SELinux security policy is enforced.
#     permissive - SELinux prints warnings instead of enforcing.
#     disabled - No SELinux policy is loaded.
#SELINUX=enforcing
SELINUX=disabled
# SELINUXTYPE= can take one of three values:
#     targeted - Targeted processes are protected,
#     minimum - Modification of targeted policy. Only selected processes are protected.
#     mls - Multi Level Security protection.
SELINUXTYPE=targeted

#修改配置文件保存

[root@dev2oracle ~]# reboot
[root@dev2oracle ~]# getenforce
Disabled
修改Linux内核参数
- 修改Linux内核参数
vim /etc/sysctl.conf
在sysctl.conf文件末尾添加如下参数
fs.aio-max-nr=1048576
fs.file-max=6815744
kernel.sem=250 32000 100 128
kernel.shmall=16777216
kernel.shmmax=68719476735
kernel.shmmni=4096
net.core.rmem_default=1048576
net.core.rmem_max=4194304
net.core.wmem_default=262144
net.core.wmem_max=1048576
net.ipv4.ip_local_port_range=9000 65500
kernel.shm_rmid_forced = 0
提示:这里注意根据自己的内存大小和硬盘大小配置
kernel.shmmax :说明
内存为 12G 时,该值为 12*1024*1024*1024-1 = 12884901887
内存为 16G 时,该值为 16*1024*1024*1024-1 = 17179869183
内存为 32G 时,该值为 32*1024*1024*1024-1 = 34359738367
内存为 64G 时,该值为 64*1024*1024*1024-1 = 68719476735
kernel.shmall :说明
当内存为 12G 时, kernel.shmall = 3145728
当内存为 16G 时, kernel.shmall = 4194304
当内次为 32G 时, kernel.shmall = 8388608
当内存为 64G 时, kernel.shmall = 16777216
[root@dev2oracle ~]# vim /etc/sysctl.conf

# sysctl settings are defined through files in
# /usr/lib/sysctl.d/, /run/sysctl.d/, and /etc/sysctl.d/.
#
# Vendors settings live in /usr/lib/sysctl.d/.
# To override a whole file, create a new file with the same in
# /etc/sysctl.d/ and put new settings there. To override
# only specific settings, add a file with a lexically later
# name in /etc/sysctl.d/ and put new settings there.
#
# For more information, see sysctl.conf(5) and sysctl.d(5).
fs.aio-max-nr = 1048576
fs.file-max = 6815744
kernel.sem = 250 32000 100 128
net.ipv4.ip_local_port_range = 9000 65500
net.core.rmem_default = 262144
net.core.rmem_max = 4194304
net.core.wmem_default = 262144
net.core.wmem_max = 1048576
# 设置共享内存最大值
kernel.shmmax = 17179869184
# 设置每个共享内存段的最大值
kernel.shmall = 4194304
# 设置共享内存的最大数量
kernel.shmmni = 4096
# 设置每个进程可用共享内存的最大值
kernel.shm_rmid_forced = 0
然后执行 sysctl -p 命令,使得配置的内核参数生效
[root@dev2oracle ~]# sysctl -p
fs.aio-max-nr = 1048576
fs.file-max = 6815744
kernel.sem = 250 32000 100 128
kernel.shmall = 2097152
kernel.shmmax = 2147483648
kernel.shmmni = 4096
net.core.rmem_default = 262144
net.core.rmem_max = 4194304
net.core.wmem_default = 262144
net.core.wmem_max = 1048576
net.ipv4.ip_local_port_range = 9000 65500
kernel.shm_rmid_forced = 0
关于Oracle用户相关操作
- 修改资源限制
vi /etc/security/limits.conf
添加以下参数
oracle soft nofile 1024
oracle hard nofile 65536
oracle soft nproc 2047
oracle hard nproc 16384
oracle soft stack 10240
[root@dev2oracle ~]# vi /etc/security/limits.conf

# End of file
oracle              soft    nofile  1024
oracle              hard    nofile  65536
oracle              soft    nproc   2047
oracle              hard    nproc   16384
oracle              soft    stack   10240
- 创建Oracle用户和用户组
groupadd oinstall  #创建oracl安装用户组 oinstall
groupadd dba   #创建dba
groupadd oper  #创建oper
useradd -g oinstall -G dba,oper oracle #授权
echo "oracle"  #查看
passwd oracle  #给Oracle用户设置密码 ****
运行结果
[root@dev2oracle ~]# groupadd oinstall
[root@dev2oracle ~]# groupadd dba
[root@dev2oracle ~]# groupadd oper
[root@dev2oracle ~]# useradd -g oinstall -G dba,oper oracle
[root@dev2oracle ~]# passwd oracle  #输密码
- oracle 用户配置
提示:以下操作需要退出root用户登录oracle用户操作
su - oracle #更换oracle用户
[root@dev2oracle ~]# su - oracle
上一次登录:四 5月 23 22:49:06 EDT 2024从 172.16.30.1pts/5 上
- 修改 oracle 用户环境变量
vim .bash_profile ##添加内容
添加以下内容
修改ORACLE_HOSTNAME,ORACLE_HOME
oracle用户得有这些文件夹的权限
if [ $USER = "oracle" ];then
 if [ $SHELL = "/bin/ksh" ];then
     ulimit -p 16384
     ulimit -n 65536
 else
     ulimit -u 16384 -n 65536
 fi
fi
# Oracle Settings
TMP=/tmp; export TMP
TMPDIR=$TMP; export TMPDIR
ORACLE_HOSTNAME=dev2oracle; export ORACLE_HOSTNAME
ORACLE_UNQNAME=orcl; export ORACLE_UNQNAME
ORACLE_BASE=/opt/oracle/app; export ORACLE_BASE
ORACLE_HOME=$ORACLE_BASE/product/12.2.0/dbhome_1; export ORACLE_HOME
ORACLE_SID=orcl; export ORACLE_SID
PATH=/usr/sbin:$PATH; export PATH
export PATH=$PATH:$ORACLE_HOME/bin
export NLS_LANG=AMERICAN_AMERICA.AL32UTF8
运行结果
# .bash_profile

# Get the aliases and functions
if [ -f ~/.bashrc ]; then
	. ~/.bashrc
fi

# User specific environment and startup programs

PATH=$PATH:$HOME/.local/bin:$HOME/bin

export PATH
if [ $USER = "oracle" ];then
 if [ $SHELL = "/bin/ksh" ];then
     ulimit -p 16384
     ulimit -n 65536
 else
     ulimit -u 16384 -n 65536
 fi
fi
# Oracle Settings
TMP=/tmp; export TMP
TMPDIR=$TMP; export TMPDIR
ORACLE_HOSTNAME=dev2oracle; export ORACLE_HOSTNAME
ORACLE_UNQNAME=orcl; export ORACLE_UNQNAME
ORACLE_BASE=/opt/oracle/app; export ORACLE_BASE
ORACLE_HOME=$ORACLE_BASE/product/12.2.0/dbhome_1; export ORACLE_HOME
ORACLE_SID=orcl; export ORACLE_SID
PATH=/usr/sbin:$PATH; export PATH
export PATH=$PATH:$ORACLE_HOME/bin
export NLS_LANG=AMERICAN_AMERICA.AL32UTF8
然后执行 source .bash_profile 使得修改生效
source .bash_profile
[oracle@dev2oracle ~]$ source .bash_profile
- 创建安装目录和文件权限
在oracle用户的目录下创建需要的文件夹并上传安装包等文件
提示:这里根据 df -h 查看的挂载空间大小配置 用户目录
我在 /home 挂载空间比较小,因此在 /opt/oracle 下安装的
需要给oracle用户分配对应的文件夹操作权限。
自己也可以根据要求重新分配挂载点大小,这里不赘述。
mkdir downloads #我在 /opt/oracle 下安装的
安装Oracle数据库
- 下载安装包
将自己下载oracle安装包上传到对应目录下
我下载的是 linuxx64_12201_database.zip
百度网盘在此
链接: https://pan.baidu.com/s/1nDYDO22Vohd_MFTCjiHj7A?pwd=yyds
提取码: yyds
下载安装包将安装包上传到自己的目录下
我上传到了 /opt/oracle/downloads 下
[oracle@dev2oracle downloads]$ ls
database  db_2024-05-22_22-27PM.rsp  dbca.rsp  linuxx64_12201_database.zip
- 解压安装包
unzip linuxx64_12201_database.zip
[oracle@dev2oracle downloads]$ unzip linuxx64_12201_database.zip
[oracle@dev2oracle downloads]$ ll
总用量 3372804
drwxr-xr-x 7 oracle oinstall        117 1月  26 2017 database
-rw-r--r-- 1 oracle oinstall 3453696911 5月  22 08:16 linuxx64_12201_database.zip
可以看到database目录
[oracle@dev2oracle downloads]$ cd database/
[oracle@dev2oracle database]$ ll
总用量 20
drwxr-xr-x  4 oracle oinstall  234 1月  26 2017 install
drwxrwxr-x  2 oracle oinstall   61 1月  26 2017 response
drwxr-xr-x  2 oracle oinstall   35 1月  26 2017 rpm
-rwxr-xr-x  1 oracle oinstall 8771 1月  26 2017 runInstaller
drwxrwxr-x  2 oracle oinstall   29 1月  26 2017 sshsetup
drwxr-xr-x 14 oracle oinstall 4096 1月  26 2017 stage
-rwxr-xr-x  1 oracle oinstall  500 2月   6 2013 welcome.html
- 修改实例配置文件
自己配置文件rsp
vim /opt/oracle/downloads/db_2024-05-24_08-07-50PM.rsp #自己配置文件
cat  /opt/oracle/downloads/db_2024-05-24_08-07-50PM.rsp #查看配置文件内容
配置文件内容参考
[oracle@dev2oracle database]$ vim /opt/oracle/downloads/db_2021-03-24_08-07-50PM.rsp
[oracle@dev2oracle database]$ cat  /opt/oracle/downloads/db_2021-03-24_08-07-50PM.rsp
####################################################################
## Copyright(c) Oracle Corporation 1998,2017. All rights reserved.##
##                                                                ##
## Specify values for the variables listed below to customize     ##
## your installation.                                             ##
##                                                                ##
## Each variable is associated with a comment. The comment        ##
## can help to populate the variables with the appropriate        ##
## values.                                                        ##
##                                                                ##
## IMPORTANT NOTE: This file contains plain text passwords and    ##
## should be secured to have read permission only by oracle user  ##
## or db administrator who owns this installation.                ##
##                                                                ##
####################################################################


#-------------------------------------------------------------------------------
# Do not change the following system generated value.
#-------------------------------------------------------------------------------
oracle.install.responseFileVersion=/oracle/install/rspfmt_dbinstall_response_schema_v12.2.0

#-------------------------------------------------------------------------------
# Specify the installation option.
# It can be one of the following:
#   - INSTALL_DB_SWONLY
#   - INSTALL_DB_AND_CONFIG
#   - UPGRADE_DB
#-------------------------------------------------------------------------------
oracle.install.option=INSTALL_DB_SWONLY

#-------------------------------------------------------------------------------
# Specify the Unix group to be set for the inventory directory.
#-------------------------------------------------------------------------------
UNIX_GROUP_NAME=oinstall

#-------------------------------------------------------------------------------
# Specify the location which holds the inventory files.
# This is an optional parameter if installing on
# Windows based Operating System.
#-------------------------------------------------------------------------------
INVENTORY_LOCATION=/opt/oracle/oraInventory
#-------------------------------------------------------------------------------
# Specify the complete path of the Oracle Home.
#-------------------------------------------------------------------------------
ORACLE_HOME=/opt/oracle/app/product/12.2.0/dbhome_1

#-------------------------------------------------------------------------------
# Specify the complete path of the Oracle Base.
#-------------------------------------------------------------------------------
ORACLE_BASE=/opt/oracle/app

#-------------------------------------------------------------------------------
# Specify the installation edition of the component.
#
# The value should contain only one of these choices.

#   - EE     : Enterprise Edition

#   - SE2     : Standard Edition 2


#-------------------------------------------------------------------------------

oracle.install.db.InstallEdition=EE
###############################################################################
#                                                                             #
# PRIVILEGED OPERATING SYSTEM GROUPS                                          #
# ------------------------------------------                                  #
# Provide values for the OS groups to which SYSDBA and SYSOPER privileges     #
# needs to be granted. If the install is being performed as a member of the   #
# group "dba", then that will be used unless specified otherwise below.       #
#                                                                             #
# The value to be specified for OSDBA and OSOPER group is only for UNIX based #
# Operating System.                                                           #
#                                                                             #
###############################################################################

#------------------------------------------------------------------------------
# The OSDBA_GROUP is the OS group which is to be granted SYSDBA privileges.
#-------------------------------------------------------------------------------
oracle.install.db.OSDBA_GROUP=dba

#------------------------------------------------------------------------------
# The OSOPER_GROUP is the OS group which is to be granted SYSOPER privileges.
# The value to be specified for OSOPER group is optional.
#------------------------------------------------------------------------------
oracle.install.db.OSOPER_GROUP=

#------------------------------------------------------------------------------
# The OSBACKUPDBA_GROUP is the OS group which is to be granted SYSBACKUP privileges.
#------------------------------------------------------------------------------
oracle.install.db.OSBACKUPDBA_GROUP=dba

#------------------------------------------------------------------------------
# The OSDGDBA_GROUP is the OS group which is to be granted SYSDG privileges.
#------------------------------------------------------------------------------
oracle.install.db.OSDGDBA_GROUP=dba

#------------------------------------------------------------------------------
# The OSKMDBA_GROUP is the OS group which is to be granted SYSKM privileges.
#------------------------------------------------------------------------------
oracle.install.db.OSKMDBA_GROUP=dba

#------------------------------------------------------------------------------
# The OSRACDBA_GROUP is the OS group which is to be granted SYSRAC privileges.
#------------------------------------------------------------------------------
oracle.install.db.OSRACDBA_GROUP=dba

###############################################################################
#                                                                             #
#                               Grid Options                                  #
#                                                                             #
###############################################################################
#------------------------------------------------------------------------------
# Specify the type of Real Application Cluster Database
#
#   - ADMIN_MANAGED: Admin-Managed
#   - POLICY_MANAGED: Policy-Managed
#
# If left unspecified, default will be ADMIN_MANAGED
#------------------------------------------------------------------------------
oracle.install.db.rac.configurationType=

#------------------------------------------------------------------------------
# Value is required only if RAC database type is ADMIN_MANAGED
#
# Specify the cluster node names selected during the installation.
# Leaving it blank will result in install on local server only (Single Instance)
#
# Example : oracle.install.db.CLUSTER_NODES=node1,node2
#------------------------------------------------------------------------------
oracle.install.db.CLUSTER_NODES=

#------------------------------------------------------------------------------
# This variable is used to enable or disable RAC One Node install.
#
#   - true  : Value of RAC One Node service name is used.
#   - false : Value of RAC One Node service name is not used.
#
# If left blank, it will be assumed to be false.
#------------------------------------------------------------------------------
oracle.install.db.isRACOneInstall=false

#------------------------------------------------------------------------------
# Value is required only if oracle.install.db.isRACOneInstall is true.
#
# Specify the name for RAC One Node Service
#------------------------------------------------------------------------------
oracle.install.db.racOneServiceName=

#------------------------------------------------------------------------------
# Value is required only if RAC database type is POLICY_MANAGED
#
# Specify a name for the new Server pool that will be configured
# Example : oracle.install.db.rac.serverpoolName=pool1
#------------------------------------------------------------------------------
oracle.install.db.rac.serverpoolName=

#------------------------------------------------------------------------------
# Value is required only if RAC database type is POLICY_MANAGED
#
# Specify a number as cardinality for the new Server pool that will be configured
# Example : oracle.install.db.rac.serverpoolCardinality=2
#------------------------------------------------------------------------------
oracle.install.db.rac.serverpoolCardinality=0

###############################################################################
#                                                                             #
#                        Database Configuration Options                       #
#                                                                             #
###############################################################################

#-------------------------------------------------------------------------------
# Specify the type of database to create.
# It can be one of the following:
#   - GENERAL_PURPOSE
#   - DATA_WAREHOUSE
# GENERAL_PURPOSE: A starter database designed for general purpose use or transaction-heavy applications.
# DATA_WAREHOUSE : A starter database optimized for data warehousing applications.
#-------------------------------------------------------------------------------
oracle.install.db.config.starterdb.type=GENERAL_PURPOSE

#-------------------------------------------------------------------------------
# Specify the Starter Database Global Database Name.
#-------------------------------------------------------------------------------
oracle.install.db.config.starterdb.globalDBName=

#-------------------------------------------------------------------------------
# Specify the Starter Database SID.
#-------------------------------------------------------------------------------
oracle.install.db.config.starterdb.SID=

#-------------------------------------------------------------------------------
# Specify whether the database should be configured as a Container database.
# The value can be either "true" or "false". If left blank it will be assumed
# to be "false".
#-------------------------------------------------------------------------------
oracle.install.db.ConfigureAsContainerDB=false

#-------------------------------------------------------------------------------
# Specify the  Pluggable Database name for the pluggable database in Container Database.
#-------------------------------------------------------------------------------
oracle.install.db.config.PDBName=

#-------------------------------------------------------------------------------
# Specify the Starter Database character set.
#
#  One of the following
#  AL32UTF8, WE8ISO8859P15, WE8MSWIN1252, EE8ISO8859P2,
#  EE8MSWIN1250, NE8ISO8859P10, NEE8ISO8859P4, BLT8MSWIN1257,
#  BLT8ISO8859P13, CL8ISO8859P5, CL8MSWIN1251, AR8ISO8859P6,
#  AR8MSWIN1256, EL8ISO8859P7, EL8MSWIN1253, IW8ISO8859P8,
#  IW8MSWIN1255, JA16EUC, JA16EUCTILDE, JA16SJIS, JA16SJISTILDE,
#  KO16MSWIN949, ZHS16GBK, TH8TISASCII, ZHT32EUC, ZHT16MSWIN950,
#  ZHT16HKSCS, WE8ISO8859P9, TR8MSWIN1254, VN8MSWIN1258
#-------------------------------------------------------------------------------
oracle.install.db.config.starterdb.characterSet=

#------------------------------------------------------------------------------
# This variable should be set to true if Automatic Memory Management
# in Database is desired.
# If Automatic Memory Management is not desired, and memory allocation
# is to be done manually, then set it to false.
#------------------------------------------------------------------------------
oracle.install.db.config.starterdb.memoryOption=false

#-------------------------------------------------------------------------------
# Specify the total memory allocation for the database. Value(in MB) should be
# at least 256 MB, and should not exceed the total physical memory available
# on the system.
# Example: oracle.install.db.config.starterdb.memoryLimit=512
#-------------------------------------------------------------------------------
oracle.install.db.config.starterdb.memoryLimit=

#-------------------------------------------------------------------------------
# This variable controls whether to load Example Schemas onto
# the starter database or not.
# The value can be either "true" or "false". If left blank it will be assumed
# to be "false".
#-------------------------------------------------------------------------------
oracle.install.db.config.starterdb.installExampleSchemas=false

###############################################################################
#                                                                             #
# Passwords can be supplied for the following four schemas in the             #
# starter database:                                                           #
#   SYS                                                                       #
#   SYSTEM                                                                    #
#   DBSNMP (used by Enterprise Manager)                                       #
#                                                                             #
# Same password can be used for all accounts (not recommended)                #
# or different passwords for each account can be provided (recommended)       #
#                                                                             #
###############################################################################

#------------------------------------------------------------------------------
# This variable holds the password that is to be used for all schemas in the
# starter database.
#-------------------------------------------------------------------------------
oracle.install.db.config.starterdb.password.ALL=

#-------------------------------------------------------------------------------
# Specify the SYS password for the starter database.
#-------------------------------------------------------------------------------
oracle.install.db.config.starterdb.password.SYS=

#-------------------------------------------------------------------------------
# Specify the SYSTEM password for the starter database.
#-------------------------------------------------------------------------------
oracle.install.db.config.starterdb.password.SYSTEM=

#-------------------------------------------------------------------------------
# Specify the DBSNMP password for the starter database.
# Applicable only when oracle.install.db.config.starterdb.managementOption=CLOUD_CONTROL
#-------------------------------------------------------------------------------
oracle.install.db.config.starterdb.password.DBSNMP=

#-------------------------------------------------------------------------------
# Specify the PDBADMIN password required for creation of Pluggable Database in the Container Database.
#-------------------------------------------------------------------------------
oracle.install.db.config.starterdb.password.PDBADMIN=

#-------------------------------------------------------------------------------
# Specify the management option to use for managing the database.
# Options are:
# 1. CLOUD_CONTROL - If you want to manage your database with Enterprise Manager Cloud Control along with Database Express.
# 2. DEFAULT   -If you want to manage your database using the default Database Express option.
#-------------------------------------------------------------------------------
oracle.install.db.config.starterdb.managementOption=DEFAULT

#-------------------------------------------------------------------------------
# Specify the OMS host to connect to Cloud Control.
# Applicable only when oracle.install.db.config.starterdb.managementOption=CLOUD_CONTROL
#-------------------------------------------------------------------------------
oracle.install.db.config.starterdb.omsHost=

#-------------------------------------------------------------------------------
# Specify the OMS port to connect to Cloud Control.
# Applicable only when oracle.install.db.config.starterdb.managementOption=CLOUD_CONTROL
#-------------------------------------------------------------------------------
oracle.install.db.config.starterdb.omsPort=0

#-------------------------------------------------------------------------------
# Specify the EM Admin user name to use to connect to Cloud Control.
# Applicable only when oracle.install.db.config.starterdb.managementOption=CLOUD_CONTROL
#-------------------------------------------------------------------------------
oracle.install.db.config.starterdb.emAdminUser=

#-------------------------------------------------------------------------------
# Specify the EM Admin password to use to connect to Cloud Control.
# Applicable only when oracle.install.db.config.starterdb.managementOption=CLOUD_CONTROL
#-------------------------------------------------------------------------------
oracle.install.db.config.starterdb.emAdminPassword=

###############################################################################
#                                                                             #
# SPECIFY RECOVERY OPTIONS                                                    #
# ------------------------------------                                        #
# Recovery options for the database can be mentioned using the entries below  #
#                                                                             #
###############################################################################

#------------------------------------------------------------------------------
# This variable is to be set to false if database recovery is not required. Else
# this can be set to true.
#-------------------------------------------------------------------------------
oracle.install.db.config.starterdb.enableRecovery=false

#-------------------------------------------------------------------------------
# Specify the type of storage to use for the database.
# It can be one of the following:
#   - FILE_SYSTEM_STORAGE
#   - ASM_STORAGE
#-------------------------------------------------------------------------------
oracle.install.db.config.starterdb.storageType=

#-------------------------------------------------------------------------------
# Specify the database file location which is a directory for datafiles, control
# files, redo logs.
#
# Applicable only when oracle.install.db.config.starterdb.storage=FILE_SYSTEM_STORAGE
#-------------------------------------------------------------------------------
oracle.install.db.config.starterdb.fileSystemStorage.dataLocation=

#-------------------------------------------------------------------------------
# Specify the recovery location.
#
# Applicable only when oracle.install.db.config.starterdb.storage=FILE_SYSTEM_STORAGE
#-------------------------------------------------------------------------------
oracle.install.db.config.starterdb.fileSystemStorage.recoveryLocation=

#-------------------------------------------------------------------------------
# Specify the existing ASM disk groups to be used for storage.
#
# Applicable only when oracle.install.db.config.starterdb.storageType=ASM_STORAGE
#-------------------------------------------------------------------------------
oracle.install.db.config.asm.diskGroup=

#-------------------------------------------------------------------------------
# Specify the password for ASMSNMP user of the ASM instance.
#
# Applicable only when oracle.install.db.config.starterdb.storage=ASM_STORAGE
#-------------------------------------------------------------------------------
oracle.install.db.config.asm.ASMSNMPPassword=

#------------------------------------------------------------------------------
# Specify the My Oracle Support Account Username.
#
#  Example   : MYORACLESUPPORT_USERNAME=abc@oracle.com
#------------------------------------------------------------------------------
MYORACLESUPPORT_USERNAME=

#------------------------------------------------------------------------------
# Specify the My Oracle Support Account Username password.
#
# Example    : MYORACLESUPPORT_PASSWORD=password
#------------------------------------------------------------------------------
MYORACLESUPPORT_PASSWORD=

#------------------------------------------------------------------------------
# Specify whether to enable the user to set the password for
# My Oracle Support credentials. The value can be either true or false.
# If left blank it will be assumed to be false.
#
# Example    : SECURITY_UPDATES_VIA_MYORACLESUPPORT=true
#------------------------------------------------------------------------------
SECURITY_UPDATES_VIA_MYORACLESUPPORT=false

#------------------------------------------------------------------------------
# Specify whether user doesn't want to configure Security Updates.
# The value for this variable should be true if you don't want to configure
# Security Updates, false otherwise.
#
# The value can be either true or false. If left blank it will be assumed
# to be true.
#
# Example    : DECLINE_SECURITY_UPDATES=false
#------------------------------------------------------------------------------
DECLINE_SECURITY_UPDATES=true

#------------------------------------------------------------------------------
# Specify the Proxy server name. Length should be greater than zero.
#
# Example    : PROXY_HOST=proxy.domain.com
#------------------------------------------------------------------------------
PROXY_HOST=

#------------------------------------------------------------------------------
# Specify the proxy port number. Should be Numeric and at least 2 chars.
#
# Example    : PROXY_PORT=25
#------------------------------------------------------------------------------
PROXY_PORT=

#------------------------------------------------------------------------------
# Specify the proxy user name. Leave PROXY_USER and PROXY_PWD
# blank if your proxy server requires no authentication.
#
# Example    : PROXY_USER=username
#------------------------------------------------------------------------------
PROXY_USER=

#------------------------------------------------------------------------------
# Specify the proxy password. Leave PROXY_USER and PROXY_PWD
# blank if your proxy server requires no authentication.
#
# Example    : PROXY_PWD=password
#------------------------------------------------------------------------------
PROXY_PWD=

#------------------------------------------------------------------------------
# Specify the Oracle Support Hub URL.
#
# Example    : COLLECTOR_SUPPORTHUB_URL=https://orasupporthub.company.com:8080/
#------------------------------------------------------------------------------
COLLECTOR_SUPPORTHUB_URL=
其中 注意以下配置根据自己的配置来
UNIX_GROUP_NAME=oinstall
INVENTORY_LOCATION=/opt/oracle/oraInventory
ORACLE_HOME=/opt/oracle/app/product/12.2.0/dbhome_1
ORACLE_BASE=/opt/oracle/app
oracle.install.db.InstallEdition=EE
oracle.install.db.OSDBA_GROUP=dba
oracle.install.db.OSBACKUPDBA_GROUP=dba
oracle.install.db.OSDGDBA_GROUP=dba
oracle.install.db.OSKMDBA_GROUP=dba
oracle.install.db.OSRACDBA_GROUP=dba
oracle.install.db.isRACOneInstall=false
oracle.install.db.rac.serverpoolCardinality=0
oracle.install.db.ConfigureAsContainerDB=false
oracle.install.db.config.starterdb.memoryOption=false
oracle.install.db.config.starterdb.managementOption=DEFAUL
oracle.install.db.config.starterdb.enableRecovery=false
- 在database目录下安装数据库
[oracle@dev2oracle opt]$ cd /opt/oracle/downloads/database/
[oracle@dev2oracle database]$  ./runInstaller -ignorePrereq  -silent -responseFile /opt/oracle/downloads/db_2021-03-24_08-07-50PM.rsp
安装成功之后会提示以下内容:
以 root 用户的身份执行以下脚本:
        1. /opt/oracle/oraInventory/orainstRoot.sh
        2. /opt/oracle/app/product/12.2.0/dbhome_1/root.sh

Successfully Setup Software.
~
- 切换用户到root用户 执行对应命令
su - root
sh /opt/database/oracle/inventory/orainstRoot.sh
sh /opt/database/oracle/product/12.2.0/dbhome_1/root.sh
如看到:The execution of the script is complete ,说明 orainstRoot.sh 执行成功了,
这里是在调整用户组和操作权限;root.sh的执行结果可以查看控制提示的log日志文件。
[oracle@dev2oracle database]$su - root
[oracle@dev2oracle database]$/opt/oracle/oraInventory/orainstRoot.sh
[oracle@dev2oracle database]$/opt/oracle/app/product/12.2.0/dbhome_1/root.sh
数据库安装完成,开始配置监听和创建数据库。
配置监听创建orcl数据库
- 配置监听
切换到 oracle 用户,加载 .bash_profile 配置文件,并执行 netca命令:
#任选其一执行
1、database目录下 netca -silent -responseFile ,
2、或者assistants目录下 ./netca /silent /responsefile 。
# 任选其一执行
[oracle@dev2oracle database]$ netca -silent -responseFile $ORACLE_HOME/assistants/netca/netca.rsp
[oracle@dev2oracle assistants]$ ./netca /silent /responsefile /opt/oracle/downloads/database/response/netca.rsp
然后执行:lsnrctl reload ,再执行 netstat -tunlp | grep 1521,查看监听的端口号是否启动
[oracle@dev2oracle ~]$ lsnrctl reload

LSNRCTL for Linux: Version 12.2.0.1.0 - Production on 27-MAY-2024 02:34:48

Copyright (c) 1991, 2016, Oracle.  All rights reserved.

Connecting to (DESCRIPTION=(ADDRESS=(PROTOCOL=TCP)(HOST=dev2oracle)(PORT=1521)))
The command completed successfully
[oracle@dev2oracle ~]$ netstat -tunlp | grep 1521
(Not all processes could be identified, non-owned process info
 will not be shown, you would have to be root to see it all.)
tcp6       0      0 :::1521                 :::*                    LISTEN      11989/tnslsnr
- 创建数据库
进入ORACLE_HOME找到dbca.rsp文件,并拷贝修改
/opt/oracle/app/product/12.2.0/dbhome_1/assistants/dbca/dbca.rsp
#修改dbca.rsp配置文件
[oracle@dev2oracle dbca]$ cp /opt/oracle/app/product/12.2.0/dbhome_1/assistants/dbca/dbca.rsp /tmp
[oracle@dev2oracle dbca]$ vim /tmp/dbca.rsp
修改内容参考下面 # 参考下边
[oracle@dev2oracle app]$ vim /tmp/dbca.rsp
responseFileVersion=/oracle/assistants/rspfmt_dbca_response_schema_v12.2.0
gdbName=orcl
sid=orcl
databaseConfigType=SI
createAsContainerDatabase=false
numberOfPDBs=1
pdbName=orclpdb
templateName=/app/oracle/app/product/12.2.0/dbhome_1/assistants/dbca/templates/General_Purpose.dbc
emExpressPort=5500
omsPort=0
characterSet=AL32UTF8
listeners=LISTENER
memoryPercentage=40
automaticMemoryManagement=false
totalMemory=0
gdbName=orcl #数据库名
sid=orcl #SID 配置
createAsContainerDatabase=false #非容器数据库
pdbName=orclpdb
characterSet=AL32UTF8 #字符编码
listeners=LISTENER #监听名称
automaticMemoryManagement=false
具体配置可以参考oracle官网,或者原来dbca.rsp的解释。
运行dbca命令安装数据库。
执行如下命令创建数据库实例,并且给 SYS、SYSTEM 两个用户设置密码
[oracle@dev2oracle app]$ dbca -silent -createDatabase -responseFile /tmp/dbca.rsp
开放端口及验证
- 开放端口
[root@dev2oracle ~]# firewall-cmd --zone=public --add-port=1521/tcp --permanent
Warning: ALREADY_ENABLED: 1521:tcp
success
[root@dev2oracle ~]# firewall-cmd --reload
success
[root@dev2oracle ~]# firewall-cmd --list-ports
1521/tcp
[root@dev2oracle ~]#systemctl start firewalld
- 验证监听
lsnrctl status
运行结果
[oracle@dev2oracle opt]$ lsnrctl status

LSNRCTL for Linux: Version 12.2.0.1.0 - Production on 27-MAY-2024 02:53:05

Copyright (c) 1991, 2016, Oracle.  All rights reserved.

Connecting to (DESCRIPTION=(ADDRESS=(PROTOCOL=TCP)(HOST=dev2oracle)(PORT=1521)))
STATUS of the LISTENER
------------------------
Alias                     LISTENER
Version                   TNSLSNR for Linux: Version 12.2.0.1.0 - Production
Start Date                22-MAY-2024 08:56:32
Uptime                    4 days 17 hr. 56 min. 38 sec
Trace Level               off
Security                  ON: Local OS Authentication
SNMP                      OFF
Listener Parameter File   /opt/oracle/app/product/12.2.0/dbhome_1/network/admin/listener.ora
Listener Log File         /opt/oracle/app/diag/tnslsnr/dev2oracle/listener/alert/log.xml
Listening Endpoints Summary...
  (DESCRIPTION=(ADDRESS=(PROTOCOL=tcp)(HOST=dev2oracle)(PORT=1521)))
  (DESCRIPTION=(ADDRESS=(PROTOCOL=ipc)(KEY=EXTPROC1521)))
Services Summary...
Service "orcl" has 1 instance(s).
  Instance "orcl", status READY, has 1 handler(s) for this service...
Service "orclXDB" has 1 instance(s).
  Instance "orcl", status READY, has 1 handler(s) for this service...
The command completed successfully
- sqlplus验证数据库实例
#登录数据库后台,并查询实例状态
[oracle@dev2oracle app]$ sqlplus / as sysdba

SQL*Plus: Release 12.2.0.1.0 Production on Thu Nov 23 21:58:40 2023

Copyright (c) 1982, 2016, Oracle.  All rights reserved.


Connected to:
Oracle Database 12c Enterprise Edition Release 12.2.0.1.0 - 64bit Production

SQL> select instance_name,status from v$instance;

INSTANCE_NAME    STATUS
---------------- ------------
orcl             OPEN

SQL> SELECT name,db_unique_name,open_mode from v$database;

NAME      DB_UNIQUE_NAME                 OPEN_MODE
--------- ------------------------------ --------------------
ORCL      standby                        READ ONLY

SQL>
远程连接测试
链接成功!
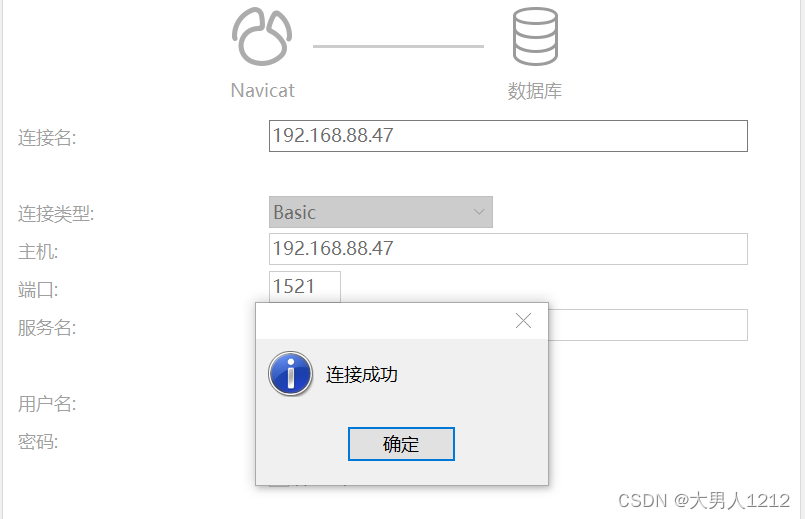
可以开始使用数据库了!


 641
641

 被折叠的 条评论
为什么被折叠?
被折叠的 条评论
为什么被折叠?
 到【灌水乐园】发言


