


初识docker
- 笔记介绍
- 本仓库介绍
- 使用xshell7
- linux命令大全
- 在centos上安装docker
- docker基础命令&镜像命令
- 了解docker的基础结构
- 容器指令
- 练习:docker安装nginx
- 练习:发布自己的nginx版本(本地镜像)
- 数据卷
- DockerFile简介
- 实战案例--使用`docker`和`ng`部署一个简单的`html`页面
- 案例:使用`dockerfile`、`ng`部署静态页面html
- 案例:使用`Dockerfile` + `nginx`部署带有`css`文件的`html`
- 案例:使用`Dockerfile` + `nginx`,部署多个html
- lrzsz上传下载文件
- 案例:dockerfile + nginx部署基础react
- 安装Xftp7
- 案例:dockerfile部署基础Koa
- docker部署mongodb基础
- `docker`部署前后端分离项目,以`react` + `koa2`为例
- 使用alpine版本部署项目
- 案例:使用node的alpine版本部署koa项目
笔记介绍
本篇笔记全文6W字(全程图文),学习过程中逐步积累所得。包含docker compose之前的知识。
学习docker的目的是用于部署项目,所以笔记中包含基础知识介绍以及大量的实战案例。
阅读本笔记,可以基本掌握docker的基础部署。
即使没有学过linux,也可以把自己的项目部署到云服务器上。
另:在学习过程中,一点要多敲多练、多练多敲
原笔记传到了gitee,
该仓库中另上传了xshell7免费版、xftp7免费版以及typora免费版的安装包。
仓库地址:
https://gitee.com/guozia007/learn-docker
本仓库介绍
学习目标:了解基本的docker操作,会通过docker部署自己的项目!!!
提示:该文档在本地用typora打开。文件夹里有免费的typora安装包。一定要设置禁止自动更新,不然要收费的。
# docker介绍
https://baike.baidu.com/item/Docker/13344470?fr=aladdin

# docker官网
https://www.docker.com/

# docker官方文档
https://docs.docker.com/

# docker资料网站
https://www.kancloud.cn/docker_practice/docker_practice/469766
使用xshell7
该仓库的xshell7文件夹有xshell7的安装包。
注意,安装好之后,点击上方的工具,在出现的下拉弹框里,选择最下面的选项,
进入到下面这个对话框,然后选择更新一栏,把实时更新的√去掉。不要更新。
![[外链图片转存失败,源站可能有防盗链机制,建议将图片保存下来直接上传(img-UuZ8esxD-1662341263092)(img/image-20220902095105884.png)]](https://img-blog.csdnimg.cn/1eabdaf354d34fd2a0df675ef628b0ed.png)
首先要买一个服务器,比如腾讯云 阿里云的云服务器 轻量服务器等
xshell连的是linux, 所以登录到云服务器控制台,要确保当前用的是linux环境进行部署的
![[外链图片转存失败,源站可能有防盗链机制,建议将图片保存下来直接上传(img-j3qRBHvi-1662341263094)(img/image-20220816232025384.png)]](https://img-blog.csdnimg.cn/fac16b91f7b64e21a0c6f801981f9f80.png)
![[外链图片转存失败,源站可能有防盗链机制,建议将图片保存下来直接上传(img-itTnH81w-1662341263098)(img/image-20220816232058340.png)]](https://img-blog.csdnimg.cn/f5c9e137a9df4961bde39044cb91d1fd.png)
看下操作系统是不是centos或者ubuntu之类的,如果不是,就重装系统,截图里装的是centos7.6
安装好xshell之后,打开。
新建一个会话框,用来连远程服务器
![[外链图片转存失败,源站可能有防盗链机制,建议将图片保存下来直接上传(img-Eynl8k47-1662341263098)(img/image-20220816232124615.png)]](https://img-blog.csdnimg.cn/fcf94cf4e1d64b098321bf99b4afe285.png)
主机就是服务器ip
![[外链图片转存失败,源站可能有防盗链机制,建议将图片保存下来直接上传(img-o6QZCtZL-1662341263099)(img/image-20220816232149824.png)]](https://img-blog.csdnimg.cn/5e8adbad025c4e0b9310e95af95a91b4.png)
端口是22, 不用改
用户名和密码是服务器的用户名和密码。不记得的话就去服务器控制台里重置密码
![[外链图片转存失败,源站可能有防盗链机制,建议将图片保存下来直接上传(img-f0XUb28D-1662341263100)(img/image-20220816232210085.png)]](https://img-blog.csdnimg.cn/885ddf553d5c44aebed03f048ce2e8ab.png)
这时候xshell就可以连上服务器了。
![[外链图片转存失败,源站可能有防盗链机制,建议将图片保存下来直接上传(img-u3X9sgkF-1662341263101)(img/image-20220816232231269.png)]](https://img-blog.csdnimg.cn/50b35f8f45d24b3aa781a7969f09ab83.png)
linux命令大全
# linux命令
https://blog.csdn.net/weixin_44191814/article/details/120091363
# 或者
https://www.runoob.com/docker/docker-command-manual.html(菜鸟教程)
# 查看服务器信息
cat /etc/os-release
![[外链图片转存失败,源站可能有防盗链机制,建议将图片保存下来直接上传(img-l1gAGiWh-1662341263101)(img/image-20220817195813552.png)]](https://img-blog.csdnimg.cn/960db752be5445bdb751bf7a1957809e.png)
在centos上安装docker
# 在centos上安装docker
https://docs.docker.com/engine/install/centos/
# 先卸载旧的docker版本
yum remove docker \
                  docker-client \
                  docker-client-latest \
                  docker-common \
                  docker-latest \
                  docker-latest-logrotate \
                  docker-logrotate \
                  docker-engine
![[外链图片转存失败,源站可能有防盗链机制,建议将图片保存下来直接上传(img-y3Sn57AT-1662341263102)(img/image-20220817195826264.png)]](https://img-blog.csdnimg.cn/bd6bfccca42c4d7ba6b5173c7fb9a366.png)
# 安装工具包
yum install -y yum-utils
# 设置仓库
yum-config-manager \
    --add-repo \
    http://mirrors.aliyun.com/docker-ce/linux/centos/docker-ce.repo # 这个是阿里云镜像,用这个
    # ----------------
    https://download.docker.com/linux/centos/docker-ce.repo # 这个下载地址是国外的,我们要改成国内的,比如阿里镜像,这样下载速度更快
# 更新yum缓存
yum makecache fast
# 安装docker
yum install docker-ce docker-ce-cli containerd.io docker-compose-plugin
# 启动docker
systemctl start docker
# 查看docker版本信息
docker version
# 验证docker安装是否正确(此处跑一下hello-world镜像试试)
docker run hello-world
# 如果看到xshell界面有字样Hello from Docker,说明docker安装正常
# 查看运行的镜像,看下hello-world镜像示例是否在运行
docker images
![[外链图片转存失败,源站可能有防盗链机制,建议将图片保存下来直接上传(img-jq8gxoN2-1662341263103)(img/image-20220817195839034.png)]](https://img-blog.csdnimg.cn/d774ed3d2978490ebcf7ed2ea438683e.png)
# 卸载docker
yum remove docker-ce docker-ce-cli containerd.io docker-compose-plugin
rm -rf /var/lib/docker
rm -rf /var/lib/containerd
docker基础命令&镜像命令
# docker基础命令

# 查看docker client-server信息
docker info
# 查看docker所有命令
docker --help
# 官方命令行帮助文档
https://docs.docker.com/reference/
# 查看镜像
docker images # 正在运行的镜像
docker images -a # 所有镜像
docker images -q # 只显示镜像的id
# 搜索镜像
docker search 镜像名
# 拉取镜像
docker pull 镜像名 # 默认拉取的是最新版本
docker pull 镜像名:版本号 # 拉取指定版本的镜像 版本号必须是docker支持的版本
# 删除镜像
docker rmi 镜像名或者镜像id
docker rmi -f 镜像名或者镜像id # 强制删除镜像
docker rmi -f $(docker images -aq) # 强制删除所有镜像
了解docker的基础结构
镜像:docker build生成镜像。
镜像是一种轻量级、可执行的独立软件包,用来打包软件运行环境和基于运行环境开发的软件。
它包含运行某个软件所需的所有内容,包括代码、运行时、库、环境变量和配置文件。
容器:docker run image 生成容器。容器是镜像的运行实例,可以简单理解,容器 = 镜像 + 环境
有了镜像,才能生成容器。
仓库:存放镜像的地方
容器指令
# 容器指令

# 创建一个新的容器并运行一个命令
docker run 镜像名或者镜像id
# 给容器命名,用来区分容器
docker run --name="Name" 镜像名或者镜像id 或者 docker run --name Name 镜像名或者镜像id
# 在后台运行容器
docker run -d 镜像名或者镜像id
# 进入容器 查看内容(执行该命令后,就进入容器了,此时很多命令都不能用了)
docker run -it 镜像名或者镜像id /bin/bash # /bin/bash的作用是表示载入容器后运行bash
# 设定容器端口
docker run -p 容器端口号 镜像名或者镜像id
# 设定容器端口映射到主机端口
docker run -p 主机端口:容器端口 镜像名或者镜像id
# 设定容器随机端口
docker run -P 镜像名或者镜像id # 这里的P是大写的
# 停止运行并退出容器,返回到主机。-d后台运行的容器,exit退出也不会让容器停止运行。
exit
# 退出容器但不停止运行
Ctrl + P + Q # 按键顺序不能错,不然无效,P和Q都是大写的
# 列出容器中的内容
ls
# 查看在运行的容器
docker ps
# 查看运行过的容器
docker ps -a
# 查看最近运行过的n个容器
docker ps -a -n=数字
# 查看运行过的容器的id
docker ps -a -q 或者 docker ps -aq
# 删除容器,不能删除在运行的容器
docker rm 容器id
# 强制删除容器,可以删除在运行的容器
docker rm -f 容器id
# 删除所有容器
docker rm -f $(docker ps -aq)  或者 docker ps -a -q|xargs docker rm
# 启动容器
docker start 容器id
# 重启容器
docker restart 容器id
# 停止容器
docker stop 容器id
# 杀掉容器
docker kill 容器id
# 查看容器日志
docker logs 容器名或者容器id
# 查看容器中运行的进程信息
docker top 容器名或者容器id
# 获取容器/镜像的元数据,得到的是关于该容器/镜像最全面的数据
docker inspect 容器/镜像
# 进入当前正在运行的容器(方法1)
docker exec -it 容器id /bin/bash # 进入容器后开启一个新的终端,可以在里面操作
# 进入当前正在运行的容器(方法2)
docker attach 容器id # 进入容器正在执行的终端,不会启动新的进程
# 将容器中的目录拷贝到主机目录中(from .. to ..)
docker cp 容器id:容器中的目录 主机中的目录
# 将主机目录拷贝到容器目录下
docker cp 主机中的目录 容器id:容器中的目录
# 将主机目录拷贝到容器中,并给拷贝后的目录重新命名
docker cp 主机中的目录 容器id:新目录
示例:在容器中的/home目录下创建一个文件test.js,然后拷贝到主机的/home目录中
![[外链图片转存失败,源站可能有防盗链机制,建议将图片保存下来直接上传(img-Xw5304kN-1662341263104)(img/image-20220817210634904.png)]](https://img-blog.csdnimg.cn/33d79a967a1f497490ba56112a082fbd.png)
# 创建文件
touch 文件名
指令总结图:
![[外链图片转存失败,源站可能有防盗链机制,建议将图片保存下来直接上传(img-QaZ56fAJ-1662341263104)(img/image-20220817224112051.png)]](https://img-blog.csdnimg.cn/e813d88fd4ac450188414229af687891.png)
练习:docker安装nginx
# 拉取nginx镜像 默认是最新版latest
[root@VM-4-7-centos ~]# docker pull nginx
Using default tag: latest
latest: Pulling from library/nginx
1efc276f4ff9: Pull complete
baf2da91597d: Pull complete
05396a986fd3: Pull complete
6a17c8e7063d: Pull complete
27e0d286aeab: Pull complete
b1349eea8fc5: Pull complete
Digest: sha256:790711e34858c9b0741edffef6ed3d8199d8faa33f2870dea5db70f16384df79
Status: Downloaded newer image for nginx:latest
docker.io/library/nginx:latest
# 查看镜像
[root@VM-4-7-centos ~]# docker images
REPOSITORY    TAG       IMAGE ID       CREATED         SIZE
nginx         latest    b692a91e4e15   2 weeks ago     142MB
hello-world   latest    feb5d9fea6a5   10 months ago   13.3kB
centos        latest    5d0da3dc9764   11 months ago   231MB
# docker run 新建一个容器,并运行容器指令
# -d 后台运行该容器
# --name="nginx01" 给新建的容器命名为nginx01。也可以写作--name nginx01
# -p 3344:80 nginx的默认端口是80,此处是把容器内的端口80映射到主机3344端口,以便在外网访问
[root@VM-4-7-centos ~]# docker run -d --name="nginx01" -p 3344:80 nginx
32806ba286f77f4a5dc53cad8fc287ce67384deb2bccbdfaad14da5cdd2e2412
# 查看运行中的容器
[root@VM-4-7-centos ~]# docker ps
CONTAINER ID   IMAGE          COMMAND                  CREATED          STATUS          PORTS                                   NAMES
32806ba286f7   nginx          "/docker-entrypoint.…"   20 seconds ago   Up 19 seconds   0.0.0.0:3344->80/tcp, :::3344->80/tcp   nginx01
c47b6456364e   5d0da3dc9764   "/bin/bash"              2 hours ago      Up 10 minutes                                           flamboyant_swirles
# 发送get请求
# curl是linux指令,详情查看https://blog.csdn.net/angle_chen123/article/details/120675472
[root@VM-4-7-centos ~]# curl localhost:3344
# 请求成功,给返回了页面的dom,访问localhost:3344成功
<!DOCTYPE html>
<html>
<head>
<title>Welcome to nginx!</title>
<style>
html { color-scheme: light dark; }
body { width: 35em; margin: 0 auto;
font-family: Tahoma, Verdana, Arial, sans-serif; }
</style>
</head>
<body>
<h1>Welcome to nginx!</h1>
<p>If you see this page, the nginx web server is successfully installed and
working. Further configuration is required.</p>

<p>For online documentation and support please refer to
<a href="http://nginx.org/">nginx.org</a>.<br/>
Commercial support is available at
<a href="http://nginx.com/">nginx.com</a>.</p>

<p><em>Thank you for using nginx.</em></p>
</body>
</html>
# 笔记以腾讯云为例
# 去到服务器控制台的防火墙,添加3344端口
![[外链图片转存失败,源站可能有防盗链机制,建议将图片保存下来直接上传(img-bhhszt8G-1662341263105)(img/image-20220817231444579.png)]](https://img-blog.csdnimg.cn/006e16d34bc347d5b691fff450609972.png)
此时,就可以在浏览器访问http://101.35.149.103:3344/了(101.35.149.103是服务器公网IP)
![[外链图片转存失败,源站可能有防盗链机制,建议将图片保存下来直接上传(img-ApQ4cxKu-1662341263106)(img/image-20220817231526627.png)]](https://img-blog.csdnimg.cn/3a8f02af598145a293650e87906b96ee.png)
继续操作:
# 进入正在运行的nginx01容器
[root@VM-4-7-centos ~]# docker exec -it nginx01 /bin/bash
# 查看nginx的配置路径 此处whereis是linux指令,用来查询配置路径
# 可以看到nginx的配置文件在 /etc/nginx 目录下
root@32806ba286f7:/# whereis nginx
nginx: /usr/sbin/nginx /usr/lib/nginx /etc/nginx /usr/share/nginx
# 进入 /etc/nginx 目录
root@32806ba286f7:/# cd /etc/nginx
# 查看目录中的内容
# 可以看到,nginx的配置文件nginx.conf就在该目录中
# 此时就可以修改nginx的配置了
root@32806ba286f7:/etc/nginx# ls
conf.d	fastcgi_params	mime.types  modules  nginx.conf  scgi_params  uwsgi_params
# 提交镜像,将容器保存为新的镜像,并添加提交信息
docker commit -m="提交的描述信息" -a="作者" 容器id 目标镜像名:版本号
练习:发布自己的nginx版本(本地镜像)
[root@VM-4-7-centos ~]# docker images
REPOSITORY   TAG       IMAGE ID       CREATED         SIZE
nginx        latest    b692a91e4e15   2 weeks ago     142MB
centos       latest    5d0da3dc9764   11 months ago   231MB
[root@VM-4-7-centos ~]# docker run -d --name="nginx01" nginx
810eb63c79ccfcd905777c2bbb3c495bdb4ee5a176ed2a59507440f5e757b173
[root@VM-4-7-centos ~]# docker ps
CONTAINER ID   IMAGE     COMMAND                  CREATED         STATUS         PORTS     NAMES
810eb63c79cc   nginx     "/docker-entrypoint.…"   4 seconds ago   Up 4 seconds   80/tcp    nginx01
# 进入容器 对容器进行一些发布前的修改,比如创建一个文件先
[root@VM-4-7-centos ~]# docker run -it b692a91e4e15 /bin/bash
root@c9bc3ac997d6:/# ls
bin   dev		   docker-entrypoint.sh  home  lib64  mnt  proc  run   srv  tmp  var
boot  docker-entrypoint.d  etc			 lib   media  opt  root  sbin  sys  usr
root@c9bc3ac997d6:/# cd /home
root@c9bc3ac997d6:/home# ls
root@c9bc3ac997d6:/home# touch nginx-test.js
root@c9bc3ac997d6:/home# ls
nginx-test.js
root@c9bc3ac997d6:/home# exit
exit
[root@VM-4-7-centos ~]# docker images
REPOSITORY   TAG       IMAGE ID       CREATED         SIZE
nginx        latest    b692a91e4e15   2 weeks ago     142MB
centos       latest    5d0da3dc9764   11 months ago   231MB
[root@VM-4-7-centos ~]# docker commit -m="测试发布自己的nginx镜像" -a="guozi007a" 810eb63c79cc myNginx:v1.0
# 自己的镜像名必须是小写,不能出现大写字母
invalid reference format: repository name must be lowercase
# 发布自己的镜像
[root@VM-4-7-centos ~]# docker commit -m="测试发布自己的nginx镜像" -a="guozi007a" 810eb63c79cc my-nginx:v1.0
sha256:af5c163a43cb85c918f595fbd64e9edb5f8a5ff55b558ce07dd30755a7c77468
# 查看镜像
[root@VM-4-7-centos ~]# docker images
REPOSITORY   TAG       IMAGE ID       CREATED              SIZE
my-nginx     v1.0      af5c163a43cb   About a minute ago   142MB
nginx        latest    b692a91e4e15   2 weeks ago          142MB
centos       latest    5d0da3dc9764   11 months ago        231MB
[root@VM-4-7-centos ~]# docker ps
CONTAINER ID   IMAGE     COMMAND                  CREATED         STATUS         PORTS     NAMES
810eb63c79cc   nginx     "/docker-entrypoint.…"   9 minutes ago   Up 9 minutes   80/tcp    nginx01
数据卷
Docker将运用与运行的环境打包形成容器运行, Docker容器产生的数据,如果不通过docker commit生成新的镜像,使得数据做为镜像的一部分保存下来, 那么当容器删除后,数据自然也就没有了。 为了能保存数据在Docker中我们使用卷。|
卷就是目录或文件,存在于一个或多个容器中,由Docker挂载到容器,但卷不属于联合文件系统(Union FileSystem),因此能够绕过联合文件系统提供一些用于持续存储或共享数据的特性:。
卷的设计目的就是数据的持久化,完全独立于容器的生存周期,因此Docker不会在容器删除时删除其挂载的数据卷。
数据卷的特点:
1.数据卷可在容器之间共享或重用数据
2.卷中的更改可以直接生效
3.数据卷中的更改不会包含在镜像的更新中
4.数据卷的生命周期一直持续到没有容器使用它为止
# 指令 运行容器并把容器目录挂载到主机目录
docker run -it -v 主机目录:容器目录 镜像名或者镜像id /bin/bash
# 只写一个目录,就是容器目录,对应的主机目录会随机生成
docker run -it -v 容器目录 镜像名或者镜像id /bin/bash
# 查看挂载情况
docker inspect 容器id # 然后到输出信息中找Mounts挂载数据,可以看到源目录和目标目录
以centos镜像为例,要开两个终端,一个操作容器,一个操作主机:
# 容器内的操作

# 创建一个容器 交互运行时 把容器内的/home目录 挂载到主机的/home/ceshi目录下
# 直接运行时,如果没有所需镜像,会先拉取
[root@VM-4-7-centos ~]# docker run -it -v /home/ceshi:/home centos /bin/bash
Unable to find image 'centos:latest' locally
latest: Pulling from library/centos
a1d0c7532777: Pull complete
Digest: sha256:a27fd8080b517143cbbbab9dfb7c8571c40d67d534bbdee55bd6c473f432b177
Status: Downloaded newer image for centos:latest
# 进入容器的/home目录,准备新建一个文件,看主机那边是否也有同样的文件
[root@abeddc6c2578 /]# cd /home
[root@abeddc6c2578 home]# ls
# 查看容器的源数据,发现并没有,因为此时应该去主机查挂载情况
[root@abeddc6c2578 home]# docker inspect abeddc6c2578
bash: docker: command not found
# 在容器的/home目录下新建一个文件
[root@abeddc6c2578 home]# touch test1.html
[root@abeddc6c2578 home]# [root@VM-4-7-centos ~]#
# 主机内的操作

# 进入主机的/home目录
[root@VM-4-7-centos ~]# cd /home
# 创建ceshi文件夹。发现已经存在了。因为容器的挂载指令执行后,主机会自动创建目录,不需要自己创建了
[root@VM-4-7-centos home]# mkdir ceshi
mkdir: cannot create directory ‘ceshi’: File exists
[root@VM-4-7-centos home]# ls
ceshi  guozi007a.txt  lighthouse  test.js
[root@VM-4-7-centos home]# docker ps
CONTAINER ID   IMAGE     COMMAND       CREATED         STATUS         PORTS     NAMES
abeddc6c2578   centos    "/bin/bash"   4 minutes ago   Up 4 minutes             funny_kowalevski
# 查看容器的源数据 其中有一条是Mounts: [...],就是在说明挂载情况
# Type 挂载类型,这里是bind,也就是绑定
# Source 数据源目录
# Destination 目标目录
# RW true 权限是可读可写
[root@VM-4-7-centos home]# docker inspect abeddc6c2578
...
"Mounts": [
            {
                "Type": "bind",
                "Source": "/home/ceshi",
                "Destination": "/home",
                "Mode": "",
                "RW": true,
                "Propagation": "rprivate"
            }
        ],
...
[root@VM-4-7-centos home]# cd /ceshi
-bash: cd: /ceshi: No such file or directory
# 进入主机的/home/ceshi目录
[root@VM-4-7-centos home]# cd /home/ceshi
# 查看目录中的文件
[root@VM-4-7-centos ceshi]# ls
test1.html
cat&vim
# 查看文件内的数据
cat 文件
# 举例
cat test.js
# 修改文件内容,编辑文件内容
vim 文件
# 举例
vim test.js # 然后输入新内容即可

# 输入完内容后 Ctrl + c 退出输入
# 然后输入指令 :wq 文件 意思是退出vim并保存内容
现在再来测试一下,在主机中修改test1.html文件,在容器内查看文件,看下容器内的文件内容发生了变化
# 主机内操作
[root@VM-4-7-centos ceshi]# vim test1.html
[root@VM-4-7-centos ceshi]# cat test1.html

hello
我现在在主机的/home/ceshi目录里修改了文件内容

容器里的文件内容是否也变化了呢?

# 容器内查看文件内容
[root@cf14f0606bef ~]# cd /home
[root@cf14f0606bef home]# ls
test1.html
[root@cf14f0606bef home]# cat test1.html

hello
我现在在主机的/home/ceshi目录里修改了文件内容

容器里的文件内容是否也变化了呢?
通过示例证明了,-v挂载目录之后,容器和主机实现了数据同步。
再来测试一下,把容器删除,主机目录内的文件是否还存在,文件内的内容是否还存在。
# 删除容器
[root@VM-4-7-centos /]# docker images
REPOSITORY   TAG       IMAGE ID       CREATED         SIZE
centos       latest    5d0da3dc9764   11 months ago   231MB
[root@VM-4-7-centos /]# docker ps
CONTAINER ID   IMAGE     COMMAND   CREATED   STATUS    PORTS     NAMES
[root@VM-4-7-centos /]# docker ps -a
CONTAINER ID   IMAGE          COMMAND       CREATED         STATUS                      PORTS     NAMES
cf14f0606bef   5d0da3dc9764   "/bin/bash"   6 minutes ago   Exited (0) 17 seconds ago             infallible_knuth
[root@VM-4-7-centos /]# docker rm -f cf14f0606bef
cf14f0606bef
[root@VM-4-7-centos /]# docker ps -a
CONTAINER ID   IMAGE     COMMAND   CREATED   STATUS    PORTS     NAMES

# 在主机内查看
[root@VM-4-7-centos ceshi]# ls
test1.html
[root@VM-4-7-centos ceshi]# cat test1.html

hello
我现在在主机的/home/ceshi目录里修改了文件内容

容器里的文件内容是否也变化了呢?
这就实现了数据的持久化。
匿名挂载&具名挂载&指定路径挂载
挂载的时候,还有别的方式,如匿名挂载,具名挂载。
匿名挂载,就是只写容器目录,不给卷起名字。
这两者都是没有写主机目录的。
docker run -it -v 容器目录 镜像名或者镜像id /bin/bash
具名挂载,就是挂载的时候,给卷起名字
docker run -it -v 卷名字:容器目录 镜像名或者镜像id /bin/bash
查看具名挂载的挂载路径:
docker volume inspect 卷名字
查看所有数据卷的信息
docker volume ls
所有docker容器内的卷,没有指定目录的情况下,都是在/var/lib/docker/volumes/卷名字/_data下面的。
总结一下匿名挂载、具名挂载、指定路径挂载
-v 容器目录 # 匿名挂载
-v 卷名:容器目录 # 具名挂载
-v 主机目录:容器目录 # 指定路径挂载
拓展内容,挂载容器时设置权限
-v 主机目录:容器目录:ro # ro是read-only只读的缩写 表示容器只有读取权限,不能修改内容
-v 主机目录:容器目录:rw # rw是read-write读写的缩写,表示容器可读取可修改
DockerFile简介
DockerFile:用来构建docker镜像的构建文件。就是一个命令脚本,通过执行文件中的命令来生成一个镜像。
# 指令:显示当前所在目录
pwd

# 示例:
[root@VM-4-7-centos ~]# pwd
/root
[root@VM-4-7-centos ~]# cd /home
[root@VM-4-7-centos home]# pwd
/home
docker build
docker build 命令用于使用 Dockerfile 创建镜像。
# docker build指令的参数

-f :指定要使用的Dockerfile路径;
--tag, -t: 镜像的名字及标签,通常 name:tag 或者 name 格式;可以在一次构建中为一个镜像设置多个标签。
其他参数:https://www.runoob.com/docker/docker-build-command.html
Dockerfile示例:
# 进入home目录
[root@VM-4-7-centos /]# cd /home
# 在home目录下创建一个docker-test-volume文件夹,用于存放Dockerfile文件
[root@VM-4-7-centos home]# mkdir docker-test-volume
[root@VM-4-7-centos home]# cd docker-test-volume
[root@VM-4-7-centos docker-test-volume]# pwd
/home/docker-test-volume
# 编辑Dockerfile文件
[root@VM-4-7-centos docker-test-volume]# vim dockerfile1
# 使用 Dockerfile 创建镜像 注意 命令最后有个点
[root@VM-4-7-centos docker-test-volume]# docker build -f dockerfile1 -t centos .
Sending build context to Docker daemon  2.048kB
Step 1/4 : FROM centos
 ---> 5d0da3dc9764
Step 2/4 : VOLUME ["volume01", "volume02"]
 ---> Running in c36b17b1e78e
Removing intermediate container c36b17b1e78e
 ---> ce5311ef0341
Step 3/4 : CMD echo "------end-------"
 ---> Running in af115f2a4d09
Removing intermediate container af115f2a4d09
 ---> bbd6182d17cd
Step 4/4 : CMD /bin/bash
 ---> Running in ef32d9fe4f76
Removing intermediate container ef32d9fe4f76
 ---> 6435bb882058
Successfully built 6435bb882058
Successfully tagged centos:latest
# 查看镜像, 发现创建了一个最新的centos镜像
[root@VM-4-7-centos docker-test-volume]# docker images
REPOSITORY   TAG       IMAGE ID       CREATED         SIZE
centos       latest    6435bb882058   9 minutes ago   231MB
centos       <none>    5d0da3dc9764   11 months ago   231MB
运行容器,然后查看文件列表,可以发现最后面有两个目录volume01 volume02,
这两个目录就是利用Dockerfile创建镜像的时候挂载的。
这俩目录是匿名挂载到外部主机的。
![[外链图片转存失败,源站可能有防盗链机制,建议将图片保存下来直接上传(img-SLCFT2HM-1662341263111)(img/image-20220822193808551.png)]](https://img-blog.csdnimg.cn/5cfb58403ace4d028123c456ecf1dd84.png)
现在来检查一下挂载到主机的路径,并且检查挂载是否成功。
# 在容器内进入目录volume01
[root@b52a82a50f0b /]# cd volume01
[root@b52a82a50f0b volume01]# pwd
/volume01
# 在volume01中创建一个文件
[root@b52a82a50f0b volume01]# touch container.txt
[root@b52a82a50f0b volume01]#
#另起一个终端 连接主机

[root@VM-4-7-centos ~]# docker ps
CONTAINER ID   IMAGE          COMMAND       CREATED         STATUS         PORTS     NAMES
b52a82a50f0b   6435bb882058   "/bin/bash"   5 minutes ago   Up 4 minutes             affectionate_chatterjee
efef626e128b   5d0da3dc9764   "/bin/bash"   2 days ago      Up 2 days                centos02
# 查看容器详细信息
[root@VM-4-7-centos ~]# docker inspect b52a82a50f0b
# 可以看到Mounts里面显示的两个数据卷容器挂载情况
"Mounts": [
            {
                "Type": "volume",
                "Name": "b0b6fbcc50df9731bd132077b6d0022697f3bad7748d120120ba2d8d4281a32d",
                "Source": "/var/lib/docker/volumes/b0b6fbcc50df9731bd132077b6d0022697f3bad7748d120120ba2d8d4281a32d/_data",
                "Destination": "volume01",
                "Driver": "local",
                "Mode": "",
                "RW": true,
                "Propagation": ""
            },
            {
                "Type": "volume",
                "Name": "13187802e1130c6e85f6cfd3b54006522d9c0ac1cdabda1201cb5ea42b421c4c",
                "Source": "/var/lib/docker/volumes/13187802e1130c6e85f6cfd3b54006522d9c0ac1cdabda1201cb5ea42b421c4c/_data",
                "Destination": "volume02",
                "Driver": "local",
                "Mode": "",
                "RW": true,
                "Propagation": ""
            }
        ],
# 进入colume01挂载到主机的路径
[root@VM-4-7-centos ~]# cd /var/lib/docker/volumes/b0b6fbcc50df9731bd132077b6d0022697f3bad7748d120120ba2d8d4281a32d/_data
# 查看目录列表 可以看到 在容器内创建的txt文件,在主机内也出现了 挂载成功
[root@VM-4-7-centos _data]# ls
container.txt
数据卷容器
数据卷容器:同一个镜像下,实现容器和容器间共享数据。
# 挂载指令 容器2挂载到数据卷容器上
docker run -it --name 容器2 --volumes-from 数据卷容器 镜像 /bin/bash
示例:
# 创建数据卷容器centos01
[root@VM-4-7-centos /]# docker run -it --name centos01 6435bb882058 /bin/bash
# 创建容器contos02挂载到centos01上
[root@VM-4-7-centos /]# docker run -it --name centos02 --volumes-from ae52069f8a7c 6435bb882058 /bin/bash
# 查看文件列表 可以看到两个目录 volume01 volume02,这两个数据卷是上面用Dockfile创建的
[root@7fc5d8943667 /]# ls -l
total 56
lrwxrwxrwx   1 root root    7 Nov  3  2020 bin -> usr/bin
drwxr-xr-x   5 root root  360 Aug 22 12:08 dev
drwxr-xr-x   1 root root 4096 Aug 22 12:08 etc
drwxr-xr-x   2 root root 4096 Nov  3  2020 home
lrwxrwxrwx   1 root root    7 Nov  3  2020 lib -> usr/lib
lrwxrwxrwx   1 root root    9 Nov  3  2020 lib64 -> usr/lib64
drwx------   2 root root 4096 Sep 15  2021 lost+found
drwxr-xr-x   2 root root 4096 Nov  3  2020 media
drwxr-xr-x   2 root root 4096 Nov  3  2020 mnt
drwxr-xr-x   2 root root 4096 Nov  3  2020 opt
dr-xr-xr-x 110 root root    0 Aug 22 12:08 proc
dr-xr-x---   2 root root 4096 Sep 15  2021 root
drwxr-xr-x  11 root root 4096 Sep 15  2021 run
lrwxrwxrwx   1 root root    8 Nov  3  2020 sbin -> usr/sbin
drwxr-xr-x   2 root root 4096 Nov  3  2020 srv
dr-xr-xr-x  13 root root    0 Aug 20 04:14 sys
drwxrwxrwt   7 root root 4096 Sep 15  2021 tmp
drwxr-xr-x  12 root root 4096 Sep 15  2021 usr
drwxr-xr-x  20 root root 4096 Sep 15  2021 var
drwxr-xr-x   2 root root 4096 Aug 22 12:01 volume01
drwxr-xr-x   2 root root 4096 Aug 22 12:01 volume02
# 在centos02的volume01中创建文件
[root@7fc5d8943667 /]# cd volume01
[root@7fc5d8943667 volume01]# ls
[root@7fc5d8943667 volume01]# touch docker01
[root@7fc5d8943667 volume01]# ls
docker01
# 进入centos01里面查看 可以看到它的volume01中也出现了docker01文件
[root@7fc5d8943667 volume01]# [root@VM-4-7-centos /]# docker attach ae52069f8a7c
[root@ae52069f8a7c /]# cd volume01
[root@ae52069f8a7c volume01]# ls
docker01
按照上面同样的步骤,再创建一个centos03,挂载到centos01
[root@VM-4-7-centos /]# docker run -it --name centos03 --volumes-from ae52069f8a7c 6435bb882058 /bin/bash
[root@1cf3bb42c8fe /]# ls -l
total 56
lrwxrwxrwx   1 root root    7 Nov  3  2020 bin -> usr/bin
drwxr-xr-x   5 root root  360 Aug 22 12:15 dev
drwxr-xr-x   1 root root 4096 Aug 22 12:15 etc
drwxr-xr-x   2 root root 4096 Nov  3  2020 home
lrwxrwxrwx   1 root root    7 Nov  3  2020 lib -> usr/lib
lrwxrwxrwx   1 root root    9 Nov  3  2020 lib64 -> usr/lib64
drwx------   2 root root 4096 Sep 15  2021 lost+found
drwxr-xr-x   2 root root 4096 Nov  3  2020 media
drwxr-xr-x   2 root root 4096 Nov  3  2020 mnt
drwxr-xr-x   2 root root 4096 Nov  3  2020 opt
dr-xr-xr-x 110 root root    0 Aug 22 12:15 proc
dr-xr-x---   2 root root 4096 Sep 15  2021 root
drwxr-xr-x  11 root root 4096 Sep 15  2021 run
lrwxrwxrwx   1 root root    8 Nov  3  2020 sbin -> usr/sbin
drwxr-xr-x   2 root root 4096 Nov  3  2020 srv
dr-xr-xr-x  13 root root    0 Aug 20 04:14 sys
drwxrwxrwt   7 root root 4096 Sep 15  2021 tmp
drwxr-xr-x  12 root root 4096 Sep 15  2021 usr
drwxr-xr-x  20 root root 4096 Sep 15  2021 var
drwxr-xr-x   2 root root 4096 Aug 22 12:10 volume01
drwxr-xr-x   2 root root 4096 Aug 22 12:01 volume02
[root@1cf3bb42c8fe volume01]# ls
docker01 # 可以看到 也存在这个文件
可以看到,centos01 centos02 centos03,这三个容器下的volume01目录中的文件是同步的,
这就是数据卷容器的数据共享。
这时候,停止或者删除其中一个容器,对共享的数据不会有影响。
Dockerfile文件的使用步骤
- 编写一个
Dockerfile文件 docker build构建生成一个镜像。指令最后有个.,表示运行当前目录的Dockerfiledocker run运行镜像,生成容器docker push发布镜像,可以把镜像发布到DockerHub、阿里云镜像仓库等。
Dockerfile基础知识
# 指令是大写的
# 指令从上到下依次执行
# 井号表示注释
# 每个指令都会创建提交一个新的镜像层,并提交
如图:
![[外链图片转存失败,源站可能有防盗链机制,建议将图片保存下来直接上传(img-9eRsybvw-1662341263112)(img/image-20220822210831785.png)]](https://img-blog.csdnimg.cn/d4fba6c9d53f412f84bb63e4108001ec.png)
指令讲解
Dockerfile常用指令:(指令都是大写的)
[外链图片转存失败,源站可能有防盗链机制,建议将图片保存下来直接上传(img-J5l8yRA5-1662341263114)(img/image-20220822191020019.png)]
FROM        # 基础镜像,通过Dockerfile构建镜像从这里开始
MAINTAINER(已弃用)  # 指定维护者信息,镜像是谁写的,姓名+邮箱
LABEL       # 添加元数据,可以替代MAINTAINER 。 可以写多行,也可以写单行
ADD         # 添加文件到镜像中,会自动解压。路径要以/结尾,不然会视为文件。
RUN         # 镜像构建的时候需要运行的命令
WORKDIR     # 镜像的工作目录
VOLUME      # 设置卷,挂载到主机目录
EXPOSE      # 暴露端口配置
CMD         # 指定这个容器启动的时候要运行的命令。
ENTRYPOINT  # 和CMD很像,但是它的指令都有效,相当于追加指令
ONBUILD     # 后面跟dockerfile的指令,这些指令在当前镜像不会执行。当前镜像被当作基础镜像时才会执行。
COPY        # 类似ADD,将文件拷贝到镜像中。不会自动解压
ENV         # 构建的时候设置环境变量
FROM
# 指令格式 以nginx为例
FROM nginx # 不写版本号,会拉取nginx的最新版本作为基础镜像
FROM nginx:1.8 # 写版本号,会拉取指定版本的nginx,比如1.8版本
FROM nginx:1.8-alpine # 带alpine的最轻量级的版本,体积会小很多倍

# FROM指令用于指定基础镜像,构建的时候,会拉取该基础镜像
# 相当于执行了一次docker pull nginx...
# 一个dockerfile在一个阶段只能有一个FROM指令
MAINTAINER
# 该指令在最新版中已弃用

# 指令格式
MAINTAINER 作者 "作者的联系方式,比如邮箱号"

# 示例
MAINTAINER guozi007a "1208001055@qq.com"
LABEL
# LABEL也是用于说明信息
# 写法有三种,可以只写一个LABEL,也可以写多个LABEL

# 第一种
LABEL maintainer="guozi007a" version="v1.0" postbox="1208001055@qq.com"

# 第二种
LABEL maintainer="guozi007a" 	  # 作者
LABEL version="v1.0"			 # 版本
LABEL postbox="1208001055@qq.com" # 联系方式

# 第三种
LABEL maintainer="guozi007a" \
	  version="v1.0" \
	  postbox="1208001055@qq.com"
ADD
# 将主机/宿主机中的文件或目录添加到容器中
# https://www.shuzhiduo.com/A/QW5YQkXM5m/

# 格式  源路径的基础路径是Dockerfile所在的目录
ADD 源路径 容器目标路径

# 写法形式有很多种,必须要清晰掌握
# 比如
ADD test1.txt test1.txt
ADD test1.txt test1.txt.bak
ADD test1.txt /mydir/
ADD data1  data1
ADD data2  data2
ADD zip.tar /myzip
ADD . /home/app
# 情形1

#如果源路径是个文件,且目标路径是以 / 结尾, 则docker会把目标路径当作一个目录,会把源文件拷贝到该目录下。

#如果目标路径不存在,则会自动创建目标路径。

# 情形2

# 如果源路径是个文件,且目标路径是不是以 / 结尾,则docker会把目标路径当作一个文件。

# 如果目标路径不存在,会以目标路径为名创建一个文件,内容同源文件;

# 如果目标文件是个存在的文件,会用源文件覆盖它,当然只是内容覆盖,文件名还是目标文件名。

# 如果目标文件实际是个存在的目录,则会源文件拷贝到该目录下。 注意,这种情况下,最好显示的以 / 结尾,以避免混淆。

# 情形3

# 如果源路径是个目录,且目标路径不存在,则docker会自动以目标路径创建一个目录,把源路径目录下的文件拷贝进来。

# 如果目标路径是个已经存在的目录,则docker会把源路径目录下的文件拷贝到该目录下。

# 情形4

# 如果源文件是个归档文件(压缩文件,比如 .tar文件),则docker会自动帮解压。但是.tar.gz文件是不会自动解压的。
# 查看镜像构建的历史过程
docker history 镜像
发布镜像到dockerHub:
# 注册dockerHub账号
# https://hub.docker.com/
# 终端登录
docker login -u 用户名 -p 密码
# 发布
docker push 要发布的镜像名:版本号
docker全流程图
![[外链图片转存失败,源站可能有防盗链机制,建议将图片保存下来直接上传(img-DCwVoKsL-1662341263115)(img/image-20220824201822576.png)]](https://img-blog.csdnimg.cn/dea4c517694d473a9033dee07242a6d9.png)
拓展:vim的用法.
参考:https://blog.csdn.net/Word_Smith_/article/details/123612962
# 修改文件内容 此处内容以index.html为例
# 如果是新文件,没内容,会自动进入编辑模式。如果是已经有内容,会进入命令模式,命令模式下不能编辑
vim index.html
# 按键盘的i键,可以从命令模式切换到编辑模式,此时会有一个`INSERT`显示
# ESC键,可以从编辑模式切换到命令模式,此时就无法编辑了
# 保存修改并退出编辑(要先按ESC或者ctrl + c退出编辑)
:wq
# 退出但不保存
:q!
实战案例–使用docker和ng部署一个简单的html页面
html内容:
<!DOCTYPE html>
<html lang="en">
<head>
  <meta charset="UTF-8">
  <meta http-equiv="X-UA-Compatible" content="IE=edge">
  <meta name="viewport" content="width=device-width, initial-scale=1.0">
  <title>测试ng部署html</title>
</head>
<body>
  <h3>welcome to ng-test web-page !</h3>
  <p>now , it is arranged in ng that u see .</p>
</body>
</html>
部署成功的网站展示:
![[外链图片转存失败,源站可能有防盗链机制,建议将图片保存下来直接上传(img-2zxgsvfj-1662341263115)(img/image-20220825192856146.png)]](https://img-blog.csdnimg.cn/e09bc79c4aaa4b1e974cc5164500994a.png)
部署流程:
# 拉取ng基础镜像,默认最新版
[root@VM-4-7-centos ~]# docker pull nginx
Using default tag: latest
latest: Pulling from library/nginx
7a6db449b51b: Pull complete
ca1981974b58: Pull complete
d4019c921e20: Pull complete
7cb804d746d4: Pull complete
e7a561826262: Pull complete
7247f6e5c182: Pull complete
Digest: sha256:b95a99feebf7797479e0c5eb5ec0bdfa5d9f504bc94da550c2f58e839ea6914f
Status: Downloaded newer image for nginx:latest
docker.io/library/nginx:latest
[root@VM-4-7-centos ~]# docker images
REPOSITORY   TAG       IMAGE ID       CREATED      SIZE
nginx        latest    2b7d6430f78d   2 days ago   142MB
# 这里需要注意。
# 1. docker容器内是没有vim指令的,而服务器上是有的,后面我们需要修改文件内容,所以我们要把
# ng文件放到服务器上操作
# 2. 这里不能直接-v映射到主机,因为此时的容器里还没有ng配置文件,nginx目录还是空的
# 3. 所以这里先创建个容器,把ng配置文件拷贝到服务器一份。然后我们重新建一个容器,映射到服务器
# 4. 这样我们就能通过在服务器内修改配置文件,让容器使用了
# 5. 后续的操作,会有容器内操作,还有另起一个窗口,在服务器操作,会有标注,以便区分。
[root@VM-4-7-centos ~]# docker run -it 2b7d6430f78d /bin/bash
# 查看nginx配置文件的位置 /etc/nginx (是etc,不是ect,不要记错了)
root@3ac9516f245b:/# whereis nginx
nginx: /usr/sbin/nginx /usr/lib/nginx /etc/nginx /usr/share/nginx
root@3ac9516f245b:/# cd /etc/nginx
root@3ac9516f245b:/etc/nginx# ls
conf.d	fastcgi_params	mime.types  modules  nginx.conf  scgi_params  uwsgi_params
# 把容器3ac9516f245b的nginx中的文件拷贝到主机的/usr/nginx-test目录下
[root@VM-4-7-centos ~]# docker cp 3ac9516f245b:/etc/nginx /usr/nginx-test
# 另一个窗口的主机操作
# 可以看到 主机的/usr/nginx-test目录中也有ng配置文件了
[root@VM-4-7-centos usr]# cd nginx-test
[root@VM-4-7-centos nginx-test]# ls
conf.d  fastcgi_params  mime.types  modules  nginx.conf  scgi_params  uwsgi_params
# 这时候就可以把原来建的容器删了,这个容器没啥用了
[root@VM-4-7-centos ~]# docker ps -a
CONTAINER ID   IMAGE          COMMAND                  CREATED          STATUS                     PORTS     NAMES
3ac9516f245b   2b7d6430f78d   "/docker-entrypoint.…"   13 minutes ago   Exited (0) 3 minutes ago             cranky_lewin
[root@VM-4-7-centos ~]# docker rm -f 3ac9516f245b
3ac9516f245b
[root@VM-4-7-centos ~]# docker ps -a
CONTAINER ID   IMAGE     COMMAND   CREATED   STATUS    PORTS     NAMES
# 重新建一个容器,名字是nginx01 ,映射端口80,容器目录/etc/nginx映射到主机的/usr/nginx
# 这样在主机上修改文件,在容器内也可以使用了
[root@VM-4-7-centos ~]# docker run -it --name nginx01 -p 80:80 -v /usr/nginx-test:/etc/nginx 2b7d6430f78d /bin/bash
# 主机上操作
# 创建个html文件
[root@VM-4-7-centos nginx-test]# touch index.html
# 编辑内容
[root@VM-4-7-centos nginx-test]# vim index.html
# 查看编辑的html内容
[root@VM-4-7-centos nginx-test]# cat index.html
<!DOCTYPE html>
<html lang="en">
<head>
  <meta charset="UTF-8">
  <meta http-equiv="X-UA-Compatible" content="IE=edge">
  <meta name="viewport" content="width=device-width, initial-scale=1.0">
  <title>测试ng部署html</title>
</head>
<body>
  <h3>welcome to ng-test web-page !</h3>
  <p>now , it is arranged in ng that u see .</p>
</body>
</html>
# 容器内操作 可以看到容器内也有index.html了
root@1900bc2c84d9:/# cd etc/nginx
root@1900bc2c84d9:/etc/nginx# ls
conf.d	fastcgi_params	index.html  mime.types	modules  nginx.conf  scgi_params  uwsgi_params
root@1900bc2c84d9:/etc/nginx#
# 主机内操作  修改ng配置文件
[root@VM-4-7-centos nginx-test]# vim conf.d/default.conf
[root@VM-4-7-centos nginx-test]# cat conf.d/default.conf
server {
    listen       80;
    server_name  localhost;

    location / {
    # 这里的root就是容器内html文件所在的目录
        root   /etc/nginx;
        index  index.html index.htm;
    }
    error_page   500 502 503 504  /50x.html;
    location = /50x.html {
        root   /usr/share/nginx/html;
    }
}
# 容器的ng目录中,启动ng
root@1900bc2c84d9:/etc/nginx# nginx
2022/08/25 12:58:14 [notice] 9#9: using the "epoll" event method
2022/08/25 12:58:14 [notice] 9#9: nginx/1.23.1
2022/08/25 12:58:14 [notice] 9#9: built by gcc 10.2.1 20210110 (Debian 10.2.1-6)
2022/08/25 12:58:14 [notice] 9#9: OS: Linux 3.10.0-1160.71.1.el7.x86_64
2022/08/25 12:58:14 [notice] 9#9: getrlimit(RLIMIT_NOFILE): 1048576:1048576
2022/08/25 12:58:14 [notice] 10#10: start worker processes
2022/08/25 12:58:14 [notice] 10#10: start worker process 11
2022/08/25 12:58:14 [notice] 10#10: start worker process 12
# 此时,需要看下自己购买的服务器有没有开放80端口的防火墙,如果有,
# 直接访问http://公网ip即可看到如下页面:
![[外链图片转存失败,源站可能有防盗链机制,建议将图片保存下来直接上传(img-N8gRojJn-1662341263116)(img/image-20220825210250348.png)]](https://img-blog.csdnimg.cn/82f9df9259844f92b7b354e9ce900b04.png)
到这里,部署就成功了。
项目长久运行在云服务器
此时,直接关闭xshell,或者关闭电脑,页面仍然是可以访问的。
但是切记,不要关容器,不要关ng,直接关xsehll或者电脑就行了。
ng配置详解
# 另附ng配置详解
https://www.runoob.com/w3cnote/nginx-setup-intro.html
案例:使用dockerfile、ng部署静态页面html
我们最终想要的页面效果:
![[外链图片转存失败,源站可能有防盗链机制,建议将图片保存下来直接上传(img-tlKPHQqX-1662341263117)(img/image-20220830013415213.png)]](https://img-blog.csdnimg.cn/5e79ccfe12f04aa8a9dd58b1bec4bfd0.png)
[root@VM-4-7-centos /]# ls
bin   data  etc   lib    lost+found  mnt  proc  run   srv  tmp  var
boot  dev   home  lib64  media       opt  root  sbin  sys  usr
# 进入usr目录 打算在这个目录里创建需要的文件
[root@VM-4-7-centos /]# cd usr
# 创建文件目录
[root@VM-4-7-centos usr]# mkdir myng
[root@VM-4-7-centos usr]# ls
bin  etc  games  include  lib  lib64  libexec  local  mpi  myng  sbin  share  src  tmp
[root@VM-4-7-centos usr]# cd myng
[root@VM-4-7-centos myng]# ls
# 创建静态html
[root@VM-4-7-centos myng]# touch index.html
[root@VM-4-7-centos myng]# vim index.html
[root@VM-4-7-centos myng]# cat index.html
<!DOCTYPE html>
<html lang="en">
<head>
	<meta charset="UTF-8">
	<meta http-equiv="X-UA-Compatible" content="IE=edge">
	<meta name="viewport" content="width=device-width, initial-scale=1.0">
	<title>使用dockerfile和ng部署静态html</title>
</head>
<body>
	<h3>hello, 这是用dockerfile和ng部署的静态页面!</h3>
	<h3>恭喜你! 成功部署了!</h3>
</body>
</html>
# 创建Dockerfile文件
[root@VM-4-7-centos myng]# touch Dockerfile
[root@VM-4-7-centos myng]# vim Dockerfile
[root@VM-4-7-centos myng]# cat Dockerfile
FROM nginx

LABEL version="v1" # 版本号
LABEL maintainer="guozi007a" # 维护人员

COPY . /usr/share/nginx/html/ # 把当前目录下的文件都拷贝到/usr/share/nginx/html/,稍后细说为啥是拷贝到这个目录下
# 使用Dockerfile构建镜像,镜像名ng 版本v1
[root@VM-4-7-centos myng]# docker build -t ng:v1 .
Sending build context to Docker daemon  3.072kB
Step 1/4 : FROM nginx
 ---> 2b7d6430f78d
Step 2/4 : LABEL version="v1"
 ---> Running in fb4048c08179
Removing intermediate container fb4048c08179
 ---> 973ad59d8422
Step 3/4 : LABEL maintainer="guozi007a"
 ---> Running in b26eda91e72d
Removing intermediate container b26eda91e72d
 ---> 8fa8000a7cfe
Step 4/4 : COPY . /usr/share/nginx/html/
 ---> 7ff77d778a0f
Successfully built 7ff77d778a0f
Successfully tagged ng:v1
[root@VM-4-7-centos myng]# docker images
REPOSITORY   TAG       IMAGE ID       CREATED         SIZE
ng           v1        7ff77d778a0f   4 seconds ago   142MB
# 创建容器 后台运行
[root@VM-4-7-centos myng]# docker run -d -p 80:80 7ff77d778a0f
f94734efd80a452420c63a142d34cc47b1e7612659825a597bd1419e3911a368
# 此时开启云服务器防火墙80端口,就可以看到我们成功部署的html页面了

# 说说上面的疑问 为啥是/usr/share/nginx/html/目录?
# 因为ng有指定的工作目录,默认是/usr/share/nginx/html/,会去加载这里的index.html文件,
# 如果不想修改ng的配置,就要把html文件放到这个目录下
# 那么,我们来查看一下ng的配置到底是不是这样?
[root@VM-4-7-centos myng]# docker ps
CONTAINER ID   IMAGE          COMMAND                  CREATED         STATUS         PORTS                               NAMES
f94734efd80a   7ff77d778a0f   "/docker-entrypoint.…"   9 minutes ago   Up 9 minutes   0.0.0.0:80->80/tcp, :::80->80/tcp   lucid_borg
[root@VM-4-7-centos myng]# docker exec -it f94734efd80a /bin/bash
# 查看nginx相关内容所在位置
root@f94734efd80a:/# whereis nginx
# ng的配置文件在/etc/nginx的conf.d目录中
nginx: /usr/sbin/nginx /usr/lib/nginx /etc/nginx /usr/share/nginx
root@f94734efd80a:/# cd /etc/nginx
root@f94734efd80a:/etc/nginx# ls
conf.d	fastcgi_params	mime.types  modules  nginx.conf  scgi_params  uwsgi_params
root@f94734efd80a:/etc/nginx# cd conf.d
root@f94734efd80a:/etc/nginx/conf.d# ls
default.conf
root@f94734efd80a:/etc/nginx/conf.d# cat default.conf
server {
    listen       80;
    listen  [::]:80;
    server_name  localhost;

    #access_log  /var/log/nginx/host.access.log  main;

    location / {
    	# 这里可以看到,工作根目录就是/usr/share/nginx/html,ng在工作时,监听到我们网站的80端口,
    	# 就会去这个目录下查找index.html文件,为我们加载这个文件
        root   /usr/share/nginx/html;
        index  index.html index.htm;
    }

    #error_page  404              /404.html;

    # redirect server error pages to the static page /50x.html
    #
    error_page   500 502 503 504  /50x.html;
    location = /50x.html {
        root   /usr/share/nginx/html;
    }
  ...
案例:使用Dockerfile + nginx部署带有css文件的html
部署后的页面效果:
![[外链图片转存失败,源站可能有防盗链机制,建议将图片保存下来直接上传(img-ZY79HHlW-1662341263118)(img/image-20220830190959964.png)]](https://img-blog.csdnimg.cn/02b8cc8f66f245b98ce4020e40a05ff9.png)
部署步骤:
# 和上面的案例写法基本一致

[root@VM-4-7-centos /]# cd usr
[root@VM-4-7-centos usr]# ls
bin  etc  games  include  lib  lib64  libexec  local  mpi  sbin  share  src  tmp
[root@VM-4-7-centos usr]# mkdir ng-test
[root@VM-4-7-centos usr]# ls
bin  etc  games  include  lib  lib64  libexec  local  mpi  ng-test  sbin  share  src  tmp
[root@VM-4-7-centos usr]# cd ng-test
[root@VM-4-7-centos ng-test]# ls
[root@VM-4-7-centos ng-test]# touch index.html
[root@VM-4-7-centos ng-test]# ls
index.html
[root@VM-4-7-centos ng-test]# vim index.html
[root@VM-4-7-centos ng-test]# cat index.html
# html文件
<!DOCTYPE html>
<html lang="en">
<head>
	<meta charset="UTF-8">
	<meta http-equiv="X-UA-Compatible" content="IE=edge">
	<meta name="viewport" content="width=device-width, initial-scale=1.0">
	<title>dockerfile + ng部署html+css</title>
	<link rel="stylesheet" href="./index.css">
</head>
<body>
	<h3>hello, 这里是部署的页面展示 !</h3>
</body>
</html>
[root@VM-4-7-centos ng-test]# touch index.css
[root@VM-4-7-centos ng-test]# vim index.css
[root@VM-4-7-centos ng-test]# cat index.css
# 简单的css文件
h3 {
  color: red;
}
[root@VM-4-7-centos ng-test]# touch Dockerfile
[root@VM-4-7-centos ng-test]# vim Dockerfile
[root@VM-4-7-centos ng-test]# cat Dockerfile
# Dockerfile文件
FROM nginx

LABEL version="v1"
LABEL maintainer="guozi007a"

COPY . /usr/share/nginx/html/
# 不能忘了最后的 .
[root@VM-4-7-centos ng-test]# docker build -t myng:v1 .
Sending build context to Docker daemon  4.096kB
Step 1/4 : FROM nginx
 ---> 2b7d6430f78d
Step 2/4 : LABEL version="v1"
 ---> Running in 335c248d74c6
Removing intermediate container 335c248d74c6
 ---> 03213011d875
Step 3/4 : LABEL maintainer="guozi007a"
 ---> Running in 050575b1df79
Removing intermediate container 050575b1df79
 ---> b538071d651d
Step 4/4 : COPY . /usr/share/nginx/html/
 ---> e4111a4409f9
Successfully built e4111a4409f9
Successfully tagged myng:v1
[root@VM-4-7-centos ng-test]# docker images
REPOSITORY   TAG       IMAGE ID       CREATED         SIZE
myng         v1        e4111a4409f9   4 seconds ago   142MB
nginx        latest    2b7d6430f78d   7 days ago      142MB
[root@VM-4-7-centos ng-test]# docker run -d -p 80:80 e4111a4409f9
231ed9f354c919c2e827d44a3b09f2f7912a49c79b187b8afca7836a75cfb811
案例:使用Dockerfile + nginx,部署多个html
要求:
打开http://101.35.149.103/或者http://101.35.149.103/:80时,显示index.html页面
注:101.35.149.103是云服务器公网IP
![[外链图片转存失败,源站可能有防盗链机制,建议将图片保存下来直接上传(img-BwEQs98u-1662341263119)(img/image-20220831000117121.png)]](https://img-blog.csdnimg.cn/f1a46a78165a4a508b942908d5058d2f.png)
打开http://101.35.149.103/child/显示child.html页面
![[外链图片转存失败,源站可能有防盗链机制,建议将图片保存下来直接上传(img-iZuHJXPO-1662341263119)(img/image-20220831000213215.png)]](https://img-blog.csdnimg.cn/2c356bd621c4414aa7ec32ec7032feb6.png)
打开http://101.35.149.103:3000/显示list.html页面
![[外链图片转存失败,源站可能有防盗链机制,建议将图片保存下来直接上传(img-6TkdJie7-1662341263120)(img/image-20220831000252712.png)]](https://img-blog.csdnimg.cn/18fbfda8ab9b4701b87168365ed191fd.png)
思路:
- 准备好需要的文件,
index.htmlindex.csschild.htmllist.htmlDockerfile docker build生成镜像- 创建一个工具容器,把容器内的
/etc/nginx配置文件copy到服务器中,目的是在服务器下可以使用vim修改nginx的配置文件 - 删除这个工具容器,然后再创建一个容器,容器的
/etc/nginx目录映射到主机的修改配置的目录下 - 这里用到了
80和3000端口,所以创建容器时,需要连续使用-p把这两个端口映射到主机,以便外网访问 - 在主机目录中修改
default.conf配置文件 - 在容器内启动
nginx,同时打开服务器80和3000端口的防火墙
操作过程:
# 开始操作
[root@VM-4-7-centos ~]# cd /usr
# 创建目录,用来存放要用到的一系列文件
[root@VM-4-7-centos usr]# mkdir ngtest
[root@VM-4-7-centos usr]# cd ngtest
[root@VM-4-7-centos ngtest]# ls
# 创建index.html
[root@VM-4-7-centos ngtest]# touch index.html
[root@VM-4-7-centos ngtest]# vim index.html
[root@VM-4-7-centos ngtest]# cat index.html
<!DOCTYPE html>
<html lang="en">
<head>
	<meta charset="UTF-8">
	<meta http-equiv="X-UA-Compatible" content="IE=edge">
	<meta name="viewport" content="width=device-width, initial-scale=1.0">
	<title>dockerfile ng 部署多个html</title>
	<link rel="stylesheet" href="./index.css">
</head>
<body>
	<h3>恭喜你部署成功了! 欢迎来到index页面!</h3>
</body>
</html>
# 创建index.css
[root@VM-4-7-centos ngtest]# touch index.css
[root@VM-4-7-centos ngtest]# vim index.css
[root@VM-4-7-centos ngtest]# cat index.css
h3 {
    color: red;
}
# 创建list.html
[root@VM-4-7-centos ngtest]# touch list.html
[root@VM-4-7-centos ngtest]# vim list.html
[root@VM-4-7-centos ngtest]# cat list.html
<!DOCTYPE html>
<html lang="en">
<head>
  <meta charset="UTF-8">
  <meta http-equiv="X-UA-Compatible" content="IE=edge">
  <meta name="viewport" content="width=device-width, initial-scale=1.0">
  <title>dockerfile ng 部署多个html</title>
</head>
<body>
  <h3>恭喜你部署成功了!欢迎来到list页面!</h3>
</body>
</html>
# 创建child.html
[root@VM-4-7-centos ngtest]# touch child.html
[root@VM-4-7-centos ngtest]# vim child.html
[root@VM-4-7-centos ngtest]# cat child.html
<!DOCTYPE html>
<html lang="en">
<head>
  <meta charset="UTF-8">
  <meta http-equiv="X-UA-Compatible" content="IE=edge">
  <meta name="viewport" content="width=device-width, initial-scale=1.0">
  <title>dockerfile ng 部署多个html</title>
  <link rel="stylesheet" href="./index.css">
</head>
<body>
  <h3>这里是index的子路由 --- child页面!</h3>
</body>
</html>
# 创建Dokcerfile
[root@VM-4-7-centos ngtest]# touch Dockerfile
[root@VM-4-7-centos ngtest]# vim Dockerfile
[root@VM-4-7-centos ngtest]# cat Dockerfile
FROM nginx

LABEL version="v1"
# 把当前目录中的所有文件拷贝到后面的目录中
COPY . /usr/share/nginx/html/
# 构建镜像 镜像名字是ng 版本号是v1 不要忘记最后的 .
[root@VM-4-7-centos ngtest]# docker build -t ng:v1 .
Sending build context to Docker daemon  6.144kB
Step 1/3 : FROM nginx
 ---> 2b7d6430f78d
Step 2/3 : LABEL version="v1"
 ---> Running in ad2cd83c3f86
Removing intermediate container ad2cd83c3f86
 ---> 560958131bbb
Step 3/3 : COPY . /usr/share/nginx/html/
 ---> e433f32e5275
Successfully built e433f32e5275
Successfully tagged ng:v1
# 查看镜像
[root@VM-4-7-centos ngtest]# docker images
REPOSITORY   TAG       IMAGE ID       CREATED         SIZE
ng           v1        e433f32e5275   5 seconds ago   142MB
nginx        latest    2b7d6430f78d   7 days ago      142MB
# 生成工具容器test1
[root@VM-4-7-centos ngtest]# docker run -it --name test1 e433f32e5275 /bin/bash
root@916f9eaec506:/# whereis nginx
nginx: /usr/sbin/nginx /usr/lib/nginx /etc/nginx /usr/share/nginx
root@916f9eaec506:/# exit
exit
# 把工具容器中的nginx配置文件拷贝到主机目录/usr/fortest下
[root@VM-4-7-centos ngtest]# docker cp 916f9eaec506:/etc/nginx /usr/fortest
# 工具容器没啥作用了,删掉
[root@VM-4-7-centos /]# docker rm -f 7b14a9955783
7b14a9955783
[root@VM-4-7-centos /]# docker ps -a
CONTAINER ID   IMAGE     COMMAND   CREATED   STATUS    PORTS     NAMES
# 重新创建我们需要做部署的容器,注意这里暴露俩端口80 3000 注意映射路径
[root@VM-4-7-centos /]# docker run -it --name test03 -v /usr/fortest:/etc/nginx -p 80:80 -p 3000:3000 e433f32e5275 /bin/bash

# 这里另起一个窗口 开始操作 修改nginx配置文件
[root@VM-4-7-centos ~]# cd /usr
[root@VM-4-7-centos usr]# ls
bin  etc  fortest  games  include  lib  lib64  libexec  local  mpi  ngtest  sbin  share  src  tmp
[root@VM-4-7-centos usr]# cd fortest
[root@VM-4-7-centos fortest]# ls
conf.d  fastcgi_params  mime.types  modules  nginx.conf  scgi_params  uwsgi_params
[root@VM-4-7-centos fortest]# cd conf.d
[root@VM-4-7-centos conf.d]# ls
default.conf
# default.conf是默认的配置文件,就修改这个
[root@VM-4-7-centos conf.d]# vim default.conf
[root@VM-4-7-centos conf.d]# cat default.conf
# 监听端口80
server {
    listen       80;
    server_name  localhost;

    #access_log  /var/log/nginx/host.access.log  main;

    location / {
        root   /usr/share/nginx/html;
        index  index.html index.htm;
    }

    location /child {
    	alias /usr/share/nginx/html; # 一个server只能有一个root根目录,其他的要用alias
		index child.html child.htm;
    }

    #error_page  404              /404.html;

    # redirect server error pages to the static page /50x.html
    #
    error_page   500 502 503 504  /50x.html;
    location = /50x.html {
        root   /usr/share/nginx/html;
    }

    # proxy the PHP scripts to Apache listening on 127.0.0.1:80
    #
    #location ~ \.php$ {
    #    proxy_pass   http://127.0.0.1;
    #}

    # pass the PHP scripts to FastCGI server listening on 127.0.0.1:9000
    #
    #location ~ \.php$ {
    #    root           html;
    #    fastcgi_pass   127.0.0.1:9000;
    #    fastcgi_index  index.php;
    #    fastcgi_param  SCRIPT_FILENAME  /scripts$fastcgi_script_name;
    #    include        fastcgi_params;
    #}

    # deny access to .htaccess files, if Apache's document root
    # concurs with nginx's one
    #
    #location ~ /\.ht {
    #    deny  all;
    #}
}
# 监听端口3000
server {
	listen 3000;
	server_name localhost;

	location / {
		root /usr/share/nginx/html;
		index list.html list.htm;
	}
}

# 配置好ng,进入容器启动ng
root@3d931b9859fe:/# cd /etc/nginx
root@3d931b9859fe:/etc/nginx# nginx
2022/08/30 15:42:59 [notice] 7#7: using the "epoll" event method
2022/08/30 15:42:59 [notice] 7#7: nginx/1.23.1
2022/08/30 15:42:59 [notice] 7#7: built by gcc 10.2.1 20210110 (Debian 10.2.1-6)
2022/08/30 15:42:59 [notice] 7#7: OS: Linux 3.10.0-1160.71.1.el7.x86_64
2022/08/30 15:42:59 [notice] 7#7: getrlimit(RLIMIT_NOFILE): 1048576:1048576
2022/08/30 15:42:59 [notice] 8#8: start worker processes
2022/08/30 15:42:59 [notice] 8#8: start worker process 9
2022/08/30 15:42:59 [notice] 8#8: start worker process 10

# 此时,服务器的80和3000端口防火墙打开的话,用浏览器打开指定路径,就可以看到我们最终的部署结果了
lrzsz上传下载文件
上传:把本地文件放到宿主机目录中
下载:把宿主机目录中的文件放到本地
安装
yum install -y lrzsz
安装后输入指令rz --v和sz --v,检测是否安装成功
如下,就表示安装成功了
[root@VM-4-7-centos usr]# rz --v
rz (lrzsz) 0.12.20
[root@VM-4-7-centos usr]# sz --v
sz (lrzsz) 0.12.20
rz:上传指令,把本地文件上传到宿主机当前目录下。r表示receive,宿主机接收文件。
sz 文件:下载指令,把宿主机当前目录下的文件下载到本地。s表示send,宿主机发送文件。注意,下载的时候,sz指令后面需要带上要下载的文件。
在xshell7中设置上传下载目录
点击左上角的+,或者右击图中箭头指向的新建会话选择属性
![[外链图片转存失败,源站可能有防盗链机制,建议将图片保存下来直接上传(img-mflRqcqB-1662341263121)(img/image-20220831150407848.png)]](https://img-blog.csdnimg.cn/22cb28214f314f42a5e91cb6afdc2ecc.png)
会出现下面 的弹框:
![[外链图片转存失败,源站可能有防盗链机制,建议将图片保存下来直接上传(img-qNapQT8l-1662341263121)(img/image-20220831150626784.png)]](https://img-blog.csdnimg.cn/9aea1677e7414953be2659851c9999a3.png)
点击左下角的文件传输,会出现如下界面
![[外链图片转存失败,源站可能有防盗链机制,建议将图片保存下来直接上传(img-FB535ZS2-1662341263122)(img/image-20220831150737135.png)]](https://img-blog.csdnimg.cn/3bbdb6e2e56d41a6ad3356d599cb952d.png)
设置下载路径,上传的时候,打开的上传框就会默认选择这个目录下的文件。
下载的时候,就会默认下载到这个路径。此处我选择的是本地电脑桌面。
文件同名时,选择覆盖
![[外链图片转存失败,源站可能有防盗链机制,建议将图片保存下来直接上传(img-Fr3dFwoi-1662341263123)(img/image-20220831150957671.png)]](https://img-blog.csdnimg.cn/e8b3530626a84dc08974d4cca80ac3eb.png)
设置好之后,确定。
示例
我设置的下载路径是本地的桌面,我在桌面创建一个txt文件hello.txt,里面写入一些简单内容(注意:这里不要是空的文件,因为没意义)。
![[外链图片转存失败,源站可能有防盗链机制,建议将图片保存下来直接上传(img-vCrfC6lV-1662341263123)(img/image-20220831151536318.png)]](https://img-blog.csdnimg.cn/6003e36966c147b0b3814b3cfd9203e0.png)
在宿主机的/usr目录中使用指令rz,会有这样一个上传框:
![[外链图片转存失败,源站可能有防盗链机制,建议将图片保存下来直接上传(img-VV5TTWzn-1662341263124)(img/image-20220831151939626.png)]](https://img-blog.csdnimg.cn/3928fae513e140469b559daa8f6a2531.png)
选择文件上传即可。
此时可以看到,hello.txt文件就出现在/usr目录中了。
![[外链图片转存失败,源站可能有防盗链机制,建议将图片保存下来直接上传(img-94bc8uu7-1662341263124)(img/image-20220831152042747.png)]](https://img-blog.csdnimg.cn/8d173a4304e64897931f413ba6b7191f.png)
现在测试一下下载。
在/usr目录下把刚才传上来的hello.txt文件的内容修改一下,然后执行下载指令。
[root@VM-4-7-centos usr]# vim hello.txt
[root@VM-4-7-centos usr]# cat hello.txt
我在本地创建了hello.txt

准备上传到宿主机...

---------------------------

我在宿主机上被修改了

准备下载到本地...
[root@VM-4-7-centos usr]# sz
sz: need at least one file to send
Try `sz --help' for more information.
[root@VM-4-7-centos usr]# sz hello.txt

[root@VM-4-7-centos usr]#
下载到本地后,打开文件查看
![[外链图片转存失败,源站可能有防盗链机制,建议将图片保存下来直接上传(img-544YNUZx-1662341263125)(img/image-20220831152616516.png)]](https://img-blog.csdnimg.cn/36ea717425e248e3badbad9d3ecbde19.png)
除了使用指令外,还可以直接拖动本地文件到宿主机的目录下。可一次拖动单个或多个文件。但是不能拖动文件夹哦。
更多文件或者文件夹,就要去用Xftp去操作了。
案例:dockerfile + nginx部署基础react
先看下部署效果:
[外链图片转存失败,源站可能有防盗链机制,建议将图片保存下来直接上传(img-xTsSlta6-1662341263126)(img/1111.gif)]
# 习惯性的在usr目录下操作
[root@VM-4-7-centos ~]# cd /usr
# 创建dist目录
[root@VM-4-7-centos ~]# mkdir dist
[root@VM-4-7-centos usr]# ls
bin  dist  etc  games  include  lib  lib64  libexec  local  mpi  sbin  share  src  tmp
# 进入dist, 把npm run build后的文件拖进来
[root@VM-4-7-centos usr]# cd dist
[root@VM-4-7-centos dist]# ls
asset-manifest.json  favicon.ico  index.html  logo192.png  logo512.png  manifest.json  robots.txt
[root@VM-4-7-centos dist]# touch Dockerfile
[root@VM-4-7-centos dist]# vim Dockerfile
[root@VM-4-7-centos dist]# cat Dockerfile
FROM nginx

LABEL version="v1"

COPY . /usr/share/nginx/html/
# 本地文件夹不能直接拖进来,要分别创建文件夹,把文件分别拖进来
[root@VM-4-7-centos dist]# mkdir static
[root@VM-4-7-centos dist]# cd static
[root@VM-4-7-centos static]# mkdir css
[root@VM-4-7-centos static]# cd css
[root@VM-4-7-centos css]# rz -E
rz waiting to receive.
[root@VM-4-7-centos css]# ls
main.a04c2db7.css  main.a04c2db7.css.map
[root@VM-4-7-centos css]# cd ..
[root@VM-4-7-centos static]# mkdir js
[root@VM-4-7-centos static]# cd js
[root@VM-4-7-centos js]# ls
[root@VM-4-7-centos js]# rz -E
rz waiting to receive.
[root@VM-4-7-centos js]# ls
main.cdbf69b2.js  main.cdbf69b2.js.LICENSE.txt  main.cdbf69b2.js.map
[root@VM-4-7-centos js]# cd ..
[root@VM-4-7-centos static]# cd ..
# 查看一下,npm run build后的文件都拖进来了
[root@VM-4-7-centos dist]# ls
asset-manifest.json  favicon.ico  logo192.png  manifest.json  static
Dockerfile           index.html   logo512.png  robots.txt
[root@VM-4-7-centos dist]# docker images
REPOSITORY   TAG       IMAGE ID       CREATED      SIZE
nginx        latest    2b7d6430f78d   8 days ago   142MB
# 构建项目镜像
[root@VM-4-7-centos dist]# docker build -t ng-react:v1 .
Sending build context to Docker daemon    532kB
Step 1/3 : FROM nginx
 ---> 2b7d6430f78d
Step 2/3 : LABEL version="v1"
 ---> Running in b7a77ba941af
Removing intermediate container b7a77ba941af
 ---> 3d25e559c025
Step 3/3 : COPY . /usr/share/nginx/html/
 ---> 5b5df35eca5c
Successfully built 5b5df35eca5c
Successfully tagged ng-react:v1
[root@VM-4-7-centos dist]# docker images
REPOSITORY   TAG       IMAGE ID       CREATED          SIZE
ng-react     v1        5b5df35eca5c   43 seconds ago   142MB
nginx        latest    2b7d6430f78d   8 days ago       142MB
# 创建容器 映射端口号80
[root@VM-4-7-centos dist]# docker run -it --name ng01 -p 80:80 ng-react:v1 /bin/bash
root@ee3d06182169:/# cd /etc/nginx
# 启动ng
root@ee3d06182169:/etc/nginx# nginx
2022/09/01 01:54:22 [notice] 7#7: using the "epoll" event method
2022/09/01 01:54:22 [notice] 7#7: nginx/1.23.1
2022/09/01 01:54:22 [notice] 7#7: built by gcc 10.2.1 20210110 (Debian 10.2.1-6)
2022/09/01 01:54:22 [notice] 7#7: OS: Linux 3.10.0-1160.71.1.el7.x86_64
2022/09/01 01:54:22 [notice] 7#7: getrlimit(RLIMIT_NOFILE): 1048576:1048576
2022/09/01 01:54:22 [notice] 8#8: start worker processes
2022/09/01 01:54:22 [notice] 8#8: start worker process 9
2022/09/01 01:54:22 [notice] 8#8: start worker process 10
安装Xftp7
该仓库的Xftp7目录下有安装包,放到本地,直接安装即可。
然后按照xshell7去掉更新的方法,同样把xftp7的自动更新关闭掉。
之后傻瓜式安装即可。
安装好之后打开,如图操作和说明:
![[外链图片转存失败,源站可能有防盗链机制,建议将图片保存下来直接上传(img-ZNC4kEj2-1662341263127)(img/image-20220902100435522.png)]](https://img-blog.csdnimg.cn/cfe7e5a4a0bc4289a5da5fb0f50b8a58.png)
# 如果是文件或少量文件夹,就不需要用xftp,直接用lrzsz即可

# 如果有大量文件夹,就要用xftp了,更方便传输文件夹
案例:dockerfile部署基础Koa
[root@VM-4-7-centos ~]# cd /usr
[root@VM-4-7-centos usr]# mkdir dist
[root@VM-4-7-centos usr]# cd dist
# 这里有一步是通过xftp把server文件夹放到主机dist目录下
[root@VM-4-7-centos dist]# touch Dockerfile
[root@VM-4-7-centos dist]# vim Dockerfile
[root@VM-4-7-centos dist]# cat Dockerfile
FROM node:14
WORKDIR /home/koa
ADD server /home/koa # 注意这里的写法,加/和不加/是有区别的
RUN npm install -registry=https://registry.npm.taobao.org
ENTRYPOINT ["npm", "start"]
[root@VM-4-7-centos dist]# ls
Dockerfile server
[root@VM-4-7-centos dist]# docker build -t koa01:v1 .
# ...这里是构建过程,略
[root@VM-4-7-centos dist]# docker images
REPOSITORY   TAG       IMAGE ID       CREATED          SIZE
koa01        v1        eb5d87dff87e   35 seconds ago   967MB
node         14        41706aa77d80   9 days ago       914MB
# koa项目默认目录是3000,这里映射到主机的80端口
[root@VM-4-7-centos dist]# docker run -it --name test-koa02 -p 80:3000 eb5d87dff87e /bin/bash
# 创建好容器后就会运行 npm start,启动koa项目
> koa-demo@0.1.0 start /home/koa
> nodemon bin/www "/bin/bash"
# 下面这些日志会自动显示
# 如果有其他操作,日志就不显示了。
# 如果要重新显示,可以使用指令docker logs -f 容器 跟踪打印日志
[nodemon] 1.19.4
[nodemon] to restart at any time, enter `rs`
[nodemon] watching dir(s): *.*
[nodemon] watching extensions: js,mjs,json
[nodemon] starting `node bin/www /bin/bash`
  <-- GET /
GET / - 209ms
  --> GET / 200 218ms 185b
  <-- GET /stylesheets/style.css
  --> GET /stylesheets/style.css 200 4ms 111b
  <-- GET /string
GET /string - 1ms
  --> GET /string 200 2ms 11b
  <-- GET /users
GET /users - 1ms
  --> GET /users 200 1ms 25b
上面使用xftp传输的server内容是这些:
![[外链图片转存失败,源站可能有防盗链机制,建议将图片保存下来直接上传(img-Y2bPcEJM-1662341263128)(img/image-20220902102518934.png)]](https://img-blog.csdnimg.cn/14b0d00bb81f476195fdad8853aef790.png)
此时用浏览器打开koa路由,就可以看到内容了:
![[外链图片转存失败,源站可能有防盗链机制,建议将图片保存下来直接上传(img-S4LgXAMV-1662341263129)(img/image-20220902103050213.png)]](https://img-blog.csdnimg.cn/975e8a81ac3348a69a38e8623e6a62f7.png)
![[外链图片转存失败,源站可能有防盗链机制,建议将图片保存下来直接上传(img-URDDE4fV-1662341263130)(img/image-20220902103103464.png)]](https://img-blog.csdnimg.cn/6653179d130942edbabf62f92c7ae40a.png)
![[外链图片转存失败,源站可能有防盗链机制,建议将图片保存下来直接上传(img-ElicEQGM-1662341263130)(img/image-20220902103122527.png)]](https://img-blog.csdnimg.cn/66ca468d0fc4424c80f6895a9a9e9bf4.png)
docker部署mongodb基础
官方文档:https://hub.docker.com/_/mongo
# 使用官方镜像 mongo:4.4.10
docker run -itd --name mongo -p 27017:27017 -e MONGO_INITDB_ROOT_USERNAME=root -e MONGO_INITDB_ROOT_PASSWORD=root -v /data/db:/data/db mongo:4.4.10
# 然后打开本地可视化工具,以compass为例。 然后连接即可
![[外链图片转存失败,源站可能有防盗链机制,建议将图片保存下来直接上传(img-cll538yr-1662341263131)(img/image-20220902181225708.png)]](https://img-blog.csdnimg.cn/588b400c815249efbef5d204c1422b2b.png)
docker部署前后端分离项目,以react + koa2为例
先简单配置下,确保在本地可以正常获取数据:
# 前端package.json配置proxy代理
"proxy": "http://localhost:4001",

# 前端安装axios并写入请求demo
import React, { useState, useEffect } from 'react';
import './App.css';
import axios from 'axios';

const App = () => {

  const [msg, setMsg] = useState('');

  useEffect(() => {
  # 这里一定要加个请求前缀 比如/api,在ng里做配置要用
    axios.get('/api/users')
      .then(data => {
        console.log('data: ', data);
        setMsg(`从后端接收到数据${data.data}`);
      }).catch(err => {
        console.log('err: ', err);
    })
  }, [])

  return <h3>{msg}</h3>
}
export default App;


export default RepeatDemo

# 后端 /bin/www中修改端口为4001
var port = normalizePort(process.env.PORT || '4001');

# 后端安装koa2-cors 配置跨域
npm i koa2-cors

# 后端 在app.js中配置
var cors = require('koa2-cors');
app.use(cors());

# 后端 在package.json中增加持续监听nodemon
"start": "nodemon bin/www",

# 启动前后端,打开前端页面
可以看到后端传来的数据:
![[外链图片转存失败,源站可能有防盗链机制,建议将图片保存下来直接上传(img-aQyXiG6W-1662341263132)(img/image-20220902194912650.png)]](https://img-blog.csdnimg.cn/a8f48681cadf4a52b187abf0a8ca5fc7.png)
本地测试完成。下面开始docker中部署。
前后端分离,所以分开做部署。
先说前端。
首先,容器里没有vim,要先建一个工具容器,把/etc/nginx里面的配置文件和/usr/share/nginx/html中的文件,都copy到主机中。修改配置和放文件的操作都在主机中进行。方便操作。
工具容器只需要创建一次,以后都-v映射即可。
# 建工具容器
[root@VM-4-7-centos /]# docker run -d --name util nginx
8219936c984af1de498fbc645a5b21004de06110546b0cc6bd8e9d9f1679e5ba
[root@VM-4-7-centos /] docker cp 82:/etc/nginx /etc/nginx
[root@VM-4-7-centos /] cd /usr/share
[root@VM-4-7-centos share] mkdir nginx
[root@VM-4-7-centos share] docker cp 82:/usr/share/nginx:/usr/share/nginx
# 删除工具容器
[root@VM-4-7-centos share]docker rm -f 82
开始在主机做配置:
先npm run build打包前端项目
[root@VM-4-7-centos /]# cd usr
[root@VM-4-7-centos usr]# mkdir dist
[root@VM-4-7-centos usr]# cd dist
# 这里先使用xftp把build文件夹放到dist目录下
[root@VM-4-7-centos dist]# touch react.conf
[root@VM-4-7-centos dist]# vim react.conf
[root@VM-4-7-centos dist]# cat react.conf
server {
    listen       80;
    listen  [::]:80;
    server_name  localhost;

    #access_log  /var/log/nginx/host.access.log  main;

    location / {
        root   /usr/share/nginx/html;
        index  index.html index.htm;
    }
	# 配置反向代理 /api是前端接口前缀
    location ^~ /api/ {
	proxy_pass http://101.35.149.103:4001/; # 后端映射端口是4001
    }

    #error_page  404              /404.html;

    # redirect server error pages to the static page /50x.html
    #
    error_page   500 502 503 504  /50x.html;
    location = /50x.html {
        root   /usr/share/nginx/html;
    }
}
# 创建容器
[root@VM-4-7-centos /]# docker run -itd --name react01 -p 80:80 -v /usr/dist/build:/usr/share/nginx/html -v /usr/dist/react.conf:/etc/nginx/conf.d/default.conf nginx
324cfd70505a4583c6c23b4a89119e2b0e103b0df6d52123bc2cf8073edcfc7e
再来看后端koa部分。
后端接口改为4001,可以安装npm i pm2。
[root@VM-4-7-centos dist]# mkdir server
[root@VM-4-7-centos server]# 这里使用xftp把koa项目中除了node_modules意外的文件都放进来
[root@VM-4-7-centos dist]# touch Dockerfile
[root@VM-4-7-centos dist]# vim Dockerfile
[root@VM-4-7-centos dist]# cat Dockerfile
FROM node:14

WORKDIR /home/koa

ADD server /home/koa

RUN npm install -registry=https://registry.npm.taobao.org

ENTRYPOINT ["npm", "start"]
[root@VM-4-7-centos dist]# docker build -t koa01:v1 .
[root@VM-4-7-centos dist]# docker run -it --name koa-test -p 4001:4001 koa01:v1 /bin/bash

> koa-demo@0.1.0 start /home/koa
> nodemon bin/www "/bin/bash"

[nodemon] 1.19.4
[nodemon] to restart at any time, enter `rs`
[nodemon] watching dir(s): *.*
[nodemon] watching extensions: js,mjs,json
[nodemon] starting `node bin/www /bin/bash`
  <-- GET /users
GET /users - 1ms
  --> GET /users 200 10ms 25b
  <-- GET /users
GET /users - 0ms
  --> GET /users 200 2ms 25b
不要忘了在云服务器的防火墙把4001端口放出来。
然后用浏览器打开http:ip查看,就可以看到如下效果:
![[外链图片转存失败,源站可能有防盗链机制,建议将图片保存下来直接上传(img-tlrvTwsz-1662341263132)(img/image-20220903042345375.png)]](https://img-blog.csdnimg.cn/ad3e1c20484748789132f67d9a353ebb.png)
部署成功。
使用alpine版本部署项目
前面的部署,仔细看镜像,可以发现个问题。原版镜像的体积非常非常的大,甚至1-2G。
体积过大,会使得构建时间较长,传输时间增加,占用空间较多。
此时,就要考虑,怎么缩小镜像体积。
这就需要用到镜像的alpine版本。它是一个缩小版的镜像。
以node镜像为例,直接使用node:14镜像,体积将近一个G,而使用alpine版本的镜像,体积只有100多M。
![[外链图片转存失败,源站可能有防盗链机制,建议将图片保存下来直接上传(img-piZECUdv-1662341263133)(img/image-20220903191001971.png)]](https://img-blog.csdnimg.cn/c3ff5a5060a64c178b7500f5cb7d338d.png)
需要注意一点,alpine版本使用的不是/bin/bash命令,而是sh命令。
案例:使用node的alpine版本部署koa项目
[root@VM-4-7-centos usr]# mkdir dist
[root@VM-4-7-centos dist]# touch Dockerfile
[root@VM-4-7-centos dist]# vim Dockerfile
[root@VM-4-7-centos dist]# cat Dockerfile
# 这里使用的是node:14-alpine版本
FROM node:14-alpine
WORKDIR /home/koa
ADD server /home/koa
RUN npm install -registry=https://registry.npm.taobao.org
ENTRYPOINT ["npm", "start"]
# 这里创建文件夹server 然后使用xftp把koa项目文件放到server文件夹里
[root@VM-4-7-centos dist]# mkdir server
# 使用Dockerfile构建镜像
[root@VM-4-7-centos dist]# docker build -t koa-test01:v1 .
Sending build context to Docker daemon 206.8kB
Step 1/5 : FROM node:14-alpine
14-alpine: Pulling from library/node
213ec9aee27d: Pull complete
7eb06cd79147: Pull complete
765a58e53190: Pull complete
beee7f5da459: Pull complete
Digest: sha256:4aff4ba0da347e51561587eba037a38db4eaa70e1a6c8334d66779fe963d5be7
Status: Downloaded newer image for node:14-alpine
---> d12c0eadaee1
Step 2/5 : WORKDIR /home/koa
---> Running in b056fde1cf1f
Removing intermediate container b056fde1cf1f
---> aabdc5575f57
Step 3/5 : ADD server /home/koa
---> 91e2828fa8ff
Step 4/5 : RUN npm install -registry=https://registry.npm.taobao.org
---> Running in fdb930575161
> core-js@2.6.12 postinstall /home/koa/node_modules/core-js
> node -e "try{require('./postinstall')}catch(e){}"
Thank you for using core-js ( https://github.com/zloirock/core-js ) for polyfilling JavaScript standard library!
The project needs your help! Please consider supporting of core-js on Open Collective or Patreon:
> https://opencollective.com/core-js
> https://www.patreon.com/zloirock
Also, the author of core-js ( https://github.com/zloirock ) is looking for a good job -)
> nodemon@1.19.4 postinstall /home/koa/node_modules/nodemon
> node bin/postinstall || exit 0
Love nodemon? You can now support the project via the open collective:
> https://opencollective.com/nodemon/donate
npm WARN optional SKIPPING OPTIONAL DEPENDENCY: fsevents@2.3.2 (node_modules/pm2/node_modules/fsevents):
npm WARN notsup SKIPPING OPTIONAL DEPENDENCY: Unsupported platform for fsevents@2.3.2: wanted {"os":"darwin","arch":"any"} (current: {"os":"linux","arch":"x64"})
npm WARN optional SKIPPING OPTIONAL DEPENDENCY: fsevents@1.2.13 (node_modules/fsevents):
npm WARN notsup SKIPPING OPTIONAL DEPENDENCY: Unsupported platform for fsevents@1.2.13: wanted {"os":"darwin","arch":"any"} (current: {"os":"linux","arch":"x64"})
added 554 packages from 360 contributors in 13.979s
22 packages are looking for funding
run `npm fund` for details
Removing intermediate container fdb930575161
---> acb86590f656
Step 5/5 : ENTRYPOINT ["npm", "start"]
---> Running in 00b0eeabd10e
Removing intermediate container 00b0eeabd10e
---> 2a6dd7981e87
Successfully built 2a6dd7981e87
Successfully tagged koa-test01:v1
# 查看镜像
[root@VM-4-7-centos dist]# docker images
REPOSITORY TAG IMAGE ID CREATED SIZE
koa-test01 v1 2a6dd7981e87 5 seconds ago 173MB
# 把koa项目的4001端口映射到主机的3001端口 最后指令使用的是sh
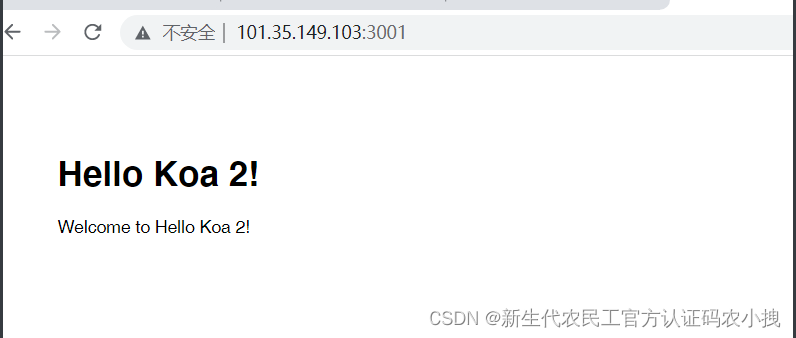
[root@VM-4-7-centos dist]# docker run -itd --name koa03 -p 3001:4001 koa-test01:v1 sh
9955840f3ff0dc88d750ad1008cff4876c9ada9593385a94bfe638a4eb6e28e7
[root@VM-4-7-centos dist]# docker ps
CONTAINER ID IMAGE COMMAND CREATED STATUS PORTS NAMES
9955840f3ff0 koa-test01:v1 "npm start sh" About a minute ago Up About a minute 0.0.0.0:3001->4001/tcp, :::3001->4001/tcp koa03
云服务器防火墙把端口3001放开,然后浏览器打开http://服务器ip:3001,可以看到:
该文档已有6万字,记录了docker compose前的内容。后续内容放在(二)中。


 498
498


 被折叠的 条评论
为什么被折叠?
被折叠的 条评论
为什么被折叠?
 到【灌水乐园】发言


