


基于MyBatis框架的JDBC基础实验//作业记录
- 实验1
- 实验2
- 实验3
项目源码见底部
实验1
实验目的:
- 理解JDBC的基本原理,掌握JDBC操作的一般过程。
- 掌握JDBC驱动的下载方法。
- 结合MySQL数据库编写基础的CRUD操作。
实验内容:
1. 在MySQL中创建名称为db_mybatis数据库。
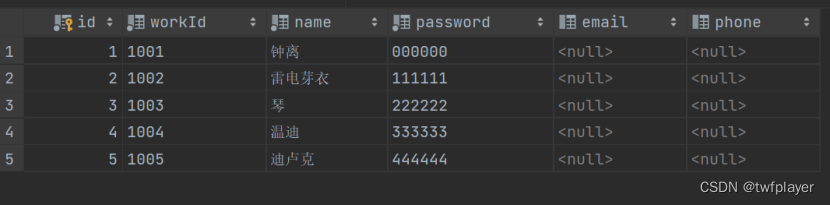
2. 在db_mybatis中创建名称为t_user的数据表,数据表中的字段信息如下图。
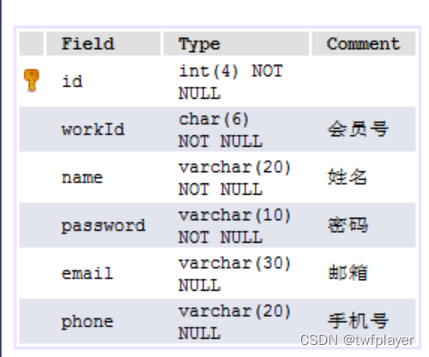
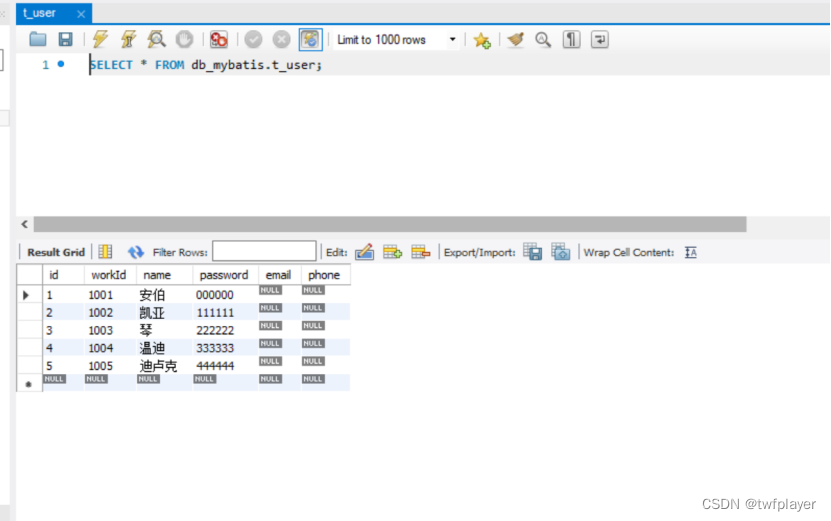
并输入若干条用户信息。
链接: MySql下载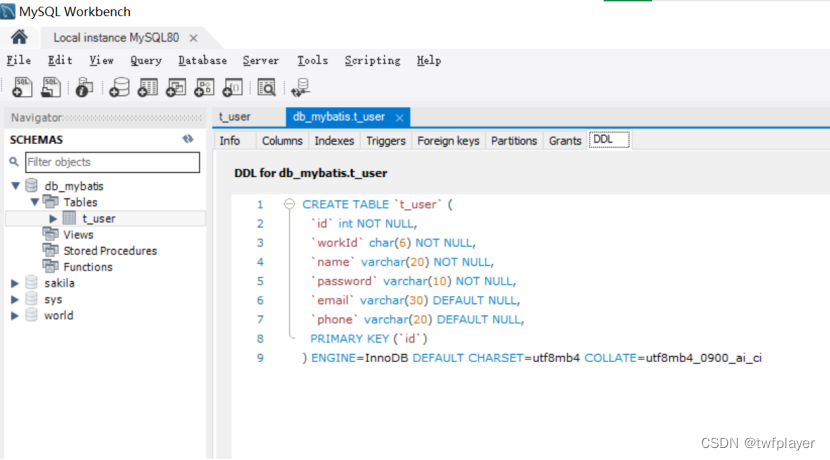
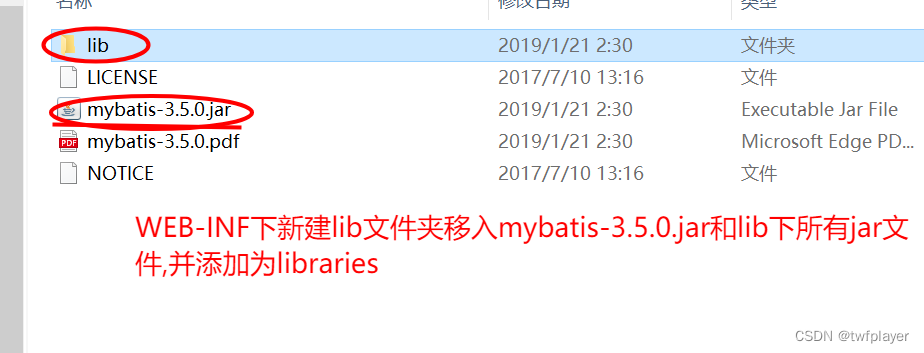
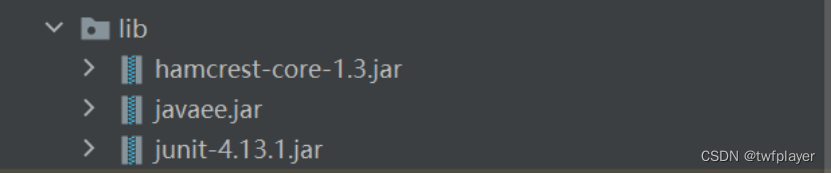
3. 创建动态Web工程,导入JDBC驱动相关的jar包。

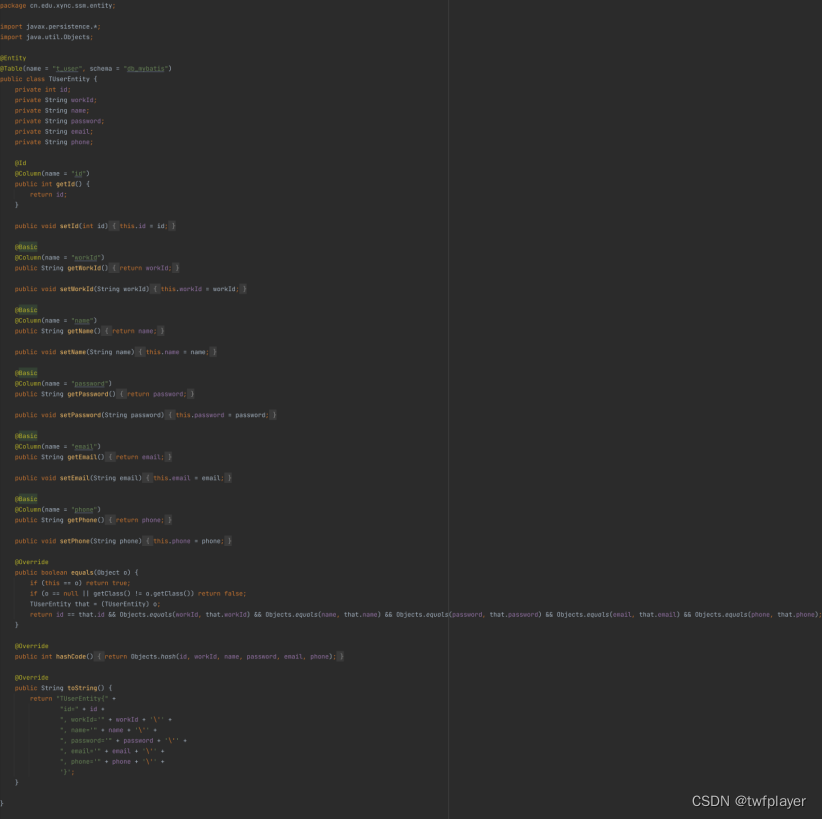
4. 创建实体类与t_user表对应,实体类名称自定。
//使用了JPA自动生成与sql数据源db_mybatis.t_user对应的实体类TUserEntity
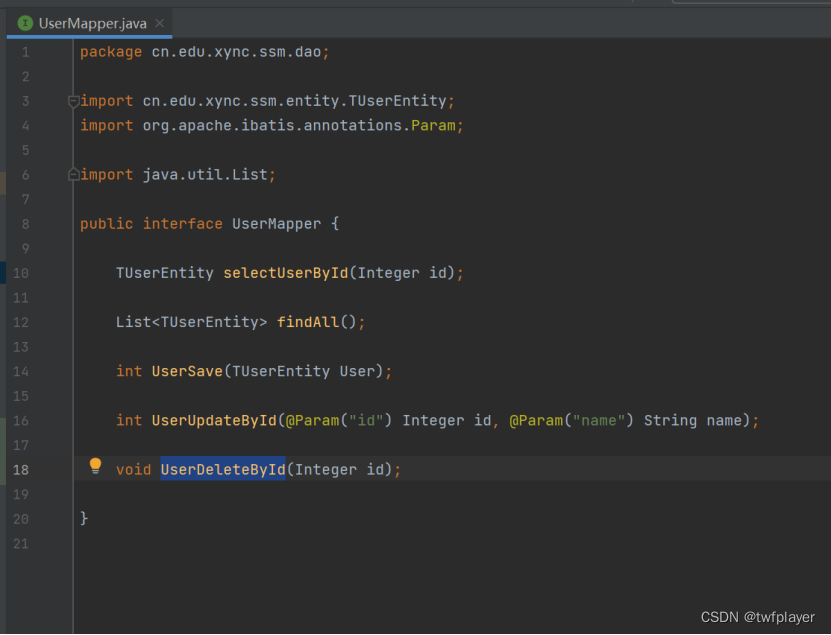
5. 创建实体类对应的DAO接口,接口中包含4个方法,分别是save()、update()、findAll()、deleteById()。
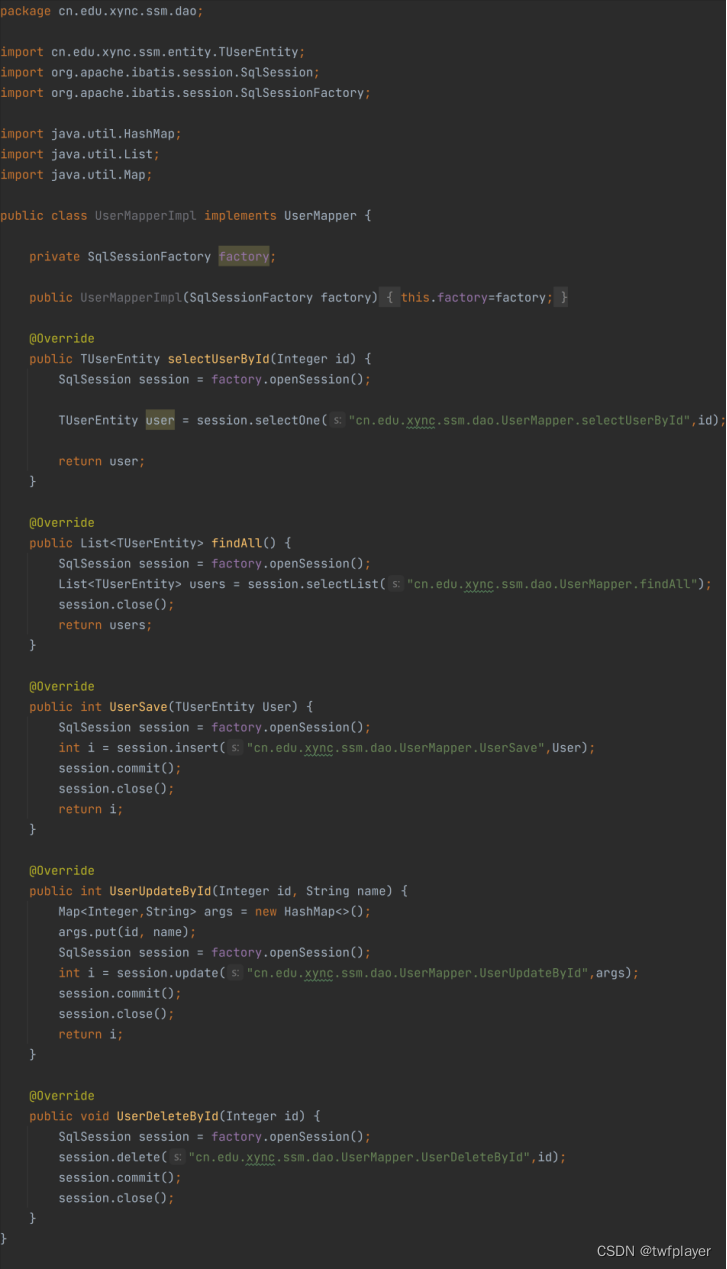
6. 创建DAO接口的实现类,完成接口中定义的4个方法。
//使用代码截图插件Code screenshots截图
7. 对DAO进行测试,验证4个方法是否执行通过。
数据库图示:
测试selectUserById()
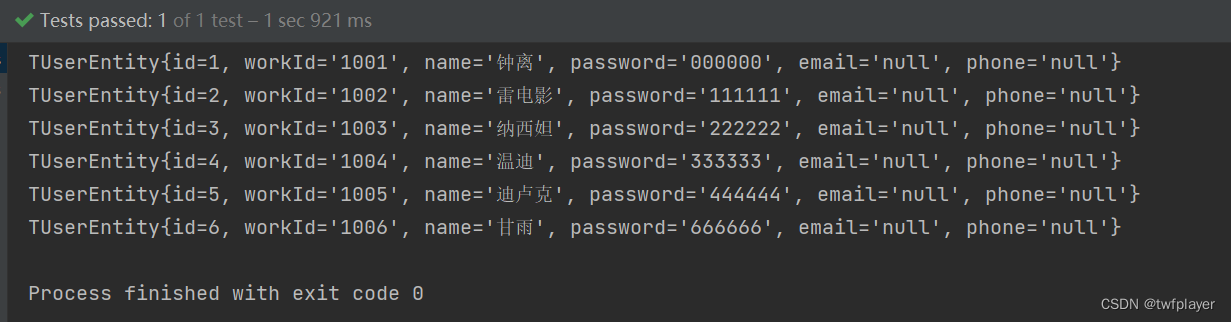
测试findAll()
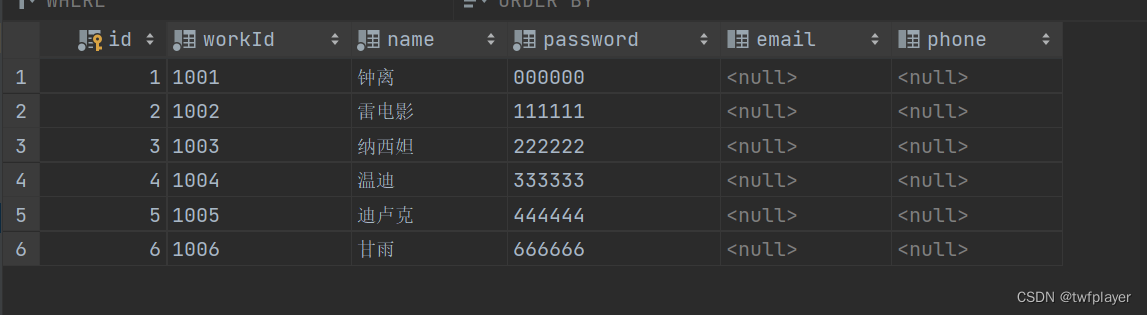
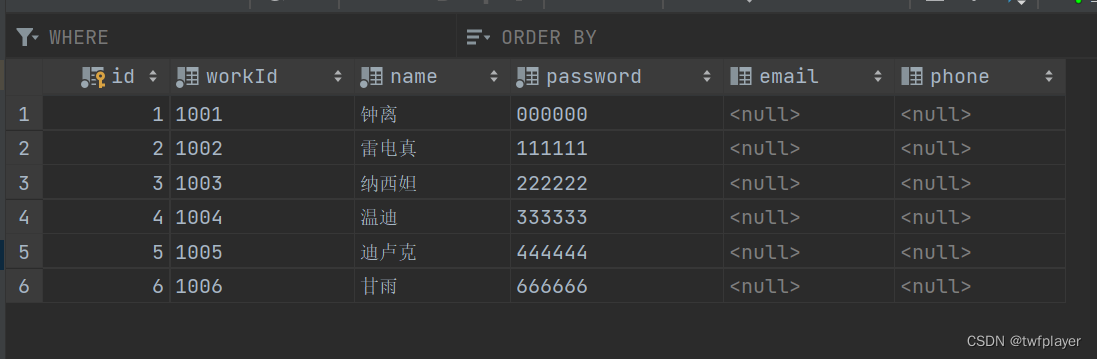
测试UserSave()
添加id=6,wordId="1006,"name=”甘雨”,password=”666666”

数据库刷新结果:
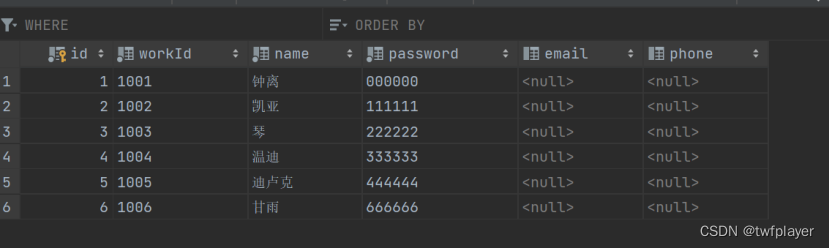
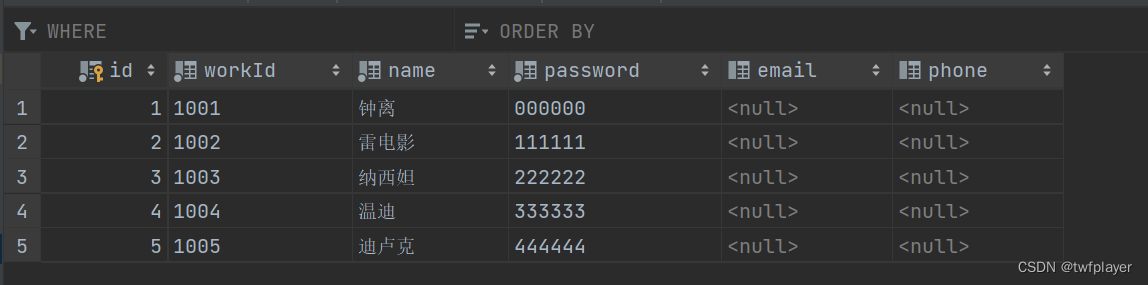
测试UserUpdateById():
更改id=2的name=”雷电芽衣”
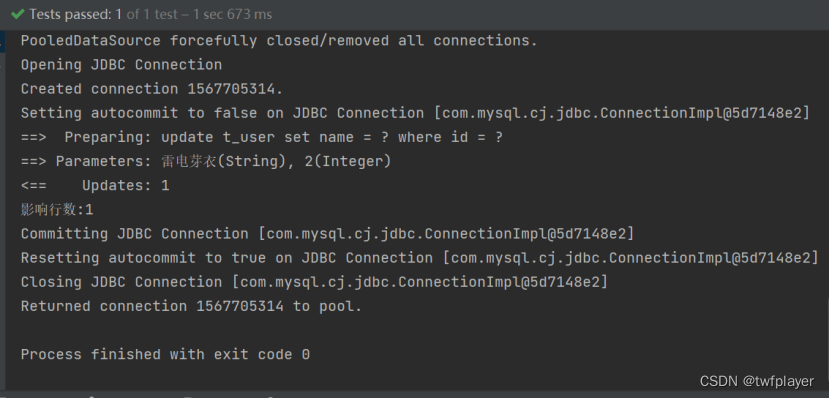
数据库刷新结果:
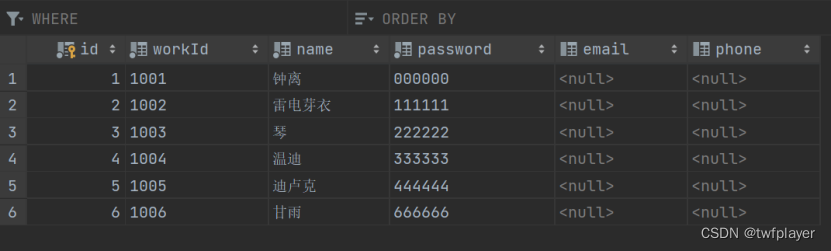
测试UserDeleteById():
删除id=6的数据
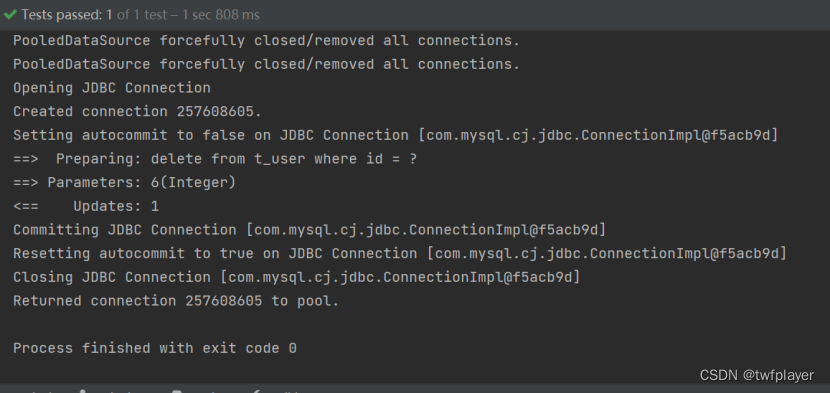
数据库刷新结果:
项目架构如图:
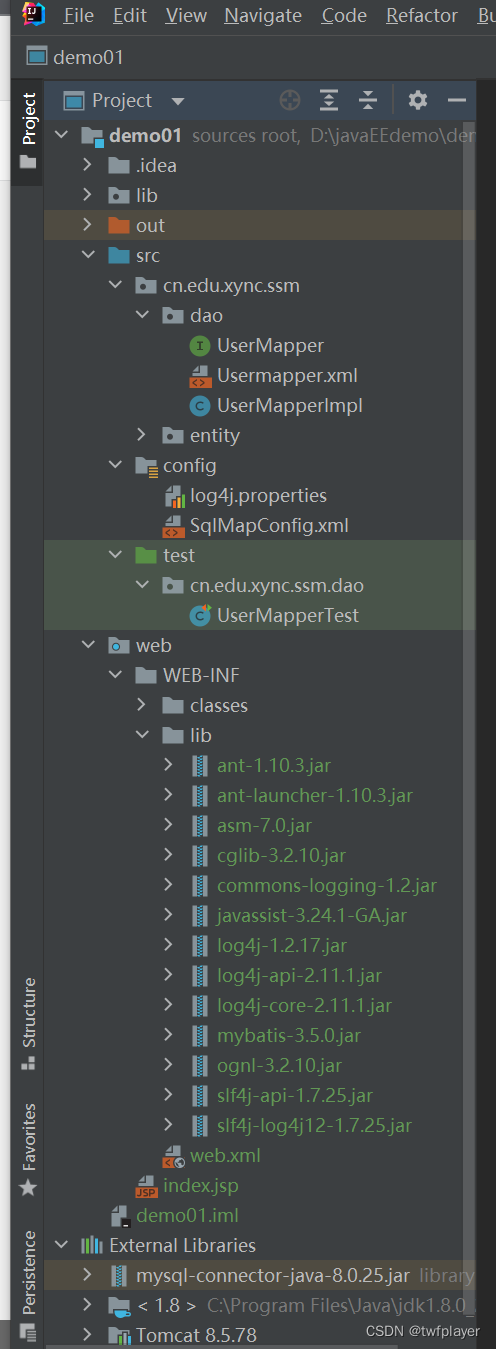
基础测试结束,项目运转良好
实验2
实验目的:
1.掌握PreparedStatement对象的使用。
2.理解数据库连接池基本概念,掌握C3P0数据库的基本使用。
3.掌握JDBC事务操作的基本方法。
实验内容:
1.继续使用实验1中创建的db_mybatis数据库和t_user表。
2.将t_user实体类对应的DAO实现类中的所有方法实现逻辑改用PreparedStatement对象实现。
package cn.edu.xync.ssm.dao;

import cn.edu.xync.ssm.entity.TUserEntity;
import com.sun.org.apache.bcel.internal.generic.ACONST_NULL;
import org.apache.ibatis.session.SqlSession;
import org.apache.ibatis.session.SqlSessionFactory;
import util.ConnectionFactory;

import java.sql.Connection;
import java.sql.PreparedStatement;
import java.sql.ResultSet;
import java.sql.SQLException;
import java.util.*;

public class UserMapperImpl implements UserMapper {

//    private SqlSessionFactory factory;

//    public UserMapperImpl(SqlSessionFactory factory){
//        this.factory=factory;
//    }

    @Override
    public TUserEntity selectUserById(Integer id) {
//        根据factory获取SqlSession对象
//        SqlSession session = factory.openSession();
//        调用SqlSession中方法实现保存

        //链接数据库
        ConnectionFactory cf = new ConnectionFactory();
        Connection con = cf.getConnection();
        try {
            PreparedStatement pre = con.prepareStatement("select * from t_user where id = ?");
            pre.setInt(1,id);
            ResultSet res = pre.executeQuery();
            if (res.next()){
                TUserEntity user = new TUserEntity();
                user.setId(res.getInt("id"));
                user.setWorkId(res.getString("workId"));
                user.setName(res.getString("name"));
                user.setPassword(res.getString("password"));
                user.setEmail(res.getString("email"));
                user.setPhone(res.getString("phone"));
                cf.close(con,pre,res);
                return user;
            }
        } catch (SQLException e) {
            e.printStackTrace();
        }
        return null;
//        TUserEntity user = session.selectOne("cn.edu.xync.ssm.dao.UserMapper.selectUserById",id);//配置信息及参数
        释放资源
//        session.close();
//        return user;
    }

    @Override
    public ArrayList<TUserEntity> findAll() {
//        SqlSession session = factory.openSession();
//        //查询列表
//        List<TUserEntity> users = session.selectList("cn.edu.xync.ssm.dao.UserMapper.findAll");
//        session.close();
        ConnectionFactory cf = new ConnectionFactory();
        Connection con = cf.getConnection();
        ArrayList<TUserEntity> users;
        try {
            PreparedStatement pre = con.prepareStatement("select * from t_user");
            ResultSet res = pre.executeQuery();
            if (!(res ==null)) {
                users = new ArrayList<>();
                while (res.next()) {
                    TUserEntity user = new TUserEntity();
                    user.setId(res.getInt("id"));
                    user.setWorkId(res.getString("workId"));
                    user.setName(res.getString("name"));
                    user.setPassword(res.getString("password"));
                    user.setEmail(res.getString("email"));
                    user.setPhone(res.getString("phone"));
                    users.add(user);
                }
                cf.close(con, pre, res);
                return users;
            }
        } catch (SQLException e) {
            e.printStackTrace();
        }
        return null;
    }
//
    @Override
    public int UserSave(TUserEntity User) {
//        SqlSession session = factory.openSession();
//        int i = session.insert("cn.edu.xync.ssm.dao.UserMapper.UserSave",User);
        事务提交
//        session.commit();
//        session.close();
        ConnectionFactory cf = new ConnectionFactory();
        Connection con = cf.getConnection();
        int i=0;
        try {
            //改为手动提交
            con.setAutoCommit(false);
            PreparedStatement pre = con.prepareStatement("insert into t_user(id,workId,name,password) values (?,?,?,?)");
            pre.setInt(1,User.getId());
            pre.setString(2,User.getWorkId());
            pre.setString(3,User.getName());
            pre.setString(4, User.getPassword());
            i = pre.executeUpdate();//语句影响的行数
            Scanner s = new Scanner(System.in);
            System.out.println("是否提交事务?(1)");
            int b = s.nextInt();
            if (b==1){
//                提交事务
                con.commit();
            }else {
//                回滚
                con.rollback();
                return 0;
            }
            s.close();
            cf.close(con,pre);
        } catch (SQLException e) {
            e.printStackTrace();
        }


        return i;
    }

    @Override
    public int UserUpdateById(Integer id, String name) {
        使用Map集合传参
        XML中parameterType="map"
//        Map<Integer,String> args = new HashMap<>();
//        args.put(id, name);
//        SqlSession session = factory.openSession();
//        int i = session.update("cn.edu.xync.ssm.dao.UserMapper.UserUpdateById",args);
//        session.commit();
//        session.close();
        ConnectionFactory cf = new ConnectionFactory();
        Connection con = cf.getConnection();
        int i = 0;
        try {
            PreparedStatement pre = con.prepareStatement("update t_user set name = ? where id = ?");
            pre.setString(1,name);
            pre.setInt(2,id);
            i = pre.executeUpdate();
            cf.close(con,pre);

        } catch (SQLException e) {
            e.printStackTrace();
        }
        return i;
    }

    @Override
    public int UserDeleteById(Integer id) {
//        SqlSession session = factory.openSession();
//        session.delete("cn.edu.xync.ssm.dao.UserMapper.UserDeleteById",id);
//        session.commit();
//        session.close();
        ConnectionFactory cf = new ConnectionFactory();
        Connection con = cf.getConnection();
        int i = 0;
        try {
            PreparedStatement pre = con.prepareStatement("delete from t_user where id = ?");
            pre.setInt(1,id);
            i = pre.executeUpdate();
            cf.close(con,pre);

        } catch (SQLException e) {
            e.printStackTrace();
        }
        return i;
    }
}
3.创建C3P0数据库连接池,将数据库连接对象的获取改为从数据库连接池获取。
c3p0-config.xml
<?xml version="1.0" encoding="utf-8"?>
<c3p0-config>
<!--  <default-config>-->
  <named-config name = "mysql">
    <property name="driverClass">com.mysql.cj.jdbc.Driver</property>
    <property name="jdbcUrl">jdbc:mysql://localhost:3306/db_mybatis</property>
    <property name="user">????</property>
    <property name="password">*********</property>

<!-- 数据库连接池一次性向数据库要多少个连接对象 -->
    <property name="acquireIncrement">20</property>
<!--    初始化连接数-->
    <property name="initialPoolSize">10</property>
<!--    最小连接数-->
    <property name="minPoolSize">5</property>
<!--    最大连接数-->
    <property name="maxPoolSize">30</property>
<!--  </default-config>-->
  </named-config>

</c3p0-config>
Util.ConnectionFactory
package util;

import com.mchange.v2.c3p0.ComboPooledDataSource;

import java.sql.Connection;
import java.sql.PreparedStatement;
import java.sql.ResultSet;
import java.sql.SQLException;

public class ConnectionFactory {
    //读c3p0,获取数据源
    private static ComboPooledDataSource dataSource = new ComboPooledDataSource("mysql");

    //获取连接
    public static Connection getConnection(){
        try {
            return dataSource.getConnection();
        } catch (SQLException e) {
            e.printStackTrace();
        }
        return null;
    }

    //资源关闭
    public static void close(Connection connection, PreparedStatement preparedStatement, ResultSet resultSet){
        try {
            if (resultSet !=null) resultSet.close();
            if (preparedStatement !=null) preparedStatement.close();
            if (connection !=null) connection.close();
        } catch (SQLException e) {
            e.printStackTrace();
        }
    }

    //资源关闭
    public static void close(Connection connection, PreparedStatement preparedStatement){
        try {
            if (preparedStatement !=null) preparedStatement.close();
            if (connection !=null) connection.close();
        } catch (SQLException e) {
            e.printStackTrace();
        }
    }
}
4.将DAO实现类中的save()开启手动控制事务进行实现。
    @Override
    public int UserSave(TUserEntity User) {
//        SqlSession session = factory.openSession();
//        int i = session.insert("cn.edu.xync.ssm.dao.UserMapper.UserSave",User);
        事务提交
//        session.commit();
//        session.close();
        ConnectionFactory cf = new ConnectionFactory();
        Connection con = cf.getConnection();
        int i=0;
        try {
            //改为手动提交
            con.setAutoCommit(false);
            PreparedStatement pre = con.prepareStatement("insert into t_user(id,workId,name,password) values (?,?,?,?)");
            pre.setInt(1,User.getId());
            pre.setString(2,User.getWorkId());
            pre.setString(3,User.getName());
            pre.setString(4, User.getPassword());
            i = pre.executeUpdate();//语句影响的行数
            Scanner s = new Scanner(System.in);
            System.out.println("是否提交事务?(1)");
            int b = s.nextInt();
            if (b==1){
//                提交事务
                con.commit();
            }else {
//                回滚
                con.rollback();
                return 0;
            }
            s.close();
            cf.close(con,pre);
        } catch (SQLException e) {
            e.printStackTrace();
        }
        return i;
    }
5.通过JUnit单体测试对DAO中的所有方法逐一进行测试,观察测试情况。
test代码
package cn.edu.xync.ssm.dao;
import cn.edu.xync.ssm.entity.TUserEntity;
import org.apache.ibatis.io.Resources;
import org.apache.ibatis.session.SqlSession;
import org.apache.ibatis.session.SqlSessionFactory;
import org.apache.ibatis.session.SqlSessionFactoryBuilder;
import org.junit.After;
import org.junit.Before;
import org.junit.Test;
import java.io.IOException;
import java.io.InputStream;
import java.util.ArrayList;
import java.util.List;
public class UserMapperTest {
// private SqlSessionFactory sqlSessionFactory;
// private SqlSession sqlSession;
// @Before
// public void setUp() throws IOException{
读取全局配置文件
// String path = "SqlMapConfig.xml";
通过Resources获取配置文件流
// InputStream resourceAsStream = Resources.getResourceAsStream(path);
创建会话工厂
// sqlSessionFactory = new SqlSessionFactoryBuilder().build(resourceAsStream);
// }
@Test
public void selectUserById() {
创建会话
// sqlSession = sqlSessionFactory.openSession();
代理模式创建代理类
// UserMapper mapper = sqlSession.getMapper(UserMapper.class);
// TUserEntity User = mapper.selectUserById(1);
UserMapperImpl Impl = new UserMapperImpl();
TUserEntity User = Impl.selectUserById(1);
System.out.println(User);
}
//
@Test
public void findAll(){
// sqlSession = sqlSessionFactory.openSession();
原始调用
// List<TUserEntity> users = sqlSession.selectList("cn.edu.xync.ssm.dao.UserMapper.findAll");
UserMapperImpl Impl = new UserMapperImpl();
ArrayList<TUserEntity> users = Impl.findAll();
for (TUserEntity s:users){
System.out.println(s);
}
}
@Test
public void UserSave(){
// sqlSession = sqlSessionFactory.openSession();
// UserMapper mapper = sqlSession.getMapper(UserMapper.class);
UserMapperImpl Impl = new UserMapperImpl();
TUserEntity user = new TUserEntity();
user.setId(6);
user.setName("甘雨");
user.setWorkId("1006");
user.setPassword("666666");
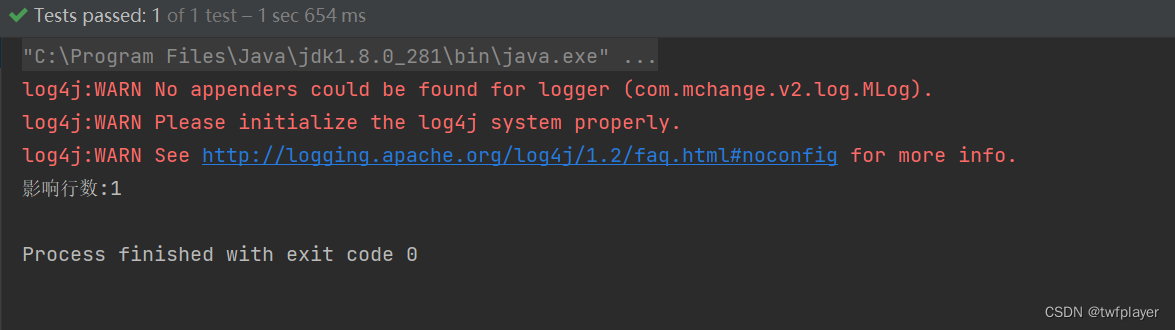
int i = Impl.UserSave(user);
// int i = mapper.UserSave(user);
System.out.println("影响行数:"+i);
mybatis中默认手动提交
// sqlSession.commit();
}
@Test
public void UserUpdateById(){
// sqlSession = sqlSessionFactory.openSession();
// UserMapper mapper = sqlSession.getMapper(UserMapper.class);
// int i = mapper.UserUpdateById(2,"雷电芽衣");
// System.out.println("影响行数:"+i);
// sqlSession.commit();
UserMapperImpl Impl = new UserMapperImpl();
int i = Impl.UserUpdateById(2,"雷电影");
System.out.println("影响行数:"+i);
}
@Test
public void UserDeleteById(){
// sqlSession = sqlSessionFactory.openSession();
// UserMapper mapper = sqlSession.getMapper(UserMapper.class);
// mapper.UserDeleteById(6);
// sqlSession.commit();
UserMapperImpl Impl = new UserMapperImpl();
int i = Impl.UserDeleteById(6);
System.out.println("影响行数:"+i);
}
// @After
// public void setDown(){
//
// sqlSession.close();
// }
}
数据库图示
1. selectUserById()

2. findAll()
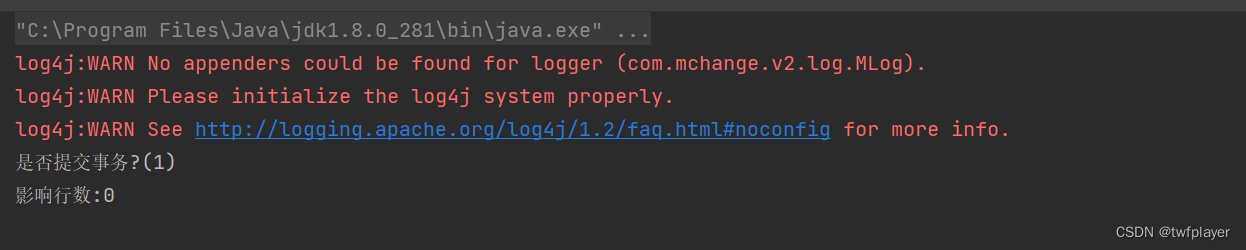
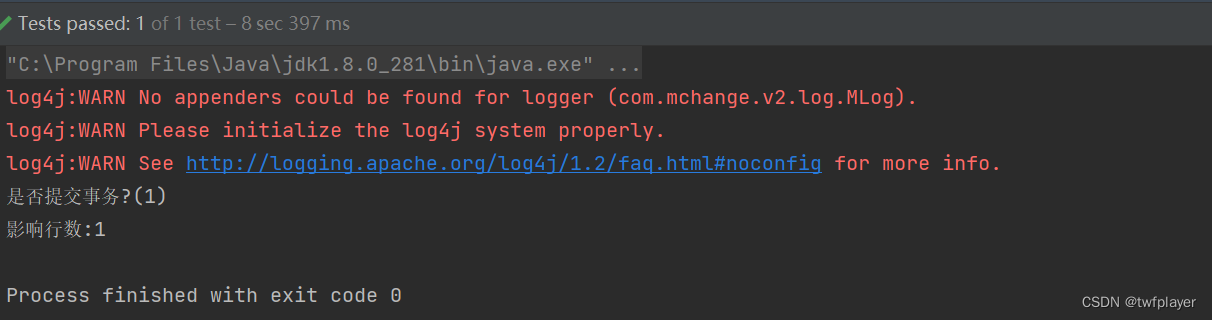
3. UserSave()
不提交事务->数据库未改变
提交事务
数据库如图:
4. UserUpdateById()
name = “雷电真”
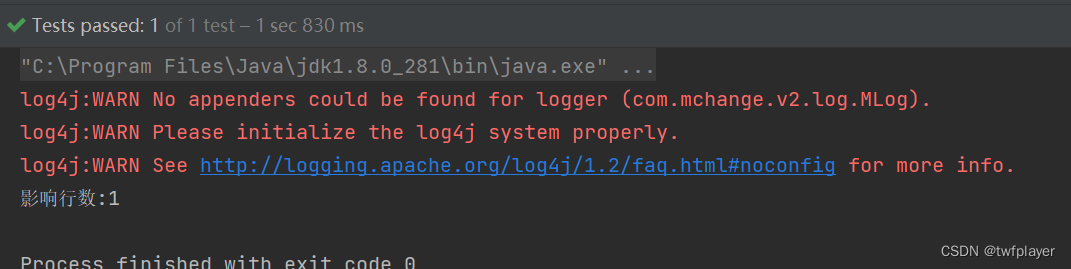
数据库如图:
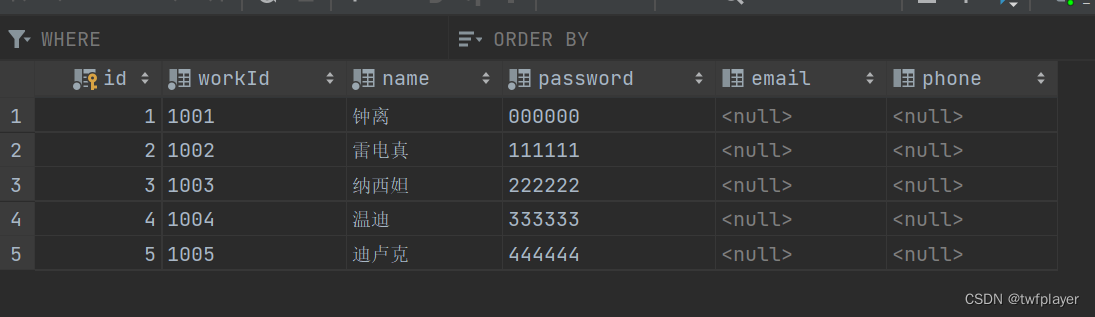
5. UserDeleteById()
数据库如图:
测试完成
实验3
实验目的:
1.掌握在MySQL中定义存储过程的基本方法,包括带参数存储过程、带参数和有单个返回值的存储过程。
2.掌握在SQLYog中调用存储过程的方法。
3.掌握CallableStatement对象的使用,掌握在JDBC中调用存储过程的方法。
实验内容:
1.继续使用实验1中创建的db_mybatis数据库和t_user表。
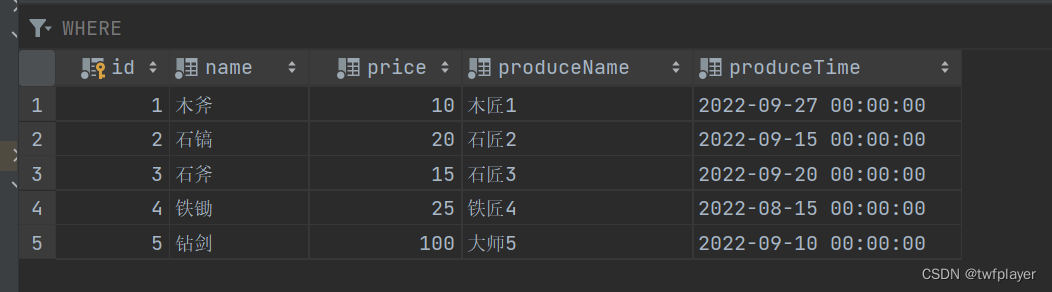
2.在db_mybatis中建立两张表,分别是t_goods和t_user_goods,两个表的信息如下:
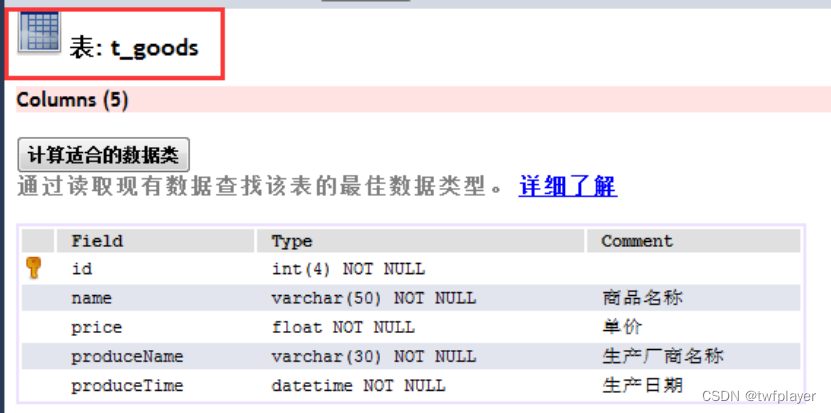
CREATE TABLE `t_goods` (
  `id` int NOT NULL,
  `name` varchar(50) NOT NULL COMMENT '商品名称',
  `price` float NOT NULL COMMENT '单价',
  `produceName` varchar(30) NOT NULL COMMENT '生产商名称',
  `produceTime` datetime NOT NULL COMMENT '生产日期',
  PRIMARY KEY (`id`)
) ENGINE=InnoDB DEFAULT CHARSET=utf8mb4 COLLATE=utf8mb4_0900_ai_ci;
自行添加的数据:
自行添加的数据:

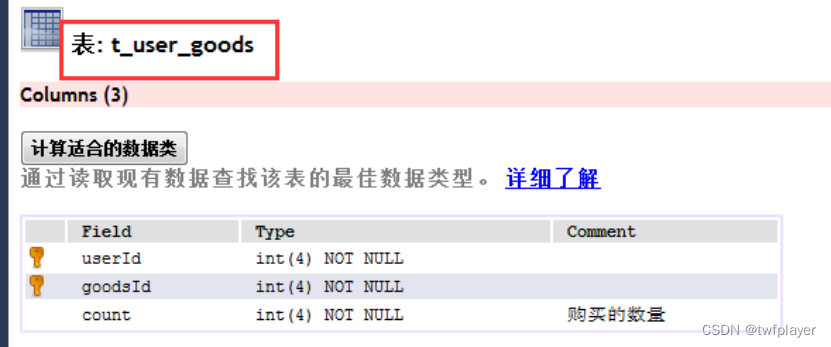
CREATE TABLE `t_user_goods` (
  `userId` int NOT NULL,
  `goodsId` int NOT NULL,
  `count` int NOT NULL COMMENT '购买的数量',
  PRIMARY KEY (`userId`,`goodsId`)
) ENGINE=InnoDB DEFAULT CHARSET=utf8mb4 COLLATE=utf8mb4_0900_ai_ci;
3.复习存储过程
4.创建一个不带参数的存储过程,名称为p_goods,该存储过程的基本作用是:检索t_goods表中的所有数据。
DELIMITER $$
CREATE DEFINER=`root`@`localhost` PROCEDURE `p_goods`()
BEGIN
	select * from t_goods;
END$$
DELIMITER ;
5.创建一个带参数和一个返回值的存储过程,该存储过程的作用是:检索某个用户所购买的商品的总数量。
DELIMITER $$
CREATE DEFINER=`root`@`localhost` PROCEDURE `p_usergoods_1`(in userId1 int ,out goodsCount int)
BEGIN
	select sum(count) into goodsCount from t_user_goods where userId = userId1;
END$$
DELIMITER ;
6.在UserDAO接口和实现类中实现上述方法,并在单体测试中进行测试,观察测试结果。
查询所有的商品:
package cn.edu.xync.ssm.dao;

import cn.edu.xync.ssm.entity.TGoodsEntity;

import java.util.ArrayList;

public interface selectGoods {
    ArrayList<TGoodsEntity> getAllGoods();
}
package cn.edu.xync.ssm.dao;

import cn.edu.xync.ssm.entity.TGoodsEntity;
import util.ConnectionFactory;
import java.sql.*;
import java.util.ArrayList;

public class selectGoodsImpl implements selectGoods {
    @Override
    public ArrayList<TGoodsEntity> getAllGoods(){
        ArrayList<TGoodsEntity> goods = new ArrayList<>();
        ConnectionFactory cf = new ConnectionFactory();
        Connection conn = cf.getConnection();
        try {
            CallableStatement stmt = conn.prepareCall("{call p_goods()}");
            ResultSet res = stmt.executeQuery();
            if (res != null) {
                while (res.next()) {
                    TGoodsEntity good = new TGoodsEntity();
                    good.setId(res.getInt("id"));
                    good.setName(res.getString("name"));
                    good.setPrice(res.getFloat("price"));
                    good.setProduceName(res.getString("produceName"));
                    good.setProduceTime(res.getTimestamp("produceTime"));
                    goods.add(good);
                }
                conn.close();
                return goods;
            }
        } catch (SQLException e) {
            e.printStackTrace();
        }
        return null;
    }
}
通过userId查询用户购买的所有商品的总数量
package cn.edu.xync.ssm.dao;

public interface getGoodsCountByUserId{
    int getCountByUserId(int userId);
}
package cn.edu.xync.ssm.dao;

import util.ConnectionFactory;

import java.sql.CallableStatement;
import java.sql.Connection;
import java.sql.SQLException;
import java.sql.Types;

public class getGoodsCountByUserIdImpl implements getGoodsCountByUserId{
    @Override
    public int getCountByUserId(int userId) {
        ConnectionFactory cf = new ConnectionFactory();
        Connection conn = cf.getConnection();
        String sql = "{call p_usergoods_1(?,?)}";
        int goodsCount =0;
        try {
            CallableStatement stmt = conn.prepareCall(sql);
            stmt.setInt(1,userId);
            stmt.registerOutParameter(2, Types.INTEGER);
            stmt.execute();
            goodsCount = (Integer)stmt.getObject(2);
            conn.close();
        } catch (SQLException e) {
            e.printStackTrace();
        }
        return goodsCount;
    }
}
test类单体测试:
获取所有商品:
package cn.edu.xync.ssm.dao;

import cn.edu.xync.ssm.entity.TGoodsEntity;
import org.junit.Test;
import java.util.ArrayList;
public class selectGoodsImplTest {

    @Test
    public void getAllGoods(){
        selectGoods Impl = new selectGoodsImpl();
        ArrayList<TGoodsEntity> goods = Impl.getAllGoods();
        for (TGoodsEntity g:goods){
            System.out.println(g);
        }
    }
}

通过userId查询用户购买的所有商品的总数量
package cn.edu.xync.ssm.dao;
import com.sun.istack.internal.Pool;
import org.junit.Test;
import static org.junit.Assert.*;
public class getGoodsCountByUserIdTest {
@Test
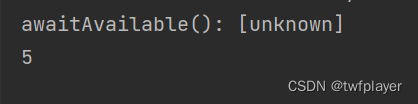
public void getCountByUserId() {
getGoodsCountByUserId Impl = new getGoodsCountByUserIdImpl();
int goodCount = Impl.getCountByUserId(1);
System.out.println(goodCount);
}
}
用户1购买的商品总量:


 408
408


 被折叠的 条评论
为什么被折叠?
被折叠的 条评论
为什么被折叠?
 到【灌水乐园】发言


