


AngularJS 通过被称为 指令 的新属性来扩展 HTML。
AngularJS 通过内置的指令来为应用添加功能。
AngularJS 允许你自定义指令。
指令的作用:实现语义化标签。
使用AngularJS的directive(指令)机制,我们可以实现这样的东西:
<body ng-app="myApp">

<directive></directive>
<script src="js/angular.js"></script>
<script>
var app = angular.module("myApp", []);
app.directive("directive", function() {
    return {
        restrict:'E',
        template : "<h1>自定义指令!</h1>",
        replace:true
    };
});
</script>

</body>
结果是:
html标签结构如下:
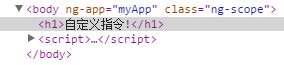
可以看到浏览器可以解析自定义的directive指定,将自定义指令替换成template中的内容。这就是replace:true的作用,至于restrict:’E’这个配置项的含义,请看下表:
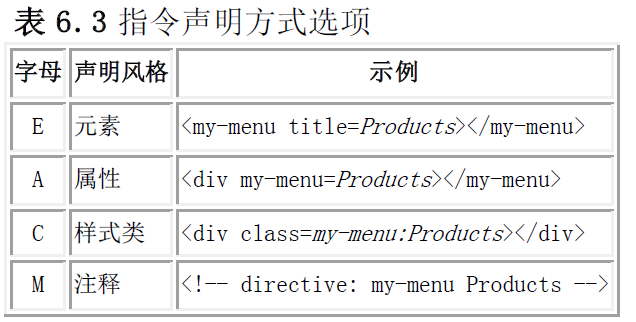
你可以限制你的指令只能通过特定的方式来调用。通过添加 restrict 属性,并设置只值为 “E”, 来设置指令只能通过元素名的方式来调用。
restrict 默认值为 EA, 即可以通过元素名和属性名来调用指令。
transclude(变换):
<body ng-app="myApp">
<directive><br>
    <span>这是内嵌元素</span>
</directive>
<script src="js/angular.js"></script>
<script>
var app = angular.module("myApp", []);
app.directive("directive", function() {
    return {
        restrict : "E",
        template : "<h1>自定义指令!<span ng-transclude></span></h1>",
        transclude:true
    };
});
</script>
</body>
结果是:
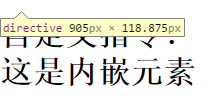
html标签结构变成了这样:
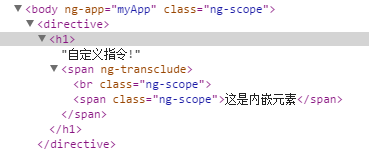
代码里面多了个transclude:true,于是内部出现了子标签。
transclude就是用来处理自定义标签内出现子标签的情况。
关于compile和link
指令的本质其实是一个替换过程。这个过程分2个阶段,也就是compile(编译)和link(连接)。
简而言之,compile阶段进行标签解析和变换,link阶段进行数据绑定等操作。这里面更加细节的处理过程请参见《AngularJS》这本书中的解析。
举个栗子
var expanderModule=angular.module('expanderModule', [])
expanderModule.directive('expander', function() {
    return {
        restrict : 'EA',
        replace : true,
        transclude : true,
        scope : {
            title : '=expanderTitle'
        },
        template : '<div>'
                 + '<div class="title" ng-click="toggle()">{{title}}</div>'
                 + '<div class="body" ng-show="showMe" ng-transclude></div>'
                 + '</div>',
        link : function(scope, element, attrs) {
            scope.showMe = false;
            scope.toggle = function toggle() {
                scope.showMe = !scope.showMe;
            }
        }
    }
});
expanderModule.controller('SomeController',function($scope) {
    $scope.title = '点击展开';
    $scope.text = '这里是内部的内容。';
});

HTML代码:

<html ng-app='expanderModule'>
    <head>
        <meta http-equiv="content-type" content="text/html; charset=utf-8" />
        <script src="../angular-1.0.3/angular.min.js"></script>
        <link rel="stylesheet" type="text/css" href="ExpanderSimple.css"/>
    </head>
    <body>
        <div ng-controller='SomeController'>
            <expander class='expander' expander-title='title'>
                {{text}}
            </expander>
        </div>
    </body>
    <script src="ExpanderSimple.js"></script>
    <script src="js/angular.js"></script>
</html>

CSS代码:

.expander {
    border: 1px solid black;
    width: 250px;
}

.expander>.title {
    background-color: orange;
    color: white;
    padding: .1em .3em;
    cursor: pointer;
}

.expander>.body {
    padding: .1em .3em;
}
效果如下:

项目开发中经常会用到link进行事件的晚绑定。
综合复杂的栗子
JS代码:

var expModule=angular.module('expanderModule',[])
expModule.directive('accordion', function() {
    return {
        restrict : 'EA',
        replace : true,
        transclude : true,
        template : '<div ng-transclude></div>',
        controller : function() {
            var expanders = [];
            this.gotOpened = function(selectedExpander) {
                angular.forEach(expanders, function(expander) {
                    if (selectedExpander != expander) {
                        expander.showMe = false;
                    }
                });
            }
            this.addExpander = function(expander) {
                expanders.push(expander);
            }
        }
    }
});

expModule.directive('expander', function() {
    return {
        restrict : 'EA',
        replace : true,
        transclude : true,
        require : '^?accordion',
        scope : {
            title : '=expanderTitle'
        },
        template : '<div>'
                   + '<div class="title" ng-click="toggle()">{{title}}</div>'
                   + '<div class="body" ng-show="showMe" ng-transclude></div>'
                   + '</div>',
        link : function(scope, element, attrs, accordionController) {
            scope.showMe = false;
            accordionController.addExpander(scope);
            scope.toggle = function toggle() {
                scope.showMe = !scope.showMe;
                accordionController.gotOpened(scope);
            }
        }
    }
});

expModule.controller("SomeController",function($scope) {
    $scope.expanders = [{
        title : 'Click me to expand',
        text : 'Hi there folks, I am the content that was hidden but is now shown.'
    }, {
        title : 'Click this',
        text : 'I am even better text than you have seen previously'
    }, {
        title : 'Test',
        text : 'test'
    }];
});

HTML代码:

<html ng-app="expanderModule">
    <head>
        <meta http-equiv="content-type" content="text/html; charset=utf-8" />
        <script src="../angular-1.0.3/angular.min.js"></script>
        <link rel="stylesheet" type="text/css" href="Accordion.css"/>
    </head>
    <body ng-controller='SomeController' >
        <accordion>
            <expander class='expander' ng-repeat='expander in expanders' expander-title='expander.title'>
                {{expander.text}}
            </expander>
        </accordion>
    </body>
    <script src="Accordion.js"></script>
</html>

CSS代码:

.expander {
    border: 1px solid black;
    width: 250px;
}

.expander>.title {
    background-color: black;
    color: white;
    padding: .1em .3em;
    cursor: pointer;
}

.expander>.body {
    padding: .1em .3em;
}
重难点是子Expander里面访问外层Accordion的scope中的数据。


 790
790


 被折叠的 条评论
为什么被折叠?
被折叠的 条评论
为什么被折叠?
 到【灌水乐园】发言


