


文章目录
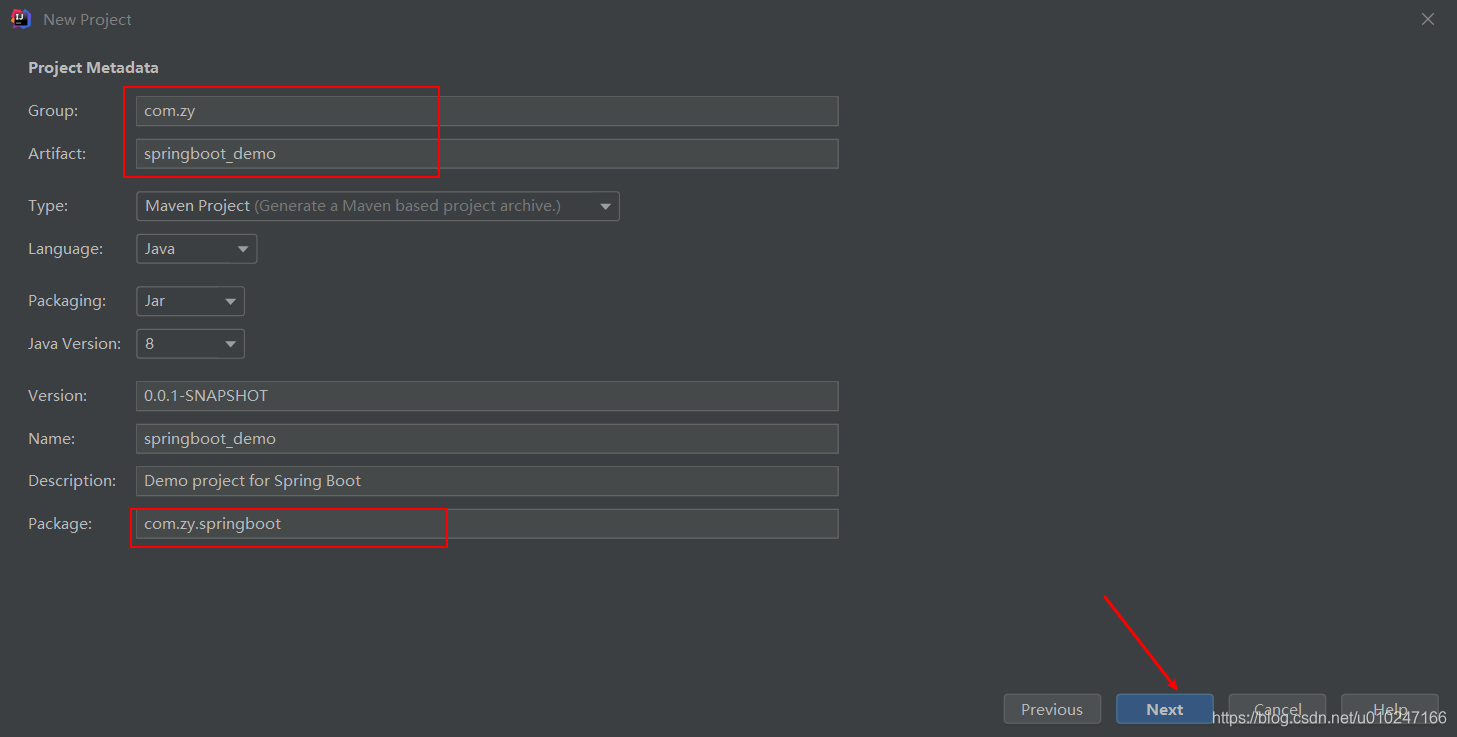
1.项目创建
1.1 在线生成springboot模板
1.利用在线生成springboot项目
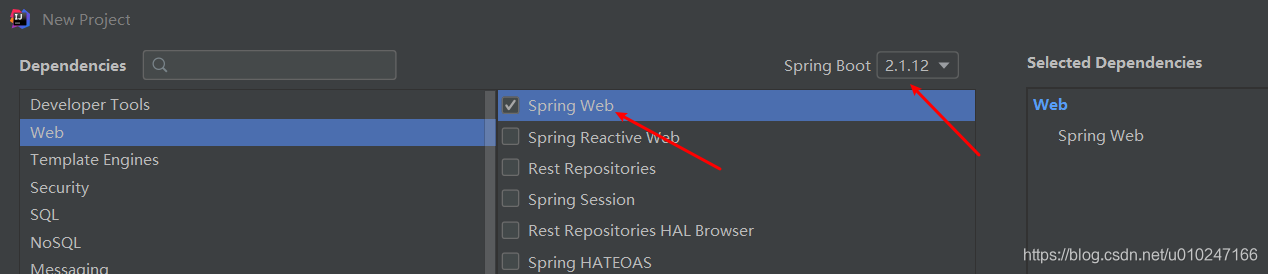
2.选择需要的组件

1.2 依赖
<?xml version="1.0" encoding="UTF-8"?>
<project xmlns="http://maven.apache.org/POM/4.0.0" xmlns:xsi="http://www.w3.org/2001/XMLSchema-instance"
         xsi:schemaLocation="http://maven.apache.org/POM/4.0.0 https://maven.apache.org/xsd/maven-4.0.0.xsd">
    <modelVersion>4.0.0</modelVersion>
    <parent>
        <groupId>org.springframework.boot</groupId>
        <artifactId>spring-boot-starter-parent</artifactId>
        <version>2.1.12.RELEASE</version>
        <relativePath/> <!-- lookup parent from repository -->
    </parent>
    <groupId>com.zy</groupId>
    <artifactId>springboot_demo</artifactId>
    <version>0.0.1-SNAPSHOT</version>
    <name>springboot_demo</name>
    <description>Demo project for Spring Boot</description>

    <properties>
        <java.version>1.8</java.version>
    </properties>

    <dependencies>
        <dependency>
            <groupId>org.springframework.boot</groupId>
            <artifactId>spring-boot-starter-web</artifactId>
        </dependency>
        <dependency>
            <groupId>org.mybatis.spring.boot</groupId>
            <artifactId>mybatis-spring-boot-starter</artifactId>
            <version>2.1.1</version>
        </dependency>

        <dependency>
            <groupId>mysql</groupId>
            <artifactId>mysql-connector-java</artifactId>
            <scope>runtime</scope>
        </dependency>
        <!--手动添加数据源-->
        <dependency>
            <groupId>com.alibaba</groupId>
            <artifactId>druid</artifactId>
            <version>1.1.8</version>
        </dependency>

        <dependency>
            <groupId>org.springframework.boot</groupId>
            <artifactId>spring-boot-starter-test</artifactId>
            <scope>test</scope>
        </dependency>
    </dependencies>

    <build>
        <plugins>
            <plugin>
                <groupId>org.springframework.boot</groupId>
                <artifactId>spring-boot-maven-plugin</artifactId>
            </plugin>
        </plugins>
    </build>

</project>
1.3 配置数据源
application.yml
spring:
  datasource:
    username: root
    password: 123456
    driver-class-name: com.mysql.jdbc.Driver
    url: jdbc:mysql://192.168.1.100:12345/mydb1
    type: com.alibaba.druid.pool.DruidDataSource

    #连接池的配置信息
    initialSize: 5
    minIdle: 5
    maxActive: 20
    maxWait: 60000
    timeBetweenEvictionRunsMillis: 60000
    minEvictableIdleTimeMillis: 300000
    validationQuery: SELECT 1 FROM DUAL
    testWhileIdle: true
    testOnBorrow: false
    testOnReturn: false
    poolPreparedStatements: true
    maxPoolPreparedStatementPerConnectionSize: 20
    filters: stat,wall
    connectionProperties: druid.stat.mergeSql:true;druid.stat.slowSqlMillis:5000
DruidConfig 数据源配置类
@Configuration
public class DruidConfig {
    @ConfigurationProperties(prefix = "spring.datasource")
    @Bean
    public DataSource druid(){
        return  new DruidDataSource();
    }
    //配置Druid的监控
    //1、配置一个管理后台的Servlet
    @Bean
    public ServletRegistrationBean statViewServlet(){
        ServletRegistrationBean bean = new ServletRegistrationBean(new StatViewServlet(), "/druid/*");
        Map<String,String> initParams = new HashMap<>();
        initParams.put("loginUsername","admin");
        initParams.put("loginPassword","123456");
        initParams.put("allow","");//默认就是允许所有访问
        initParams.put("deny","192.168.15.21");
        bean.setInitParameters(initParams);
        return bean;
    }
    //2、配置一个web监控的filter
    @Bean
    public FilterRegistrationBean webStatFilter(){
        FilterRegistrationBean bean = new FilterRegistrationBean();
        bean.setFilter(new WebStatFilter());

        Map<String,String> initParams = new HashMap<>();
        initParams.put("exclusions","*.js,*.css,/druid/*");
        bean.setInitParameters(initParams);
        bean.setUrlPatterns(Arrays.asList("/*"));
        return  bean;
    }
}
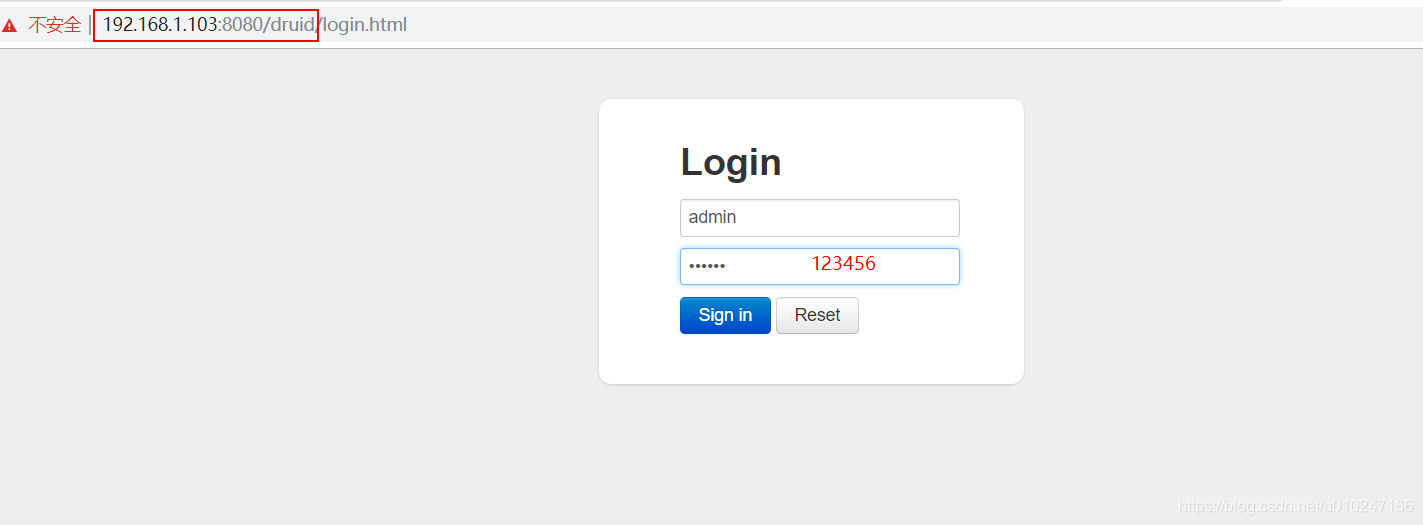
启动即可访问
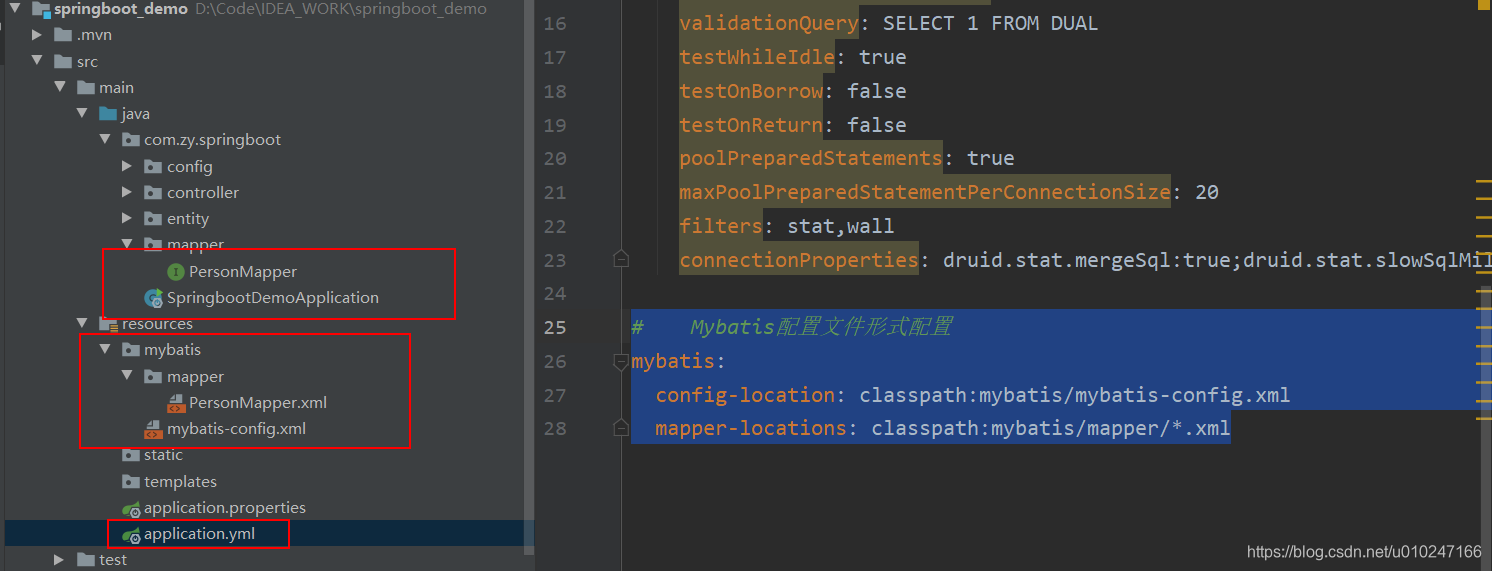
1.4 项目结构

2.注解配置
2.1 增加相关类
1.请求处理类
@RestController
public class PersonController {

    @Autowired
    PersonMapper personMapper;

    @GetMapping("/person/{id}")
    public Person getPerson(@PathVariable("id") Integer id){
        return personMapper.getPersonById(id);
    }

}
2.实体类
public class Person {

    private Integer pId;
    private String pName;
    private Integer pAge;

    public Person() {
    }
    ....
}
3.数据库操作类
@Mapper
public interface PersonMapper {
    @Select("select * from person where pid = #{id}")
    public Person getPersonById(Integer id);

}
2.2 代码结构
1.添加代码

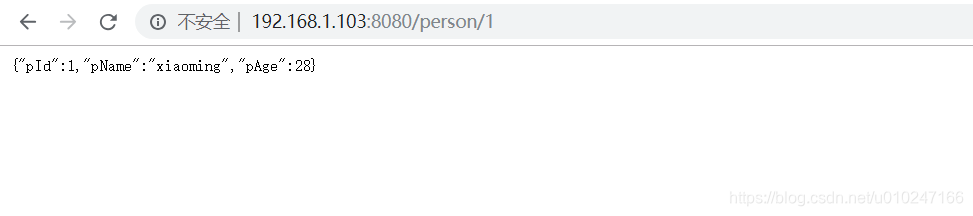
2.启动访问

3.XML配置
3.1 修改代码
1.去掉相关注解
public interface PersonMapper {
    public Person getPersonById(Integer id);

}
2.mybatis全局配置文件
<?xml version="1.0" encoding="UTF-8" ?>
<!DOCTYPE configuration
        PUBLIC "-//mybatis.org//DTD Config 3.0//EN"
        "http://mybatis.org/dtd/mybatis-3-config.dtd">
<configuration>
    <!--驼峰命名-->
    <settings>
        <setting name="mapUnderscoreToCamelCase" value="true"/>
    </settings>
</configuration>
3.mybatis映射文件
<?xml version="1.0" encoding="UTF-8" ?>
<!DOCTYPE mapper
        PUBLIC "-//mybatis.org//DTD Mapper 3.0//EN"
        "http://mybatis.org/dtd/mybatis-3-mapper.dtd">
<mapper namespace="com.zy.springboot.mapper.PersonMapper">
    <select id="getPersonById" resultType="com.zy.springboot.entity.Person">
            select * from person where pid = #{id}
    </select>
</mapper>
4.springboot配置文件增加mybatis配置
#    Mybatis配置文件形式配置
mybatis:
  config-location: classpath:mybatis/mybatis-config.xml
  mapper-locations: classpath:mybatis/mapper/*.xml
5.启动项增加扫描注解
@MapperScan(value = "com.zy.springboot.mapper") //必须要增加,不然后续会报容器找不到实例错误
@SpringBootApplication
public class SpringbootDemoApplication {

    public static void main(String[] args) {
        SpringApplication.run(SpringbootDemoApplication.class, args);
    }
}
3.2 代码目录


 1303
1303


 被折叠的 条评论
为什么被折叠?
被折叠的 条评论
为什么被折叠?
 到【灌水乐园】发言


