


一、UITabBarController
微信底部那一排 微信、通讯录、发现、朋友圈,就是UITabBarController
它上面的控制的四个视图控制器是平级的,一般情况下将self.window.rootViewController设置为UITabBarController
然后在UITabBarController上面添加UINavigationController
UINavigationController上面添加一般的UIViewController
UITabBarController-->UINavigationController-->UIViewController

二、属性和方法
UITabBar的高度是49,最多显示5个UITabBarItem,超过5个会增加一个更多按钮。
    //创建一个ViewController加到NavigationController上
    //再将NavigationController加到TabBarController上

    RootViewController *rootVC = [[RootViewController alloc]init];
    UINavigationController *navigationC = [[UINavigationController alloc]initWithRootViewController:rootVC];

    //创建UITabBarController
    UITabBarController *myTabBar = [UITabBarController new];

    //将导航控制器放入tabBar
    myTabBar.viewControllers = @[navigationC];

    //设置底部的item标题,这个字很小
    navigationC.tabBarItem.title = @"根";

    //设置图片,这里图片大小不能自适应,最好把图片裁好 40*40,照片还有设置渲染效果,背景色会影响照片显示
    navigationC.tabBarItem.image = [[UIImage imageNamed:@"b3.gif"]
    imageWithRenderingMode:UIImageRenderingModeAlwaysOriginal];;

    //设置tabBar的字体颜色
    myTabBar.tabBar.tintColor = [UIColor colorWithRed:109/255.0 green:211/255.0 blue:206/255.0 alpha:1];

    //设置tabbar背景颜色
    myTabBar.tabBar.barTintColor =  [UIColor colorWithRed:200/255.0 green:233/255.0 blue:160/255.0 alpha:1];

    //是否半透明
    myTabBar.tabBar.translucent = NO;

    //将tabBarController设置为根视图控制器
    self.window.rootViewController = myTabBar;

    //把SecondView添加
    SecondViewController *secondVC = [[SecondViewController alloc]init];
    UINavigationController *secondNavC = [[UINavigationController alloc]initWithRootViewController:secondVC];

    //设置标题
    secondNavC.tabBarItem.title = @"second";

    //设置item角标,右上角的红色数字,未读消息数
    secondNavC.tabBarItem.badgeValue = @"10";


    //去掉(默认)
<pre name="code" class="objc">    secondNavC.tabBarItem.badgeValue = nil;
//当前被选中的页面/按钮 myTabBar.selectedIndex = 0; //将第三个界面加入 tabbar ThirdViewController *thirdVC = [[ThirdViewController alloc]init]; UINavigationController *thirdNavC = [[UINavigationController alloc]initWithRootViewController:thirdVC]; thirdNavC.tabBarItem.title = @"third"; //将所有视图加入 tabbar myTabBar.viewControllers = @[navigationC,secondNavC,thirdNavC]; //设置默认页 myTabBar.selectedIndex = 1; //设置为根视图控制器 RootTabBarViewController *rootTabBarVC = [[RootTabBarViewController alloc]init]; self.window.rootViewController = rootTabBarVC UITabBarController自带逻辑,点击下面的分区bar会自动跳转到相应的NavigationController下的ViewController
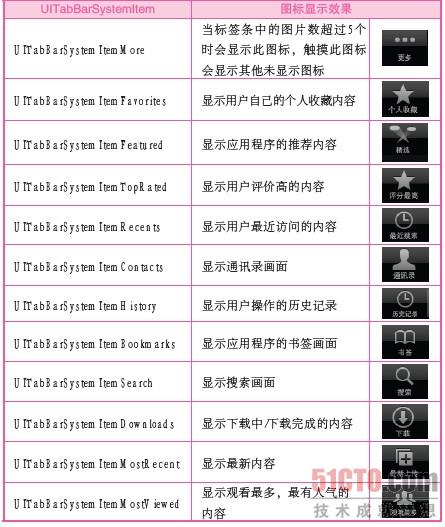
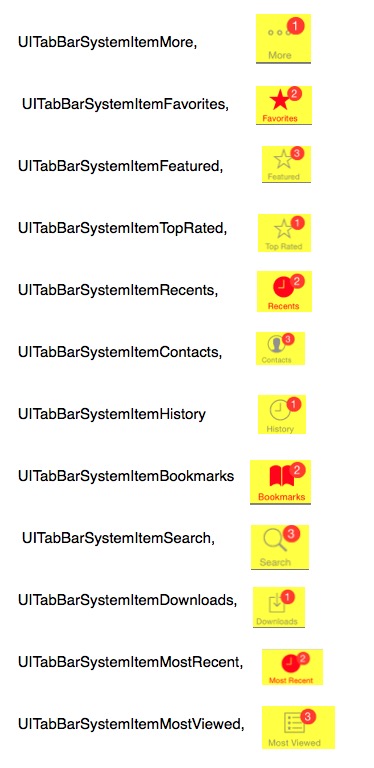
这是UITabBarItem的样式和对应的枚举值
三、自定义UITabBarViewController
系统的TabBar有时不能满足我们的需求,我们可以更改它的外观。
自定义一个UIView的视图,贴在UITabBar的View上
将UITabBarController的tabbar属性的hidden设置为YES,就可以隐藏原有的tabbar显示了。
先写自定义的tabBarUIview,思路是做一个底部横条视图,给上面加上自定义的button,给button加上方法,该方法来改变系统的UITabBarController的selectedIndex值。
这里涉及一个页面间传值的问题,可以使用block或者协议方法
customTabBarView.h
#import <UIKit/UIKit.h>

//block传值

typedef void(^passValue)(NSInteger tag);

@protocol CustomTabBarDelegate <NSObject>

//把btn的tag传出去的方法
-(void)selectedIndexWithTag:(NSInteger)tag;

@end

@interface CustomTabBarView : UIView

@property (nonatomic,copy)passValue passValueTag;
@property (nonatomic,assign)id <CustomTabBarDelegate>delegate;

@end
customTabBarView.m
//
// CustomTabBarView.m
// Class_09_UITabBarController02
//
// Created by wanghao on 16/1/22.
// Copyright © 2016年 wanghao. All rights reserved.
//
#import "CustomTabBarView.h"
@implementation CustomTabBarView
//创建按钮
-(void)createSubViews
{
for (int i = 0; i < 2; i ++) {
//初始化按钮
UIButton *btn = [UIButton buttonWithType:UIButtonTypeCustom];
[btn setTitle:[@(i) stringValue] forState:UIControlStateNormal];
//点击时的样式
[btn setTitle:@"选" forState:UIControlStateHighlighted];
[btn setTitle:@"33" forState:UIControlStateFocused];
[btn setImage:[[UIImage imageNamed:@"b33"]imageWithRenderingMode:UIImageRenderingModeAlwaysOriginal] forState:UIControlStateSelected];
[btn setTitle:@"" forState:UIControlStateSelected];
//选中状态
// btn.selected = NO;
//通过tag值来确定我们点击的是哪一个按钮,来切换到对应的视图控制器
[btn setTag:1000+i];
//设置点击方法
[btn addTarget:self action:@selector(customSelectedIndex:) forControlEvents:UIControlEventTouchDown];
//设置frame
btn.frame = CGRectMake((414)/2*i, 0, 414/2, 50);
[self addSubview:btn];
}
}
//按钮的回调方法
-(void)customSelectedIndex:(UIButton*)sender
{
for (int i = 0; i< 2; i++) {
UIButton *btn = (UIButton*)[self viewWithTag:1000+i];
btn.selected = NO;
}
sender.selected = YES;
// 判断在指定的代理类中是否实现了该协议方法
// 确保执行时无此方法时不崩溃
if([self.delegate respondsToSelector:@selector(selectedIndexWithTag:)])
{
[self.delegate selectedIndexWithTag:(sender.tag - 1000)];
}
else
{
NSLog(@"selectIndexWithTag该方法没有实现");
}
//调用block方法
//self.passValueTag(sender.tag - 1000);
}
//初始化自定义的UIView
-(instancetype)initWithFrame:(CGRect)frame
{
//设置frame
frame = CGRectMake(0, 736-50, 414, 50);
self = [super initWithFrame:frame];
if (self) {
[self createSubViews];
self.backgroundColor = [UIColor colorWithRed:109/255.0 green:211/255.0 blue:206/255.0 alpha:1];
}
return self;
}
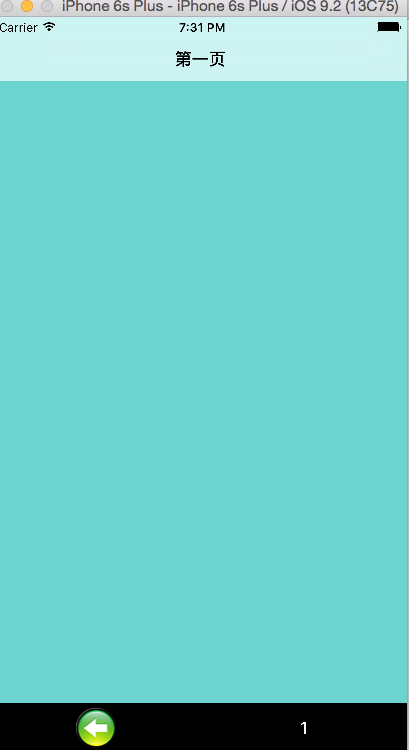
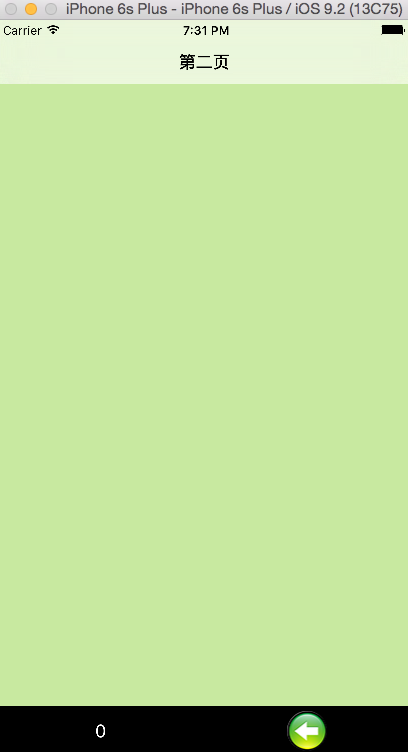
@end在RootTabBController.m中添加自定义的视图,并隐藏原本的TabBar
这里的secondViewController和FirstViewController就是跳转后显示的VC
//

#import "RootTabBarController.h"
#import "FirstViewController.h"
#import "SecondViewController.h"
#import "CustomTabBarView.h"

//导入协议
@interface RootTabBarController ()<CustomTabBarDelegate>

@end

@implementation RootTabBarController

-(void)viewDidLoad
{
    [super viewDidLoad];

    //创建视图控制器
    FirstViewController *firstVC = [[FirstViewController alloc]init];
    UINavigationController *firstNavC = [[UINavigationController alloc]initWithRootViewController:firstVC];
    firstVC.view.backgroundColor = [UIColor colorWithRed:109/255.0 green:211/255.0 blue:206/255.0 alpha:1];

    SecondViewController *secondVC = [[SecondViewController alloc]init];
    UINavigationController *secondNavC = [[UINavigationController alloc]initWithRootViewController:secondVC];
    secondVC.view.backgroundColor = [UIColor colorWithRed:200/255.0 green:233/255.0 blue:160/255.0 alpha:1];

    //给tabBarController添加子控制器
    [self addChildViewController:firstNavC];
    [self addChildViewController:secondNavC];

    //使用自定义的tabbar先把系统的隐藏掉
    self.tabBar.hidden = YES;

    //初始化自定义的tabbar
    CustomTabBarView *customView = [[CustomTabBarView alloc]initWithFrame:CGRectZero];
    [self.view addSubview:customView];

    //指定代理
    customView.delegate = self;

    //设置block内容
    customView.passValueTag = ^(NSInteger tag)
    {
        self.selectedIndex = tag;
    };

}

//实现代理方法
- (void)selectedIndexWithTag:(NSInteger)tag
{
    self.selectedIndex = tag;
}


@end
做的比较丑和简单


 2622
2622

 被折叠的 条评论
为什么被折叠?
被折叠的 条评论
为什么被折叠?
 到【灌水乐园】发言


