


(一)前言
(1.1)什么是单点登录?
单点登录(Single Sign On,简称SSO),它的用途在于,不管多么复杂的应用群,只要在用户权限范围内,那么就可以做到,用户只需要登录一次就可以访问权限范围内的所有应用子系统。对于用户而言,访问多个应用子系统只需要登录一次,同样在需要注销的时候也只需要注销一次。
(1.2)OAuth2.0第三方授权登录与单点登录的区别
①各应用间的关系:OAuth2.0授权服务端和第三方客户端不属于一个互相信任的应用群(通常都不是同一个公司提供的服务),第三方客户端的用户不属于OAuth2.0授权服务端的官方用户;而单点登录的服务端和接入的客户端都在一个互相信任的应用群(通常是同一个公司提供的服务),各个子系统的用户属于单点登录服务端的官方用户。
②从资源角度来看。OAuth2.0授权主要是让用户自行决定——用户在OAuth2.0服务提供商的个人资源是否允许第三方应用访问,而具体能获取何种信息由服务提供商决定;而单点登录实现的做法有很多,可以将用户资源放在一个单点登录服务器中,做统一认证,由于单点登录服务器属于同一公司,因此可定制。
(二)授权登录原理
(2.1)第三方应用授权流程

(2.2)Spring Social在Spring Security过滤器链中的位置情况

(2.3)Spring Social 对授权流程的具体实现图

(2.4)向第三方应用发起授权登录的请求后

(三)代码实现
(3.1)QQ第三方登录
采取的是由里向外的开发顺序。
(1)请求服务提供商的具体实现
请求服务提供商(基于OAuth2.0授权码模式):申请授权码 ==》 携授权码申请AccessToken ==》 用AccessToken请求openId ==》 用openId和appId请求QQ用户信息
(1.1)获取openId 和 用户信息:
(1.1.1)用户信息类
//参照QQ返回的用户信息封装的用户信息类
public class QQUserInfo {
    //返回码
    private int ret;
    //如果ret<0,会有相应的错误信息提示,返回数据全部用UTF-8编码。
    private String msg;
    //唯一标识
    private String openId;
    private int is_lost;
    //省(直辖市)
    private String province;
    //市(直辖市区)
    private String city;
    //出生年月
    private String year;
    private String constellation;
    //用户在QQ空间的昵称。
    private String nickname;
    //大小为30×30像素的QQ空间头像URL。
    private String figureurl;
    //大小为50×50像素的QQ空间头像URL。
    private String figureurl_1;
    //大小为100×100像素的QQ空间头像URL。
    private String figureurl_2;
    //大小为40×40像素的QQ头像URL。
    private String figureurl_qq_1;
    //大小为100×100像素的QQ头像URL。需要注意,不是所有的用户都拥有QQ的100×100的头像,但40×40像素则是一定会有。
    private String figureurl_qq_2;
    private String figureurl_qq;
    private String figureurl_type;
    //性别。 如果获取不到则默认返回”男”
    private String gender;
    private int gender_type;
    //标识用户是否为黄钻用户(0:不是;1:是)。
    private String is_yellow_vip;
    //标识用户是否为黄钻用户(0:不是;1:是)
    private String vip;
    //黄钻等级
    private String yellow_vip_level;
    //等级
    private String level;
    //标识是否为年费黄钻用户(0:不是; 1:是)
    private String is_yellow_year_vip;
	/**Getters and Setters ...**/
}
(1.1.2)接口实现
//获取用户信息
public interface QQ {
    QQUserInfo getUserInfo();
}

/**
 * QQ接口调用
 * 因为每一个用户的accessToken,openId是不同的,不能用@Component,这样就变成单例的对象了
 */
public class QQImpl extends AbstractOAuth2ApiBinding implements QQ {
    ObjectMapper objectMapper = new ObjectMapper();
    //获取openId的请求串
    private static final String GET_OPENID_URL = "https://graph.qq.com/oauth2.0/me?access_token=%s";
    //获取用户信息的请求串
    private static final String GET_USERINFO_URL = "https://graph.qq.com/user/get_user_info?oauth_consumer_key=%s&openid=%s";
    private final Logger logger = LoggerFactory.getLogger(this.getClass());
    private String appId;//appId是去QQ互联上注册的应用id
    private String openId;//用户在QQ里的唯一标识(每个QQ对应一个)
    //accessToken,appId需要外边传入,openId在该类中获取
    public QQImpl(String accessToken, String appId){
        super(accessToken, TokenStrategy.ACCESS_TOKEN_PARAMETER);//作为查询参数(TokenStrategy.AUTHORIZATION_HEADER则是放在请求头)
        this.appId = appId;
        String getOpenIdUrl = String.format(GET_OPENID_URL, accessToken);//用accessToken替换%s
        String result = getRestTemplate().getForObject(getOpenIdUrl, String.class);
        logger.info("openId result:"+result);
        this.openId = StringUtils.substringBetween(result,"\"openid\":\"", "\"}");
    }

    /**
     * 用openId(通过accessToken获取)和appId去获取用户信息
     * @return
     */
    @Override
    public QQUserInfo getUserInfo() {
        String getUserInfoUrl = String.format(GET_USERINFO_URL, this.appId, this.openId);
        String result = getRestTemplate().getForObject(getUserInfoUrl, String.class);
        logger.info("user info result:"+result);
        QQUserInfo userInfo;
        try {
            userInfo = objectMapper.readValue(result, QQUserInfo.class);
            userInfo.setOpenId(openId);
            return userInfo;
        } catch (IOException e) {
            throw new RuntimeException("获取用户信息失败!");
        }
    }
}
(1.2)申请授权码 以及 携授权码申请AccessToken:
public class QQOAuth2Template extends OAuth2Template {

	private Logger logger = LoggerFactory.getLogger(getClass());
	public QQOAuth2Template(String clientId, String clientSecret, String authorizeUrl, String accessTokenUrl) {
		super(clientId, clientSecret, authorizeUrl, accessTokenUrl);
		setUseParametersForClientAuthentication(true);//会设置clientId和clientSecret入参
	}
	//默认是转换成Map类型,而QQ返回的是url连接串,因此重写
	@Override
	protected AccessGrant postForAccessGrant(String accessTokenUrl, MultiValueMap<String, String> parameters) {
		String responseStr = getRestTemplate().postForObject(accessTokenUrl, parameters, String.class);

		logger.info("获取accessToken的响应:"+responseStr);
		//成功返回串为:access_token=***&expires_in=7776000&refresh_token=***
		String[] items = StringUtils.splitByWholeSeparatorPreserveAllTokens(responseStr, "&");

		String accessToken = StringUtils.substringAfterLast(items[0], "=");
		Long expiresIn = new Long(StringUtils.substringAfterLast(items[1], "="));//过期时间
		String refreshToken = StringUtils.substringAfterLast(items[2], "=");//刷新Token

		return new AccessGrant(accessToken, null, refreshToken, expiresIn);
	}
	@Override
	protected RestTemplate createRestTemplate() {
		RestTemplate restTemplate = super.createRestTemplate();
		//处理text/html格式的response
		restTemplate.getMessageConverters().add(new StringHttpMessageConverter(Charset.forName("UTF-8")));
		return restTemplate;
	}
}
/**
 * QQ服务提供(主要进行两步-1.获取授权码 2.通过授权码申请票据(AccessToken),可用票据去调用api获取用户信息)
 * 主要的授权逻辑
 */
public class QQServiceProvider extends AbstractOAuth2ServiceProvider<QQ> {
    private String appId;

    //请求认证服务器的地址
    private static final String URL_AUTHORIZE = "https://graph.qq.com/oauth2.0/authorize";
    //请求获取令牌的地址
    private static final String URL_ACCESS_TOKEN = "https://graph.qq.com/oauth2.0/token";

    public QQServiceProvider(String appId, String appSecret) {
        //因为AbstractOAuth2ServiceProvider没有默认的构造方法实现(只有public AbstractOAuth2ServiceProvider(OAuth2Operations oauth2Operations))
        //因此若想继承该类必须实现该类的构造方法
        super(new QQOAuth2Template(appId, appSecret, URL_AUTHORIZE, URL_ACCESS_TOKEN));//Auth2Template是OAuth2Operations的子类
        this.appId = appId;
    }
    /**
     * 获取api接口实例(重写父类方法)
     * @param accessToken
     * @return
     */
    @Override
    public QQ getApi(String accessToken) {
        return new QQImpl(accessToken, this.appId);
    }
}
(2)与数据库交互
Spring Social会建立关于第三方应用登录的表UserConnection.
(2.1)QQ用户数据与Spring Social表规范字段适配
//QQ接口适配器
public class QQAdapter implements ApiAdapter<QQ> {
    @Override
    public boolean test(QQ qq) {
        return true;//默认qq这个api是通的
    }
    @Override
    public void setConnectionValues(QQ qq, ConnectionValues connectionValues) {
        QQUserInfo qqUserInfo = qq.getUserInfo();
        connectionValues.setDisplayName(qqUserInfo.getNickname());//显示的名称 - QQ昵称
        connectionValues.setImageUrl(qqUserInfo.getFigureurl_qq_1());//头像路径 - QQ空间小头像
        connectionValues.setProfileUrl("");//个人主页 - 空
        connectionValues.setProviderUserId(qqUserInfo.getOpenId());//用户ID - QQ openId
    }
    @Override
    public UserProfile fetchUserProfile(QQ qq) {
        return null;
    }
    @Override
    public void updateStatus(QQ qq, String s) {//更新个人状态,此处不做更新
    }
}
public class QQConnectionFactory extends OAuth2ConnectionFactory<QQ> {
    public QQConnectionFactory(String providerId, String appId, String appSecret) {
        super(providerId, new QQServiceProvider(appId, appSecret), new QQAdapter());
    }
}
@Configuration
@ConditionalOnProperty(prefix = "funnee.security.social.qq", name = "app-id")//存在该配置才将该类加入spring容器
public class QQAutoConfig extends SocialAutoConfigurerAdapter {

	@Autowired
	private SecurityProperties securityProperties;

	@Override
	protected ConnectionFactory<?> createConnectionFactory() {
		QQProperties qqConfig = securityProperties.getSocial().getQq();
		return new QQConnectionFactory(qqConfig.getProviderId(), qqConfig.getAppId(), qqConfig.getAppSecret());
	}
}
由于本地数据库是MySql8.0的rank是关键字不能命名表字段,因此需要重写与该字段相关的类。
//复制一份JdbcConnectionRepository,将其所有用到rank字段的地方都改为自己定义的字段
public class FunneeJdbcConnectionRepository implements ConnectionRepository  {
//......
}
//由于最后JdbcUsersConnectionRepository中会创建JdbcConnectionRepository的实例
//这里复制一份JdbcUsersConnectionRepository,将其用到JdbcConnectionRepository的地方改为自己新建的类
public class FunneeJdbcUsersConnectionRepository implements UsersConnectionRepository {
//......
    public ConnectionRepository createConnectionRepository(String userId) {
        if (userId == null) {
            throw new IllegalArgumentException("userId cannot be null");
        }
        return new FunneeJdbcConnectionRepository(userId, jdbcTemplate, connectionFactoryLocator, textEncryptor, tablePrefix);
    }
}
(3)配置
(3.1)Spring Social相关配置
回调地址 = 域名 + filterProcessesUrl + providerId.
SpringSocialConfigurer源码将SocialAuthenticationFilter加入过滤器链。
/**
 * 自定义的SpringSocialConfigure
 * SpringSocialConfigurer会将SocialAuthenticationFilter加入过滤器链中
 */
public class FunneeSpringSocialConfigure extends SpringSocialConfigurer {
    @Autowired
    SecurityProperties securityProperties;
    //回调地址的前半部分,参照SocialAuthenticationFilter的部分源码
    /*private String getRequestedProviderId(HttpServletRequest request) {
        //...
        if (!uri.startsWith(this.filterProcessesUrl)) {
            return null;
        } else {
            uri = uri.substring(this.filterProcessesUrl.length());
            return uri.startsWith("/") ? uri.substring(1) : null;
        }
    }*/
    private String filterProcessesUrl;
    public FunneeSpringSocialConfigure(String filterProcessesUrl){
        this.filterProcessesUrl = filterProcessesUrl;
    }

    @Override
    protected <T> T postProcess(T object) {
        SocialAuthenticationFilter filter = (SocialAuthenticationFilter)super.postProcess(object);
        filter.setFilterProcessesUrl(filterProcessesUrl);//默认是"/auth",这里修改成配置化的地址
        filter.setSignupUrl(securityProperties.getBrowser().getSignUpUrl());//默认是"/signup",这里修改成配置化的地址
        return (T)filter;
    }
}
(3.2)配置Spring Social的ConnectionRepository
@Configuration
@EnableSocial//开启spring security social相关支持
@Order(1)//意为加载顺序,数字越小,优先级越高
//若不加这行,SocialAuthenticationProvider中的usersConnectionRepository为默认的InMemoryUsersConnectionRepository,
//不是自定义的FunneeJdbcUsersConnectionRepository
public class SocialConfig extends SocialConfigurerAdapter {
    @Autowired
    DataSource dataSource;
    @Autowired
    SecurityProperties securityProperties;
    @Autowired(required = false)//若不存在则不注入
    private ConnectionSignUp connectionSignUp;//链接自动注册

    @Override
    public UsersConnectionRepository getUsersConnectionRepository(ConnectionFactoryLocator connectionFactoryLocator) {
        UsersConnectionRepository usersConnectionRepository = new FunneeJdbcUsersConnectionRepository(dataSource, connectionFactoryLocator, Encryptors.noOpText());
        if(connectionSignUp != null){
            ((FunneeJdbcUsersConnectionRepository) usersConnectionRepository).setConnectionSignUp(connectionSignUp);
        }
        return usersConnectionRepository;
    }
    @Bean
    public SpringSocialConfigurer funneeSpringSocialConfig(){
        return new FunneeSpringSocialConfigure(securityProperties.getSocial().getFilterProcessesUrl());
    }
    @Bean
    public ProviderSignInUtils providerSignInUtils(ConnectionFactoryLocator connectionFactoryLocator){
        return new ProviderSignInUtils(connectionFactoryLocator, getUsersConnectionRepository(connectionFactoryLocator)){};
    }
}
(3.3)配置到Spring Security的拦截机制中
@Configuration
@EnableWebSecurity
public class BrowserSecurityConfig  extends AbstractChannelSecurityConfig {
    @Autowired
    private SecurityProperties securityProperties;
    @Autowired
    private DataSource dataSource;
    @Autowired
    private SpringSocialConfigurer springSocialConfigurer;//将spring social相关过滤器加到过滤器链中
    @Bean
    public PersistentTokenRepository persistentTokenRepository(){
        JdbcTokenRepositoryImpl jdbcTokenRepository = new JdbcTokenRepositoryImpl();
        jdbcTokenRepository.setDataSource(dataSource);//没有添加jdbc依赖导致该方法不存在
        //jdbcTokenRepository.setCreateTableOnStartup(true);
        return jdbcTokenRepository;
    }
    //配置了该bean之后,spring security校验用户密码时会用该加密算法进行校验(而不是明文)
    @Bean
    public PasswordEncoder passwordEncoder(){
        return new BCryptPasswordEncoder();//可用自定义的加密方式(实现PasswordEncoder即可)
    }
    @Override
    protected void configure(HttpSecurity http) throws Exception {

        //http.httpBasic()//spring默认校验方式
        http.formLogin()
        	.loginPage("/authentication/login")
        	.apply(springSocialConfigurer)
                .and()
            .authorizeRequests()//对请求授权
                .antMatchers(SecurityConstants.DEFAULT_UNAUTHENTICATED_URL,
                        securityProperties.getBrowser().getLoginUrl(),
                        SecurityConstants.DEFAULT_VALIDATE_CODE_URL_PREFIX+"/*",
                        securityProperties.getBrowser().getSignUpUrl(),
                        "/user/register"
                ).permitAll()
                .anyRequest()
                .authenticated()//进行身份认证
            .and()
            .csrf().disable();
    }
}
(4)注册登录流程
SocialAuthenticationProvider 和 SocialAuthenticationFilter部分源码解析:
/**SocialAuthenticationProvider**/
public Authentication authenticate(Authentication authentication) throws AuthenticationException {
    Assert.isInstanceOf(SocialAuthenticationToken.class, authentication, "unsupported authentication type");
    Assert.isTrue(!authentication.isAuthenticated(), "already authenticated");
    SocialAuthenticationToken authToken = (SocialAuthenticationToken)authentication;
    String providerId = authToken.getProviderId();
    Connection<?> connection = authToken.getConnection();
    String userId = this.toUserId(connection);
    if (userId == null) {//未找到用户
    	//顶层SocialAuthenticationFilter会将其捕获并处理
        throw new BadCredentialsException("Unknown access token");
    } else {
        UserDetails userDetails = this.userDetailsService.loadUserByUserId(userId);
        if (userDetails == null) {
            throw new UsernameNotFoundException("Unknown connected account id");
        } else {
            return new SocialAuthenticationToken(connection, userDetails, authToken.getProviderAccountData(), this.getAuthorities(providerId, userDetails));
        }
    }
}
protected String toUserId(Connection<?> connection) {
	//根据关联用户的connection获取userId
    List<String> userIds = this.usersConnectionRepository.findUserIdsWithConnection(connection);
    return userIds.size() == 1 ? (String)userIds.iterator().next() : null;
}

/**SocialAuthenticationFilter**/
private Authentication doAuthentication(SocialAuthenticationService<?> authService, HttpServletRequest request, SocialAuthenticationToken token) {
    try {
        if (!authService.getConnectionCardinality().isAuthenticatePossible()) {
            return null;
        } else {
            token.setDetails(this.authenticationDetailsSource.buildDetails(request));
            Authentication success = this.getAuthenticationManager().authenticate(token);//会跳至provider执行
            Assert.isInstanceOf(SocialUserDetails.class, success.getPrincipal(), "unexpected principle type");
            this.updateConnections(authService, token, success);
            return success;
        }
    } catch (BadCredentialsException var5) {
        if (this.signupUrl != null) {//跳转到注册页
            this.sessionStrategy.setAttribute(new ServletWebRequest(request), ProviderSignInAttempt.SESSION_ATTRIBUTE, new ProviderSignInAttempt(token.getConnection()));
            throw new SocialAuthenticationRedirectException(this.buildSignupUrl(request));
        } else {
            throw var5;
        }
    }
}
注册页:
<!DOCTYPE html>
<html>
<head>
<meta charset="UTF-8">
<title>登录</title>
</head>
<body>
	<h2>Demo注册页</h2>
	<form action="/user/register" method="post">
		<table>
			<tr>
				<td>用户名:</td>
				<td><input type="text" name="name"></td>
			</tr>
			<tr>
				<td>密码:</td>
				<td><input type="password" name="password"></td>
			</tr>
			<tr>
				<td colspan="2">
					<button type="submit" name="type" value="register">注册</button>
					<button type="submit" name="type" value="binding">绑定</button>
				</td>
			</tr>
		</table>
	</form>
</body>
</html>
注册控制器实现: ProviderSignInUtils是基于session的注册工具类。
@RestController
@RequestMapping("/user")
@Api(value = "用户查询接口", description = "用户查询接口")
public class UserController {
    @Autowired
    private ProviderSignInUtils providerSignInUtils;

    @PostMapping("/register")
    public void register(User user, HttpServletRequest request) {

        //不管是注册用户还是绑定用户,都会拿到一个用户唯一标识。
        String userId = user.getName();
        providerSignInUtils.doPostSignUp(userId, new ServletWebRequest(request));
    }
}
安全跳转的相关配置:
@RestController
public class BrowserSecurityController {
    //重定向
    private RedirectStrategy redirectStrategy = new DefaultRedirectStrategy();
    //请求缓存
    private RequestCache requestCache = new HttpSessionRequestCache();
    @Autowired
    SecurityProperties securityProperties;
    @Autowired
    private ProviderSignInUtils providerSignInUtils;
    Logger logger = LoggerFactory.getLogger(BrowserSecurityController.class);
    /**
     * 认证跳转页面
     * @param request
     * @param response
     * @return
     */
    @RequestMapping("/authentication/login")
    @ResponseStatus(code = HttpStatus.UNAUTHORIZED)
    public SimpleResponse loginPage(HttpServletRequest request, HttpServletResponse response) throws IOException {
        SavedRequest savedRequest = requestCache.getRequest(request, response);
        if(savedRequest != null){
            String targetUrl = savedRequest.getRedirectUrl();
            logger.info("目标url:"+targetUrl);
            if(StringUtils.endsWithIgnoreCase(targetUrl, ".html")){
                redirectStrategy.sendRedirect(request,response,securityProperties.getBrowser().getLoginUrl());
            }
        }
        return new SimpleResponse("当前请求需要授权认证,请登录!");
    }
    //获取当前登录的用户信息
    @GetMapping("/social/user")
    public SocialUserInfo getSocialUserInfo(HttpServletRequest request) {
        SocialUserInfo userInfo = new SocialUserInfo();
        Connection<?> connection = providerSignInUtils.getConnectionFromSession(new ServletWebRequest(request));
        userInfo.setProviderId(connection.getKey().getProviderId());
        userInfo.setProviderUserId(connection.getKey().getProviderUserId());
        userInfo.setNickname(connection.getDisplayName());
        userInfo.setHeadimg(connection.getImageUrl());
        return userInfo;
    }
}
(四)测试
输入: 域名 + filterProcessesUrl + providerId.
成功跳转至QQ授权登录页面。
授权后成功跳转回调地址。

微信单点
五、开发问题记录
问题1: Maven拥有同一级parent无法成功导入同项目别的依赖。(报错信息:Failed to read artifact descriptor for com.funnee…)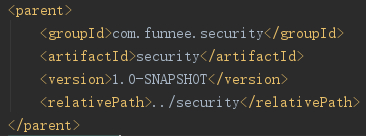
解决: 通过C:\用户.m2\repository发现父项依赖并没有成功安装在本地仓库,重新安装父项依赖(在父项pom的同级目录执行命令mvn -U install(将包安装在本地仓库),然后再去子项目刷新maven即可)
问题2: 被引入项目的websecurity配置类(adapter)不生效
解决: ①在springboot启动类添加注解
@ComponentScan(basePackages = {“com.funnee.browser”}),能够扫描到该类。
②被引入项目的Maven配置需要添加下面代码
<build>
	<!--将本地代码封入包内-->
	<sourceDirectory>src/main/java</sourceDirectory>
</build>
问题3: 配置自定义页面时,遇到循环重定向的问题。

解决: 因为配置了自定义登录页loginPage,然而又对所有请求进行授权要求,因此loginPage就又发向loginPage请求授权,如此循环下去。将匹配loginPage的URL放行就不会出现这种现象。
@Configuration
@EnableWebSecurity
public class BrowserSecurityConfig extends WebSecurityConfigurerAdapter {
    @Override
    protected void configure(HttpSecurity http) throws Exception {
        http.formLogin()
            .loginPage("/login/login.html")
            .and()
            .authorizeRequests()
                .antMatchers("/login/login.html").permitAll()//添加这句得以解决
            .anyRequest()
            .authenticated();
    }
}
问题4: browserProperty get set 对象名不一致导致
1spring MVC方式
2.spring boot方式
3.整合CAS


 3181
3181


 被折叠的 条评论
为什么被折叠?
被折叠的 条评论
为什么被折叠?
 到【灌水乐园】发言


