


前言
Rabbitmq简介这里就不多说了,安装可以见我另外一篇帖子使用Docker安装Rabbitmq,Springboot对Mq协议封装的比较好了,因此其实整合过程很简单,大家按步骤进行操作就可以完成快速整合。
文章末尾处提供了源代码地址,可以下载完整代码。
maven依赖
我这里放工程的完整依赖
 <dependencies>
        <dependency>
            <groupId>org.springframework.boot</groupId>
            <artifactId>spring-boot-starter-web</artifactId>
        </dependency>


        <dependency>
            <groupId>com.alibaba</groupId>
            <artifactId>fastjson</artifactId>
            <version>1.2.75</version>
        </dependency>

        <dependency>
            <groupId>org.springframework.boot</groupId>
            <artifactId>spring-boot-starter-test</artifactId>
            <scope>test</scope>
        </dependency>
        <!--rabbitmq-->
        <dependency>
            <groupId>org.springframework.boot</groupId>
            <artifactId>spring-boot-starter-amqp</artifactId>
        </dependency>


        <dependency>
            <groupId>org.projectlombok</groupId>
            <artifactId>lombok</artifactId>
            <version>1.18.16</version>
            <scope>compile</scope>
        </dependency>

        <dependency>
            <groupId>com.google.guava</groupId>
            <artifactId>guava</artifactId>
            <version>20.0</version>
        </dependency>

        <dependency>
            <groupId>com.googlecode.json-simple</groupId>
            <artifactId>json-simple</artifactId>
            <version>1.1.1</version>
        </dependency>
    </dependencies>
配置文件
这里在Spring中配置Mq的地址及密码,这里没有设置vhost,是使用默认的,如果你们创建了则可以通过配置指定对应的vhost。
spring:
  #rabbitmq配置
  rabbitmq:
    username: admin
    password: 12345678Aa
    addresses: 127.0.0.1:5672
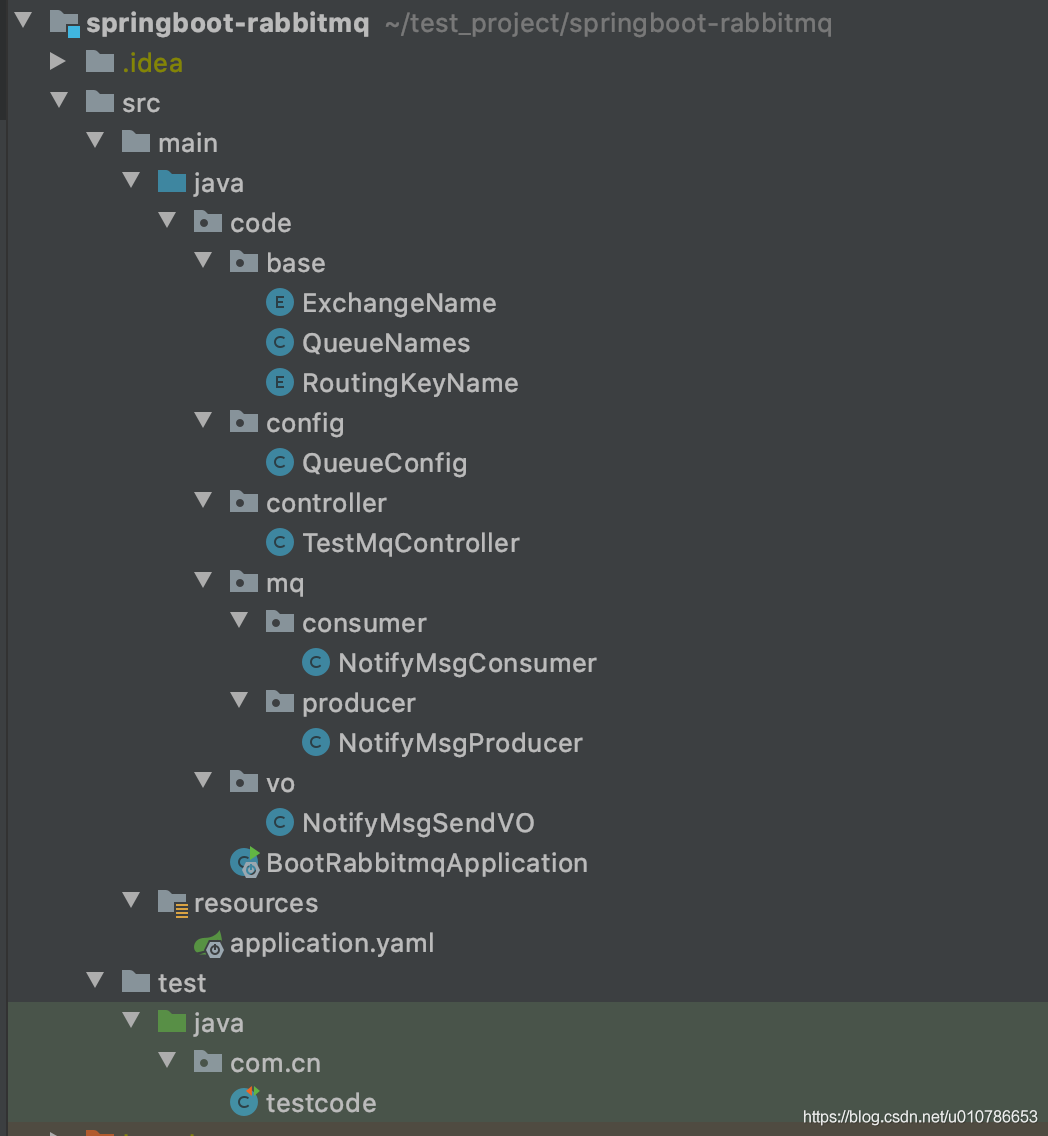
工程目录结构
目录结构仅供参考。这里做个简单说明:
- base包中定义了交换机名称、队列名称、路由键名称。
- config包中是用来绑定交换机和队列以及路由键。
- mq包中是生产者和消费者。
- vo包中放着mq的传输对象。
功能类详解
QueueConfig中使用@Bean注解将对应的queue、exchange、binding等交给容器统一管理。
@Configuration
public class QueueConfig {

    @Bean
    public DirectExchange defaultExchange() {
        return new DirectExchange(ExchangeName.DEFAULT.name());
    }

    @Bean
    public DirectExchange notifyMsgDirectExchange() {
        return new DirectExchange(ExchangeName.NOTIFY_MSG.name());
    }

    @Bean
    public Queue notifyMsgQueue() {
        return new Queue(QueueNames.NOTIFY_MSG_QUEUE, true);
    }


    @Bean
    public Binding notifyMsgQueueBinding() {
        return BindingBuilder
                .bind(notifyMsgQueue())
                .to(notifyMsgDirectExchange())
                .with(RoutingKeyName.NOTIFY_MSG);
    }
}
Mq传输对象需要实现Serializable。
@Data
@ToString
public class NotifyMsgSendVO implements Serializable {

    private static final long serialVersionUID = 5905249092659173678L;

    private String priKey;

    private String businessType;

    private String phoneNum;

    private String msg;


}
Mq生产者,直接注入RabbitTemplate,调用方法传入交换机名称及路由键,它会根据之前设置的绑定关系将消息路由到对应的队列中由队列另一端的消费者消费。
@Slf4j
@Component
public class NotifyMsgProducer {
    @Resource
    private RabbitTemplate rabbitTemplate;


    public void send(NotifyMsgSendVO notifyMsgSendVO) {
        log.debug("生产消息【{}】",notifyMsgSendVO);
        this.rabbitTemplate.convertAndSend(ExchangeName.NOTIFY_MSG.name(),
                RoutingKeyName.NOTIFY_MSG.name(), notifyMsgSendVO);
    }
}
Mq消费者,使用@RabbitListener注解指定对应的队列即可消费消息,这里值得一说的是,在消费者中需要处理一下异常,如果不处理会导致消费者无法继续消费。
@Component
@Slf4j
public class NotifyMsgConsumer {

    @RabbitListener(queues = QueueNames.NOTIFY_MSG_QUEUE)
    public void msgSend(NotifyMsgSendVO vo) {
        System.out.println("消费者收到消息:"+vo);
    }
}
测试
这里提供了一个http接口,调用接口可以生成一个测试消息。
@RestController
public class TestMqController {

    @Resource
    private NotifyMsgProducer notifyMsgProducer;

    @GetMapping("/produce")
    public String produce() {
        NotifyMsgSendVO vo = new NotifyMsgSendVO();
        vo.setPriKey(UUID.randomUUID().toString());
        vo.setPhoneNum("191xxxxxxxx");
        vo.setBusinessType("msg_send");
        notifyMsgProducer.send(vo);
        return "success";
    }
}
调用接口:http://localhost:9091/produce
查看控制台日志:
可以看到消费者已经收到了消息。
看完记得点赞哦!
下面是源代码地址:https://gitee.com/ErGouGeSiBaKe/springboot-rabbitmq


 49万+
49万+


 被折叠的 条评论
为什么被折叠?
被折叠的 条评论
为什么被折叠?
 到【灌水乐园】发言


