


整个流程分为【打包流程】和【启动流程】
【打包流程】:
=============================
=============================================
采用
cd
/d %~dp0
mvn
assembly:assembly
进行编译打包。
=====================================
之后 这个命令会找到 pom.xml
pom.xml内容中assembly打包配置如下:
<build>
<plugins>
<plugin>
<artifactId> maven-assembly-plugin</artifactId >
<configuration>
<descriptor> src/main/assembly/assembly.xml</descriptor >
</configuration>
<executions>
<execution>
<id> make-assembly</id >
<phase> package</ phase>
<goals>
<goal> single</ goal>
</goals>
</execution>
</executions>
</plugin>
</plugins>
</build>
=========================================
之后assembly插件会根据pom.xml中的配置找到assembly.xml配置文件
pom.xml配置的参数如下图:

===============================================================
我们大概可以知道了assembly的功能其实就根据
assembly.xml所配置的,把指定目录的文件复制到另一个指定的目录(不存在的文件会帮我们创建)
assembly.xml内容如下:
<!--
- Copyright 1999-2011 Alibaba Group.
-
- Licensed under the Apache License, Version 2.0 (the "License");
- you may not use this file except in compliance with the License.
- You may obtain a copy of the License at
-
- http://www.apache.org/licenses/LICENSE-2.0
-
- Unless required by applicable law or agreed to in writing, software
- distributed under the License is distributed on an "AS IS" BASIS,
- WITHOUT WARRANTIES OR CONDITIONS OF ANY KIND, either express or implied.
- See the License for the specific language governing permissions and
- limitations under the License.
-->
<
assembly
>
<
id
>
assembly
</
id
>
<
formats
>
<
format
>
tar.gz
</
format
>
</
formats
>
<
includeBaseDirectory
>
true
</
includeBaseDirectory
>
<
fileSets
>
<
fileSet
>
<
directory
>
src/main/assembly/bin
</
directory
>
<
outputDirectory
>
bin
</
outputDirectory
>
</
fileSet
>
<
fileSet
>
<
directory
>
src/main/ conf
</
directory
>
<
outputDirectory
>
conf
</
outputDirectory
>
</
fileSet
>
</
fileSets
>
<
dependencySets
>
<
dependencySet
>
<
outputDirectory
>
lib
</
outputDirectory
>
</
dependencySet
>
</
dependencySets
>
</
assembly
>
===============================================================================
assembly执行完毕就会得到如下目录结构

整个打包流程到这里结束了
===============================
下面讲的是启动流程
【启动流程 】:
上一个打包流程的bin目录有很多启动脚本,它会对打包的文件进行操作,这些脚本依赖于打包流程的配置的目录结构。

@echo off & setlocal enabledelayedexpansion
set LIB_JARS=""
cd ..\lib
for %%i in (*) do set LIB_JARS=!LIB_JARS!;..\lib\%%i
cd ..\bin
if ""%1"" == ""debug"" goto debug
if ""%1"" == ""jmx"" goto jmx
java -Xms256m -Xmx512m -XX:MaxPermSize=64M -classpath ..\conf;%LIB_JARS% com.framework.loippi.Main
goto end
:debug
java -Xms256m -Xmx512m -XX:MaxPermSize=64M -Xdebug -Xnoagent -Djava.compiler=NONE -Xrunjdwp:transport=dt_socket,address=8000,server=y,suspend=n -classpath ..\conf;%LIB_JARS% com.framework.loippi.Main
goto end
:jmx
java -Xms256m -Xmx512m -XX:MaxPermSize=64M -Dcom.sun.management.jmxremote.port=1099 -Dcom.sun.management.jmxremote.ssl=false -Dcom.sun.management.jmxremote.authenticate=false -classpath ..\conf;%LIB_JARS% com.framework.loippi.Main
:end
pause

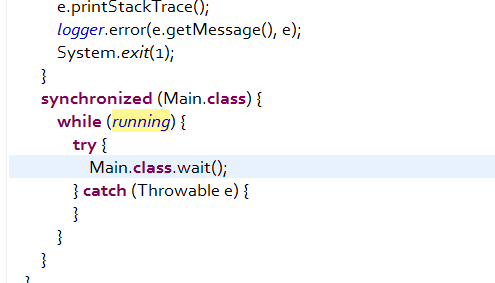
上图配置中的这个main函数其实就是dubbo的container

而dubbo的main好处就是比tomcat节省资源,比我们直接用spring启动多了优雅关闭和优雅开启功能···这点官方文档有描述
另外官方的主线程等到不是用system.in.read()-__-||
而用同步锁等待
-----------------------------------------------------
另外提一下
spring container的 自动加载spring配置的目录默认是:META-INF/spring目录
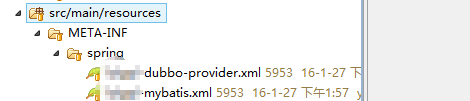
附官方文档


 569
569

 被折叠的 条评论
为什么被折叠?
被折叠的 条评论
为什么被折叠?
 到【灌水乐园】发言


