


对于学习spring有帮助的网站:http://jinnianshilongnian.iteye.com/blog/1482071
Spring表达式语言:SpEL
- Spring 表达式语言(简称SpEL):是一个支持运行时查询和操作对象图的强大的表达式语言。
- 语法类似于 EL:SpEL 使用 #{…} 作为定界符,所有在大框号中的字符都将被认为是 SpEL
- SpEL 为 bean 的属性进行动态赋值提供了便利
- 通过 SpEL 可以实现:
1.通过 bean 的 id 对 bean 进行引用
2.调用方法以及引用对象中的属性
3.计算表达式的值
4.正则表达式的匹配
下面我们创建3个类,分别是address,car,person
address属性:city,street。
car属性:brand,price,perimeter(周长)。
person属性:name,address,car,level(人物级别)
这3个对象类的源码我就不写了,比较简单,大家自己创建,
下面我们来看IOC容器的配置。
<?xml version="1.0" encoding="UTF-8"?>
<beans xmlns="http://www.springframework.org/schema/beans"
    xmlns:xsi="http://www.w3.org/2001/XMLSchema-instance" xmlns:context="http://www.springframework.org/schema/context"
    xmlns:p="http://www.springframework.org/schema/p"
    xsi:schemaLocation="http://www.springframework.org/schema/beans http://www.springframework.org/schema/beans/spring-beans.xsd
        http://www.springframework.org/schema/context http://www.springframework.org/schema/context/spring-context-4.1.xsd">

    <bean id="address" class="com.gp.spring.spel.Address">
        <property name="city" value="#{'JiXi'}"></property>
        <property name="street" value="heShan"></property>
    </bean>

    <bean id="car" class="com.gp.spring.spel.Car">
        <property name="brand" value="#{'Audi'}"></property>
        <property name="price" value="#{500000}"></property>
        <property name="perimeter" value="#{T(java.lang.Math).PI*80}"></property>
    </bean>

    <bean id="person" class="com.gp.spring.spel.Person">
        <property name="name" value="GaoPeng"></property>
        <property name="car" value="#{car}"></property>
        <property name="address" value="#{address}"></property>
        <property name="level" value="#{car.price > 300000 ? '土豪' : '普通人'}"></property>
    </bean>
</beans>
可以注意到我们使用了spEL表达式来为每个bean的属性赋值。
并且注意在为car周长属性赋值的时候使用了运算符及引用了java的静态变量。
在person的level属性中使用了三目表达式。
运行main方法得到的测试结果:
Person [name=GaoPeng, address=Address [city=JiXi, street=heShan], car=Car [brand=Audi, price=500000.0, perimeter=251.32741228718345], level=土豪]
更多的spEL用法可以参考:http://sishuok.com/forum/blogPost/list/2463.html
Bean的生命周期
Bean的生命周期主要分为5个步骤:
- 调用Bean的构造器
- 为Bean中的属性赋值
- 调用IOC容器指定的init-method方法
- 对Bean使用
- 调用IOC容器指定的destroy-method方法
下面我们做了个测试,
IOC容器配置
    <bean id="car" class="com.gp.spring.cycle.Car" init-method="init"
        destroy-method="destroy">
        <property name="brand" value="Aodi"></property>
    </bean>
我们指定了init-method与destroy-method
Car类代码如下
package com.gp.spring.cycle;

public class Car {
    private String brand;

    public String getBrand() {
        return brand;
    }

    public Car() {
        super();
        System.out.println("构造方法...");
    }

    public void setBrand(String brand) {
        System.out.println("setBrand(String brand)");
        this.brand = brand;
    }

    @Override
    public String toString() {
        return "Car [brand=" + brand + "]";
    }

    public void init() {
        System.out.println("init...");
    }

    public void destroy() {
        System.out.println("destroy...");
    }
}
对各个方法打出日志
测试
public static void main(String[] args) {
ClassPathXmlApplicationContext context = new ClassPathXmlApplicationContext("spring_cycle.xml");
Car car = (Car)context.getBean("car");
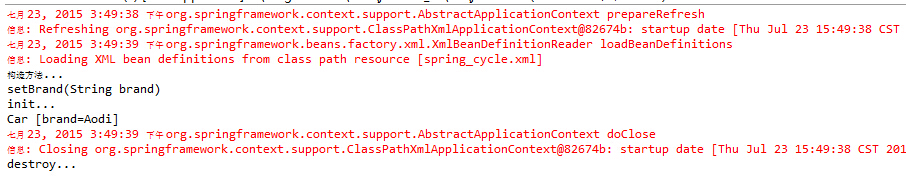
System.out.println(car);
context.close();
}我们注意到,直接使用的是ClassPathXmlApplicationContext,而没使用ApplicationContext父类接口,因为父类接口中不包含close方法。
输出结果
Bean的后置处理器
我们在增加一个类MyBeanPostProcessor实现BeanPostProcessor接口。
代码如下
package com.gp.spring.cycle;

import org.springframework.beans.BeansException;
import org.springframework.beans.factory.config.BeanPostProcessor;

public class MyBeanPostProcessor implements BeanPostProcessor {

    @Override
    public Object postProcessBeforeInitialization(Object bean, String beanName)
            throws BeansException {
        System.out.println("postProcessBeforeInitialization: bean=" + bean
                + ",beanName=" + beanName);
        return bean;
    }

    @Override
    public Object postProcessAfterInitialization(Object bean, String beanName)
            throws BeansException {
        System.out.println("postProcessAfterInitialization: bean=" + bean
                + ",beanName=" + beanName);
        return bean;
    }

}
将此方法通过IOC容器注入
    <bean id="car" class="com.gp.spring.cycle.Car" init-method="init"
        destroy-method="destroy">
        <property name="brand" value="Aodi"></property>
    </bean>

    <bean class="com.gp.spring.cycle.MyBeanPostProcessor"></bean>
输出结果
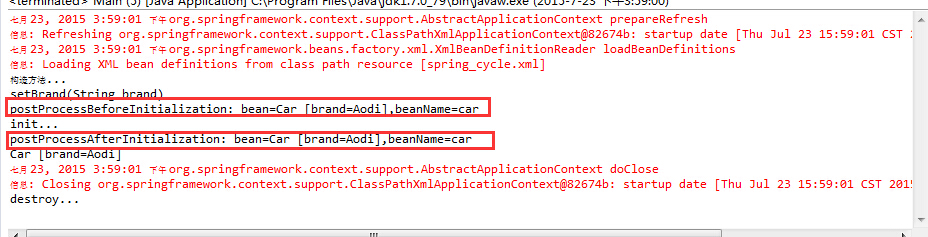
增加了BeanPostProcessor的实现后,我们发现在执行init方法的前后分别执行了postProcessBeforeInitialization与postProcessAfterInitialization两个方法。
每个Bean在被实例化之前都会将对象传给这个接口的这两个方法,然后再返回。通常可以作为对Bean类型的检查及过滤使用。
静态工厂方法配置Bean
正如其名,我们不直接在IOC容器中配置目标Bean,而是通过配置静态的工厂方法,然后通过工厂方法来配置Bean。
我们来看下,Bean对象Car
package com.gp.spring.factory;

import java.util.HashMap;
import java.util.Map;

public class Car {
    private String brand;
    private String price;

    public String getBrand() {
        return brand;
    }

    public void setBrand(String brand) {
        this.brand = brand;
    }

    public String getPrice() {
        return price;
    }

    public void setPrice(String price) {
        this.price = price;
    }

    public Car(String brand, String price) {
        super();
        this.brand = brand;
        this.price = price;
    }

    @Override
    public String toString() {
        return "Car [brand=" + brand + ", price=" + price + "]";
    }

}
再来看下,我们的静态工厂方法
package com.gp.spring.factory;

import java.util.HashMap;
import java.util.Map;

public class StaticCarFactory {
    private static Map<String, Car> carMap = new HashMap<String, Car>();

    static{
        carMap.put("aodi", new Car("aodi", "100000"));
        carMap.put("baoma", new Car("baoma", "700000"));
    }

    public static Car getCar(String carName){
        return carMap.get(carName);
    }
}
静态方法中,为Car创建2条数据。
再来看IOC容器的配置
    <bean id="car1"
        class="com.gp.spring.factory.StaticCarFactory"
        factory-method="getCar">
        <constructor-arg value="aodi"></constructor-arg>
    </bean>
配置中增加了factory-method=”getCar”,执行工厂类中的getCar方法,并且通过
    public static void main(String[] args) {
        ApplicationContext context = new ClassPathXmlApplicationContext("spring_factory.xml");
        Car car = (Car)context.getBean("car1");
        System.out.println(car);
    }
运行结果
Car [brand=aodi, price=100000]
调用实例工厂方法配置Bean
在IOC容器中,通过调用其他Bean,完成工厂方法配置Bean的操作。
我们先来看下配置文件
    <bean id="instanceCarFactory" class="com.gp.spring.factory.InstanceCarFactory"></bean>

    <bean id="car2" factory-bean="instanceCarFactory" factory-method="getCar">
        <constructor-arg value="aodi"></constructor-arg>
    </bean>
我们看到,将InstanceCarFactory类配置到IOC容器中,然后在IOC容器的其他Bean直接通过factory-bean指定工厂方法,完成配置Bean的目的
看下InstanceCarFactory代码
package com.gp.spring.factory;

import java.util.HashMap;
import java.util.Map;

public class InstanceCarFactory {

    Map<String, Car> carMap = null;

    InstanceCarFactory(){
        carMap = new HashMap<String, Car>();
        carMap.put("aodi", new Car("InstanceCarFactory_aodi", "100000"));
        carMap.put("baoma", new Car("InstanceCarFactory_baoma", "700000"));
    }

    public Car getCar(String carName){
        return carMap.get(carName);
    }
}
其实和我们上一个静态工厂方法配置Bean的操作类似,只是将工厂方法分离出来。实现弱耦合,提高功能的可扩展性。
FactoryBean配置Bean
spring为我们提供了FactoryBean接口,用以调用Spring内置的一个工具Bean。
我们来看一下FactoryBean的自定的实现类
package com.gp.spring.factoryBean;

import org.springframework.beans.factory.FactoryBean;

public class CarFactoryBean implements FactoryBean<Car> {

    @Override
    public Car getObject() throws Exception {
        return new Car("BMW", "1000000");
    }

    @Override
    public Class<Car> getObjectType() {
        // TODO Auto-generated method stub
        return Car.class;
    }

    @Override
    public boolean isSingleton() {
        // TODO Auto-generated method stub
        return true;
    }

}
通过此FactoryBean调用Car对象。
IOC容器配置
<bean id="car" class="com.gp.spring.factoryBean.CarFactoryBean"></bean>测试输出结果
Car [brand=BMW, price=1000000]


 492
492


 被折叠的 条评论
为什么被折叠?
被折叠的 条评论
为什么被折叠?
 到【灌水乐园】发言


