


第一篇 基础案例篇
1.1、Windows环境搭建
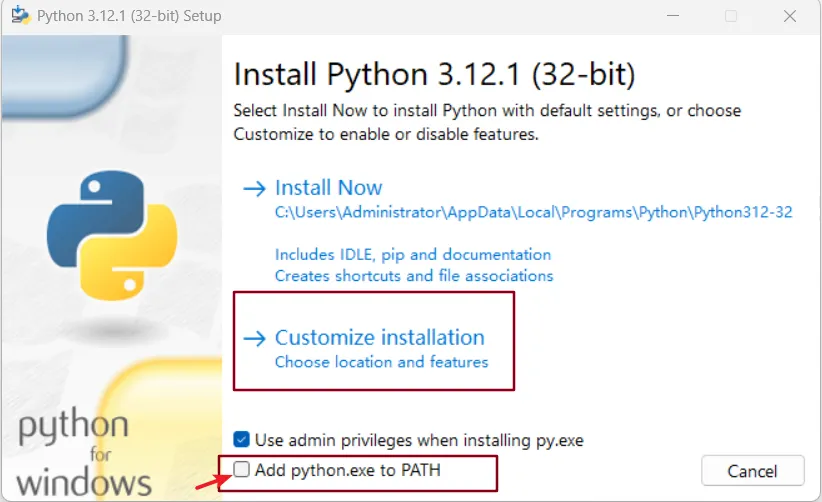
- Python环境
a、对应的操作系统对应的版本
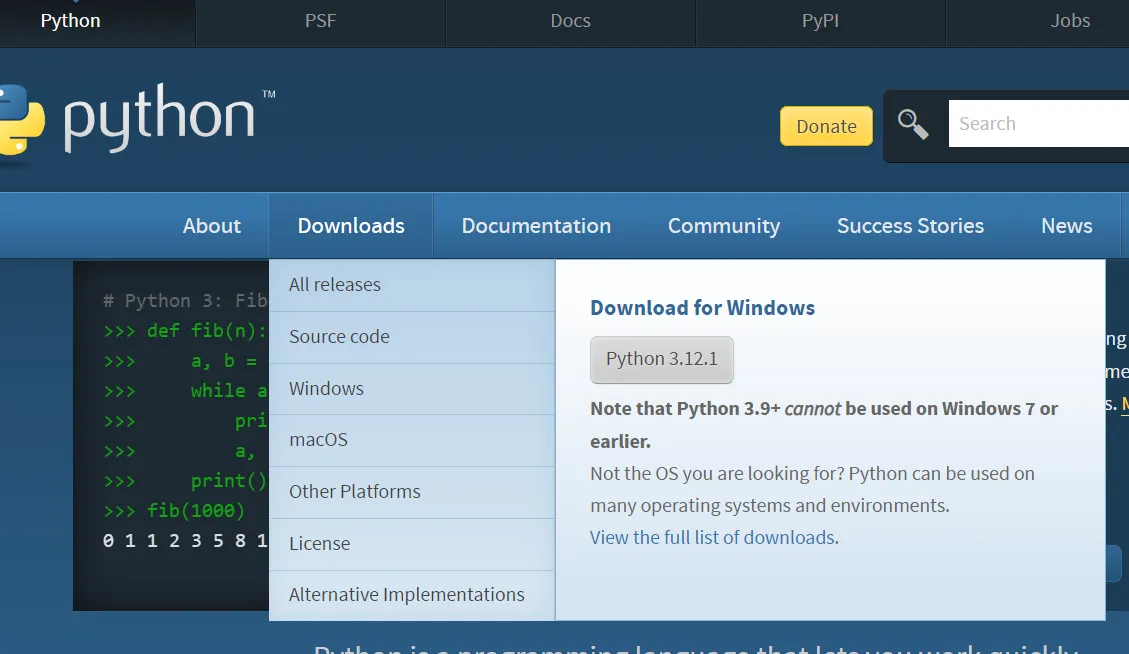
b、安装时选择“Add Python 3.10 to PATH
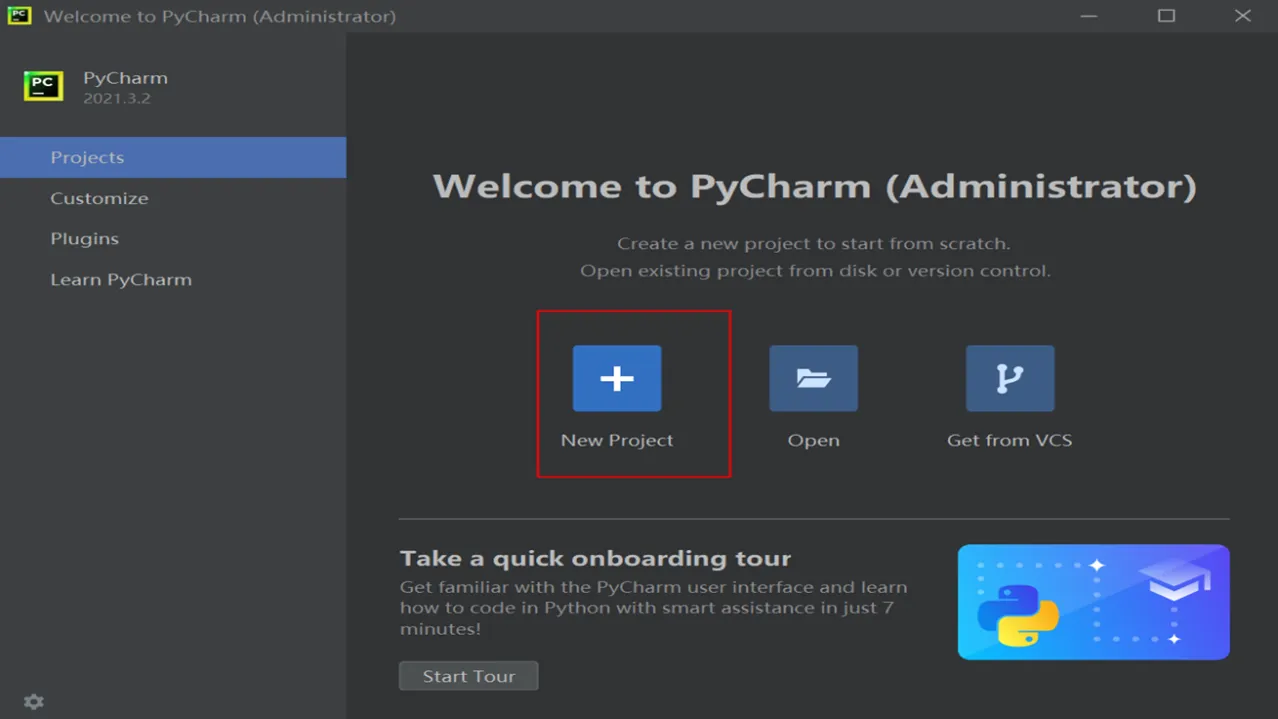
- Pycharm环境搭建
下载地址:https://www.jetbrains.com/pycharm/download/
- pip介绍
Python有成千上万的宝藏库,这些库相当于是已经集成好的工具,只要安装就能在Python里使用。它们可以处理各式各样的问题,无需你再造轮子,而且随着社区的不断更新维护,有些库越来越强大,几乎能媲美企业级应用。
怎么下载安装呢?它们被放在一个统一的”仓库”里,名叫PyPi(Python Package Index),所有的库安装都是从这里调度。
有了仓库之后,还需要有管理员,pip就是这样一个角色。pip把库从PyPi取出来,然后安装到Python里,还可以管理安装好的库,比如更新、查看、搜索、卸载等等
换成国内源:
1、临时方式
pip install -i http://mirrors.aliyun.com/pypi/simple/ --upgrade h5py --trusted-host mirrors.aliyun.com
2、永久方式
C:\Users\用户名\AppData\Roaming 在Roaming文件夹下新建pip文件夹 pip.ini配置文件,文件内容如下:(快捷键:win +r ; 输入%appdata%)
[global] index-url = https://pypi.tuna.tsinghua.edu.cn/simple [install] trusted-host=mirrors.aliyun.com
pip命令:
#pip install xx (selenium) 安装软件
#pip install selenium==3.6.0安装版本是3.6.0 selenium
#pip install -U xx 更新 update缩写
#pip uninstall Package 卸解软件
#pip install xx –upgrade
#pip freeze 查看已安装版本或#pip list
#pip show xx 查看某个包的版本
#python setup.py install   离线包安装命令
pip官网:
https://pypi.org/project/selenium/#files
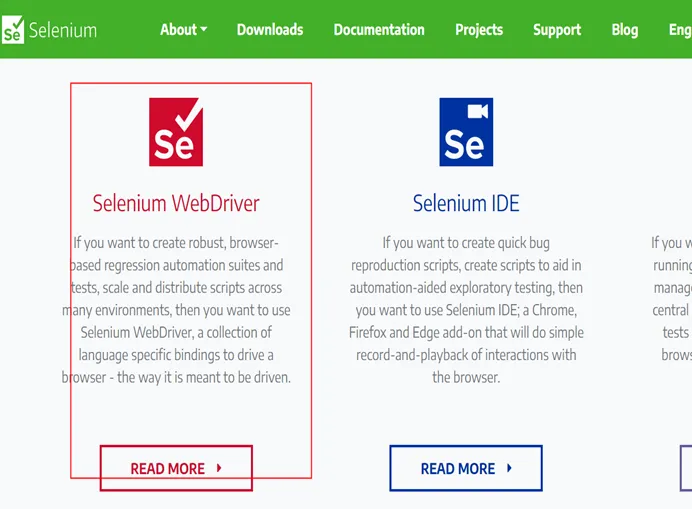
- Selenium环境搭建
- 驱动安装
1、谷歌驱动:http://npm.taobao.org/mirrors/chromedriver/
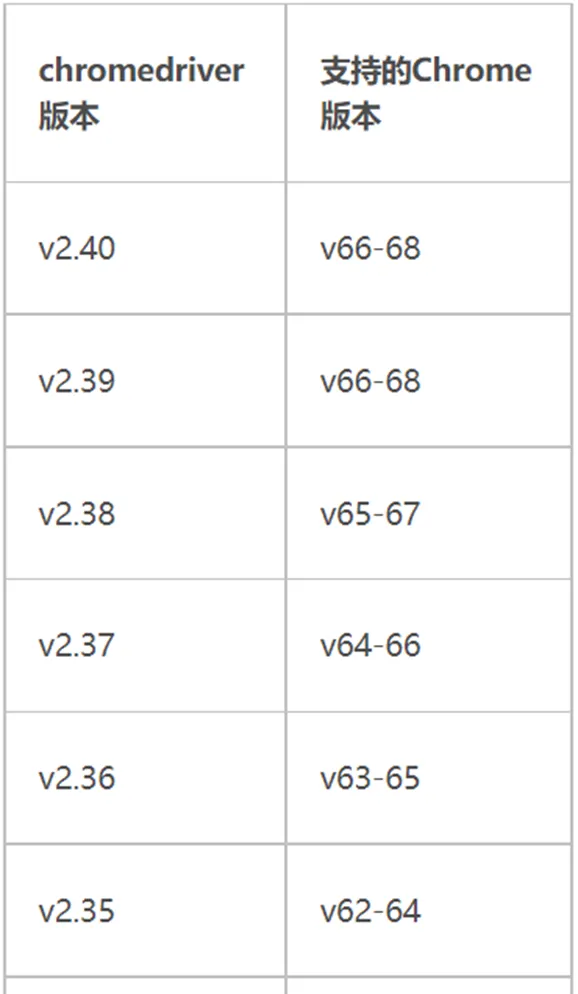
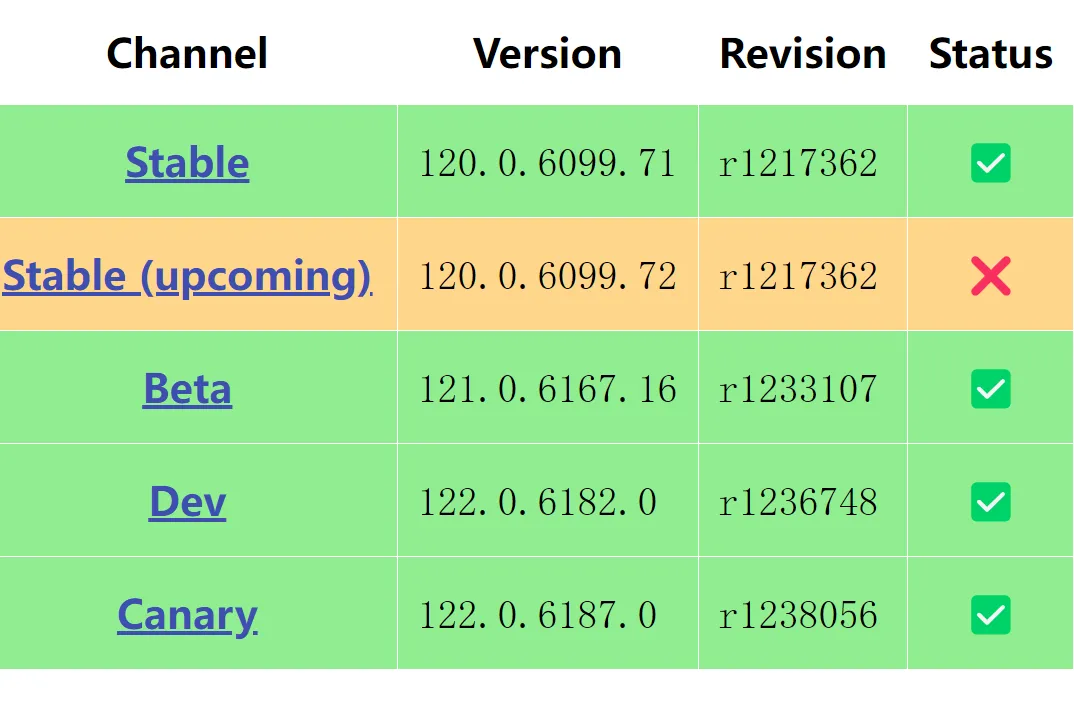
新版本驱动下载:https://googlechromelabs.github.io/chrome-for-testing/
126版本:https://googlechromelabs.github.io/chrome-for-testing/
2、火狐驱动网址:
https://npm.taobao.org/mirrors/geckodriver/
3、Edge驱动网址:
https://developer.microsoft.com/en-us/microsoft-edge/tools/webdriver/
测试脚本:
#coding=utf-8
from selenium import webdriver
path= '../chromedriver.exe'
#selenium4新增了Service方法
#path1=Service(r'D:\dr\geckodriver.exe')
driver = webdriver.Chrome(path)
driver.get('https://www.baidu.com/'
(1) pycharm自带selenium模块,D:\soft\PyCharm 2021.3.2\plugins\python\helpers\typeshed\stubs\selenium
(2) 不同环境导致找不到库
版本匹配异常

- 1、下载mac版python
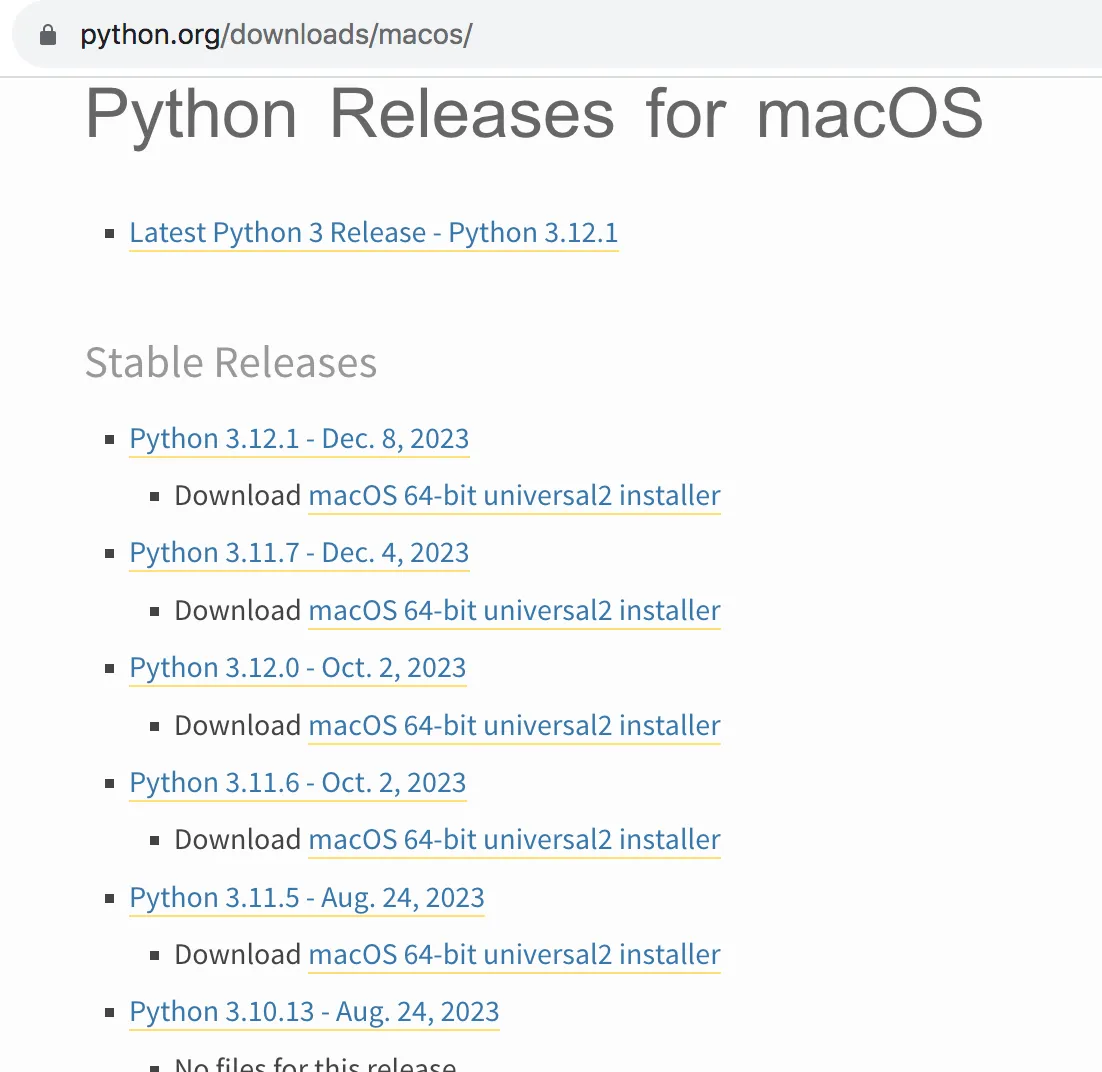
2、默认安装路径:
#/Library/Frameworks/Python.framework/Versions/3.11
设置默认python版本:
设置 Python 3 为默认版本,先打开终端,输入如下命令打开配置文件:#vim ~/.bash_profile 在配置文件中加入以下内容: alias python="/Library/Frameworks/Python.framework/Versions/3.11/bin/python3" alias pip="/Library/Frameworks/Python.framework/Versions/3.11/bin/pip3" 保存并退出,然后执行以下命令: #source ~/.bash_profile 在命令行窗口中输入“python”,显示“Python 3.11.1”,说明版本切换成功3、驱动选择mac专属版
#coding=utf-8
from selenium import webdriver
from selenium.webdriver.chrome.service import Service
from selenium.webdriver.common.by import By
import time
#driver路径
path =Service('/Users/tim/Downloads/chromedriver')
driver = webdriver.Chrome(service=path)
#打开登录页面
driver.get('file:///Users/tim/Desktop/se/book/login.html')
-----------------------------------------------------------------------------
1.2、十六大定位
元素定位意

-
- ID
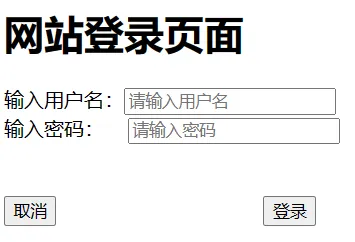
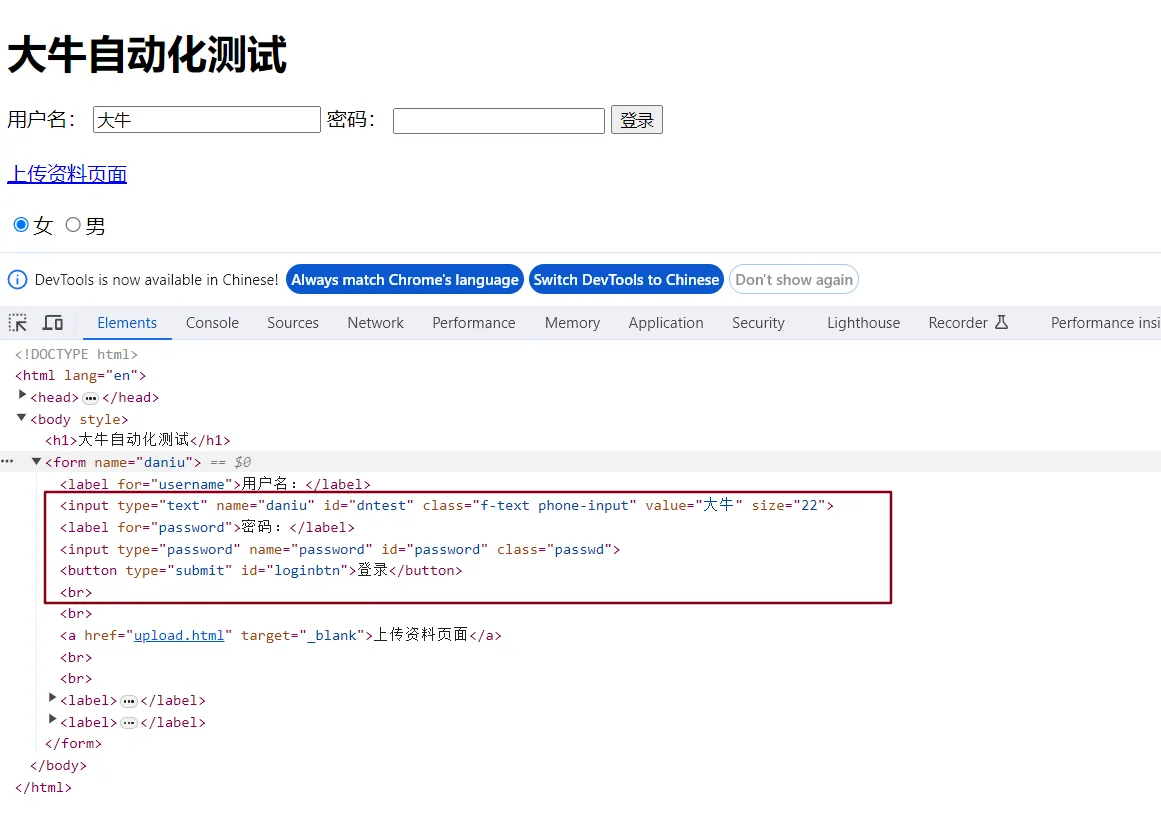
例:素材为资料包中login.html网页
用户名id为"dntest"
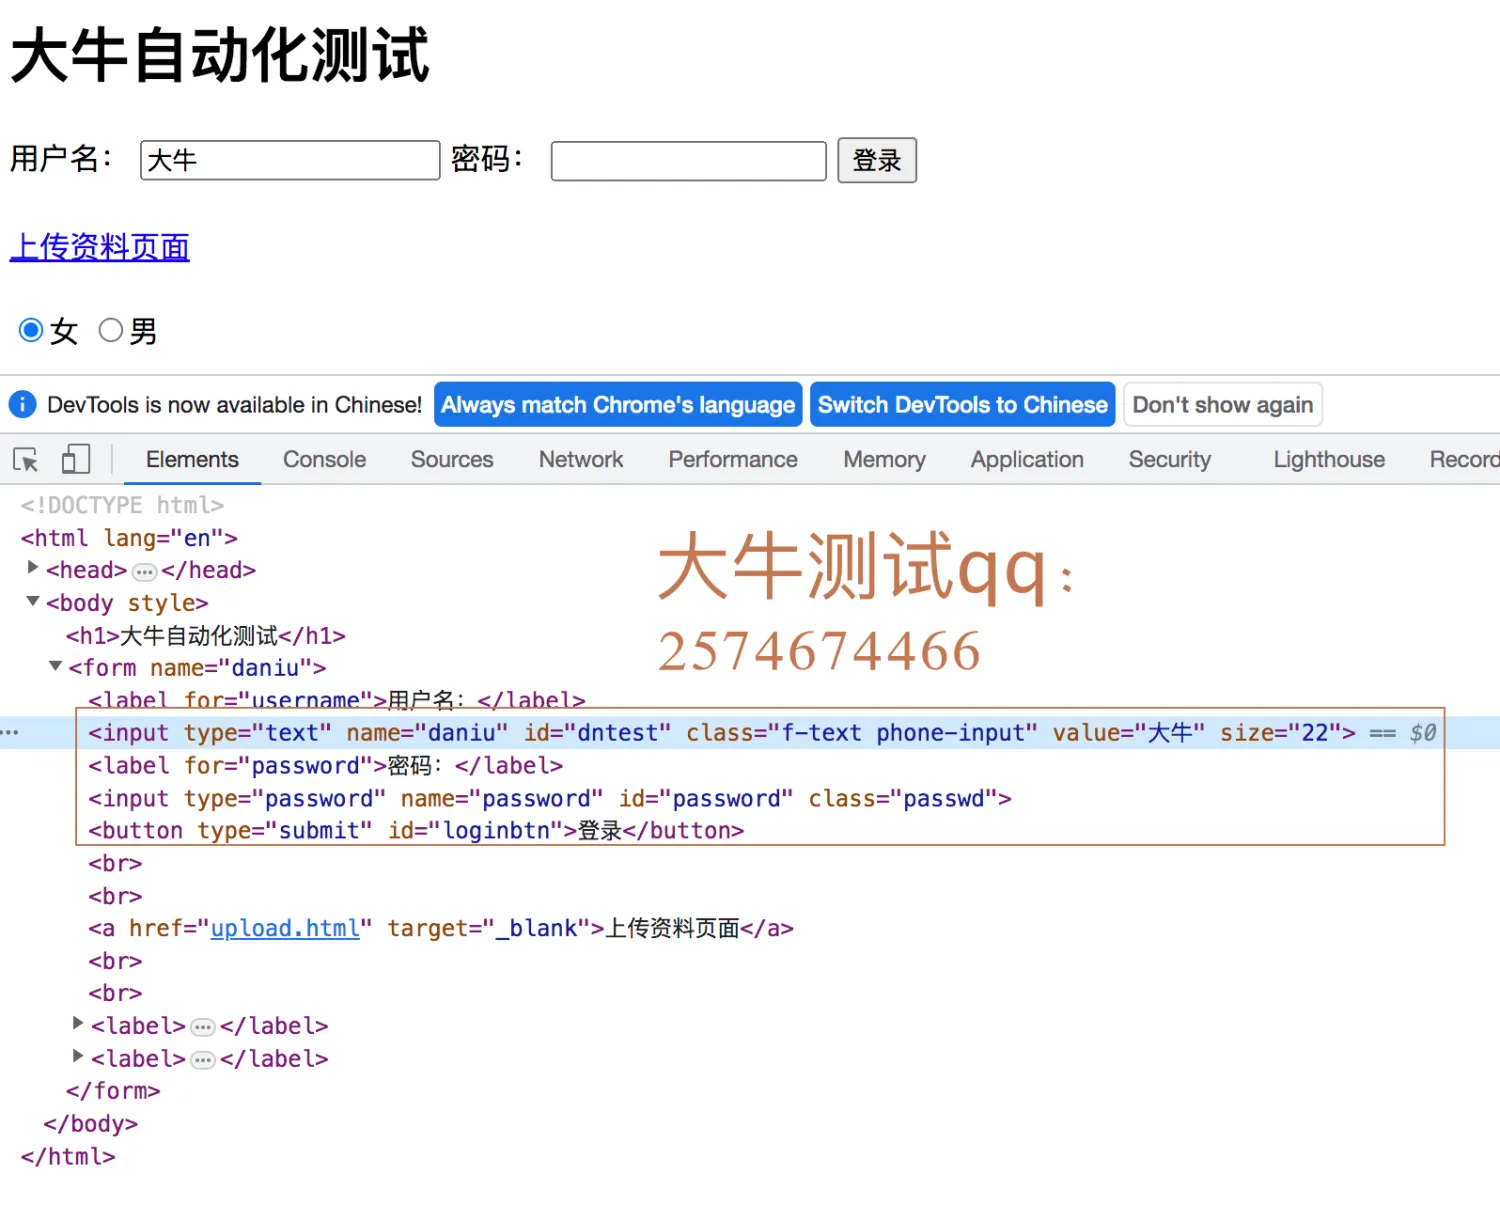
from selenium import webdriver
from selenium.webdriver.chrome.service import Service
from selenium.webdriver.common.by import By
import time
path =Service('/Users/tim/Downloads/chromedriver')
driver = webdriver.Chrome(service=path)
#打开登录页面
driver.get('file:///Users/tim/Desktop/selenium/book/login.html')
#用户名输入测试
driver.find_element(By.ID,"dntest").send_keys("大牛测试")
- NAME (素材为login.html网页)
例:用户名文本框name为"daniu"
def find_element(self, by=By.ID, value: Optional[str] = None) -> WebElement: """ Find an element given a By strategy and locator. :Usage: :: element = driver.find_element(By.ID, 'foo') :rtype: WebElement """ driver.find_element(By.NAME,"daniu").send_keys("大牛测试")- LINK_TEXT
例:单击login.html“上传资料页面”
driver.find_element(By.LINK_TEXT,"上传资料页面").click()
- PARTIAL_LINK_TEXT
例:单击login.html“上传资料”
driver.find_element(By.PARTIAL_LINK_TEXT,"上传资料").click()
- TAG_NAME
例:login.html页面获取form标签name属性"daniu"并输出
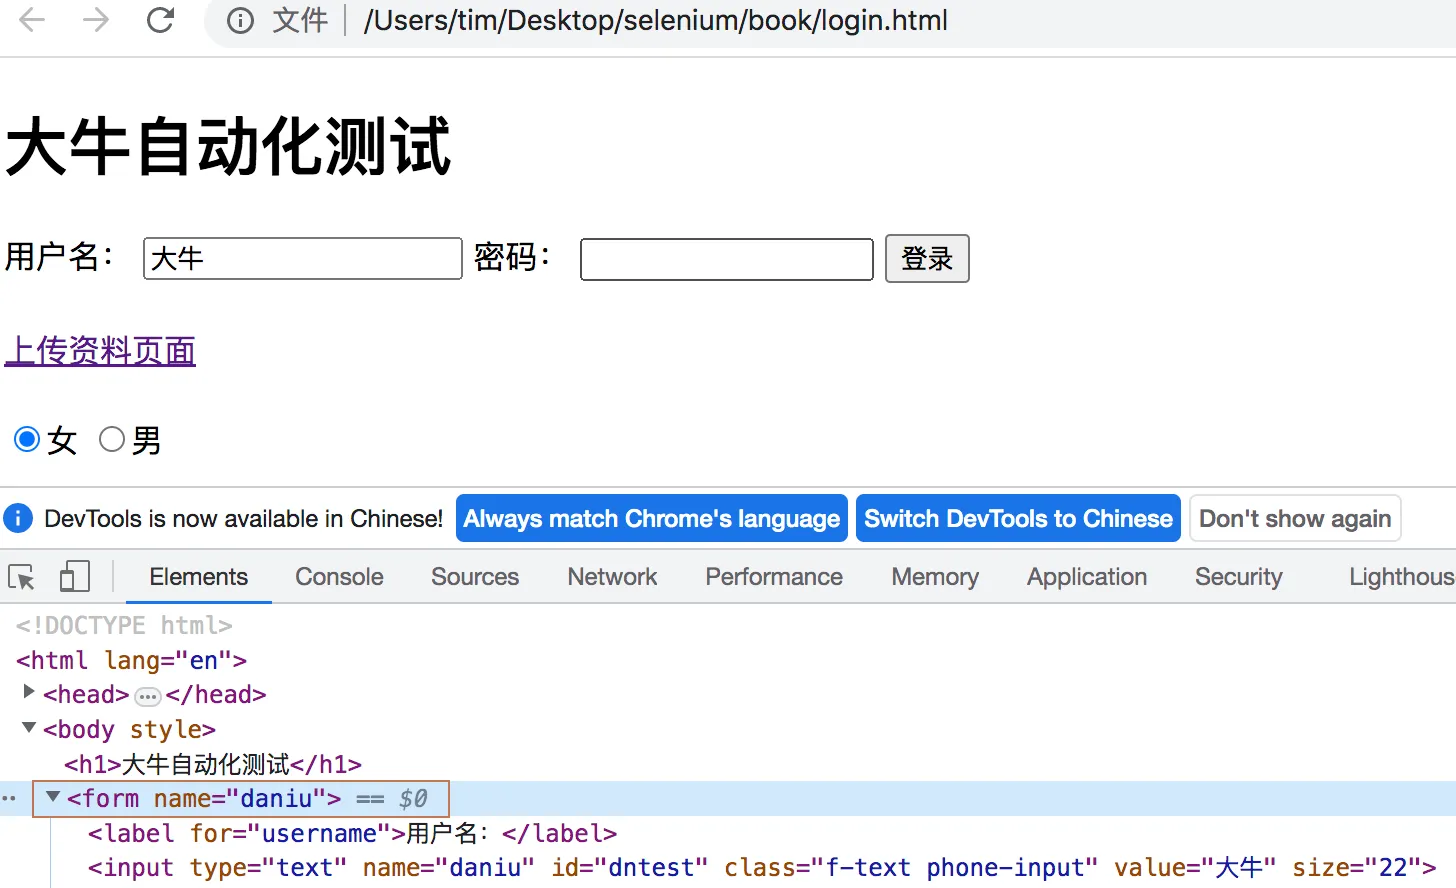
print(driver.find_element(By.TAG_NAME,"form").get_attribute("name"))
- CLASS_NAME
例:login.html页面密码框:"passwd"
driver.find_element(By.CLASS_NAME,"passwd").send_keys("testdaniu")- CSS_SELECTOR
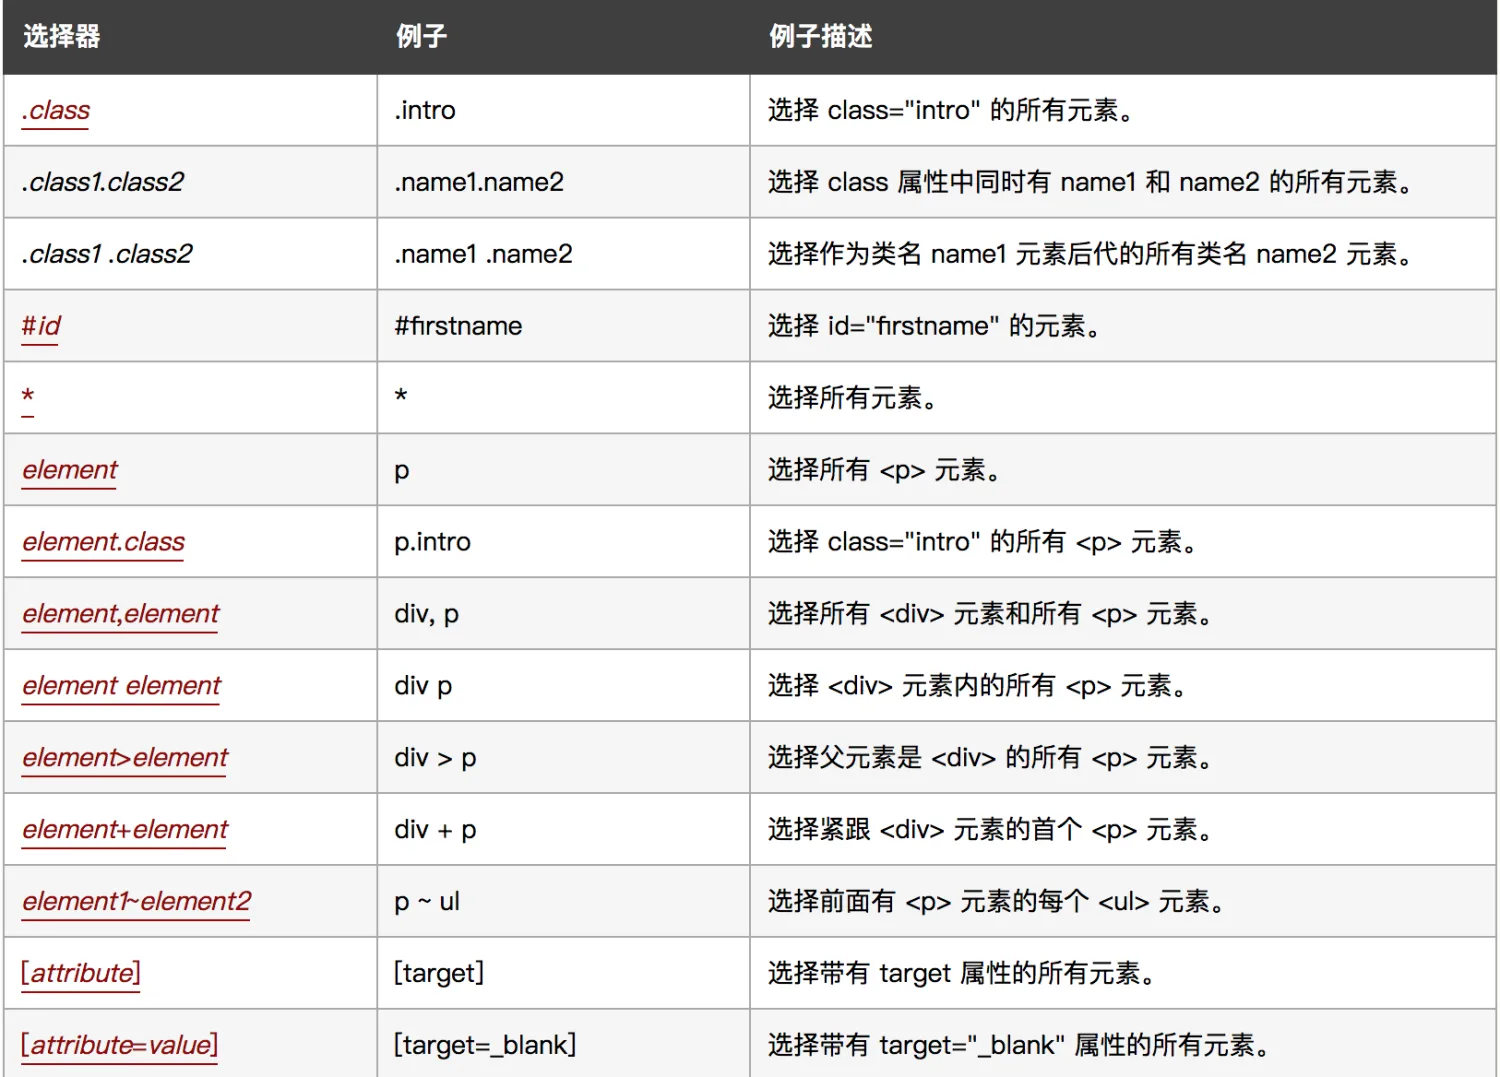
https://www.w3school.com.cn/cssref/css_selectors.asp
例:class方式
#text与phone之间空格加入“.”
driver.find_element(By.CSS_SELECTOR,".f-text.phone-input").send_keys("技术")
#用.f-text也可
driver.find_element(By.CSS_SELECTOR,".f-text").send_keys("技术")
#用class=’f-text phone-input’text与phone之间空格不需处理
driver.find_element(By.CSS_SELECTOR,"[class='f-text phone-input']").send_keys("技术")
id 方式
driver.find_element(By.CSS_SELECTOR,"#dntest").send_keys("大牛测试")name方式
driver.find_element(By.CSS_SELECTOR,"input[name='daniu']").send_keys("大牛测试")- XPATH
绝对路径:例,大牛测试用户名 -- html/body/form/input[1]
driver.find_element(By.XPATH,"html/body/form/input[1]").send_keys("大牛测试")相对路径:
#login.html登录用户名标签是“input”
driver.find_element(By.XPATH,"//input[@id='dntest']").send_keys("技术")#多个属性条件之间可用and
(By.XPATH,"//*[@id='dntest'and @name='daniu']")#or表示只需一个属性条件满足即可
(By.XPATH,"//*[@id='dntest' or @name='daniu']")模糊定位:
starts-with与contains
例:
#login.html页面,用户名为例,id属性"dntes"开头定位
By.XPATH,'//input[starts-with(@id,"dntes")]
#login.html页面,用户名为例,id属性"ntes"开头定位
By.XPATH,'//input[contains(@id,"ntes")]
1.22 表格定位
学习表格定位前,先熟悉python基础,有基础的同学飘过
- python 变量不需要声明类型
x = 5 int类型
x = "selenium"字符串
- 字符串类型
#coding=utf-8from_station = "杭州很漂亮" print(from_station) print(from_station[1:2]) print(from_station[0:1])- if语句
书写规则#coding=utf-8 a = 5 if a > 5: print("数字大于5") elif a < 10: print("数字小于5") else: print("数字等于5")- 列表
list1 = ["selenium","appium","python","automation"]对列表操作 取值:list1[1]、list1[2:4]、list1[-2] 增加:list1.append('') 实现在列表最后添加一个元素,并且一次只能添加一个元素 删除: del list1[1] insert()方法:在特定位置上添加元素 list1.insert(0,"dntest") remove()方法:其作用是可以删除列表中的特定元素 pop() 将列表中的最后一个元素返回,并将其从列表中删除 def pop(self, *args, **kwargs): # real signature unknown """ Remove and return item at index (default last). Raises IndexError if list is empty or index is out of range. """ pass面试题append与extend区别:
append:
一次只能追加一个数据
追加的数据是元组、列表、集合、字典,该函数会将他们当作一个整体追加到原来的列表中
extend:
该函数会将可迭代对象中的元素逐一添加到原列表中,
单独的整型、浮点型是不可以用extend函数的,如extend(3),extend(3.3)
- for循环
法一
#coding=utf-8

 #使用for循环来遍历列表list1中的所有的元素
 #第一种方式
 for l in list1:
   print(l)
法二 range方式
for index in range(len(list1)):
   print(list1[index])
range
range(start, stop[, step])start: 计数是从start开始的,默认是从0开始的。stop: 计数到stop结束,但是不包括stop自身。step: 步长,默认为1。例1:
#coding=utf-8
for i in range(10):
    print(i)
print("***************")
例2:
for j in range(2,10,2): print(j) print("***- 元组:tuple
用小括号表示
tu = ('a', 'b', 6, 5)
tu[0]
tu[1:2]
len(tu)
#占用控件
#list1.__sizeof__()
占用空间小
逐个分配空间
- Python格式化字符串
①、%s ,%d,%f(浮点型)
str1="tim"
price =3000
print("【%s】,【%d】" %(str1,price))
②、format
#下标占位
print("【{1}】,【{0}】".format("daniutest",3000))
#变量名
print("【{name}】,【{price}】".format(name="daniutest",price=3000))
③、格式化f
# 格式化fstr1 = 'timtest'
price = 3000
print(f'机构是:{str1},价格是:{price}')
打开资料包中table1.html网页,学习表格定位
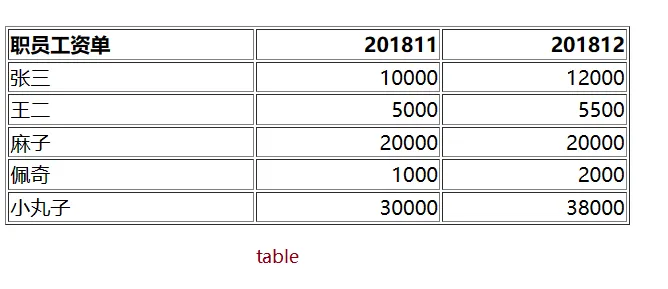
例1:打印所有元素
定位表格中具体元素举例
例:在被测试网页的表格中定位第 3 行第 3 列的单元格,XPath 定位表达式为:
//*[@id="table1"]/tbody/tr[3]/td[3] 对应的 Python 定位语句是:
driver.find_element(By.XPATH, ‘//*[@id="table1"]/tbody/tr[3]/td[3]’)在表达式中,tr[3]表示第 3 行,td[3]表示第 3 列。使用 CSS 定位,则表达式为:
#table1 > tbody > tr:nth-child(3) > td:nth-child(3)
("By.CSS_SELECTOR","#table1 > tbody > tr:nth-child(3) > td:nth-child(3)")- 关联元素定位策略
资料包中relative_locator1.html页面
例1:above
使用关联元素定位策略时,需要引入 locate_with,引入语句为“from selenium. webdriver.support.relative_locator import locate_with”。
通过 Above 模式获取 relative locator 对象。
relative locator 对象以参数的形式传入方法 find_element。
#通过relative locator的above方式先获取到password input,然后再获取username input.username_locator = locate_with(By.TAG_NAME,"input").above({By.ID: "id_pass"}) username = driver.find_element(username_locator) username.send_keys('大牛测试')例2:below
Below 模式使用方式为“locate_with(By.TAG_NAME,"input").below”。
password_locator = locate_with(By.TAG_NAME,"input").below({By.ID: "id_username"})
password = driver.find_element(password_locator)
password.send_keys('daniu')
例3:Left of
案例:获取登录按钮,再执行取消
cancel_locator = locate_with(By.TAG_NAME,"button").to_left_of({By.ID: "id_login"})
cancel_element = driver.find_element(cancel_locator)
print(cancel_element)
例4:Right of
#通过关联元素定位策略的Left of模式先获取“登录”按钮,然后获取“取消”按钮 cancel_locator = locate_with(By.TAG_NAME,"button").to_left_of({By.ID: "id_login"}) cancel_element = driver.find_element(cancel_locator)例5:Near模式,即目标元素在某元素的附近
locator = locate_with(By.TAG_NAME,”label”).near({By.ID:“id_username”})
element = driver.find_element(label_username_locator)
print(label_username_element)
例6: Chaining relative locators 模式
目标元素的位置既满足在元素 A 的 Above 位置,又满足在元素 B 的 Right of 位置
locator = locate_with(By.TAG_NAME,"button").below({By.ID:
"id_label2"}).to_left_of({By.ID: "id_login"})
element = driver.find_element(cancel_button_locator) #输出元素对象
print(cancel_button_element)
----------------------------------------------------------------------------
1.3、源码中学习常用方法
- send_keys
-- 应用场景:文本框输值
例:login.tml页面输入用户名
源码:
def send_keys(self, *value) -> None:
    """Simulates typing into the element.

        :Args:
            - value - A string for typing, or setting form fields.  For setting
              file inputs, this could be a local file path.

        Use this to send simple key events or to fill out form fields::

            form_textfield = driver.find_element(By.NAME, 'username')
            form_textfield.send_keys("admin")

        This can also be used to set file inputs.

        ::

            file_input = driver.find_element(By.NAME, 'profilePic')
            file_input.send_keys("path/to/profilepic.gif")
            # Generally it's better to wrap the file path in one of the methods
            # in os.path to return the actual path to support cross OS testing.
            # file_input.send_keys(os.path.abspath("path/to/profilepic.gif"))
        """
    # transfer file to another machine only if remote driver is used
    # the same behaviour as for java binding
    if self.parent._is_remote:
        local_files = list(
            map(
                lambda keys_to_send: self.parent.file_detector.is_local_file(str(keys_to_send)),
                "".join(map(str, value)).split("\n"),
            )
        )
        if None not in local_files:
            remote_files = []
            for file in local_files:
                remote_files.append(self._upload(file))
            value = "\n".join(remote_files)

    self._execute(
        Command.SEND_KEYS_TO_ELEMENT, {"text": "".join(keys_to_typing(value)), "value": keys_to_typing(value)}
    )
- click
--应用场景:单击
click 方法用于实现单击操作,如 button 登录操作,以 login.html 页面登录为例,示例 代码如下:
driver.find_element(By.ID,"loginbtn").click()
- get_attribute
login.html页面 class
-

- is_selected
-- 应用场景:常用于检查选择框状态是否选中
返回值:True/False
login.html 页面 男/女
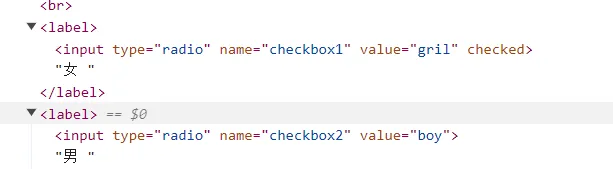
print(driver.find_element(By.NAME,"checkbox1").is_selected()) print(driver.find_element(By.NAME,"checkbox2").is_selected())- is_enabled
返回值:True/False
判断页面元素是否可用,可用则返回 True,不可用则返回 False。 如 login.html 用户名为可用状态,则返回 True,示例代码如下
print(driver.find_element(By.ID,"dntest").is_enabled)def is_enabled(self) -> bool: """Returns whether the element is enabled.""" return self._execute(Command.IS_ELEMENT_ENABLED)["value"]
- is_displayed
-- 应用场景:是否显示,肉眼可见
返回值:True/False
print(driver.find_element(By.ID,"dntest").is_displayed)
- maximize_window
-- 最大化
driver.maximize_window()
- fullscreen_window
-- 全屏
driver.fullscreen_window()
- minimize_window
-- 最小化
driver.minimize_window()
- text
-- linkText("上传附件")
driver.find_element(By.LINK_TEXT,"上传资料页面").get_attribute
('textContent')
driver.find_element(By.LINK_TEXT,"上传资料页面").text
- clear
应用场景:清空,如有初始值先“清空”
login.html用户名
driver.find_element(By.ID,"dntest").clear()源码:
def clear(self) -> None:
        """Clears the text if it's a text entry element."""
        self._execute(Command.CLEAR_ELEMENT)
- driver.back() 后退

#浏览器工具栏向后操作
driver.back();
- driver.forward() 前进
#浏览器工具栏向前操作
driver.forward();
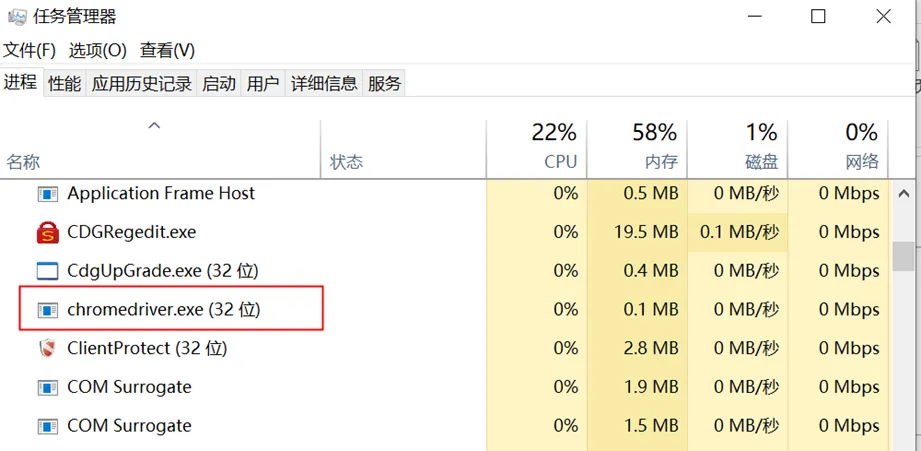
- close()
关闭浏览器,多个tab只关闭当前。老版本driver不会退出
- quit
关闭并driver退出,多个tab一起关闭
- current_url
login.html页面
print(driver.current_url)
- driver.current_window_handle
current_window_handle 方法用于返回窗口句柄,即标识窗口字符串
driver.current_window_handle
- refresh
-- 刷新
#刷新当前页面
driver.refresh()
- title
-- 如:login.html,title为"大牛测试"
#在控制台上打印 title“大牛测试” print(driver.title)- page_source
-- page_source 方法用于输出网页源码
print(driver.page_source)
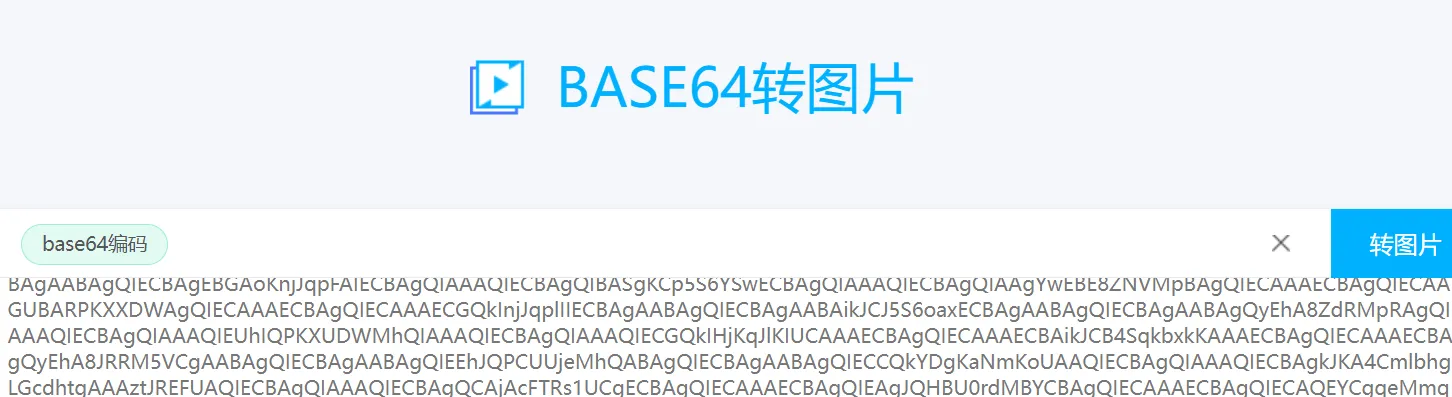
- get_screenshot_as_base64()
图片编码在线转换
https://tool.jisuapi.com/base642pic.html
- name
返回当前运行的浏览器名称, 如:输出firefox
print(driver.name)
23.set_window_size(800,600)
set_window_size 方法用于设置浏览器当前窗口大小,设置窗口宽度为 800、高度为 600,示例代码如下:
driver.set_window_size(800,600)
24.driver.get_window_size()
get_window_size 方法用于获取浏览器当前窗口的高度与宽度,示例代码如下
driver.get_window_size()25. set_window_position
set_window_position 方法用于设置浏览器当前窗口的位置,设置 x,y 为 0,0,示例代码 如下:
driver.set_window_position(0,0)
26. window_handles
window_handles 方法用于获取多窗口句柄,返回列表类型,如打开 login.html 页面, 单击“上传资料页面”后,输出所有窗口句柄,代码如下
#打印当前窗口句柄 driver.find_element(By.PARTIAL_LINK_TEXT,"上传资料").click() print(driver.window_handles)1.4、特殊方法
1、下拉框,以select.html为例●直接法
如选择第3个选项,定位语句为:
"/html/body/form/select/option[3]"●Select① 打印所有选项② all_selected_options,返回下拉框中已经选中的选项,代码如下:③ first_selected_option,返回第一个被选中的选项:
例1:
# select_element = driver.find_element(By.ID,"select_id")
# #index索引是从0开始的,如下代码选择1,则是表示第二个选项。
# Select(select_element).select_by_index(1)
例2:
se = driver.find_element(By.NAME,"selectList") # Select(se).select_by_visible_text("每页显示20条") ops = Select(se).first_selected_option print(ops.text)2、鼠标事件鼠标悬停即当光标与其名称表示的元素重叠时触发的事件,Selenium中对键盘鼠标操作封装在Action Chains类中。Action Chains类的主要应用场景为单击鼠标、双击鼠标、鼠标拖拽等。部分常用的方法使用分类如下:鼠标事件:click(on_element=None),模拟鼠标单击操作。• click_and_hold(on_element=None),模拟鼠标单击并且按住不放。• double_click(on_element=None),模拟鼠标双击。• context_click(on_element=None),模拟鼠标右击操作。• drag_and_drop(source,target),模拟鼠标拖拽。• drag_and_drop(source,xoffset,yoffset),模拟将目标拖拽到目标位置。• key_down(value,element=None),模拟按住某个键,实现快捷键操作。• key_up(value,element=None),模拟松开某个键,一般和key_down操作一起使用• move_to_element(to_element),模拟将鼠标移到指定的某个页面元素• move_to_element_with_offset(to_element,xoffset,yoffset),移动鼠标至指定的坐标• perform(),将之前一系列的ActionChains执行。• release(on_element=None),释放按下的鼠标例1、move_to_element#from selenium.webdriver.common.action_chains import ActionChains
driver.get('file:///Users/tim/Desktop/selenium/book/hover.html')
#鼠标悬停在系统控件
ActionChains(driver).move_to_element(driver.find_element(By.ID,"testdn")).perform()
#单击登录
driver.find_element(By.ID,"dntest").click()
例2、double_click 双击
driver.get('file:///D:/selenium/book/login.html')
element = driver.find_element(By.LINK_TEXT,"上传资料页面")
#双击“上次资料页面”
ActionChains(driver).double_click(element).perform()
例3、右击context_click
driver.get('file:///D:/selenium/book/login.html')
element = driver.find_element(By.ID,"dntest")
ActionChains(driver).context_click(element).perform()
例4、对滑块操作
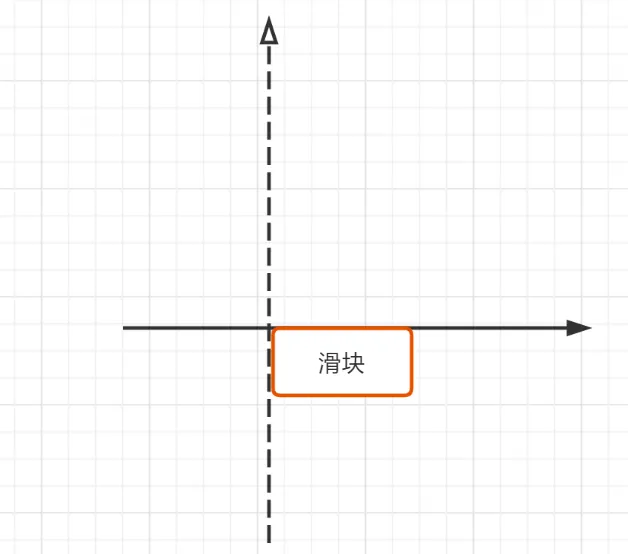
driver.get('https://passport.ctrip.com/user/reg/home')
import time
time.sleep(4)
driver.find_element(By.XPATH,"//*[@id='agr_pop']/div[3]/a[2]").click()
source = driver.find_element(By.CSS_SELECTOR,"#slideCode > div.cpt-drop-box > div.cpt-drop-btn")
target= driver.find_element(By.CSS_SELECTOR,"#slideCode > div.cpt-drop-box > div.cpt-bg-bar")
ActionChains(driver).drag_and_drop_by_offset(source,target.location.get("x"),target.location.get("Y")).perform()
3、键盘事件
- Keys.BACK_SPACE:删除键。
- Keys.SPACE:空格键。
- Keys.TAB:Tab 键。
- Keys.ESCAPE:回退键。
- Keys.ENTER:回车键。
- Keys.CONTROL,"a":快捷键 Ctrl + A。
- Keys.CONTROL,"x":快捷键 Ctrl + X。
- Keys.CONTROL,"v":快捷键 Ctrl + V。
- Keys.CONTROL,"c":快捷键 Ctrl + C。
- Keys.F1:F1 键。
- Keys.F12:F12 键。
例:实现登录框输入文本为“测试”并删除输入的最后一个字符,代码如下:
driver.find_element(By.ID,"").send_keys("dntest") driver.find_element(By.ID,"").send_keys(Keys.BACK_SPACE)4、定位一组元素以checkbox.html页面为例,选择所有测试类目
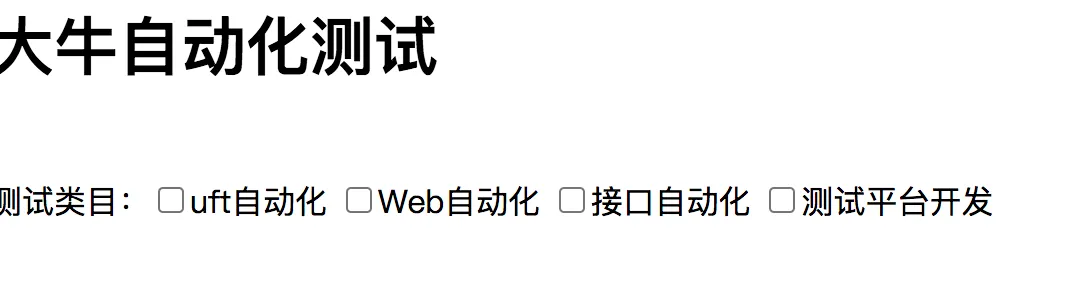
elements = driver.find_elements(By.NAME,"daniu") #打印所有NAME为“daniu”元素,存放到列表中 print(elements) #单击第二个元素即Web自动化 elements[1].click()5、frame操作frame标签有frameset、frame、iframe三种,frameset跟其他普通标签没有区别,不会影响到正常的定位,frame/iframe一样id、name、对象● switch_to.frame● switch_to.default_content()● switch_to.parent_frame()多层嵌套frame,切回
源码:
def frame(self, frame_reference: Union[str, int, WebElement]) -> None:
        """Switches focus to the specified frame, by index, name, or
        webelement.

        :Args:
         - frame_reference: The name of the window to switch to, an integer representing the index,
                            or a webelement that is an (i)frame to switch to.

        :Usage:
            ::

                driver.switch_to.frame('frame_name')
                driver.switch_to.frame(1)
                driver.switch_to.frame(driver.find_elements(By.TAG_NAME, "iframe")[0])
        """
        if isinstance(frame_reference, str):
            try:
                frame_reference = self._driver.find_element(By.ID, frame_reference)
            except NoSuchElementException:
                try:
                    frame_reference = self._driver.find_element(By.NAME, frame_reference)
                except NoSuchElementException as exc:
                    raise NoSuchFrameException(frame_reference) from exc

        self._driver.execute(Command.SWITCH_TO_FRAME, {"id": frame_reference})
例1:
driver.get('file:///D:/selenium/book/frame.html') # driver.switch_to.frame("frame")6、附件上传、下载上传
●方法一、send_keys
driver.find_element(By.ID,"upload").send_keys("D:/response.txt")●方法二、autoit
下载autoit工具,代码如下:
ControlFocus("打开","","Edit")
WinWait("[CLASS:#32770]","",5)
#上传 ip.txt 文件
ControlSetText("打开","","Edit1","D:\soft\ip.txt")
Sleep(1000)
ControlClick("打开","","Button1");
●方法三、pywinauto
#pip install pywinauto
#coding=utf-8
#引入 Application 模块
from pywinauto.application import Application
import time
app =Application()
#定位到窗口
app = app.connect(title_re="打开",class_name="#32770")
#设置文件路径
app['打开']["EDit1"].SetEditText("D:\soft\ip.txt ")
time.sleep(2)
#单击按钮
app["打开"]["Button1"].click()
print("end")
下载
driver.get('http://localhost:63342/pyse2023/chapter05/download.html?') driver.find_element(By.LINK_TEXT,'点击下载').click()7、多窗口切换功能:
driver.get('file:///Users/tim/Desktop/selenium/book/login.html#')
#打印当前窗口句柄
print(driver.current_window_handle)
driver.find_element(By.PARTIAL_LINK_TEXT,"上传资料").click()
#打印所有窗口句柄
print(driver.window_handles)
#切换都新页面
driver.switch_to.window(driver.window_handles[-1])
#打开上传附件窗口
driver.find_element(By.ID,"AttachFrame").click()
def window(self, window_name) -> None:"""Switches focus to the specified window.
:Args: - window_name: The name or window handle of the window to switch to.8、弹框●alert:用来提示
参见al.html页面●confirm:用来确认●prompt:输入内容accept 接受dismiss()取消
例:
driver.get("file:///D:/selenium/book/al.html")
#打开alert弹框

driver.find_element(By.ID,"alert").click()
#切换到 alert

al = driver.switch_to.alert
#执行接受即消除弹
al.accept()
9、颜色验证
from selenium.webdriver.support.colorimportColor
driver.get("http://localhost/login")
#获取的背景色 #1c84c6
# baidu_background_color = Color.from_string(driver.find_element(By.CLASS_NAME,'imgcode').value_of_css_property('background-color'))
#btnSubmit
baidu_background_color=Color.from_string(driver.find_element(By.ID,'btnSubmit').value_of_css_property('background-color'))
print(baidu_background_color.hex)
编写邮件(包含主旨、附件、正文)自动发送到邮箱2574674466@qq.com
--------------------------------------------------------------------------------------
第二章 基础加强
学习目标:
- ChromOptions细解
- 从源码看等待时间
- js与jquery高级应用
- cookie登录
- 驱动管理
- 元素截图以及By.ID打印后启发
2.1 、ChromOptions
- "start-fullscreen";全屏
- "headless";#无界面运行
- "window-size=400,600";
- "kiosk";无地址栏
- options.add_argument('--disable-infobars') # 禁止策略化
add_argument('--incognito') # 隐身模式(无痕模式)
add_argument('--disable-javascript') # 禁用javascript
add_argument('--start-maximized') # 最大化运行(全屏窗口),
add_argument('--hide-scrollbars') # 隐藏滚动条, 应对一些特殊页面
add_argument('blink-settings=imagesEnabled=false') # 不加载图片, 提升速度
例子:浏览器后台运行
options = webdriver.ChromeOptions()
options.add_argument(xx)
options = webdriver.ChromeOptions() #全屏 options.add_argument("start-fullscreen") driver = webdriver.Chrome(service=path,options=options) driver.get("file:///D:/selenium/book/login.html")2.2、等待时间
- 强制等待 time.sleep()
- 隐性等待driver.implicitly_wait()
设置的隐式等待时间为10秒
- 显式(expected_conditions)
如:WebDriverWait(driver,10,1)表示最长等待时间为 10s,每隔 1s 检查 1 次元素,直至元素被定位
By default, it is 0.5 second.
POLL_FREQUENCY: float = 0.5
class WebDriverWait:
    def __init__(
        self,
        driver,
        timeout: float,
        poll_frequency: float = POLL_FREQUENCY,
        ignored_exceptions: typing.Optional[WaitExcTypes] = None,
    ):
        """Constructor, takes a WebDriver instance and timeout in seconds.

        :Args:
         - driver - Instance of WebDriver (Ie, Firefox, Chrome or Remote)
         - timeout - Number of seconds before timing out
         - poll_frequency - sleep interval between calls
           By default, it is 0.5 second.
         - ignored_exceptions - iterable structure of exception classes ignored during calls.
           By default, it contains NoSuchElementException only.
from selenium.webdriver.support.ui import WebDriverWait from selenium.webdriver.support import expected_conditions as ex locate = (By.ID,"dntest") WebDriverWait(driver,10,1).until(ex.visibility_of_element_located(locate))WebDriverWait
- title_is
判断当前页面的title是否完全等于XX
- presence_of_element_located
判断某个locator元素是否被加到DOM树里,并不代表该元素一定可见(元素是隐藏的)
- element_selection_state_to_be
An Expectation for checking an element is visible and enabled such thatyou can click it.
- visibility_of
检查元素存在DOM页的,要能够看得到
- visibility_of_element_located
判断某个locator元素是否可见
- element_to_be_clickable
判断某个locator元素是否可点击
- element_to_be_selected
等待element元素是被选中,一般用在下拉列表
- element_located_to_be_selected
等待locator元素是被选中
"""An expectation for the element to be located is selected.locator is a tuple of (by, path)"""
2.3、JAVAScript与Jquery
- js通过id操作
document.getElementById('’).value='daniutest'
driver.execute_script(js)
- 滚动条window.scrollTo(0,1000) 纵向
- 滚动条window.scrollTo(1000,0) 横向
使用 JavaScript 代码来执行对浏览器滚动条的操作,以 scroll.html 页面为例,代码 如下:
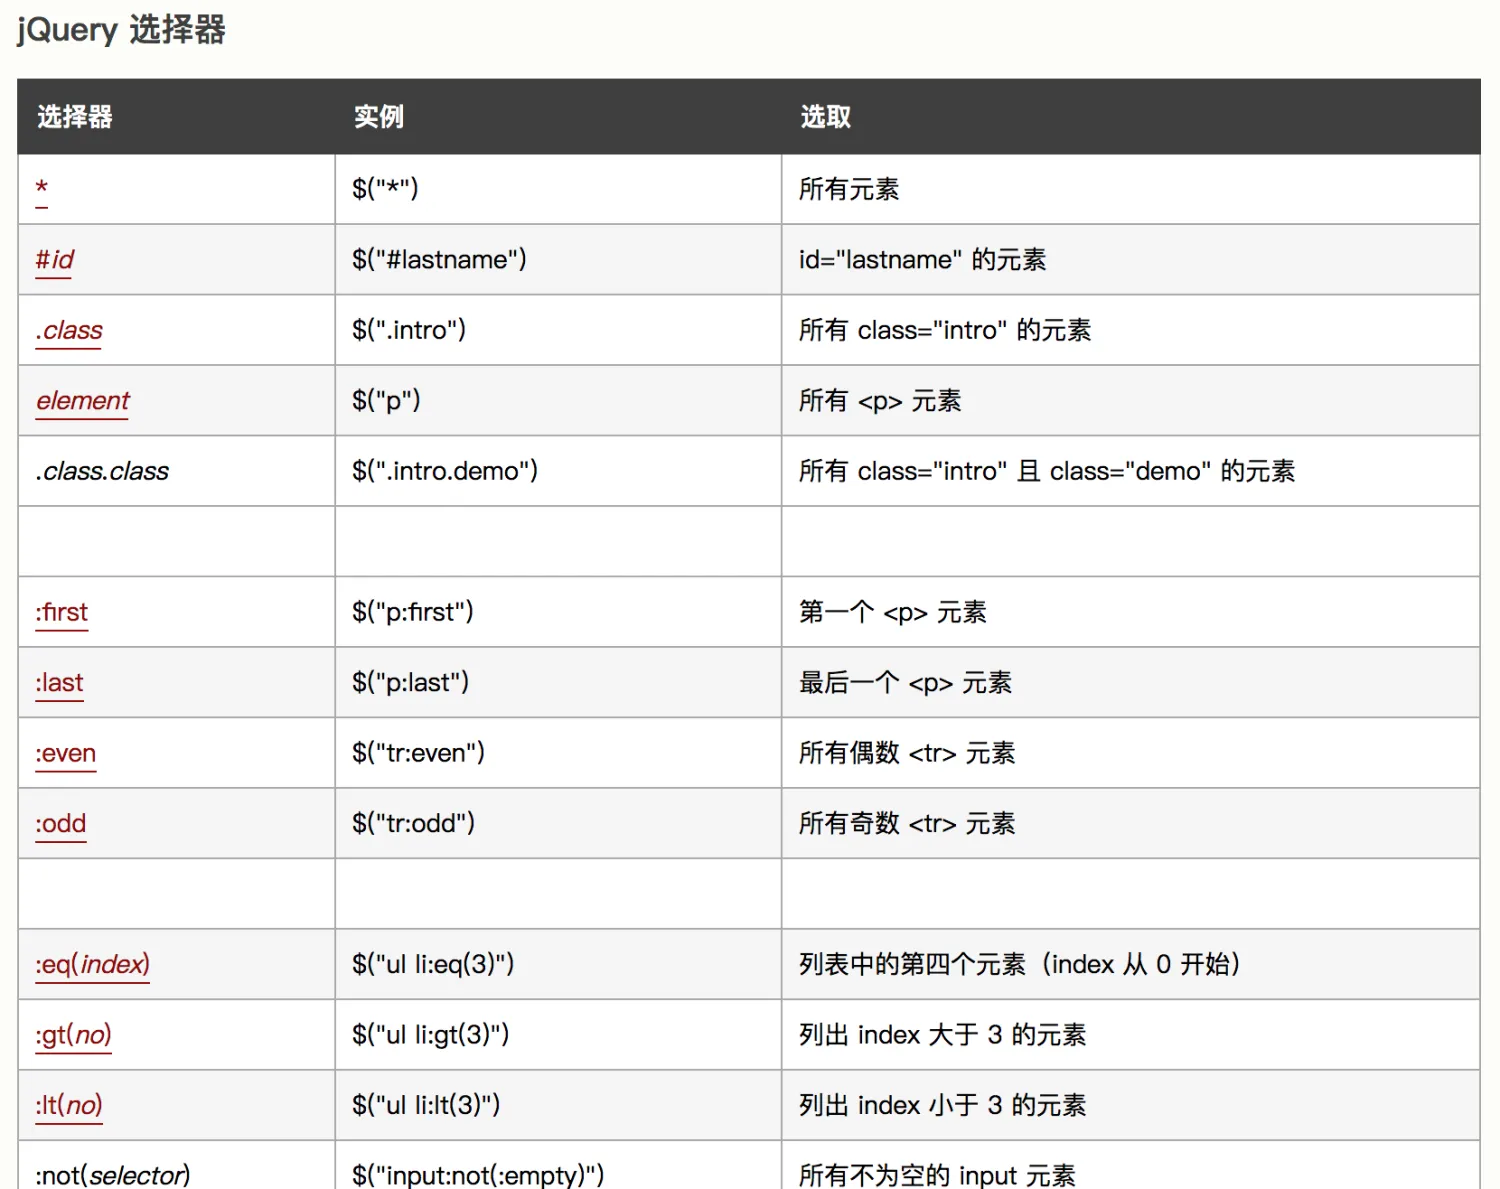
#coding=utf-8
from selenium import webdriver
from selenium.webdriver.chrome.service import Service
#driver 地址
path =Service('D:\\dr\\chromedriver')
driver = webdriver.Chrome(service=path)
driver.maximize_window()
driver.get("file:///D:/selenium/book/scroll.html")
#设置浏览器窗口大小,目的是让滚动条显示出来
driver.set_window_size(600,400)
js = "window.scrollTo(100,300)"
driver.execute_script(js)
jquery 是一个快速、简洁 JavaScript 库。
网址:https://www.w3school.com.cn/jquery/jquery_ref_selectors.asp
例1:
#coding=utf-8 from selenium import webdriver driver = webdriver.Chrome() driver.maximize_window() driver.get("xx") jq = "$('#id').val('dntest')" driver.execute_script(jq)例2:#以下代码实现单击登录按钮
jq = "$('').click()" driver.execute_script(jq) driver.quit()- 复数 document.getElementsByName("wd")
- 自定义属性:
element.setAttribute("dn","www"); element.getAttribute- 同步执行与异步执行
execute_script 是同步执行javascript代码。
execute_async_script 异步执行代码,WebDriver不会等待异步执行的代码的结果,直接执行以下的代码。
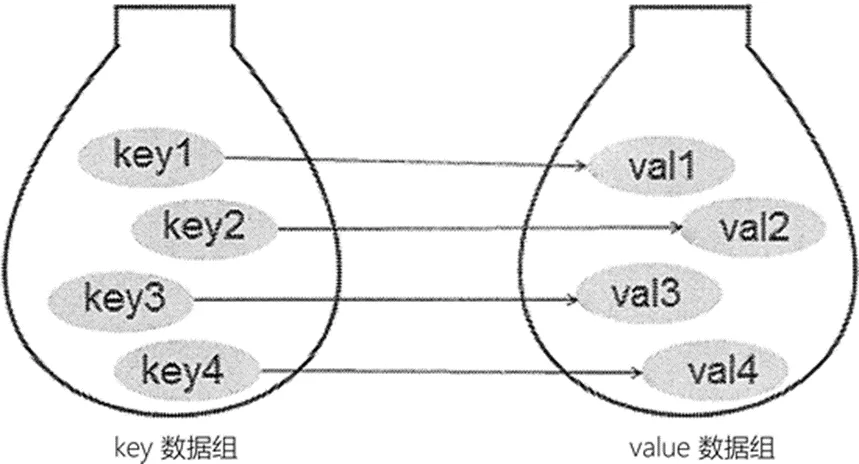
1.4、Cookie操作
- 字典
字典也是 Python 提供的一种常用的数据结构,它用于存放具有映射关系的数据
dic ={"a":"selenium","b":"appium","c":"ui"}
print(dic.get("b"))
for k in dic:
    print (k)
    print(dic[k])
浅拷贝:
深考贝:
- 浅拷贝:意思是就 拷贝了,但又拷贝得不彻底。浅拷贝之后,新对象确实是生成了,但在某些情况下新对象还和被拷贝对象有千丝万缕的联系。
- 深拷贝:深拷贝是真正的拷贝,一股脑儿都拷贝一个新,是彻底的拷贝,拷贝以后与被拷贝对象不再有任何瓜葛
面试题:请讲述 python字典 浅拷贝与深拷贝:
#深拷贝会完全拷贝父对象及父对象内部的子对象,而浅拷贝会拷贝父对象,但不会拷贝父对象内部的子对象
from copy import deepcopy dic = {"a":[1,1,1],"b":[2,2,2],"c":[4,4,4],"d":[5,5,5]} d1 = deepcopy(dic) #深拷贝 print("d1=",d1) d2 = dic.copy() #浅拷贝 print("d2=",d2) print("--------深拷贝修改子对象--------") #对字典内部子对象列表修改 d1["c"].append() d1["d"].append(111) print("子对象修改后d1:\n ",d1) print("深拷贝的父对象:\n ",dic) #父对象没有修改 print("--------浅拷贝修改子对象--------") d2["c"].append(222) d2["d"].append(222) print("子对象修改后d2:\n ",d2) print("浅拷贝的父对象:\n ",dic) #父对象被修改了- Cookie常用方法:
Cookie操作方法
方法描述
add_cookie(cookie_dict)
在当前会话中添加cookie信息,并且参数是属于字典类型数据
delete_all_cookies()
删除所有cookie信息
delete_cookie(cookie_name)
删除单个名字为“cookie_name”的cookie信息
get_cookie(cookie_name)
返回名为“cookie_name”的cookie信息
get_cookies()
返回当前会话所有的cookie信息
百度网网盘登录前后cookie比较:
2.5 innerText 与 innerHTML
innerText 属性将文本内容设置或返回为指定节点及其所有子节点的纯文本,如 inner.html 页面对标签
操作,输出字符“大牛测试”
InnerHTML 允许使用 HTML 格式的文本,并且不会自动对文本进行编码和解码,如 inner.html 页面对标签<p>操作,输出“<b>大牛测试</b>”,
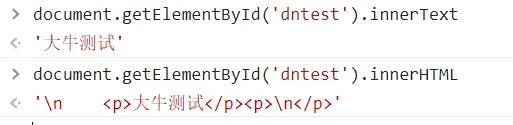
driver = webdriver.Chrome(service=path)
driver.maximize_window()
driver.get("file:///D:/selenium/book/inner.html")
#输出 innerText 值“大牛测试”
print(driver.find_element(By.ID,"dntest").get_attribute("innerText"))
#输出 innerHTML 值“<b>大牛测试</b>”
#print(driver.find_element(By.ID,"dntest").get_attribute("innerHTML"))
2.6元素截图
方法一、直接截图
driver.get("file:///Users/tim/Desktop/selenium/book/login.html")
driver.save_screenshot("verification_code.png")
imglogin=driver.find_element(By.ID,"img")
imglogin.screenshot("login.png")
方法二、先截整张、再截部分
安装pillow库 # pip install pillow
from PIL import Image
driver = webdriver.Chrome()
driver.get("file:///Users/tim/Desktop/selenium/book/login.html")
time.sleep(2)
driver.save_screenshot("code.png")
imgcode=driver.find_element(By.ID,"loginbtn")
#登录位置 left 值
left= imgcode.location['x']
#登录位置 top 值
top= imgcode.location['y']
#加上宽度
right = left+imgcode.size['width']
#加上高度
bottom = top+imgcode.size['height']
im = Image.open("vcode.png")
im = im.crop((left,top,right,bottom))
im.save('login.png')
2.7 驱动管理
Selenium 4 支持驱动管理模式,使用 WebDriver Manager 模式进行驱动管理时首先需 要下载 WebDriver Manager 模块,命令为“pip install webdriver-manager”
from selenium import webdriver
from selenium.webdriver.chrome.service import Service
from webdriver_manager.chrome import ChromeDriverManager
driver = webdriver.Chrome(service=Service
(ChromeDriverManager().install()))
driver.get("file:///Users/tim/Desktop/selenium/book/login.html"
源码:
class ChromeDriverManager(DriverManager):
    def __init__(
            self,
            driver_version: Optional[str] = None,
            name: str = "chromedriver",
            url: str = "https://chromedriver.storage.googleapis.com",
            latest_release_url: str = "https://chromedriver.storage.googleapis.com/LATEST_RELEASE",
            chrome_type: str = ChromeType.GOOGLE,
            download_manager: Optional[DownloadManager] = None,
            cache_manager: Optional[DriverCacheManager] = None,
            os_system_manager: Optional[OperationSystemManager] = None
    ):
        super().__init__(
            download_manager=download_manager,
            cache_manager=cache_manager,
            os_system_manager=os_system_manager
        )

        self.driver = ChromeDriver(
            name=name,
            driver_version=driver_version,
            url=url,
            latest_release_url=latest_release_url,
            chrome_type=chrome_type,
            http_client=self.http_client,
            os_system_manager=os_system_manager
        )

    def install(self) -> str:
        driver_path = self._get_driver_binary_path(self.driver)
        print(driver_path)
        os.chmod(driver_path, 0o755)
        return driver_path
面试题:你是如何管理驱动的?
2.8 通过源码理解By.ID
例: 输出 By.ID 值,思考为什么?通过看源码恍然大悟
#coding=utf-8
from selenium import webdriver
from selenium.webdriver.chrome.service import Service
from selenium.webdriver.common.by import By
path =Service('D:\\dr\\chromedriver')
driver = webdriver.Chrome(service=path)
print(By.ID)
源码:
class By:
    """
    Set of supported locator strategies.
    """

    ID = "id"
    XPATH = "xpath"
    LINK_TEXT = "link text"
    PARTIAL_LINK_TEXT = "partial link text"
    NAME = "name"
    TAG_NAME = "tag name"
    CLASS_NAME = "class name"
    CSS_SELECTOR = "css selector"
尝试替换id
driver.find_element("id","dntest").send_keys("测试")作业:
用getElementsByName给用户名输入“大牛测试”
第二篇 项目实战
学习目标:
- 理解项目需求
- 测试用例编写
- 验证码识别与方法改良
- 框架封装
- 无人值守方案解决思路
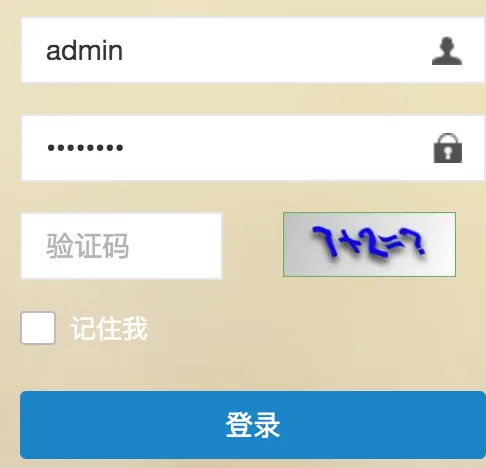
1.1 功能测试用例
ID
模块名
覆盖功能点
前置条件
测试步骤
预期结果
testcase_01
系统登录
登录功能
登录功能 正常
(1)打开系统登录页面。
(2)在用户名和密码输入框 中分别输入用户名与密码。
(3)使用验证码识别技术识 别验证码。
(4)输入第(3)步中识别 出来的验证码。
(5)单击“登录”按钮
(1)登录页面能正常打开。
(2)用户名、密码信息能正常 输入。
(3)验证码能被正确识别。
(4)识别出来的验证码能被正 确输入。
(5)用户能正常登录系统
testcase_02
岗位管理
岗位信息管理 功能
管理员能正常 登录系统
(1)打开岗位管理页面。
(2)单击“新增”按钮。
(3)在添加岗位页面,输入 “岗位名称”“岗位编码”“显 示顺序”“备注”等。
(4)单击“确定”按钮
(1)岗位管理页面能正常打开。 (2)添加岗位页面能正常打开。 (3)测试步骤(3)中的这些字 段都能输入相关字段内容。
(4)能够成功添加岗位
testcase_03
部门管理
部门信息管理 功能
管理员能正常 登录系统
(1)打开部门管理页面。
(2)单击“新增”按钮。
(3)在添加部门页面,输入 “上级部门”“部门名称”“显 示顺序”“负责人”“联系电 话”“邮箱”“部门状态”(正 常或停用)等。
(4)单击“确定”按钮
(1)部门管理页面能正常打开。 (2)添加部门页面能正常打开。 (3)测试步骤(3)中的这些字 段都能输入相关字段内容。
(4)能够成功添加部门
testcase_04
角色管理
角色信息管理 功能
管理员能正常 登录系统
(1)打开角色管理页面。
(2)单击“新增”按钮。
(3)在添加角色页面,输入 “角色名称”“权限字符”“显 示顺序”“状态”“备注”“菜 单权限”等。
(4)单击“确定”按钮
(1)角色管理页面能正常打开。 (2)添加角色页面能正常打开。 (3)测试步骤(3)中的这些字 段都能输入相关字段内容。
(4)能够成功添加角色
testcase_05
用户管理
用户信息管理 功能
管理员能正常 登录系统
(1)打开用户管理页面。
(2)单击“新增”按钮。
(3)在添加用户页面,输入 “用户名称”“手机号码”“登 录账户”“用户性别”“岗位” “角色”“归属部门”“邮箱” “登录密码”“用户状态”等。
(4)单击“确定”按钮
(1)用户管理页面能正常打开。 (2)添加用户页面能正常打开。 (3)测试步骤(3)中的这些字 段都能输入相关字段内容,其 中岗位、角色和归属部门可以 选择 testcase_02/03/04 新建的 记录。
(4)能够成功添加用户
3.1 、项目部署
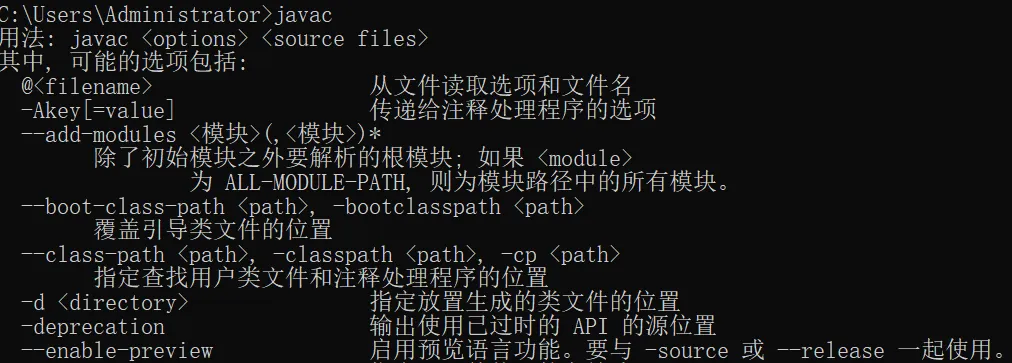
1、项目本地部署
- 先安装JDK
安装后好输入dos窗口输入:java
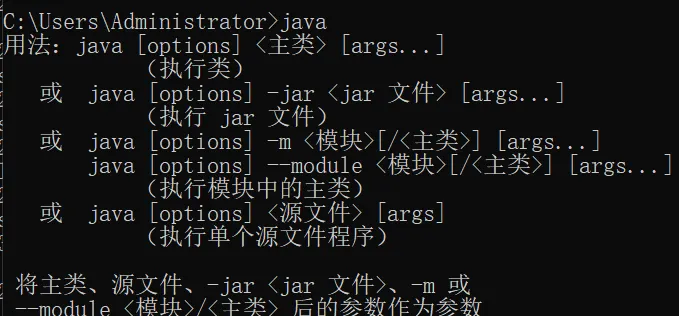
再输入javac
- #java -jar dntest.jar
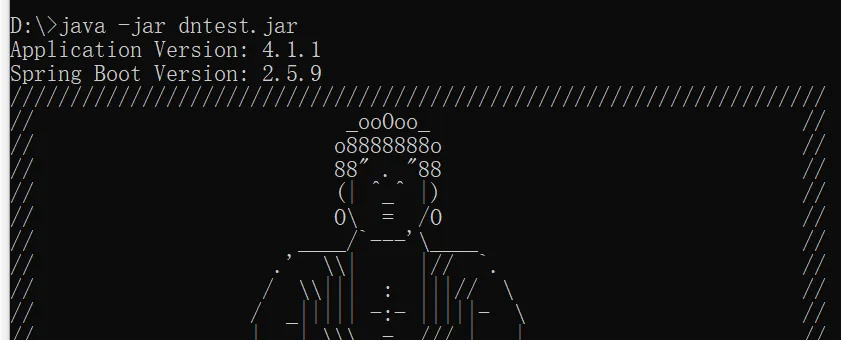
用户名/密码 :
3.2 、角色管理疑难分析
角色管理-选中与不选中
#side-menu > li.active > ul > li.active.selected > a
新增-确定功能
3.3、复杂控件定位
#js复数定位
3.4、登录验证码封装
斐斐打码:
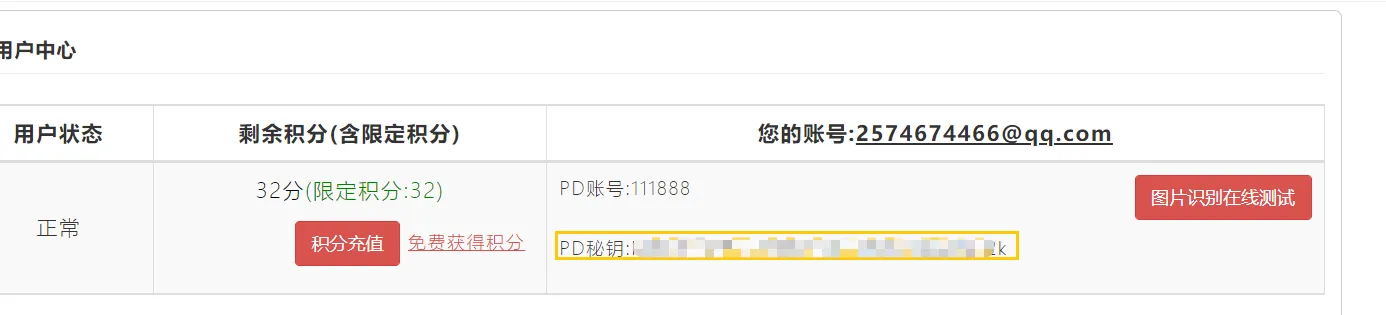
下载地址:

源码修改:
3.5、封装
学习目标:
- 有、无返回值函数
- unittest框架应用
- unittest结合selenium实践
3.51、函数
函数指将一组语句的集合通过一个名字(函数名)封装起来,可以简化代码、提高代码的复用性、代码可扩展
Python函数有五大要素:def、函数名、函数体、参数、返回值
例子:
def sum(a,b):
    return a+b
注:函数名“sum”和参数部分“a,b”,后面紧接一个冒号“:”可以理解为声明函数结束标志;“return a+b”是函数体
例1:参数有初始值
def testFunc2(a,b = 3):
   return a + b
例2:可变参数-即函数中,参数的个数是不固定的,可以是1个,2个,还可以是0个等等
def testFunc3(a,*b): print(a) print(b) testFunc3(2)例3:关键字参数
关键字参数允许传入0个或任意个含参数名的参数,而这些关键字参数在函数内部自动组装成一个字典类型。实例源码如下:
def testFunc4(id,name,**kw):
    print('id:',id,'name:',name,'other:',kw)

testFunc4("a","b",ss='kk')
引用外部函数:
import xx
  from xx import xx
3.52、 单元测试
单元测试框架●测试脚手架test fixture表示为了开展一项或多项测试所需要进行的准备工作,以及所有相关的清理操作。举个例子,这可能包含创建临时或代理的数据库、目录,再或者启动一个服务器进程。●测试用例一个测试用例是一个独立的测试单元。它检查输入特定的数据时的响应。unittest提供一个基类:TestCase,用于新建测试用例。●测试套件test suite是一系列的测试用例,或测试套件,或两者皆有。它用于归档需要一起执行的测试。●测试运行器(test runner)test runner 是一个用于执行和输出测试结果的组件。这个运行器可能使用图形接口、文本接口,或返回一个特定的值表示运行测试的结果。●断言类型
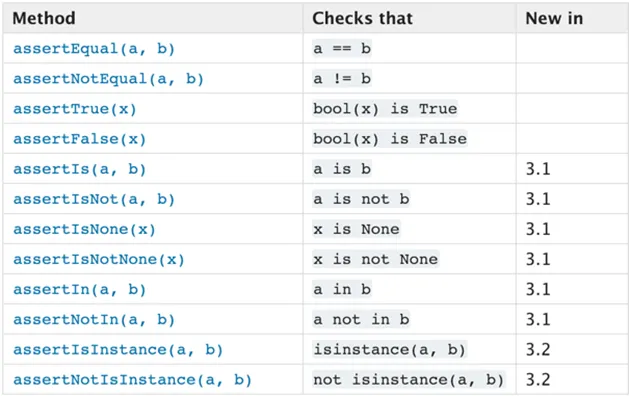
示例
import unittest class TestStringMethods(unittest.TestCase): def test_upper(self): self.assertEqual('foo'.upper(), 'FOO') def test_isupper(self): self.assertTrue('FOO'.isupper()) self.assertFalse('Foo'.isupper()) if __name__ == '__main__': unittest.main()●@unittest.skip(reason)¶跳过被此装饰器装饰的测试。 reason 为测试被跳过的原因。●setUp●tearDown
3.53、批量运行脚本:
top_level_dir 路径:第一次运行时如果为None 会取当前传入的在路径为 top_level_dir
path = os.getcwd()+"\\cases"
print(path)
discover = unittest.defaultTestLoader.discover(path, pattern="test*.py", top_level_dir=None)
runner = unittest.TextTestRunner()
runner.run(discover)
综合案例:
重构多窗口案例,增加断言
登录窗口
需求:十组用户登录批量登录功能
问题:1、浏览器打开两遍
2、默认值没有去掉
3、excel+ddt
def get_data(filename, sheetnum): path = 'testdata.xls' book_data = xlrd.open_workbook(path) book_sheet = book_data.sheet_by_index(0) #book_sheet = book_data.sheet_by_index(1) # 打开文件的中第一个表 rows_num = book_sheet.nrows # 行数 rows0 = book_sheet.row_values(0) # 第一行的各个名称作为字典的键 rows0_num = len(rows0) # 这个可以知道有几列 list = [] for i in range(1, rows_num): rows_data = book_sheet.row_values(i) # 取每一行的值作为列表 rows_dir = {} for y in range(0, rows0_num): # 将每一列的值与每一行对应起来 rows_dir[rows0[y]] = rows_data[y] list.append(rows_dir) return list3.6、无人值守自动化
登录封装
复杂案例:循环登录实现
3.7、框架封装
重构登录
重构角色管理
作业:
1、完善需求表
2、参照角色管理模块封装方法,任选一模块进行封装
-------------------------------------------------------
第四章 数据驱动框架
4.1、文件
- CSV文件:
# import csv # p='test.csv' # c=csv.reader(open(p,'r',encoding='utf-8')) # for cs in c: # print(cs[1])- 文本文件
- 路径操作
乱码问题:
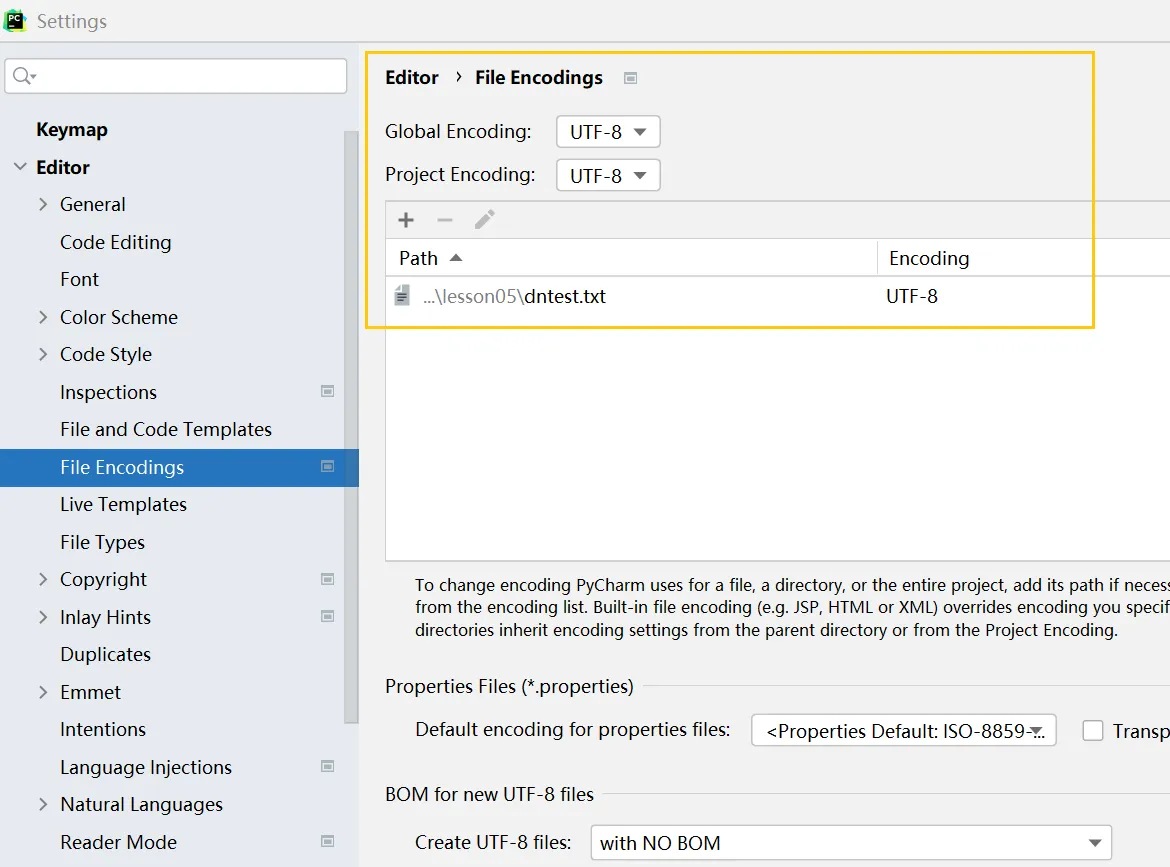
代码加入:
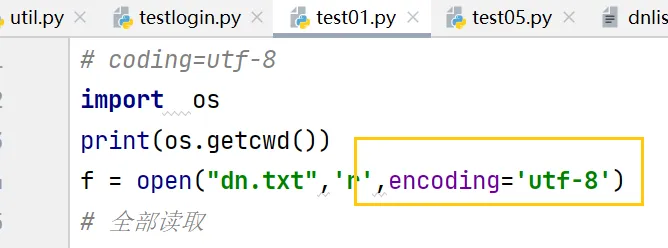
4.2 、Excel用法
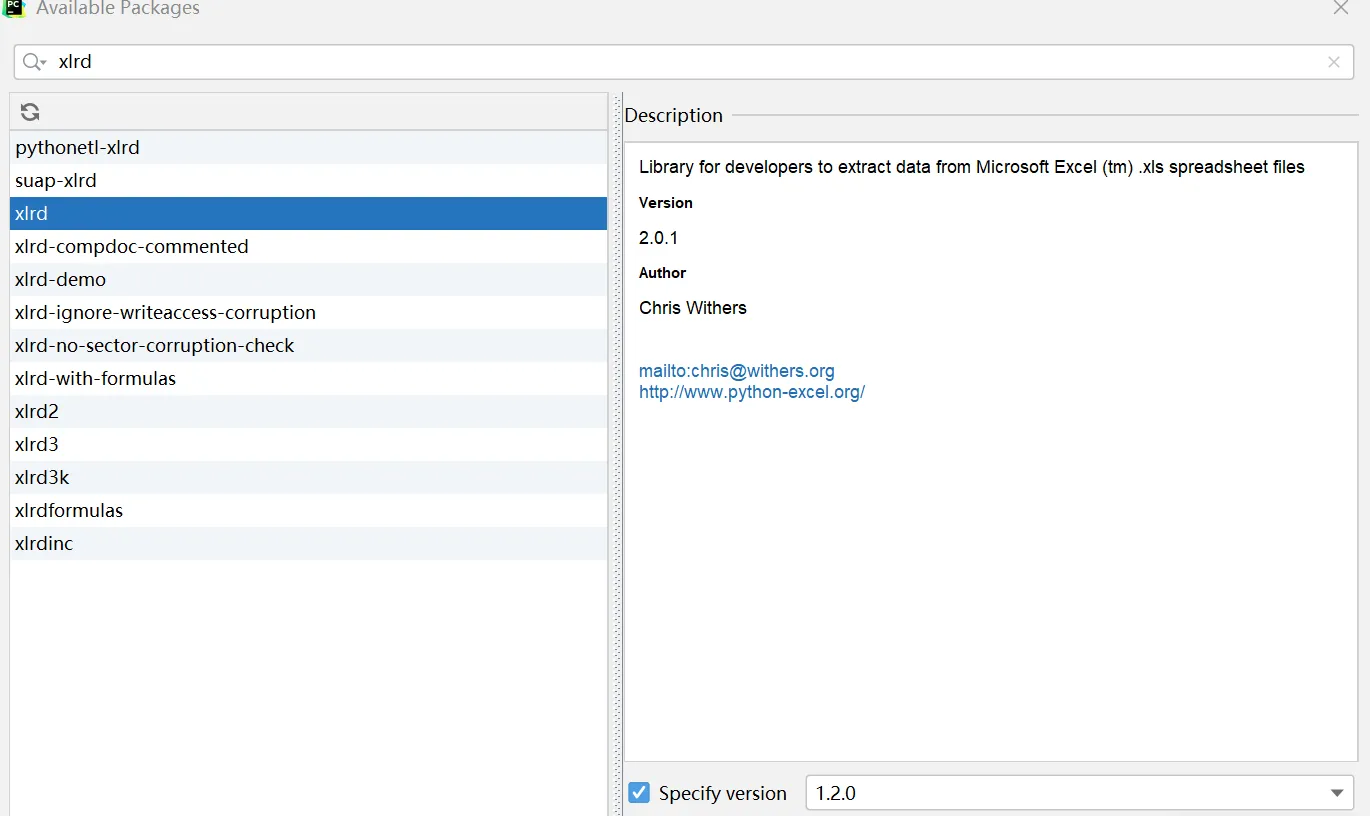
- 读取exel :xlrd
pip install xlrd- 写excel:xwt
pip install xlrd注:xlrd 2.0.1版本不支持xlsx,需回退到 1.2.0
4.3、Json与xml
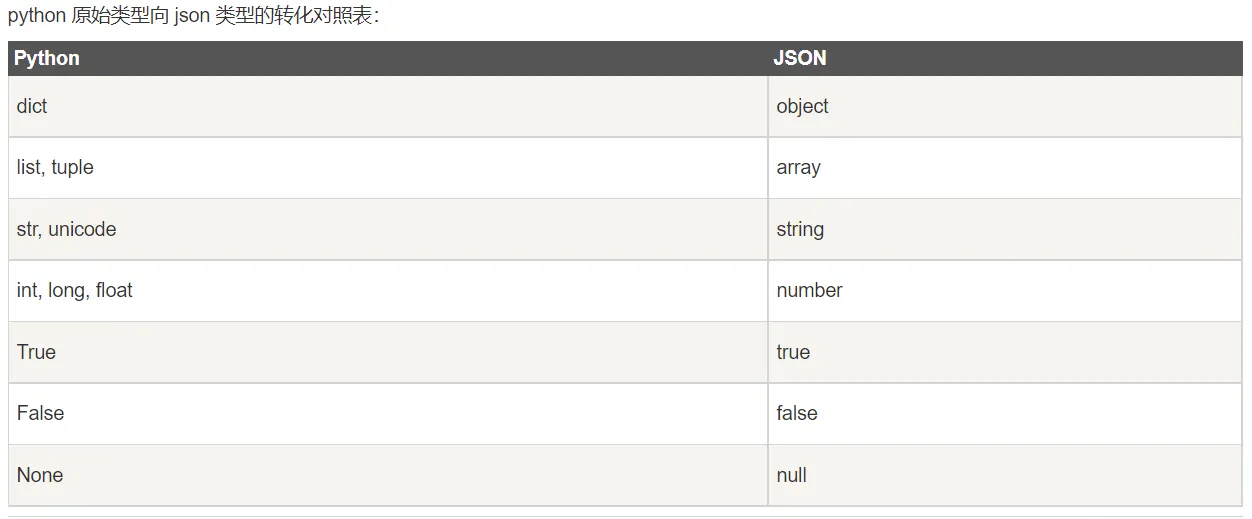
dump用于将dict类型的数据转成str,并写入到json文件
load用于从json文件中读取数据
dumps用于将dict类型的数据转成str,因为如果直接将dict类型的数据写入json文件中会发生报错,因此在将数据写入时需要用到该函数。
loads用于将str类型的数据转成dict
import json

a_dict = {'a': 1, "b": 'qw', '''c''': ['q', 'w'], 'd': '您好'}
a_json = json.dumps(a_dict, ensure_ascii=False, indent=2)  # 缩进2个空格
print(type(a_json))
print(a_json)
xml文件:
<?xml version="1.0" encoding="UTF-8"?>
<users>
	<user id ="1001">
		<username>test1</username>
                              <password>t123</password>
	</user>
              <user id="1002">
		<username>test2</username>
		<password>t234</password>
              </user>
</users>
xml:
import  xml.dom.minidom
dom=xml.dom.minidom.parse("user.xml")
root= dom.documentElement
ls=root.getElementsByTagName("user")
print(ls[1].getAttribute("id"))
print(ls[1].getElementsByTagName("password")[0].childNodes[0].nodeValue)
for l in ls:
    print(l.getElementsByTagName("password")[0].childNodes[0].nodeValue)
4.4 、ddt框架
安装ddt库
pip install ddt@符号用做函数的修饰符
@data,先执行data内的属性
@data 跟for循环一样 遍历元组每个数据 然后传递给被装饰的方法的一个参数,有几条数据 就执行几次用例
如:
@data(2, 3)
@unpack() 分解数据,主要是把元组和列表解析成多个参数
案例:循环登录功能实践
- 通过excel:
需求格式
[{"username": "tim", "password": "123"}, {"username": "tim1", "password": "123"}]- 通过json实现
{"1":{"user":"dntest","passwd":"admin123"},
 "2":{"user":"dntest","passwd":"admin123"},
 "3":{"user":"dntest","passwd":"admin123"}
}
第五章 PageObject设计模式
5.1 、测试报告:
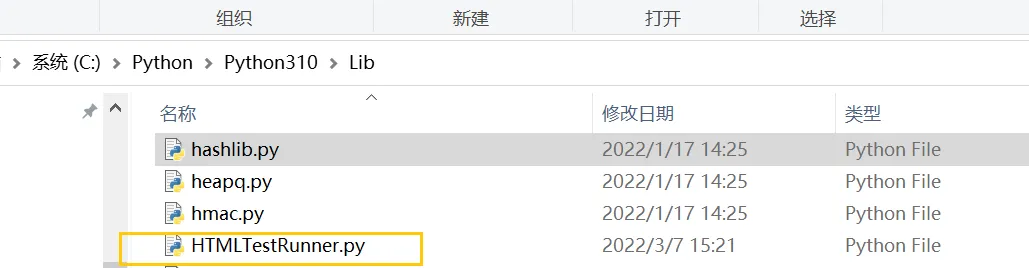
下载HTMLTestRunner.py文件,下载地址:
http://tungwaiyip.info/software/HTMLTestRunner.html
它的语法是基于Python 2的。假如需要Python3版本的,需要对它进行修改
HTMLTestRunner.py放于Python Lib目录下
5.2 、类与继承
5.3 po实战
PO概念:
- 公共方法代表页面提供的服务
- 不要暴露页面细节
- 不要把断言和操作细节混用
- 方法可以 return 到新打开的页面
- 不要把整页内容都放到PO 中
- 相同的行为会产生不同的结果,可以封装不同结果
例:以登录为例PageObject实现
setup():测试函数运行前运行
teardown():测试函数运行完后执行
setUpClass():必须使用
@classmethod 装饰器,所有test运行前运行一
tearDownClass():必须使用
@classmethod装饰器,所有test运行完后运行一次
框架重构:
1、基本类封装改良
可变参数
*args是arguments单词缩写,表示任意多个无名参数,是一个tuple,如 (1,2,3,‘dn','test')
2、logging模块
log改良
#pip install logurulog.debug('调试消息')
log.info('普通消息')
log.warning('警告消息')
log.error('错误消息')
log.critical('严重错误消息')
log.success('成功调用')
第六章 pytest重构项目
6.1 pytest基础
单元测试框架pytest
6.11 安装:#pip install pytest

查看版本:#pytest --version

第一个示例:
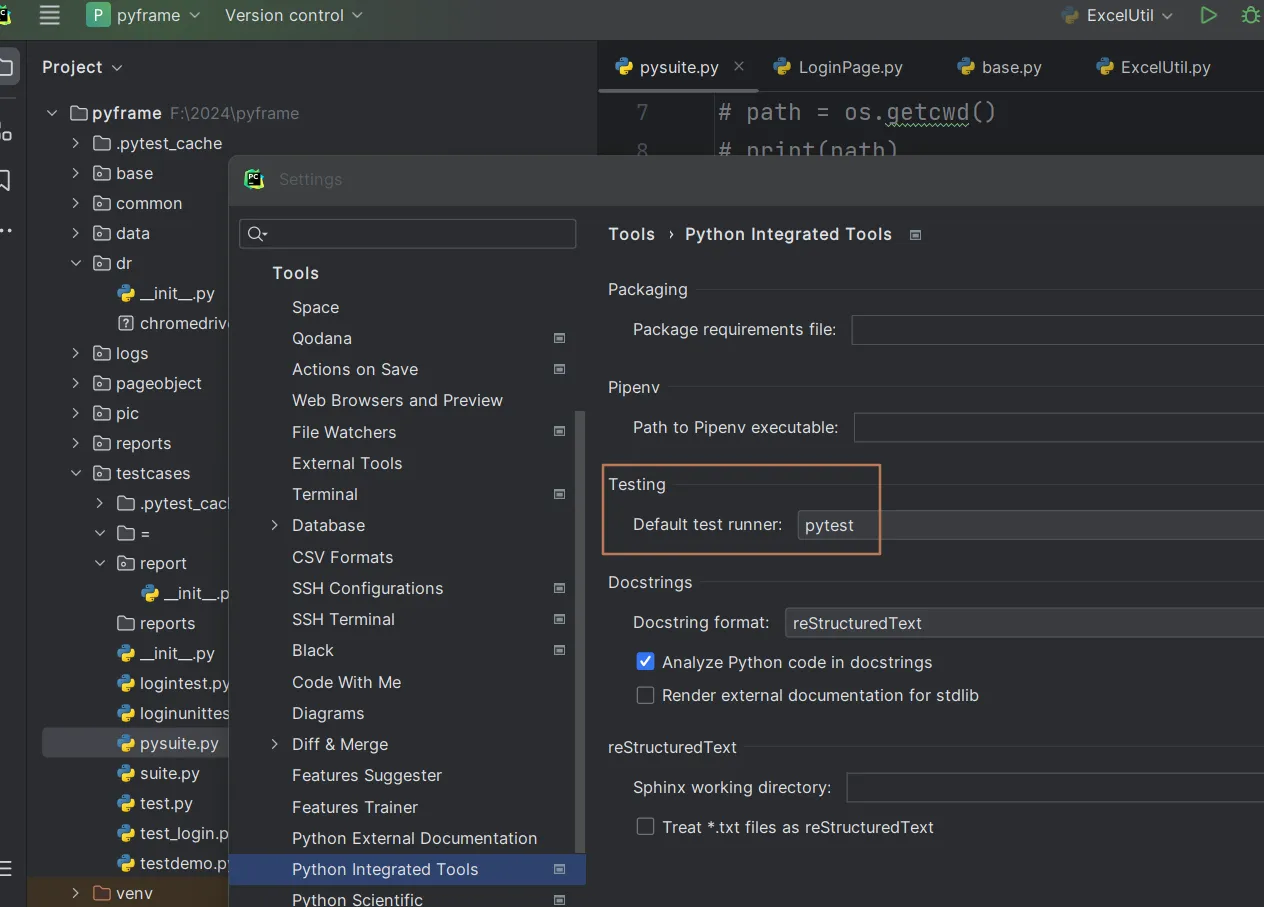
def daniu(x):
    return x+1
def test_answer():
    assert daniu(8) == 9
注意:(1) 运行pycharm设置
pycharm -> preferences -> Tools-> python integrated Tools
(2) 命令行运行
#pytest xx.py
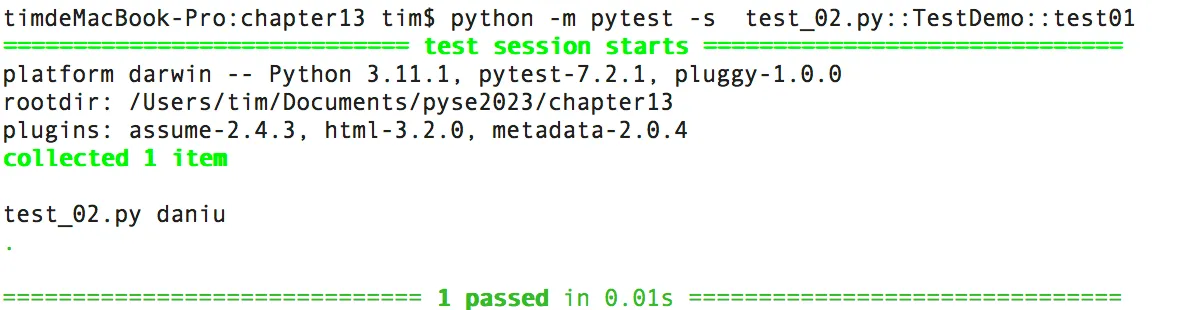
(3) 指定执行某个test方法
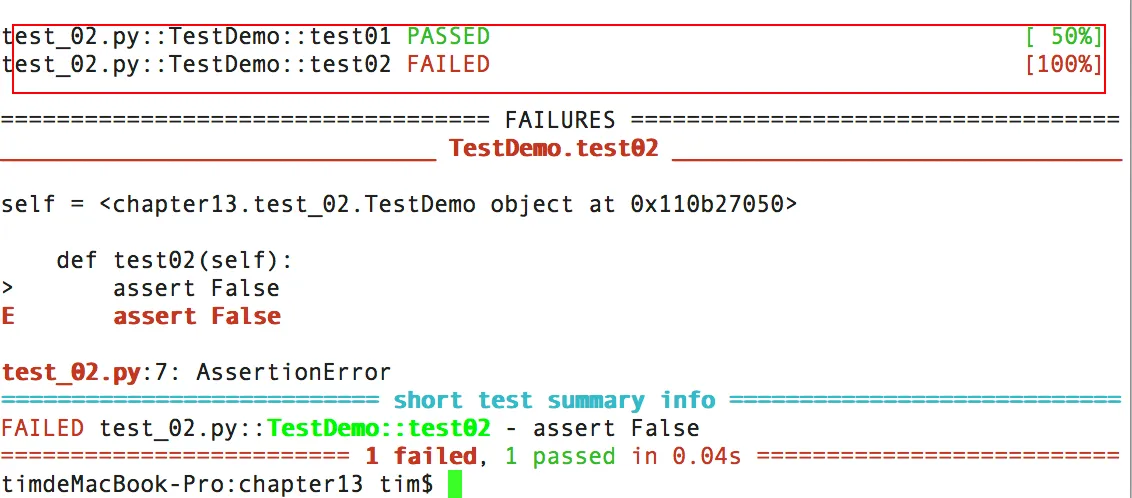
pytest test_02.py::TestDemo::test01
6.12 格式示例
文件名以test_开头或以_test结尾
例:
测试类以Test开头,不能有init方法
例:
测试方法以test开头
例:
6.13 pyest断言:
常用断言:关键字assert + 表达式
assert xx :判断 xx 为真assert not xx :判断 xx 不为真assert a in b :判断 b 包含 aassert a == b :判断 a 等于 bassert a != b :判断 a 不等于 b
6.14 执行命令:
- -v增加显示测试方法以及测试通过率百分比。
#pytest -v xx.py
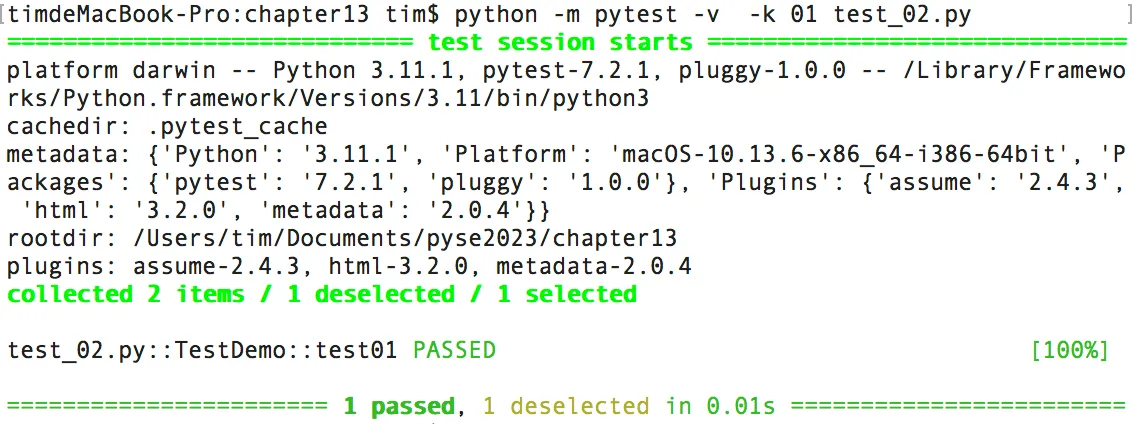
if __name__ =="__main__": pytest.main(["-v","test_02.py"])- -k 筛查只运行部分测试用例,如test_02中test01,命令为:
#pytest -k 01 test_02.py
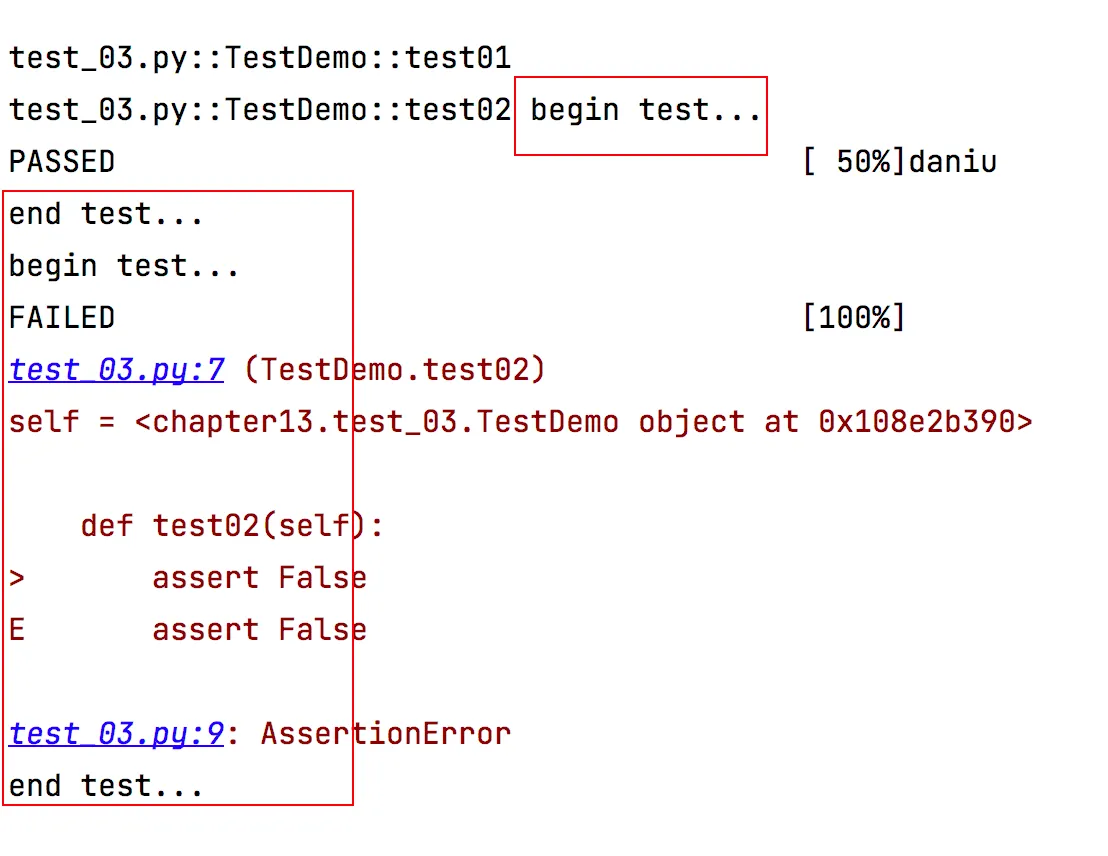
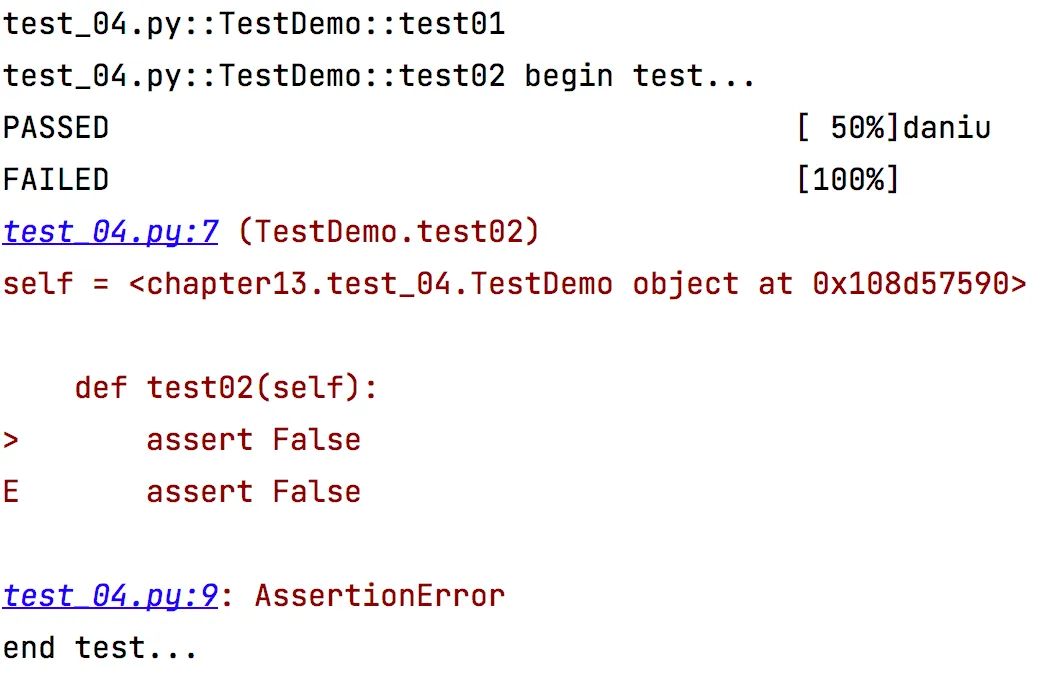
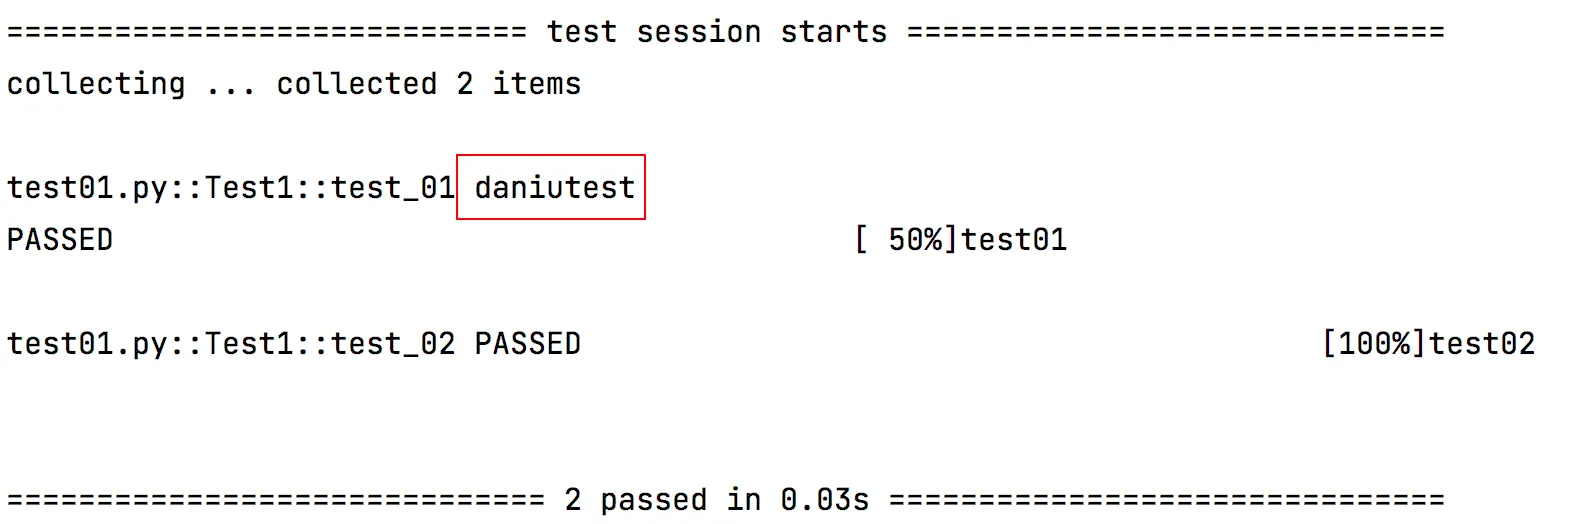
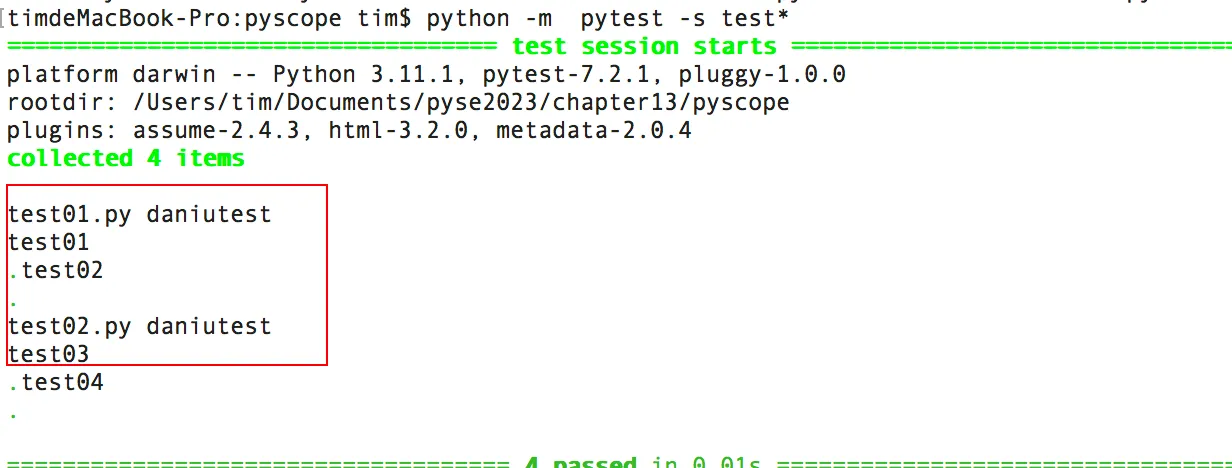
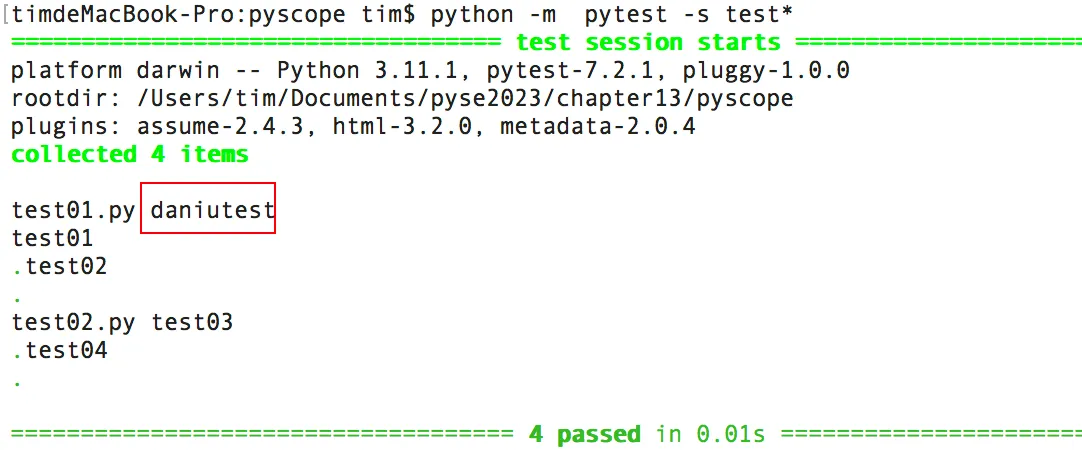
- -s 显示测试代码中print语句

6.2 测试前置与销毁
setup与teardown作用范围同unittest框架
- setup函数是可以在测试方法执行之前执行的
- teardown函数是可以在测试方法执行之后执行的
例子:
- setup_class,作用范围每个类之前
- teardown_class,作用范围每个类之后
执行参数
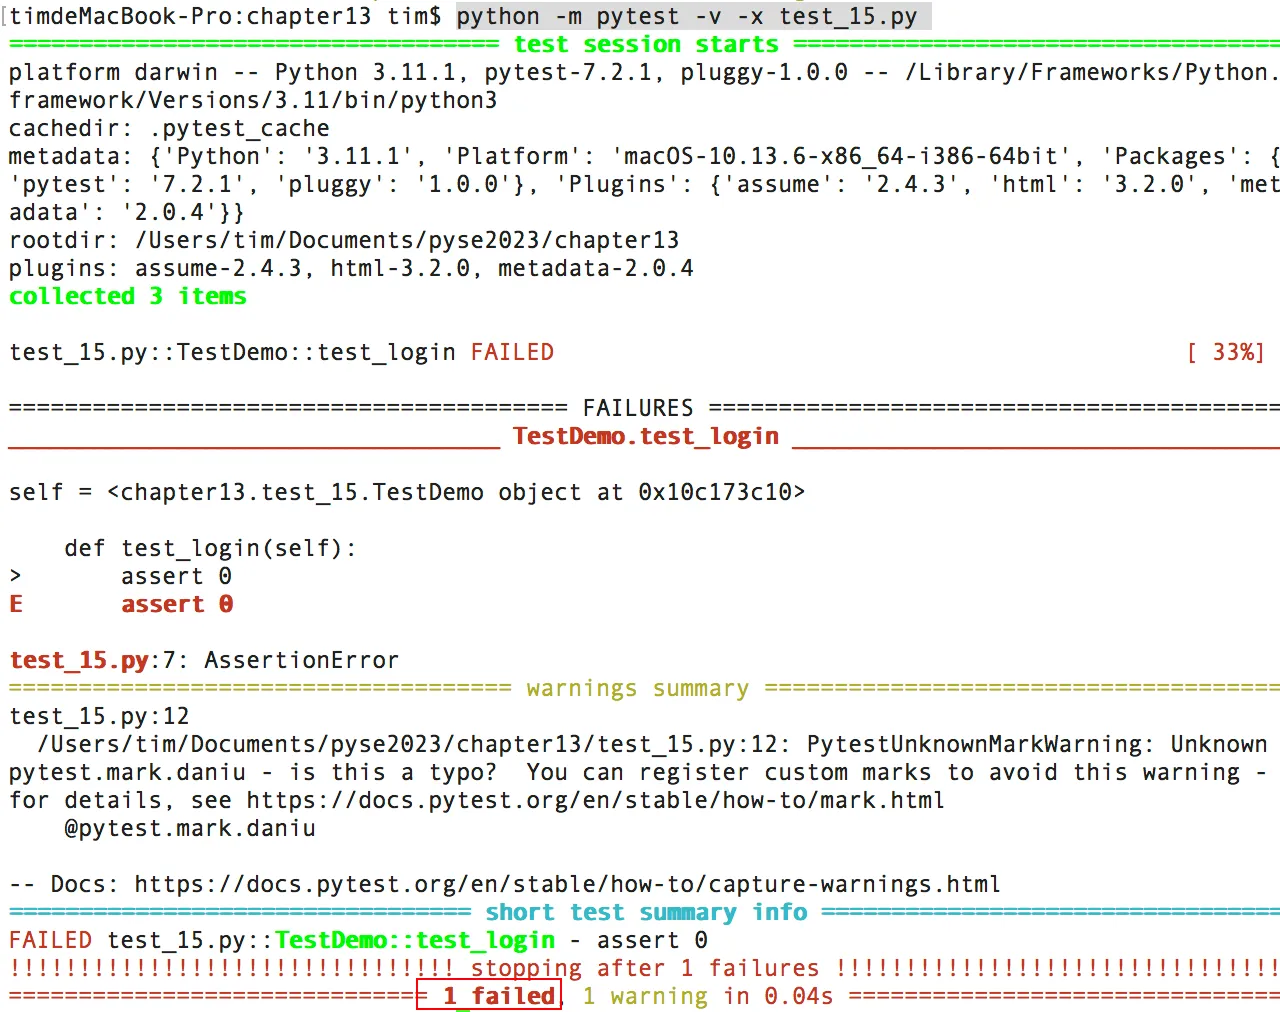
-x执行失败停止执行
#python -m pytest -v -x test_15.py
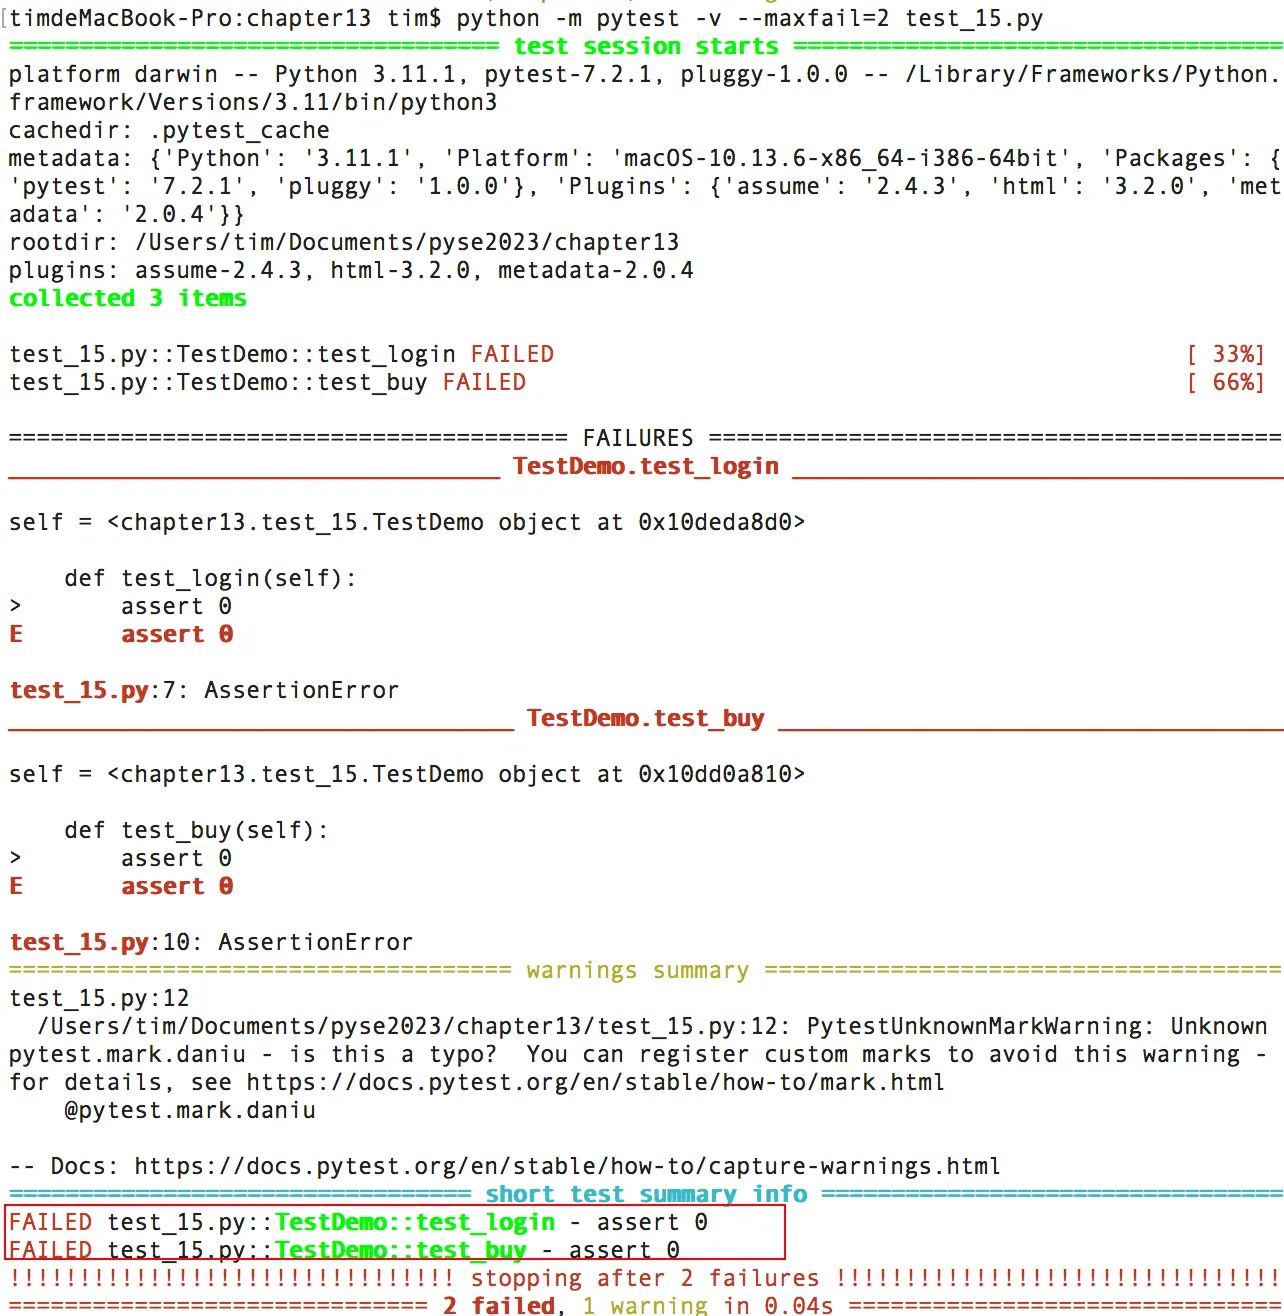
参数 --maxfail=n 如 test_15.py 执行两次2败(即有个test是fail则停止)
python -m pytest -v --maxfail=2 test_15.py
--lf (last failed)重新运行上次失败的用例
#python -m pytest -v --lf test_15.py
--ff(failed first) 运行所有用例,但先运行上次失败的用例,
#python -m pytest -v --ff test_15.py
6.3 装饰器
装饰器含义:
fixture 自定义测试用例预置条件
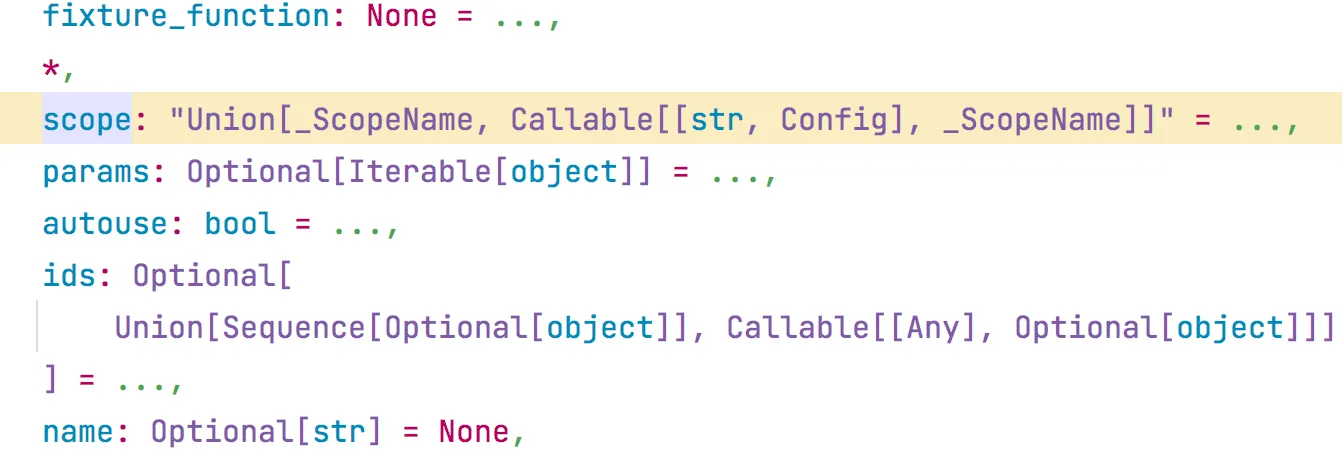
params:(list 类型)提供参数数据,供调用标记方法的函数使用
fixture普通用法:
例:test_fix_01.py
autouse:是否自动运行,默认为 False 不运行,设置为 True 自动运行,无需每个函数注入fixture
例:
import pytest

@pytest.fixture(autouse=True)
def para():
    str = "daniutest"
    print(str)

def test_01(para):
    print("大牛测试01")

def test_02():
    #获取para对象
    print("大牛测试02")

def test_03():
    print("大牛测试03")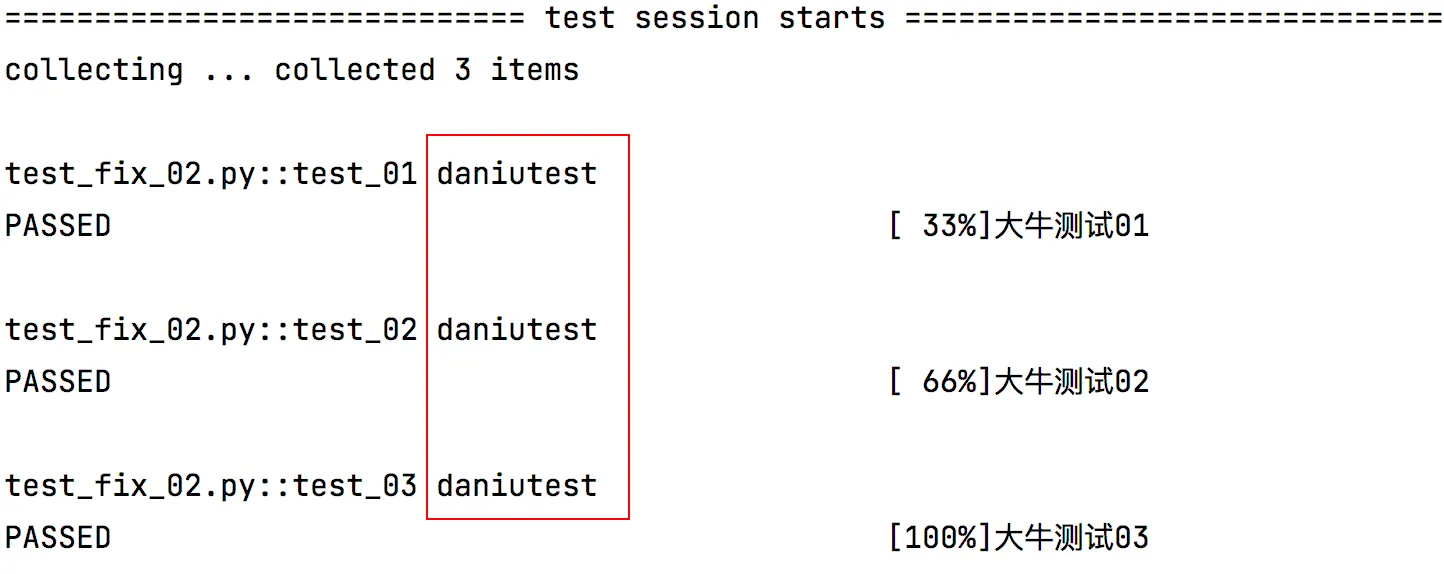
fixture在类外部
import pytest

@pytest.fixture(scope="class",autouse=True)
def para():
    str = "daniutest"
    print(str)
class TestDaniu1:
    def test_01(self):
        print("大牛测试01")

    def test_02(self):
        #获取para对象
        print("大牛测试02")
class TestDaniu2:
    def test_03(self):
        print("大牛测试03")
类使用fixture
例:test_fix_04.py
params参数使用:
通过固定参数 request 传递参数
例:test_fix_05.py
多个参数,params = [''","",""]
例:test_fix_06.py
skip 跳过,标注功能暂未实现的或有问题测试用例
例子:
@pytest.mark.skip("not done!")
    def test01(self):
        print ("daniu")
        assert True
    def test02(self):
        assert False
@pytest.mark.skipif(condition,reason) 满足条件会跳过测试方法或类
@pytest.mark.skipif(da="daniu",reason="not done!")
    def test01(self):
        print ("daniu")
        assert True
@pytest.mark.xfail(reason='测试失败') 标记失败用例
@pytest.mark.run(order)
@pytest.mark.run(1) 数字越小越优先执行
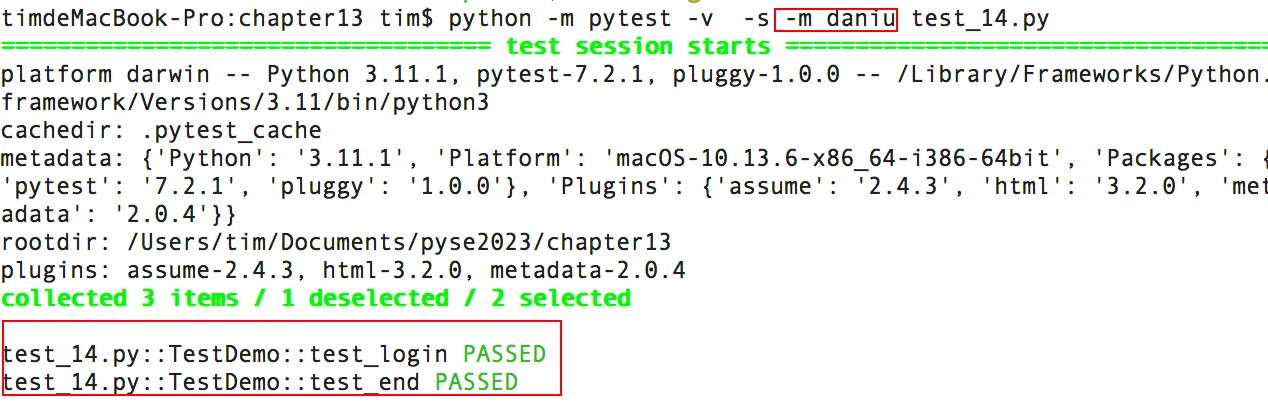
pytest.mark.repeat(2) 执行当前用例两次,再执行下面用例。
重复执行标记用例,安装repeat
用法:
#pip install pytest-repeat
执行:#python -m pytest -v test_14.py

6.4 conftest
conftest文件是pytest特有的配置文件,可以实现数据、参数、方法、函数的共享
fixture中scope参数可以控制fixture的作用范围,共有四种fuction、scope、module和session四种,具体如下。
function:每一个函数和方法都会调用:
例:conftest.py
import pytest

@pytest.fixture(scope="session")
def auto():
    print("daniutest")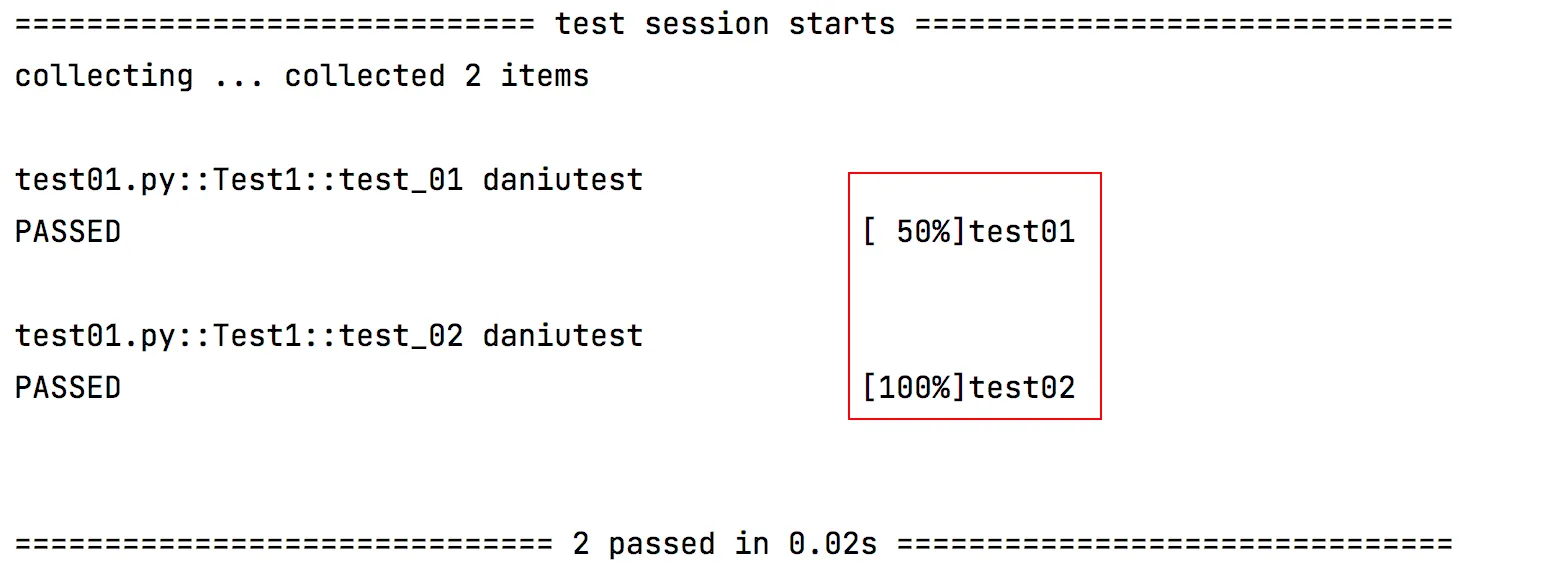
class:每一个类调用一次
module:每一个python文件调用一次
session:是多个文件调用一次,修改文件conftest参数为“session”
6.5 参数化
- parametrize参数化,第一个参数是字符串;第2个参数是列表
传一个参数 多个值:
import pytest @pytest.mark.parametrize("param",[10,2,3,4]) def test_method(param): assert param > 3- 传多个参数,多个值,值用元组形式
#参数化,传多个参数多个值 import pytest @pytest.mark.parametrize("username,passwd", [("daniu", "daniu123"), ("daniu1", "daniu123"), ("daniu2", "daniu123")]) def test_login(username, passwd): print(username + " : " + passwd) assert username == passwd if __name__ =="__main__": pytest.main(["-s","test_07.py"])- 多个参数混用
import pytest data1 = ['daniu','daniu1'] data2 = ['xiaoniu','xiaoniu2'] @pytest.mark.parametrize("a", data1) @pytest.mark.parametrize("b", data2) def test_para(a, b): print(a + " : " + b) # assert a == b if __name__ =="__main__": pytest.main(["-s","test_08.py"])- 传入字典
import pytest json=({"username":"daniu","passwd":"123456"},{"username":"daniu1","password":"123456"}) @pytest.mark.parametrize('json', json) def test_parametrize_1(json): print(f'username : {json["username"]}, password : {json["password"]}') if __name__ =="__main__": pytest.main(["-s","test_09.py"])pytest提供了mark功能,可以给测试用例打上各种各样的标签,运行用例时可以指定运行某个标签。mark功能作用就是灵活的管理和运行测试用例
例:给类与方法打标签
# 可以给类打标签
@pytest.mark.daniu
class TestDemo:

    @pytest.mark.xiaoniu
    @pytest.mark.daniu
    def test_login(self):
        pass

if __name__ =="__main__":
    pytest.main(["-sv","test_10.py"])
注:执行标记用例
与标记集合
#参数化,传多个参数多个值
import pytest

@pytest.mark.parametrize("username,passwd",
                         [("daniu", "daniu123"), ("daniu1", "daniu123"),
                          pytest.param("daniu2", "daniu123", marks=pytest.mark.xfail)])
def test_login(username, passwd):
    print(username + " : " + passwd)
    assert username == passwd
if __name__ =="__main__":
    pytest.main(["-s","test_11.py"])
6.6 集成html与Allure报告
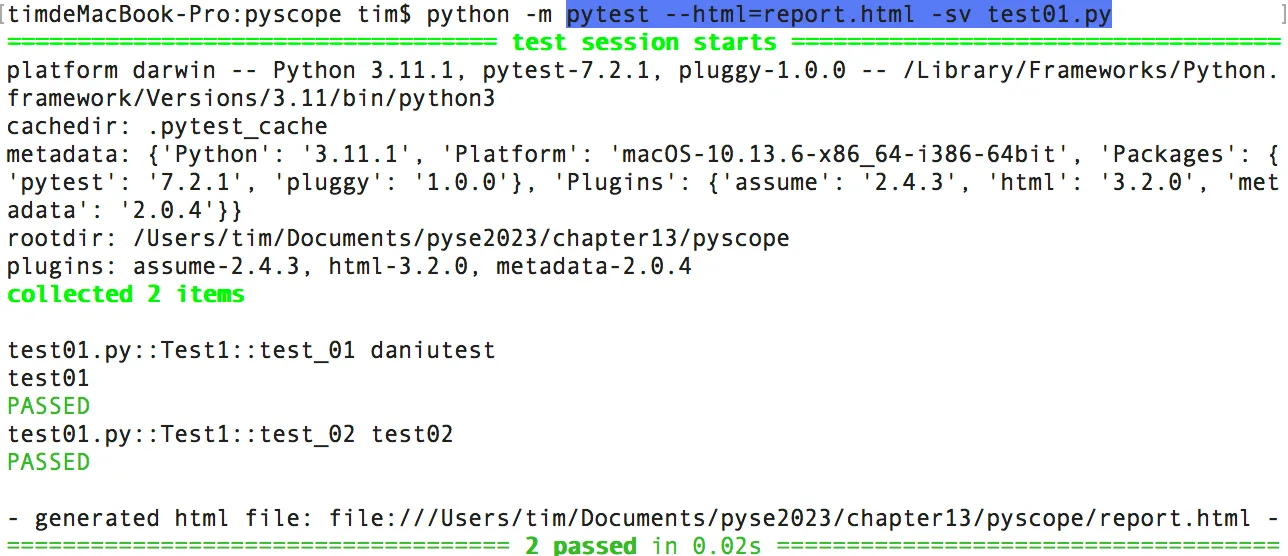
1、普通html报告
#pip install pytest-html
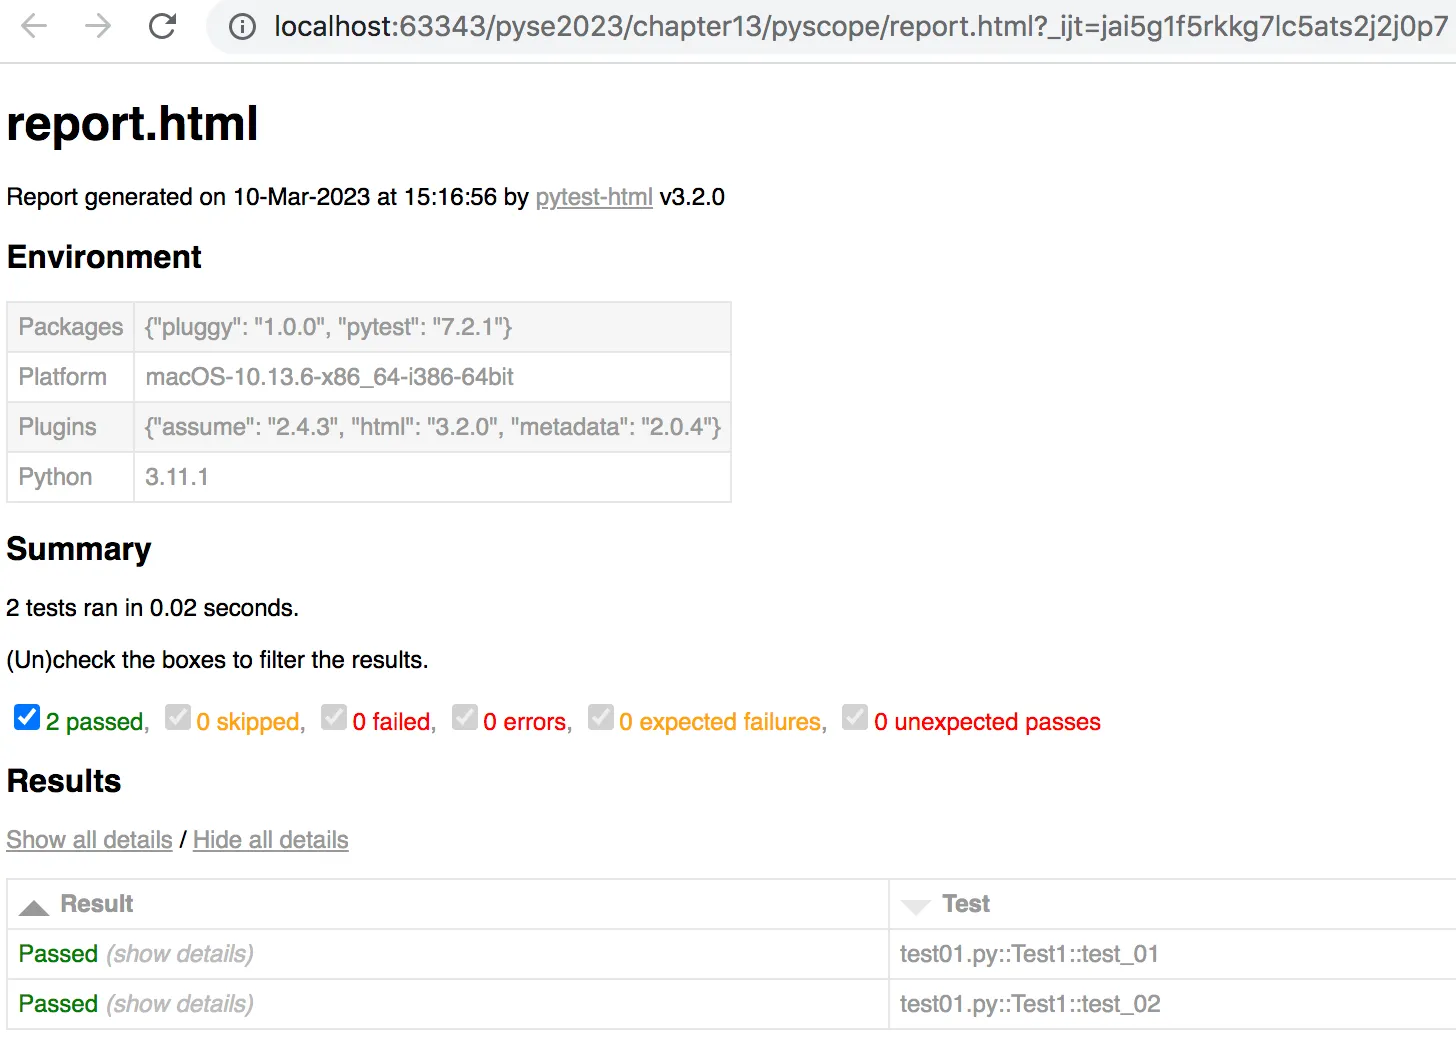
执行命令#pytest --html=report.html -sv test01.py
报告:
2、Allure报告
https://allurereport.org/docs/pytest/
mac系统配置。下载zip文件
#vi ~/.bash_profile
export Maven_HOME=/Users/tim/Downloads/apache-maven-3.8.4
export PATH=$PATH:$Maven_HOME/bin
export PATH=$PATH:/Users/tim/Downloads/allure-2.25.0/bin
export PATH
#source ~/.bash_profile
#allure --version
执行命令:
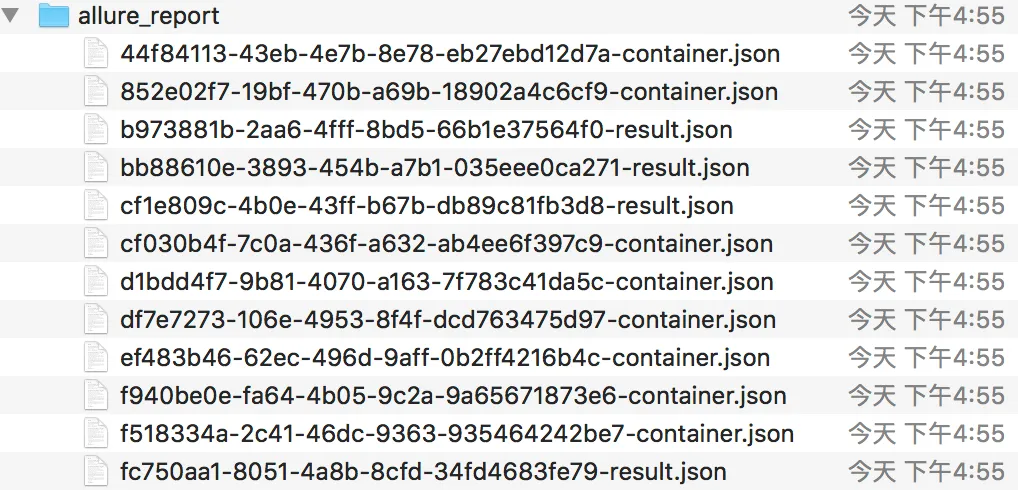
#pytest --alluredir=./allure_report -sv test_instance06.py 生成json文
或#python -m pytest test_instance07.py --alluredir=./result/2
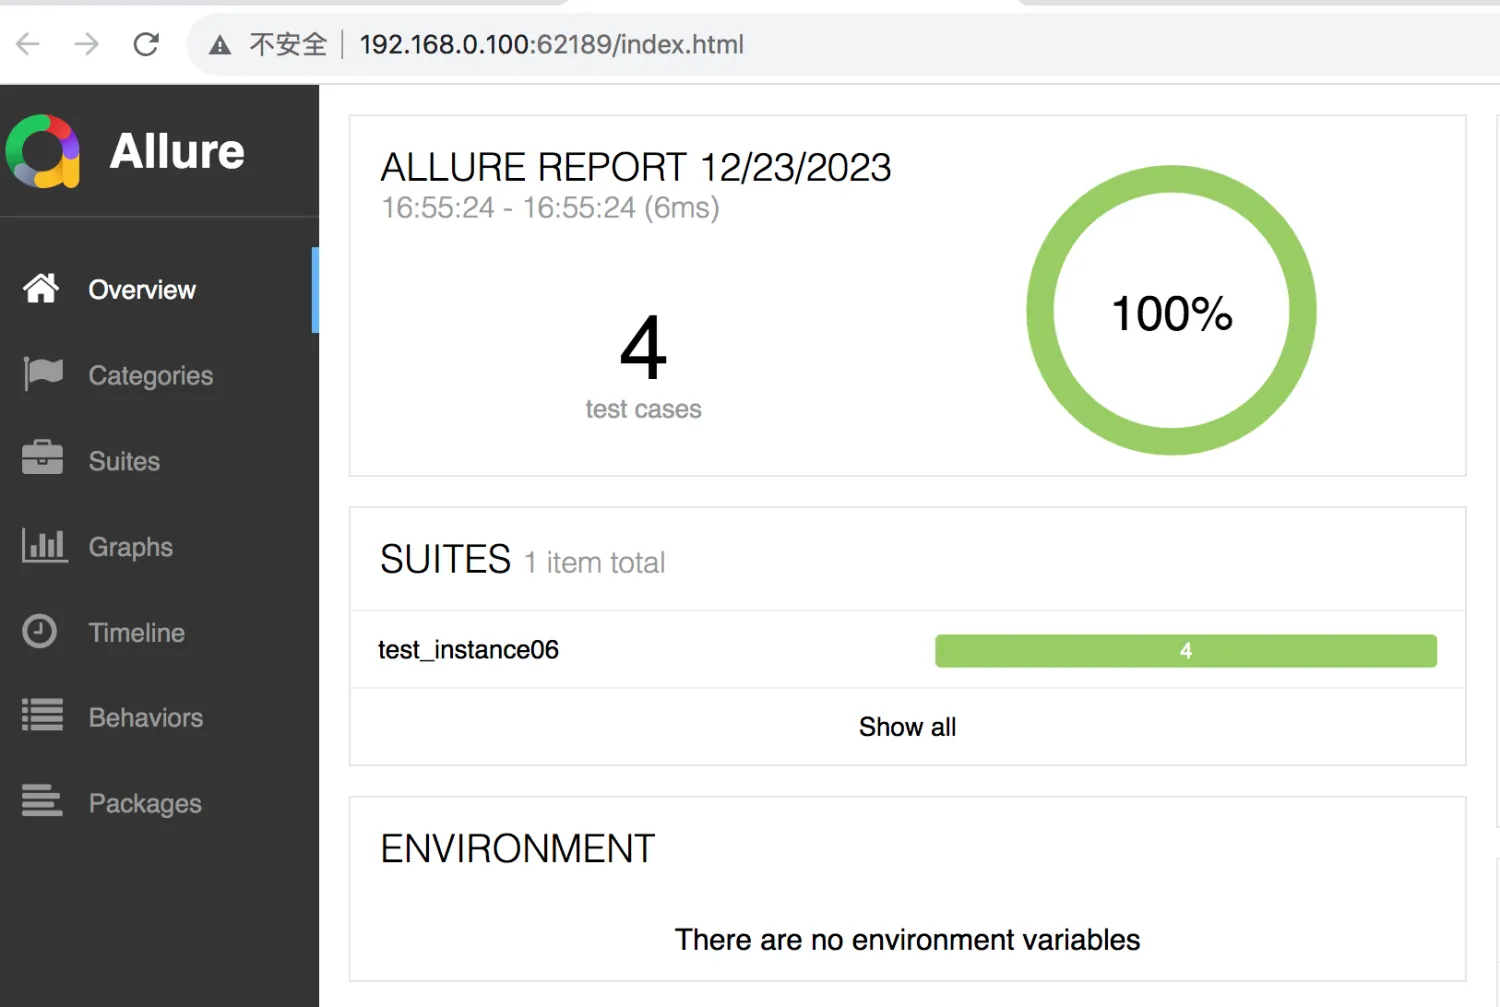
#allure serve allure_report
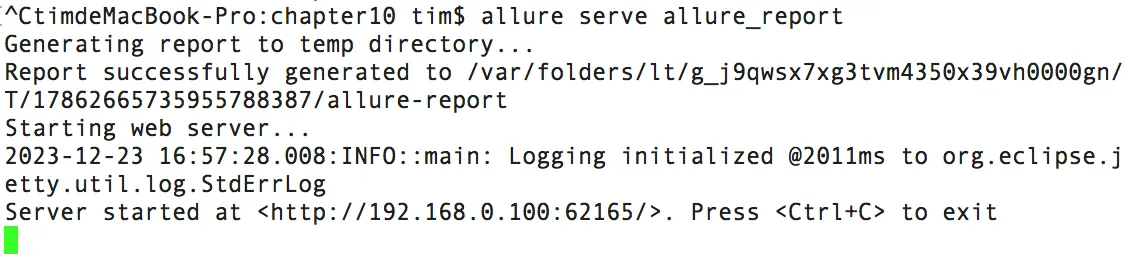
生成报告如下:

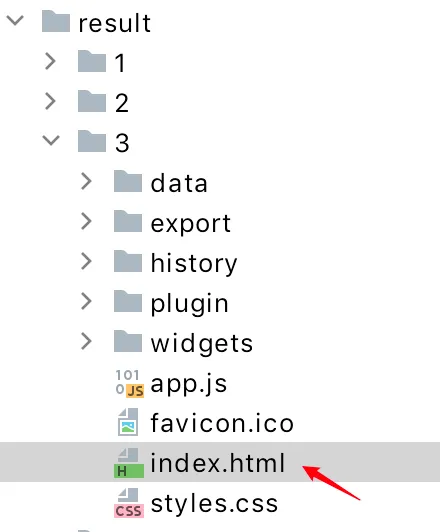
法二、使用 allure generate 生成 html 格式的测试结果报告,并用allure open打开
#allure generate ./result/ -o ./result/3 --clean
将 ./result/ 目录下的测试数据生成 HTML 测试报告到 ./result/3路径下
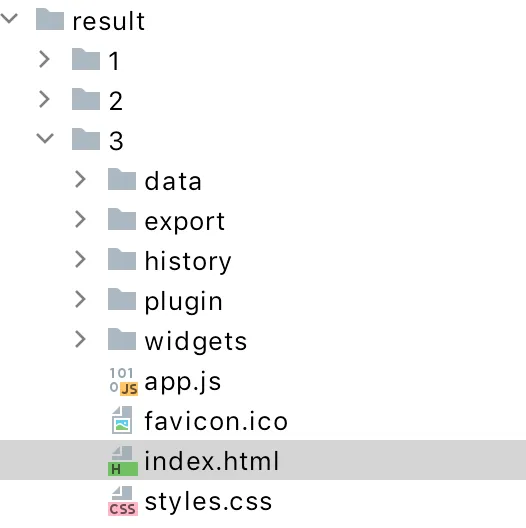
#allure open -h 127.0.0.1 -p 8883 ./result/3
打开报告:
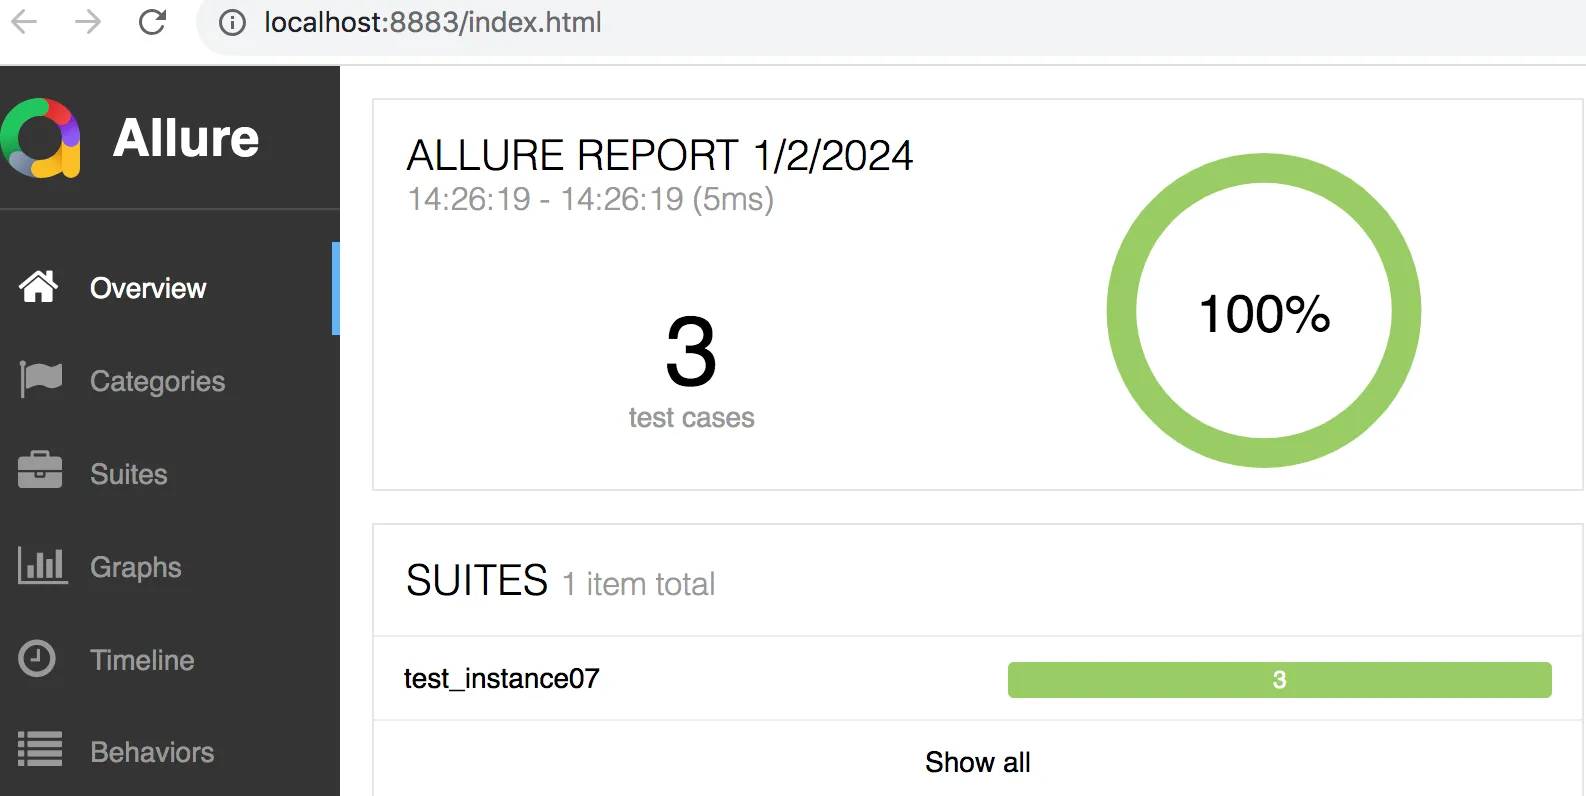
或者,右键run->index.html 打开报告
#allure generate report\tmp -c -o report\allure-report
report/tmp:每个用例的执行结果生成的每个json文件存放的位置
-o report/allure-report:allure报告生成的位置【指定目录生成测试报告】
-c report/allure-report:新的allure报告生成之前先把先前的allure报告清理掉
allure标记描述
- Overview:总览
- Categories:类别,默认是分了failed和error,归类执行结果
- Suites:测试套件,就是所有用例的层级关系,可以根据package、module、类、方法查用例
- Graphs:测试结果图形化,包括用例执行结果的分布图,优先级,耗时等
- Timeline:测试用例精确的测试时序(执行顺序),包括执行时间
- Behaviors:行为驱动,根据epic、feature、story来分组测试用例
- Packages:按照package、module来分组测试用例
Epic是User Story逻辑上的集合, 一个Epic可以被break down成多个小的User Story; 一个Epic可能需要多个Sprint才能完成
Epic:指一个大型的、跨越多个迭代周期的用户需求或者业务功能
Feature:Epics有时包含着太多且模糊的需求,所以常常包含着不同的特性,而一个特性就是一组可以归为一类的需求,就是一个Feature
story:Epic 通常包含多个相关的故事(User Story),这些故事描述了 Epic 所包含的具体功能和需求,
User Story 是一种简洁、可理解、可验证的描述方式,用于表示软件系统的用户需求和期望行为
@allure.epic()
敏捷中epic
@allure.feature()
模块
@allure.story()
用户故事
@allure.title(用例的标题)
标题
@allure.testcase()
链接测试用例地址
@allure.issue()
bug,链接地址
@allure.description()
用例描述
@allure.step()
操作步骤
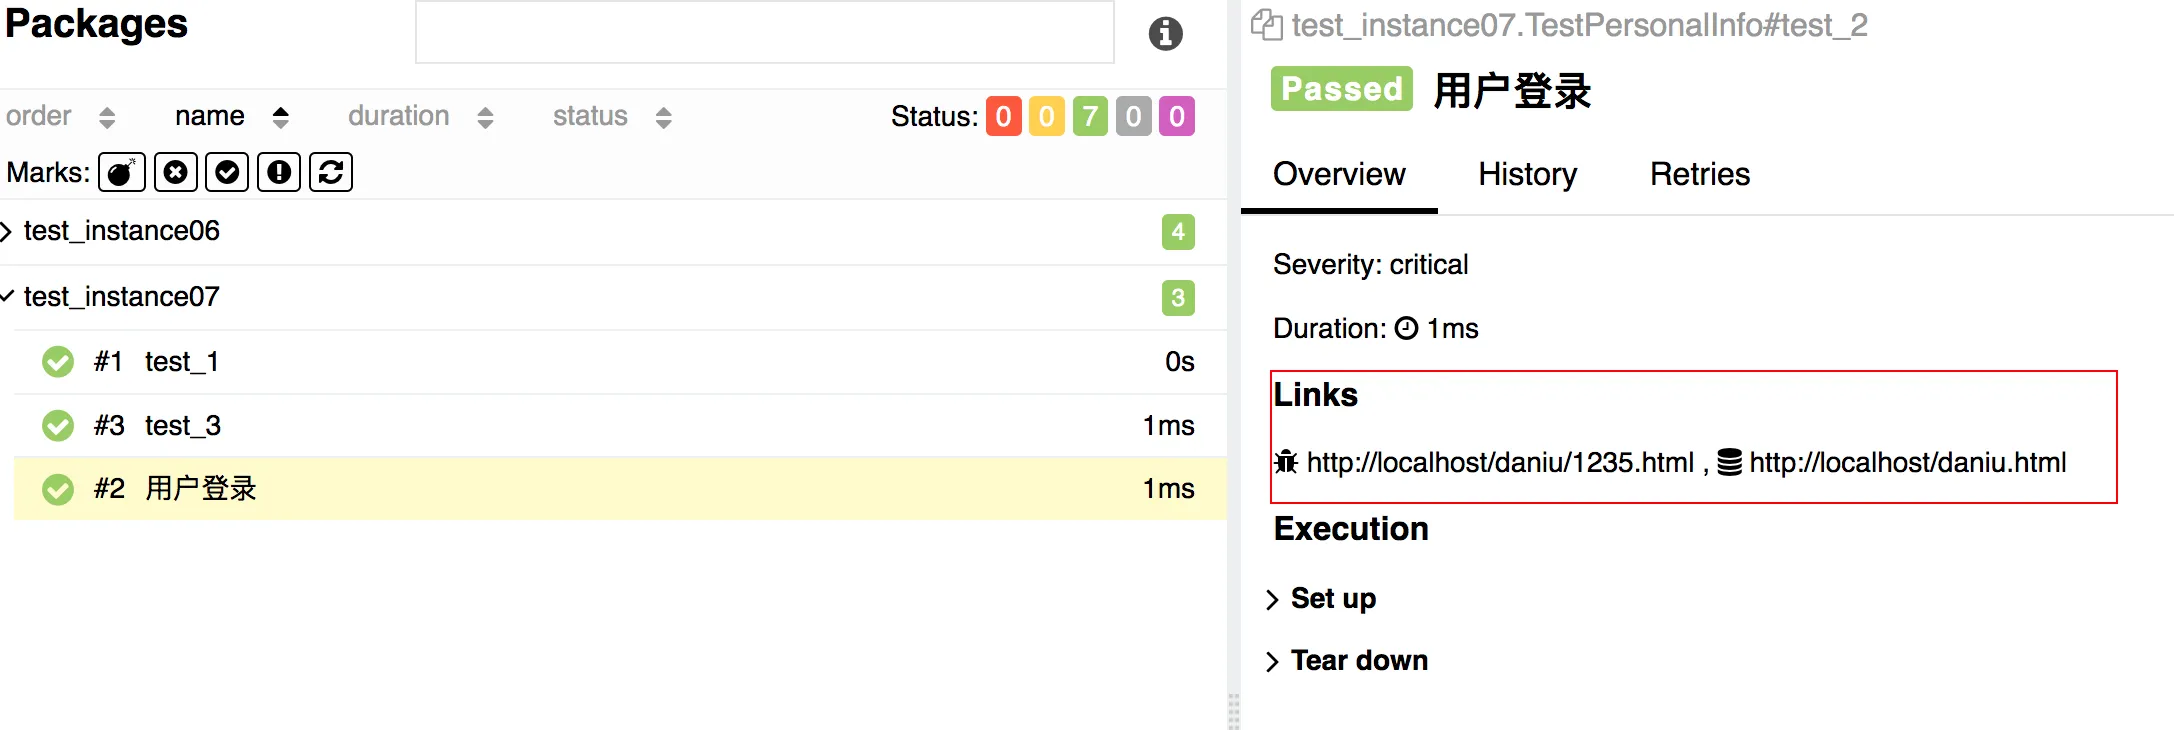
@allure.severity()
用例等级,blocker,critical,normal,minor,trivial
@allure.link()
定义一个链接在测试报告中展示
@allure.attachment()
报告添加附件
严重程度(Severity)
Blocker: 即系统无法执行、崩溃或严重资源不足、应用模块无法启动或异常退出、无法测试、造成系统不稳定
Critical:即影响系统功能或操作,主要功能存在严重缺陷,但不会影响到系统稳定性
Major:即界面、性能缺陷、兼容性
Minor:不太重要
Trivial:即易用性及建议性问题,不重要
报告:
- @allure.step() 只能以装饰器的形式放在类或者方法上面
- with allure.step(): 可以放在测试用例方法里面,但测试步骤的代码需要被该语句包含
在测试报告中添加图片或视频
在测试报告里附加图片
allure.attach.file("image.png", attachment_type=allure.attachment_type.PNG)allure.attach.file("video.mp4", name="视频", \ attachment_type=allure.attachment_type.MP4)修订:https://blog.csdn.net/u010698107/article/details/111416173
python 反射 https://blog.csdn.net/u010698107/article/details/117600196?spm=1001.2014.3001.5502
6.7 配置文件
pytest.ini:pytest主配置文件,可以改变pytest的默认行为,有很多可配置的选项,
markers 作用:测试用例中添加了 @pytest.mark.smoke 装饰器,如果不添加marks选项的话,就会报warnings
#python -m pytest --markers
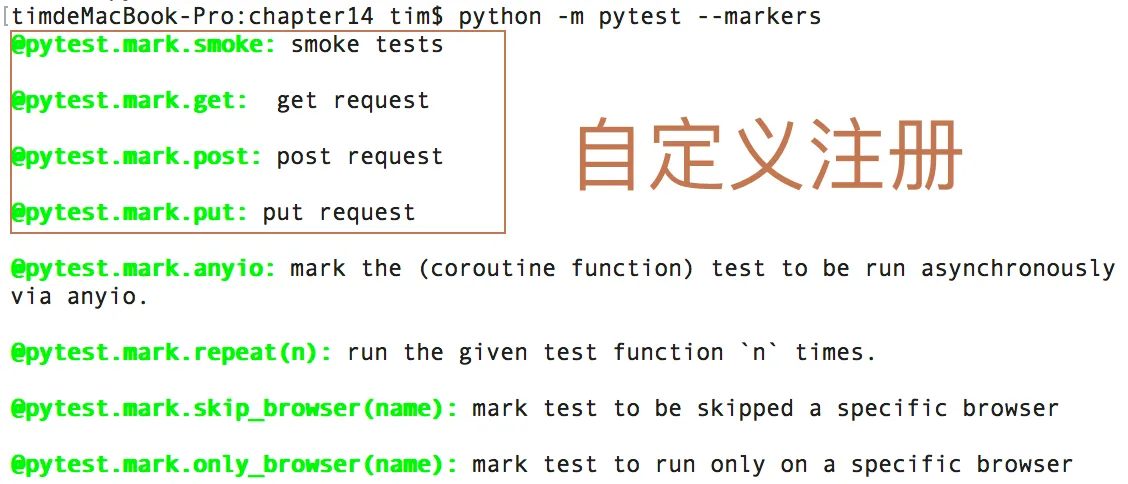
例:
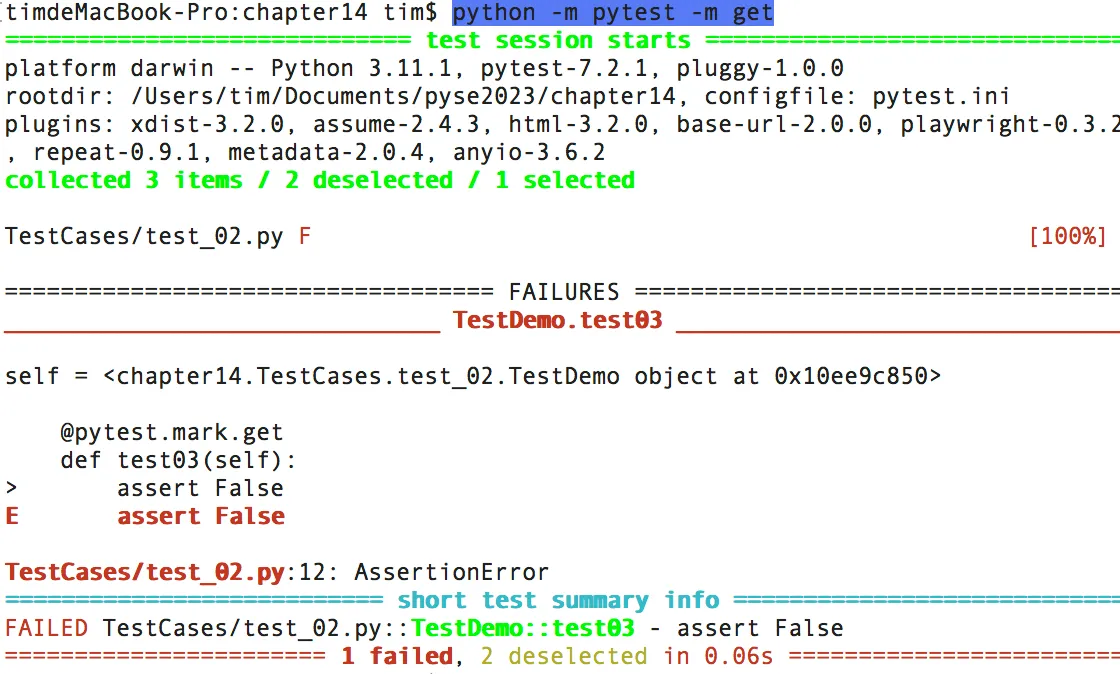
import  pytest
class TestDemo:
    @pytest.mark.smoke
    def test01(self):
        print ("daniu")
        assert True
    def test02(self):
        assert False

    @pytest.mark.get
    def test03(self):
        assert False
if __name__ =="__main__":
    pytest.main(["-v","test_02.py"])
运行:
#python -m pytest -m get
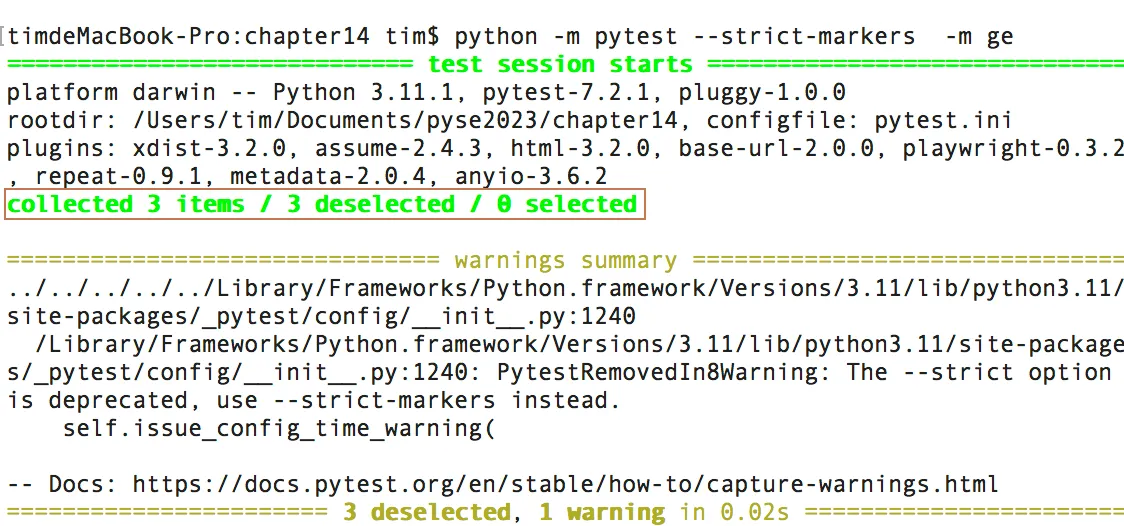
addopts = -rsxX -l --tb=short --strict
--strict选项表示禁止使用未在ini文件中注册的标记
#python -m pytest --strict-markers -m ge //.ini中没有使用ge作标记
指定不用访问的目录:

norecursedirs = .* daniu *. egg dist build
不运行daniu文件夹
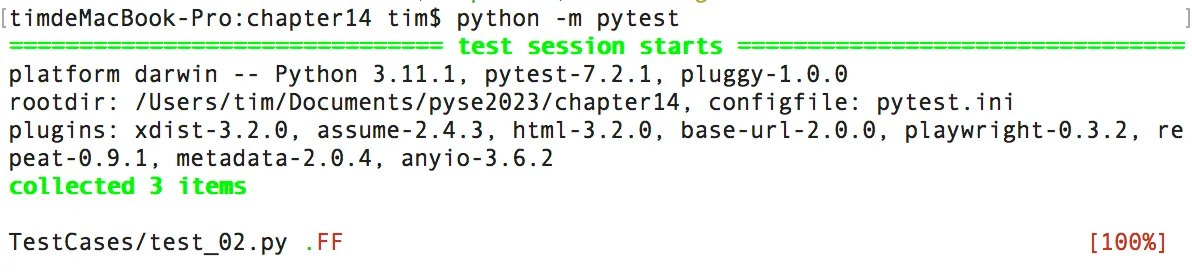
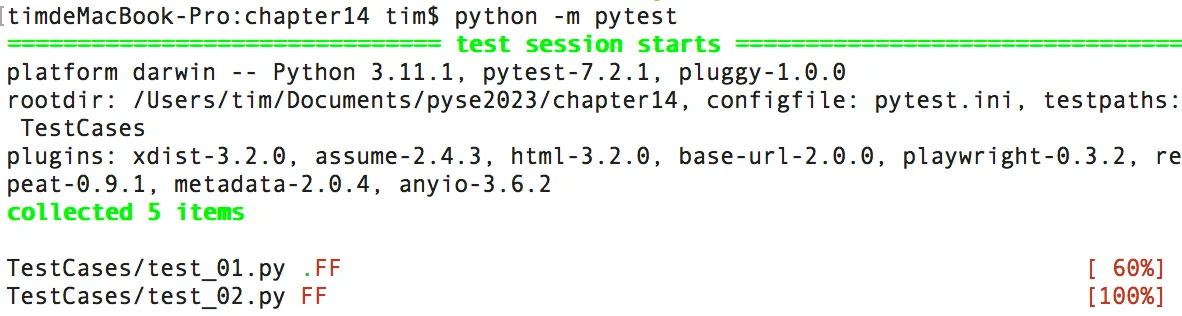
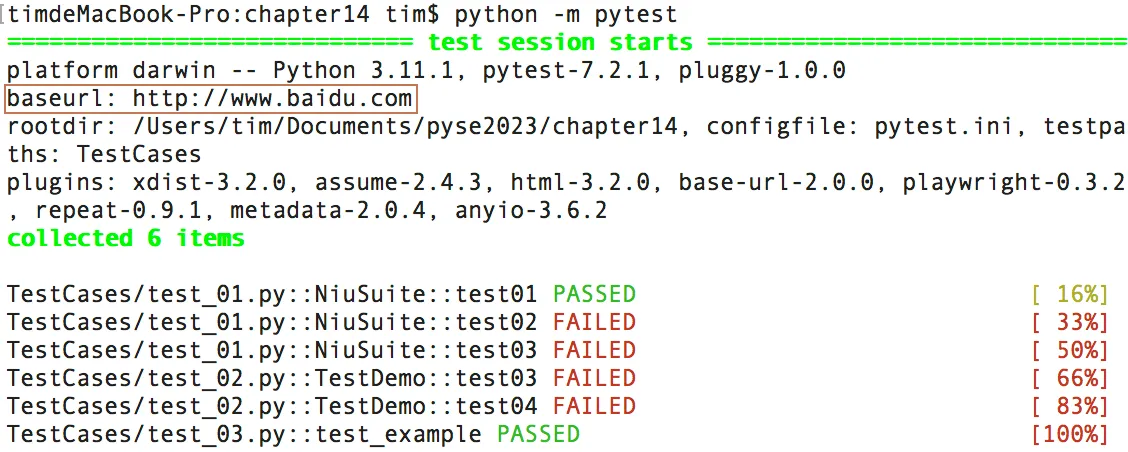
如:testpaths = TestCases
python_classes = *Suite 会搜索xxSuite测试类
python_files更改默认的测试文件搜索规则
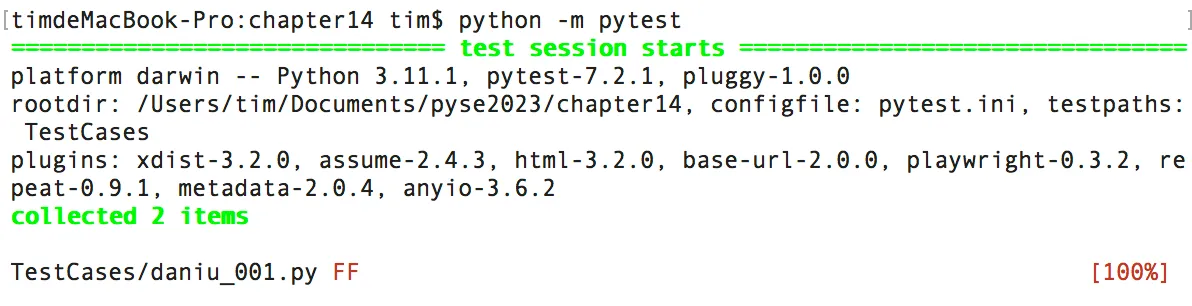
如:新增daniu_xx.py文件。
python_files = daniu_*
python_functions = niu_*
def niu_04(self):
    assert False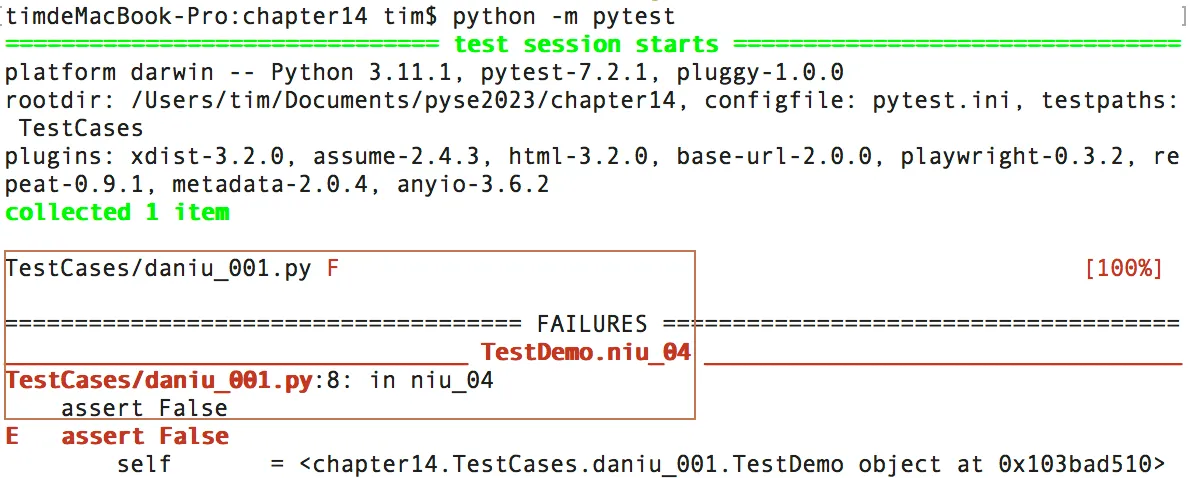
addopts参数可以更改默认命令行选项
addopts可以更改默认命令行参数,将一些命令添加到pytest.ini里则不需要每次命令行执行时都带上参数,默认以pytest.ini里配置去运行,多个命令行参数用空格分隔,可添加多个命令行参数
pytest -v --rerun=2 --html=daniureport.html --self-contained-html -n=auto
log_cli=True, 方便查看package中module下测试用例是passed还是failed
切换环境插件
#pip install pytest-base-url
方式一、用命令行运行
#python -m pytest -s --base-url http://www.baidu.com xx.py //传递一个url参数
方式二、配置文件pytest.ini
方式三、
- Hook函数的名称是确定的;
- pytest有非常多的钩子函数;
- 使用时直接编写函数体;
pytest测试用例的执行顺序:
- pytest_addoption:添加命令行参数,运行时先读取命令行参数
- pytest_collection_modifyitems:收集测试用例,收集之后改编码,改执行顺序
- pytest_collection_finish:收集之后的操作
- pytest_runtest_setup:在调用pytest_runtest_call之前调用
- pytest_runtest_call:调用执行测试的用例
- pytest_runtest_makereport:运行测试用例,返回setup,call,teardown的执行结果
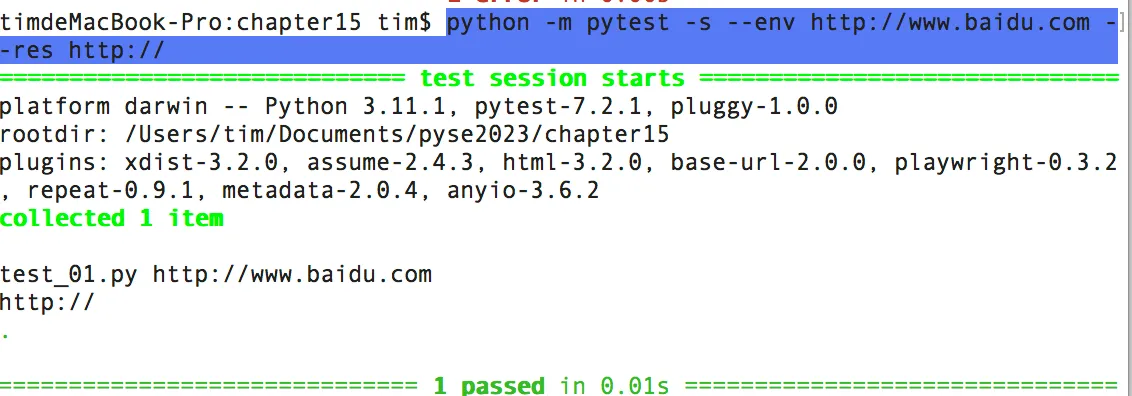
- 例:pytest_addoption传递参数
- #python -m pytest -s --env http://www.baidu.com --res http://
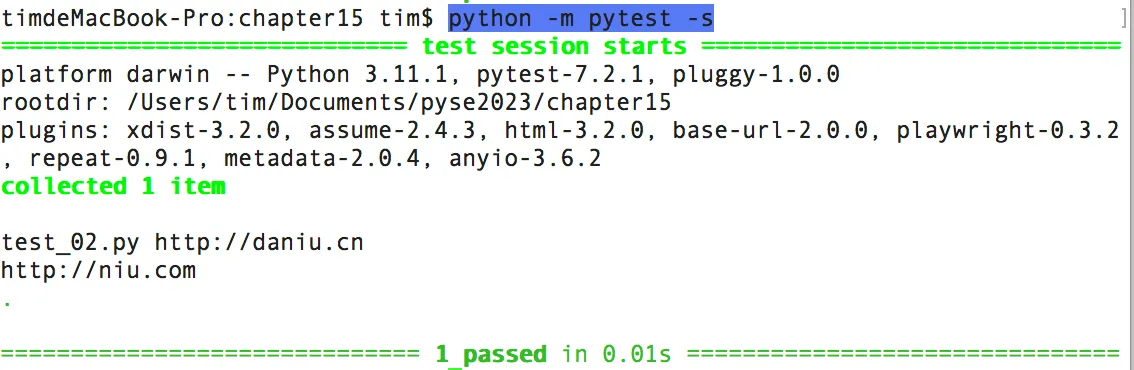
方式四、conftest结合ymal
- #pip install PyYAML
- 执行后
#python -m pytest -s
第七章 pytest框架搭建
详见视频课程:
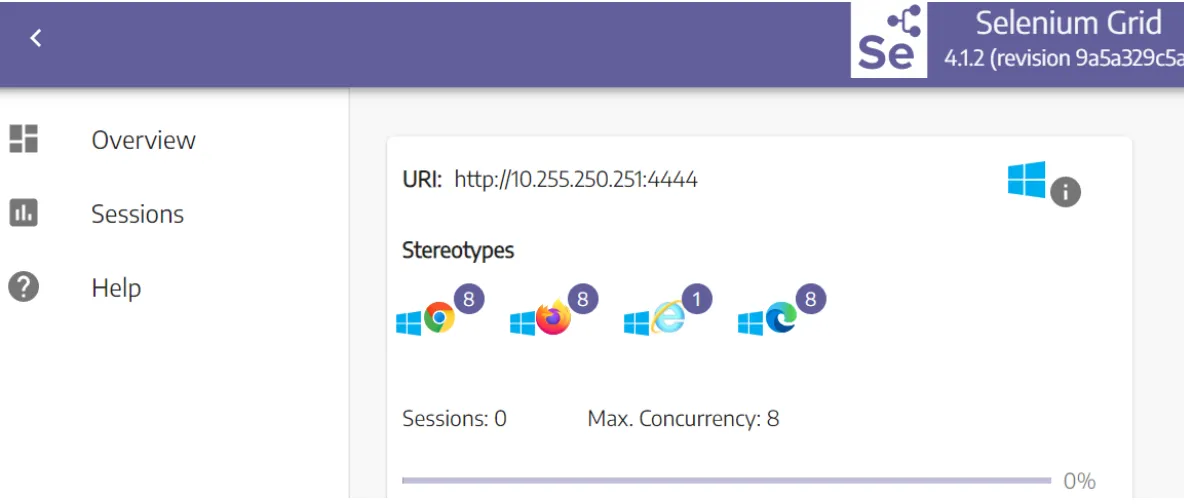
第八章 平台搭建
- selenium grid 多线程测试之selenium-server
#java -jar selenium-server-4.1.2.jar standalone
- 环境移植
pip freeze > requirements.txt- 安装
pip install -r requirements.txt平台优势
1) 账号管理
2) 集成不同的环境
3) 存储每次执行结果
4) 发邮件
5) 定时执行
.....
Git提交异常:

问题:
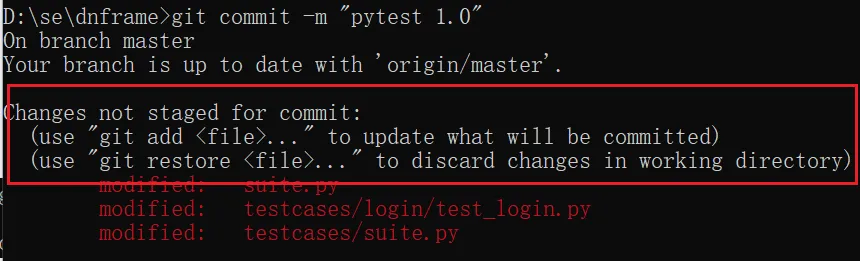
commit加上a,a表示新增

#git push -u origin master
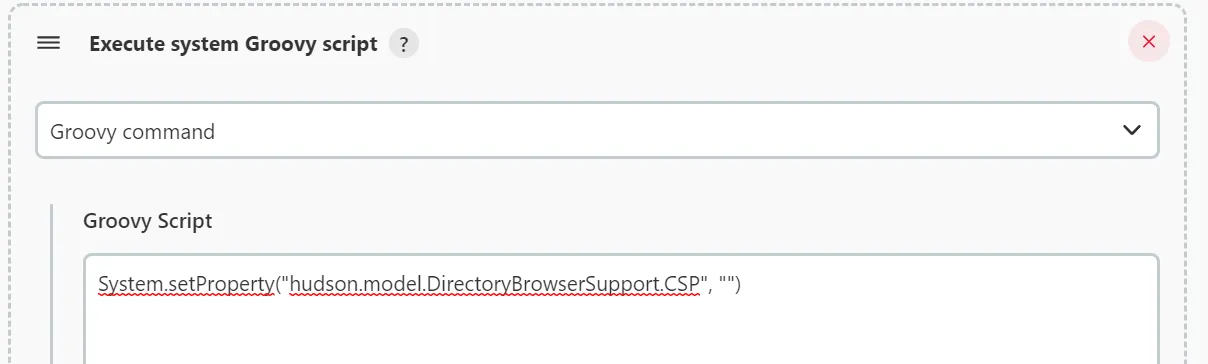
Jenkins报告乱码:
#System.setProperty("hudson.model.DirectoryBrowserSupport.CSP", "")
问题思考:
在Python中,枚举和我们在对象中定义的类变量时一样的,每一个类变量就是一个枚举项,访问枚举项的方式为:类名加上类变量
注:每次作业发送至2574674466@qq.com


 52万+
52万+

 被折叠的 条评论
为什么被折叠?
被折叠的 条评论
为什么被折叠?
 到【灌水乐园】发言


