


 本文详细介绍了SpringBootSDK项目的工程结构,包括服务类、数据库操作、Maven依赖配置,以及如何正确配置启动引擎项目以扫描和引用SDK。还提供了案例和解决常见问题的方法。
一 sdk项目
1.1 工程结构
1.1. 1 工程结构说明
说明:sdk项目目录中只有基础的service类以及mybatis操作数据库的相关文件,service类中包含查询数据库的方法。
本博客记录的案例:均是在springboot 2.x版本下。

说明:https://www.cnblogs.com/sueyyyy/p/12197922.html
1.1. 2 pom依赖
<?xml version="1.0" encoding="UTF-8"?>

<project xmlns="http://maven.apache.org/POM/4.0.0" xmlns:xsi="http://www.w3.org/2001/XMLSchema-instance"
  xsi:schemaLocation="http://maven.apache.org/POM/4.0.0 http://maven.apache.org/xsd/maven-4.0.0.xsd">
  <modelVersion>4.0.0</modelVersion>
  <!-- 引入springboot -->
  <parent>
    <groupId>org.springframework.boot</groupId>
    <artifactId>spring-boot-starter-parent</artifactId>
    <version>2.0.1.RELEASE</version>
    <relativePath/> <!-- lookup parent from repository -->
  </parent>
  <groupId>com.pab</groupId>
  <artifactId>dlock-component</artifactId>
  <version>1.0-SNAPSHOT</version>

  <name>dlock-component</name>
  <!-- FIXME change it to the project's website -->
  <url>http://www.example.com</url>

  <properties>
    <project.build.sourceEncoding>UTF-8</project.build.sourceEncoding>
    <maven.compiler.source>1.8</maven.compiler.source>
    <maven.compiler.target>1.8</maven.compiler.target>
  </properties>

  <dependencies>
    <dependency>
      <groupId>junit</groupId>
      <artifactId>junit</artifactId>
      <version>4.11</version>
      <scope>test</scope>
    </dependency>
    <!--spring boot的依赖 -->
    <dependency>
      <groupId>org.springframework.boot</groupId>
      <artifactId>spring-boot-starter-web</artifactId>
    </dependency>
    <dependency>
      <groupId>org.mybatis.spring.boot</groupId>
      <artifactId>mybatis-spring-boot-starter</artifactId>
      <version>1.3.2</version>
    </dependency>
  </dependencies>

  <build>
<plugins>
  <plugin>
    <groupId>org.apache.maven.plugins</groupId>
    <artifactId>maven-compiler-plugin</artifactId>
    <configuration>
      <source>1.8</source>
      <target>1.8</target>
    </configuration>
  </plugin>
</plugins>
  </build>
</project>
1.2 sdk的pom打包配置
dblock-component项目作为公共项目,打成jar包供其他项目引用,注意被引入的项目不能使用默认的maven-plugin打包,否则引入此jar包的项目编译时会报找不到程序包的错误。需要按下面的依赖进行配置:
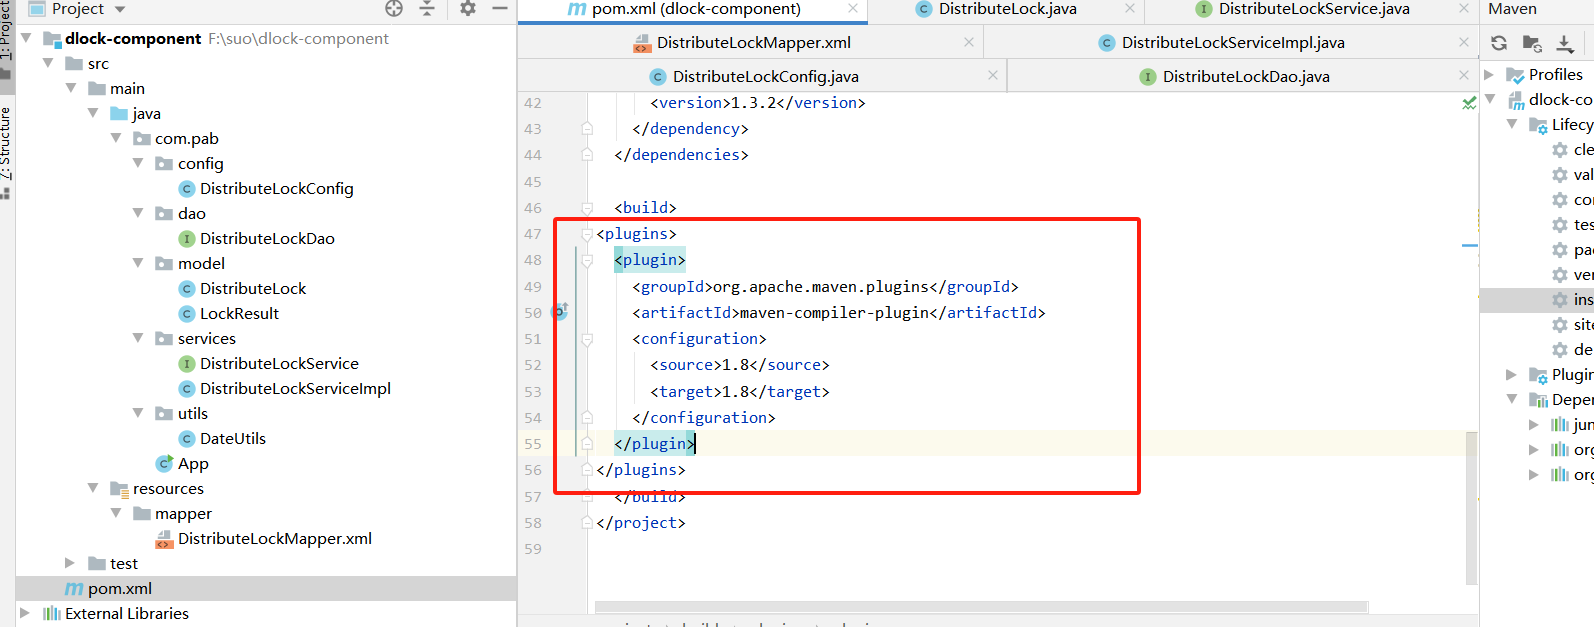
需要替换成以下配置,代码如下:
<plugins>
<plugin>
<groupId>org.apache.maven.plugins</groupId>
<artifactId>maven-compiler-plugin</artifactId>
<configuration>
<source>1.8</source>
<target>1.8</target>
</configuration>
</plugin>
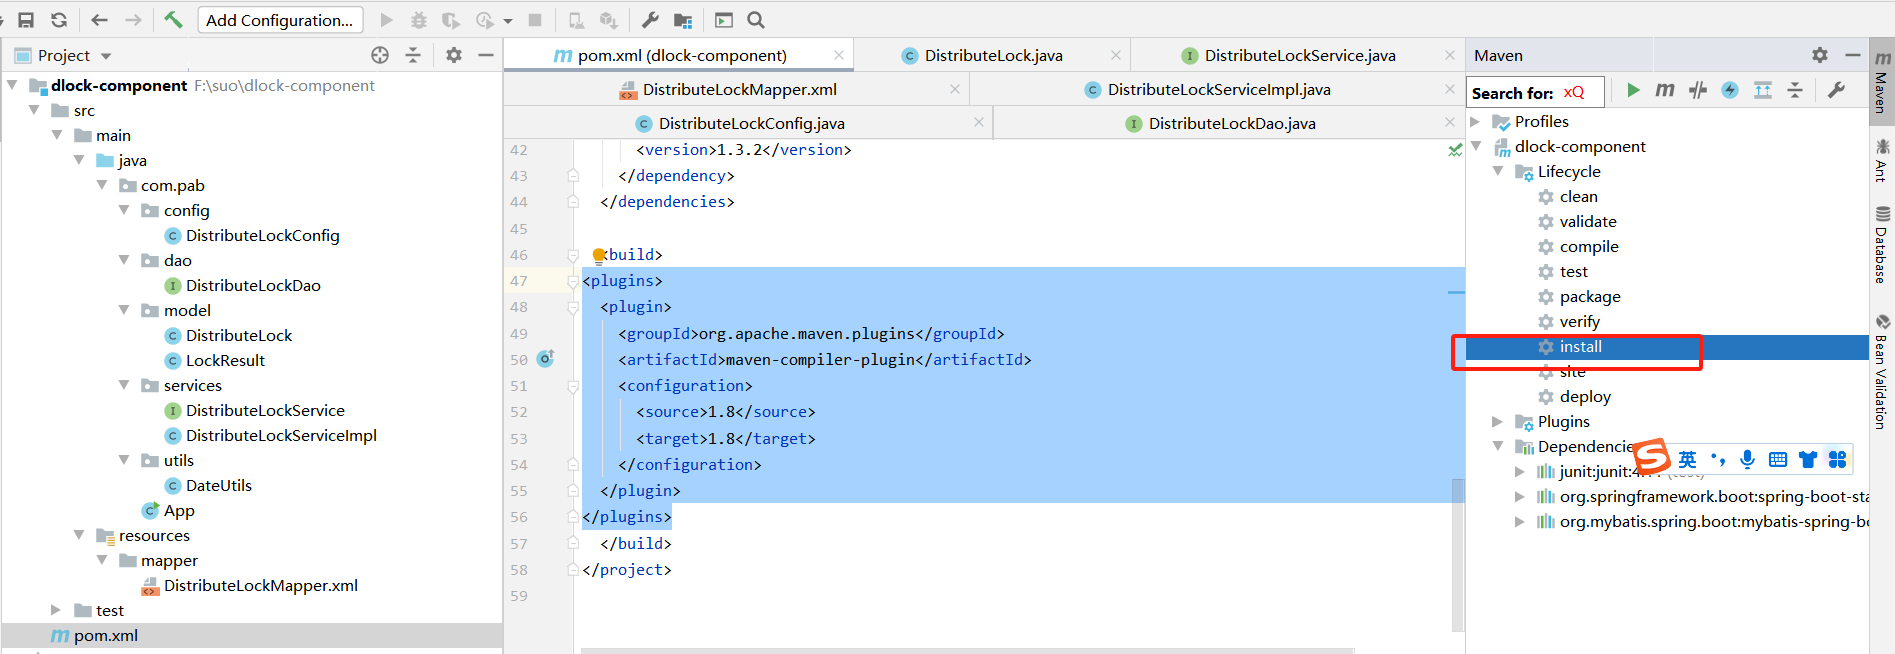
</plugins>1.3 进行打包
配置完成后使用maven工具进行打包,其他项目引用时,只需要在pom文件中使用上面的坐标引入依赖。

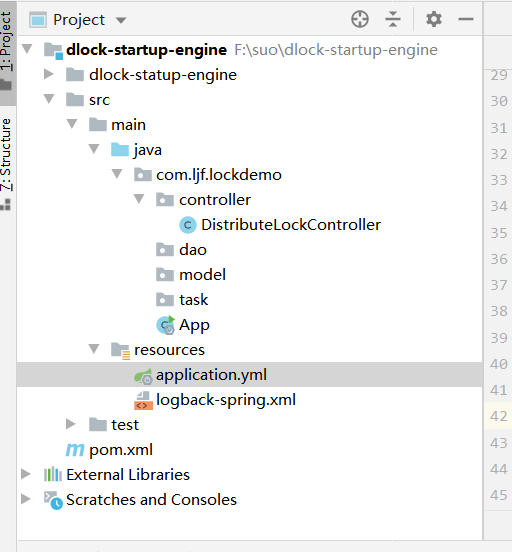
二 启动引擎项目
2.1 启动引擎的结构
dblock-startup-engine 项目需要引用dblock-component项目。
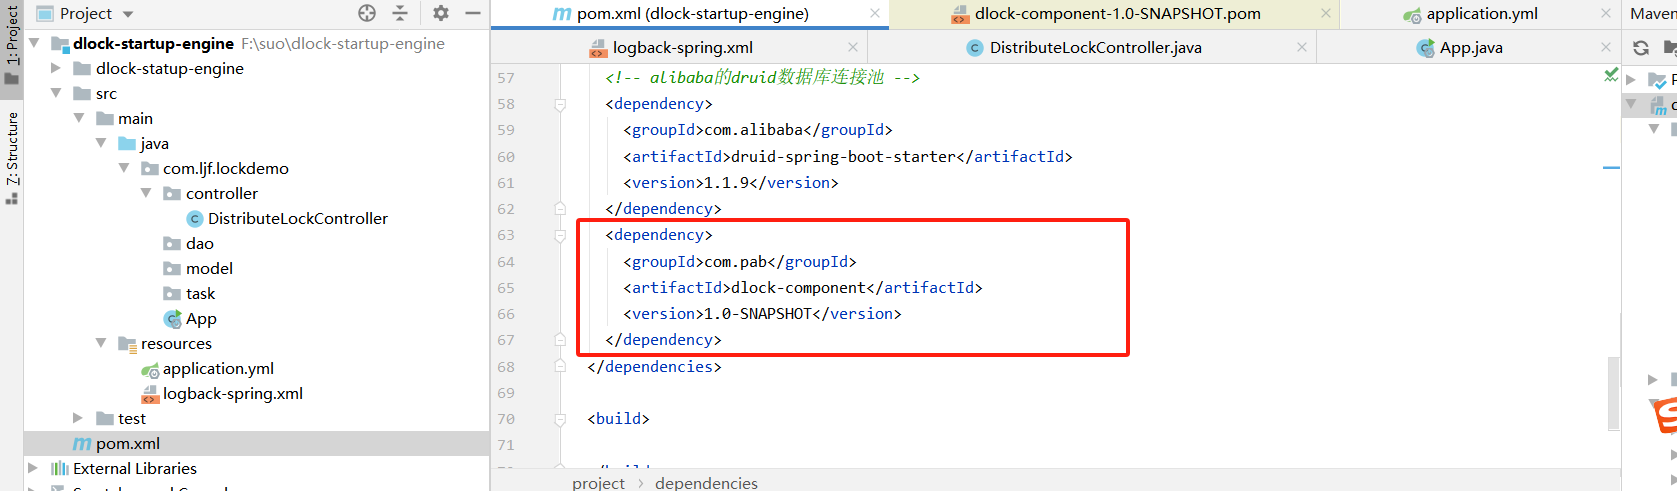
2.2 在pom文件引入依赖
2.3 扫描文件配置
项目dblock-startup-engine作为主程序,需要有启动类和配置文件。
dblock-startup-engine项目本身只需要配置扫描当前项目的dao接口。因为@SpirngBootApplication默认包含了@ComponentScan注解并且处于其他类文件的根目录,所以可以自动扫描到同级下面的所有@Service、@Controller类。
如果要扫描到dblock-component项目的类和接口就要添加dblock-component的目录,写法如下:
@MapperScan同时扫描sdk的dao接口和启动引擎项目的dao接口
@ComponentScan同时注册sdk和启动引擎项目下需要被使用的类
Tips:如果被引入的jar和主项目两个项目的文件路径全都一致的话,就不需要额外再配置扫描被引入的项目的目录。

2.4 application配置文件
server:
  port: 8080
spring:
    datasource:
        name: mysql_test
        type: com.alibaba.druid.pool.DruidDataSource
        #druid相关配置
        druid:
          #监控统计拦截的filters
          filters: stat
          driver-class-name: com.mysql.jdbc.Driver
          #基本属性
          url: jdbc:mysql://127.0.0.1:3306/mytestdb?useUnicode=true&characterEncoding=UTF-8&allowMultiQueries=true
          username: root
          password: cloudiip
          #配置初始化大小/最小/最大
          initial-size: 1
          min-idle: 1
          max-active: 20
          #获取连接等待超时时间
          max-wait: 60000
          #间隔多久进行一次检测,检测需要关闭的空闲连接
          time-between-eviction-runs-millis: 60000
          #一个连接在池中最小生存的时间
          min-evictable-idle-time-millis: 300000
          validation-query: SELECT 'x'
          test-while-idle: true
          test-on-borrow: false
          test-on-return: false
          #打开PSCache,并指定每个连接上PSCache的大小。oracle设为true,mysql设为false。分库分表较多推荐设置为false
          pool-prepared-statements: false
          max-pool-prepared-statement-per-connection-size: 20

mybatis:
  mapper-locations: classpath*:mapper/*.xml
  type-aliases-package: com.ljf.lockdemo.model
  #configuration:
    #增加打印sql语句,一般用于本地开发测试
    #log-impl: org.apache.ibatis.logging.stdout.StdOutImpl
#配置log输出文件
logging:
  config: classpath:logback-spring.xml
distribute:
  lock:
    keep-alive-time: 30

#pagehelper
pagehelper:
    helperDialect: mysql
    reasonable: true
    supportMethodsArguments: true
    params: count=countSql
    returnPageInfo: check
注意:如果引入的其它的jar并且要使用它对应的mapper/*.xml文件时,要修改mapper-locations配置,使用通配符扫描所有calsspath对应目录下的mapper文件,如下配置
mapper-locations: classpath*:mapper/*.xml
2.5 启动测试
1.postman测试
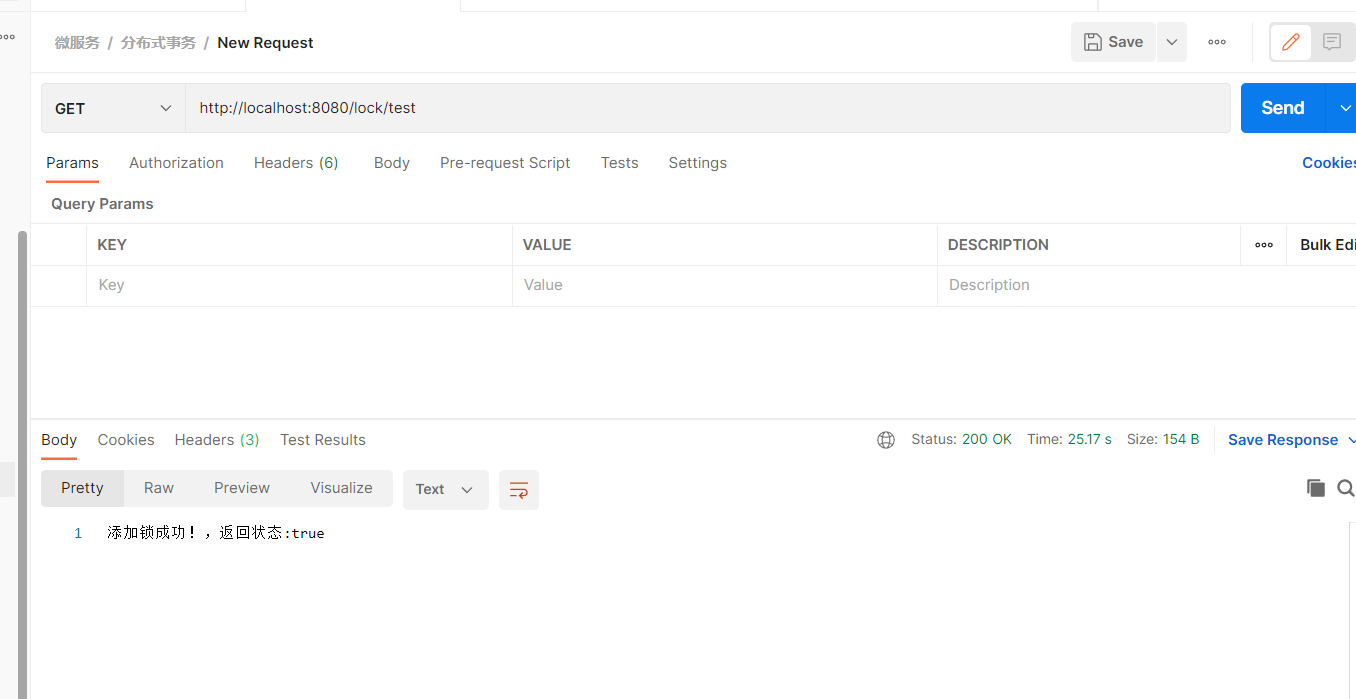
2.查看日志:看到调用sdk中实现查询数据操作的日志。

三 案例2
3.1 工程结构
core为sdk,starter的过度中间件引用core,engine为应用调用方法,应用starter

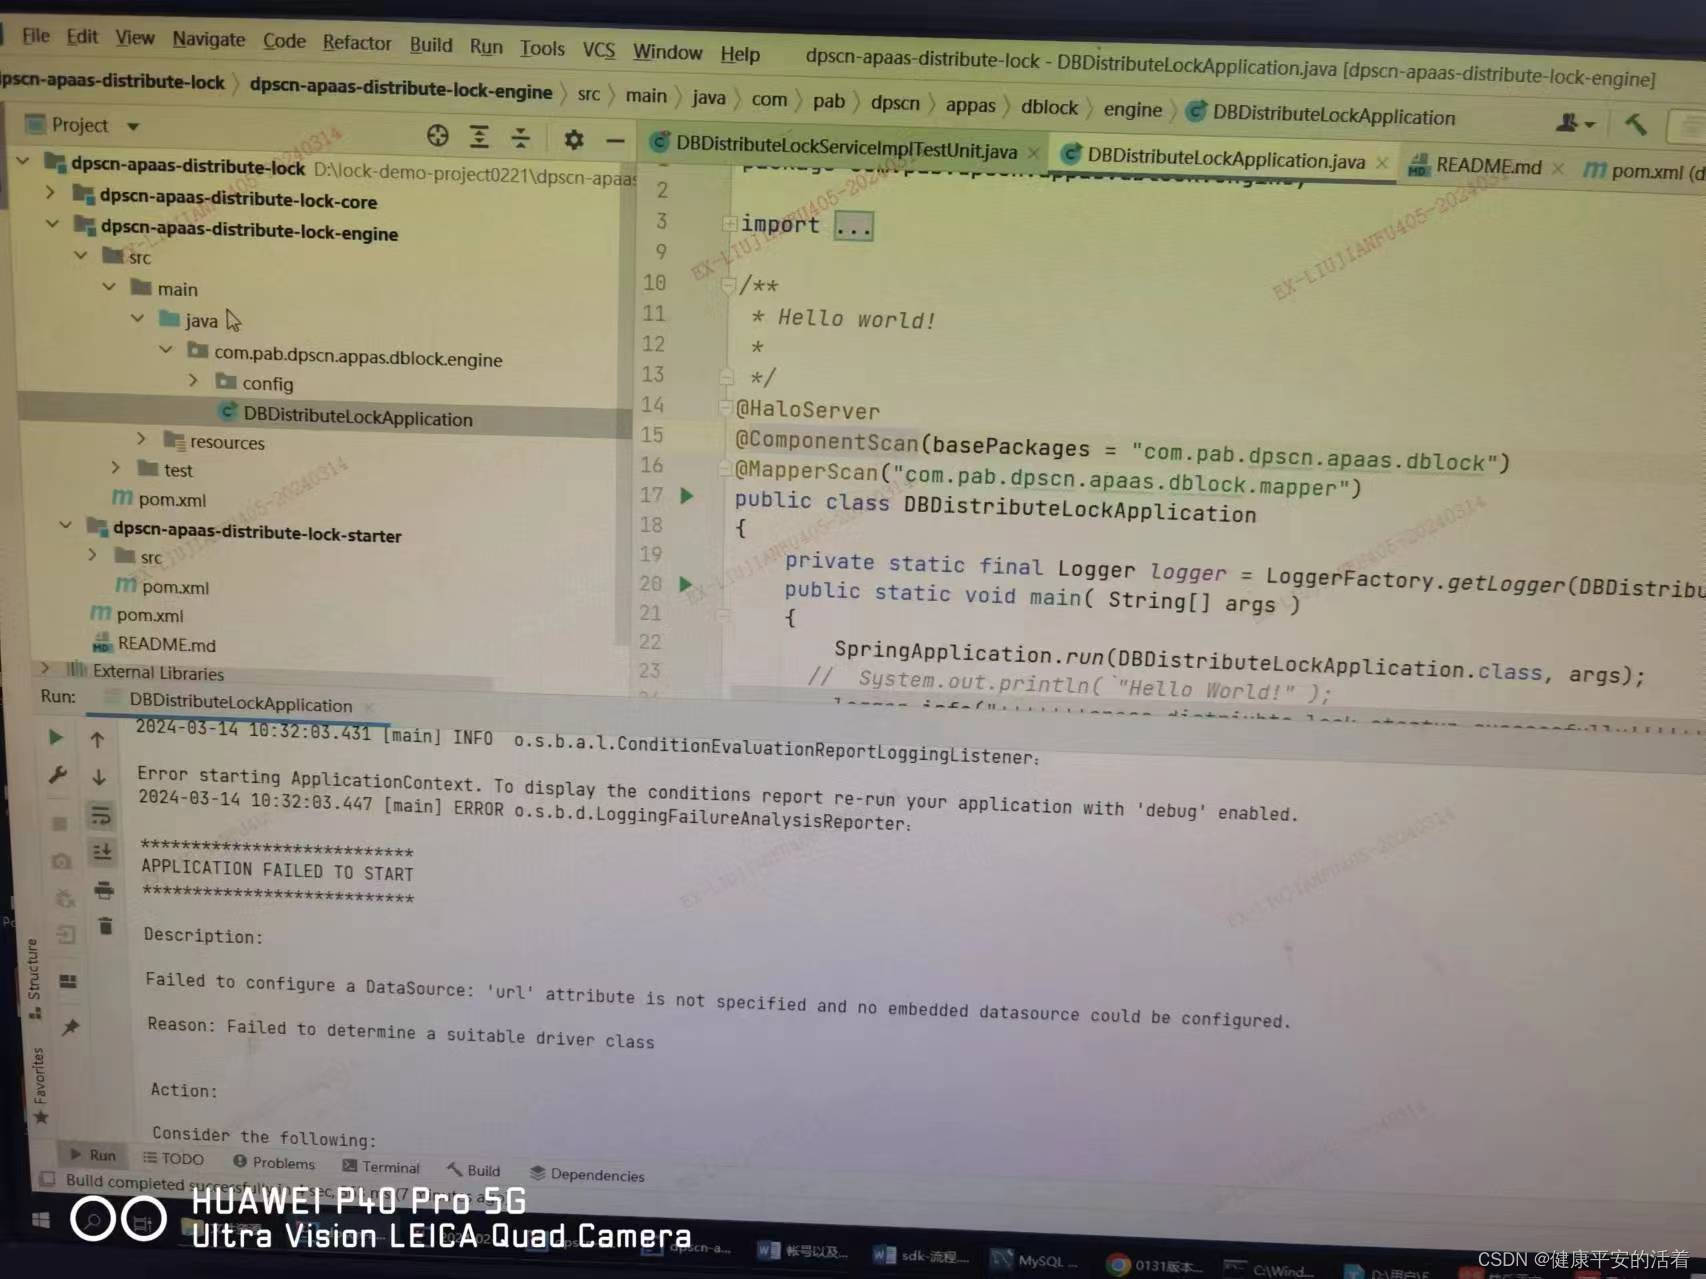
3.2 将扫描内配置到 应用启动类
将这些扫描注解配置到启动上
@ComponentScan(basePackages=“com.pab.dpscn.apaas.dblock”)
@MapperScan("com.pab.dpsn.apaas.dblock.mapper")
启动不起来提示错误。
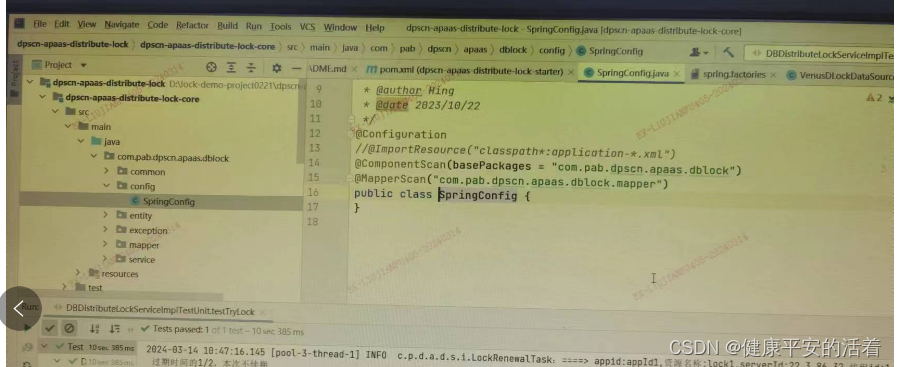
3.3 解决办法
1.core工程中,新建springConfig扫描类,把mapperscan和componentscan的扫描路径,配置到这个目录下,如下
2.在starter工程中的resources目录下新建META-INF下spring.factories 配置内容如下:
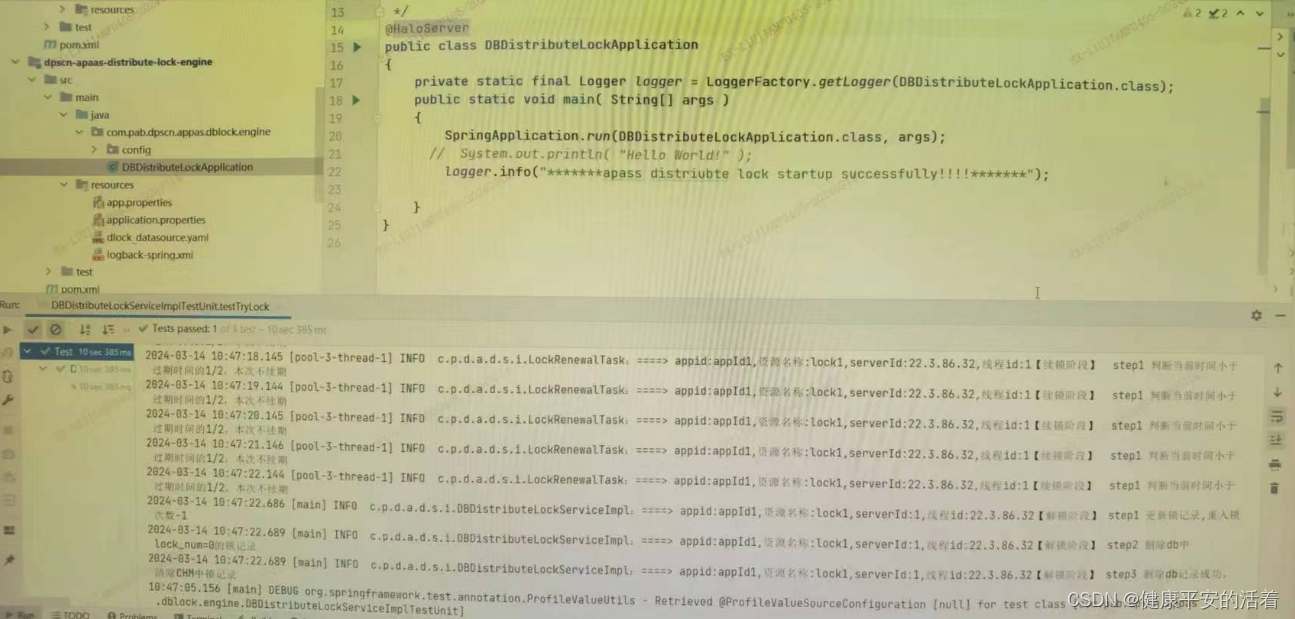
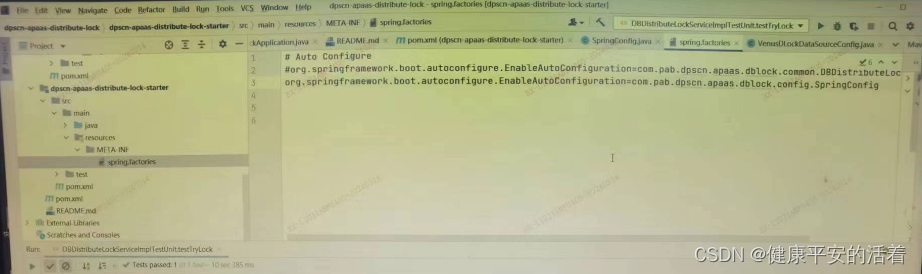 3.在应用方启动服务查看如下:在应用方启动类,不用再添加扫描信息,启动后,正确执行


 411
411


 被折叠的 条评论
为什么被折叠?
被折叠的 条评论
为什么被折叠?
 到【灌水乐园】发言


