


react基础04--redux 管理数据
1 介绍
react基础03–render渲染、组件生命周期、组件通信 中介绍了React render渲染、组件生命周期、组件通信等重要知识。本文在其基础上继续介绍 redux 数据管理的方法,并配以实际案例。
实际项目中,很多时候需要在多个组件或者多个页面显示统一个数据,例如商品数量,如果通过参数传递就显得很麻烦。此时我们就可以通过redux事项数据管理。
2 方法&案例
安装 redux 模块:
npm i redux --save
安装后在 package.json 中就可以看到 { “dependencies”: {“redux”: “^4.1.2”}}
在多个组件中使用Store中的数据
- 定义Store.js 文件,引用 createStore函数,返回 createStore 的回调
- 在哪里使用就在哪里调用,分别在 App.js 和 Demo.js 中通过 Store.getState().name 访问Store中的数据即可,不需要各种复杂的传参步骤
vim index.html
<!DOCTYPE html>
<html lang="en">
  <head>
    <meta charset="utf-8" />
    <meta name="viewport" content="width=device-width, initial-scale=1" />
    <title>React App 2-1</title>
  </head>
  <body>
    <div id="root"></div>
  </body>
</html>
vim index.js
import React from 'react';
import ReactDOM from 'react-dom';
import Demo from './Demo';

ReactDOM.render(
    <Demo />
  ,document.getElementById('root')
);
vim Demo.js
import React, { Component } from 'react'
import App from './App';
import Store from './Store';
export default class Demo extends Component {
constructor(){
super();
this.state = {
msg: Store.getState().name
}
}
render() {
return (
<div>
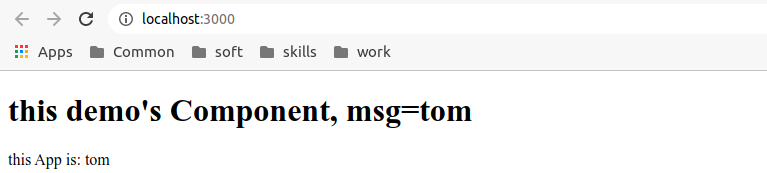
<h1>this demo's Component, msg={this.state.msg}</h1>
<App />
</div>
)
}
}
export default Demo
vim App.js
import React, { Component } from 'react'
import Store from './Store'

export class App extends Component {
    constructor(){
        super()

        this.state = {
            name: Store.getState().name
        }
    }
    render() {
        return (
            <div>
                this App is: {this.state.name}
            </div>
        )
    }
}
export default App
vim Store.js
import { createStore } from 'redux'

const defaultState = {
    name: 'tom'
}
const store = createStore((state = defaultState,action)=>{
    return state;
    }
);
export default store
结果:
规范 store 写法
当需要存储的数据较多的时候,如果将所有的数据都放在 Store.js, 那么将会很冗余,因此需要将其拆分出为一个单独的 reducer.js
vim App.js
import React, { Component } from 'react'
import Store from './Store'
import Header from './Header'
import Content from './Content'
import Footer from './Footer'
export class App extends Component {
constructor(){
super()
this.state = Store.getState()
}
render() {
return (
<div>
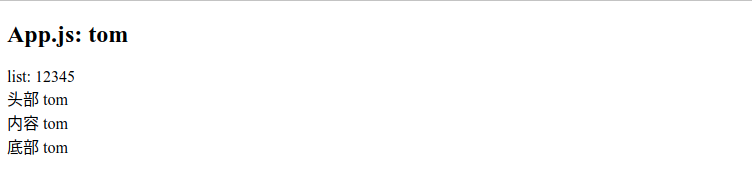
<h2> App.js: {this.state.name} </h2>
list: {this.state.list}
<Header />
<Content />
<Footer />
</div>
)
}
}
export default App
vim reducer.js
const defaultState = {
    name: 'tom',
    list: [1,2,3,4,5]
}

export default ((state = defaultState,action)=>{
    return state;
    }
);
vim Store.js
import { createStore } from 'redux'
import reducer from './reducer';

const store = createStore(reducer);
export default store
结果:
修改Store中的数据
当前端有操作的时候,可以捕获事件,在事件中将具体信息分发给reducer;
在reducer 中需要通过 action.type 来确认是哪个组件派发的,并将数据返回;
同时需要在组件中新增Store.subscribe函数,当其检测到更新就将数据更新到组件中;
vim reducer.js
const defaultState = {
    name: 'tom',
    list: [1,2,3,4,5]
}

export default (state = defaultState,action)=>{
    if (action.type === 'change_name'){
        let tmpState = state;
        tmpState.name = action.name;
        return tmpState
    }
    return state
};
vim Content.js
import React, { Component } from 'react'
import Store from './Store'

export class Content extends Component {
    constructor(){
        super()
        this.state = Store.getState()

        Store.subscribe(()=>{
            console.log(Store.getState());
            this.setState(Store.getState())
        })
    }
    render() {
        return (
            <div>
                内容 {this.state.name}
                <p>
                    <input input={this.state.name} onChange={this.change.bind(this)}/>
                    <button>提交</button>
                </p>
            </div>
        )
    }
    change(e){
        let inputValue = e.target.value;
        console.log(inputValue)
        let action = {
            type: 'change_name',
            name: inputValue
        }
        Store.dispatch(action) // 把action 对象派发给reducer
    }
}
export default Content
输出结果:
默认为 tom

输入bob后更新为bob

注意:
如果只在change(e)事件中使用 this.setState, 那么只会更新 Content 组件。
        this.setState({
            name: inputValue
        })
如果需要其它组件也更新相关字段,那么需要在其它组件中添加 Store.subscribe 函数。
refs属性获取元素对象
在 修改Store中的数据 中, 每次input中有变动就更新给各个组件,有时候需要输入完毕,点击提交的时候才将信息更新给不同的组件。
此时我们需要设置button 的onClick 事件,并且通过 input 的refs 获取元素的对象,并将该元素的值派发给reducer。
vim Content.js
import React, { Component } from 'react'
import Store from './Store'

export class Content extends Component {
    constructor(){
        super()
        this.state = Store.getState()

        Store.subscribe(()=>{
            this.setState(Store.getState())
        })
    }
    render() {
        return (
            <div>
                内容 {this.state.name}
                <p>
                    <input ref="inputValue"/>
                    <button onClick={this.click.bind(this)}>提交</button>
                </p>
            </div>
        )
    }
    click(){
        let inputValue = this.refs.inputValue.value;
        console.log(inputValue)
        let action = {
            type: 'change_name',
            name: inputValue
        }
        Store.dispatch(action) // 把action 对象派发给reducer
    }
}
export default Content
redux-thunk 中间件
安装组件
npm i axios --save
npm i redux-thunk --save
以上都是通过派发变量的方式改变参数,如果想派发函数,那么就需要redux-thunk中间件了。
需要在Store.js 中 createStore 引入 pplyMiddleware(thunk) 参数,在reducer.js 中引入对应的处理方法;
程序启动的时候将getList函数派发给thunk;
thunk 再将对应的数据派发给 reducer;
当 App 中的模块监听到 reducer的变动后,就会更新对应的数据。
vim data.json
{
    "list": [5,6,7,8,9]
}
vim reducer.js
const defaultState = {
    name: 'tom',
    list: [1,2,3,4,5]
}

export default (state = defaultState,action)=>{
    if (action.type === 'change_name'){
        let tmpState = state;
        tmpState.name = action.name;
        return tmpState;
    }
    // 初始化list
    if (action.type === 'init_list'){
        console.log(action);
        let tmpState = state;
        tmpState.list = action.list;
        return tmpState;
    }
    return state
};
vim Store.js
import { createStore, applyMiddleware } from 'redux'
import reducer from './reducer';
import thunk from 'redux-thunk'

const store = createStore(reducer, applyMiddleware(thunk));
export default store
vim App.js
import React, { Component } from 'react'
import Store from './Store'
import Header from './Header'
import Content from './Content'
import Footer from './Footer'
import axios from 'axios'

export class App extends Component {
    constructor(){
        super()
        this.state = Store.getState()
        Store.subscribe(()=>{
            this.setState(Store.getState())
        })
    }
    componentDidMount(){
        Store.dispatch(this.getList()) // 先派发给thunk
    }
    getList(){
        return (dispatch)=>{
            axios.get("http://localhost:3000/data.json")
            .then((resp)=>{
                // console.log(resp.data)
                let action = {
                    type: 'init_list',
                    list: resp.data.list
                }
                dispatch(action) //派发给reducer
            })
        }
    }
    render() {
        return (
            <div>
                <h2> App.js: {this.state.name} </h2>
                list: {this.state.list}
                <Header />
                <Content />
                <Footer />
            </div>
        )
    }
}
export default App
启动输出:

3 注意事项
- 如果只是分发不同变量,直接用普通的reducer即可;如果需要分发函数,那么需要使用 redux-thunk 组件来实现。
4 说明
软件版本:
node 16.13.1
create-react-app 5.0.0
参考文档:
React基础入门+综合案例
react 官网
React基础入门教程
中国 NPM 镜像


 424
424


 被折叠的 条评论
为什么被折叠?
被折叠的 条评论
为什么被折叠?
 到【灌水乐园】发言


