


一 windows
根据系统类型启动相应bat.
二 linux
安装环境:linux rhe
activemq版本:5.8.0
1.从http://activemq.apache.org/download.html地址下载apache-activemq-5.8.0-bin.tar.gz包
2.解压缩到指定的目录
tar zxvf apache-activemq-5.8.0-bin.tar.gz -C /usr/local
解压缩后会在/usr/local下生成apache-activemq-5.8.0目录,其中bin目录下就是activeMQ的执行脚本存在的位置了。
3.如果启动脚本无法执行,我们需要修改一下权限
3.1 cd /usr/local/apache-activemq-5.8.0/bin
3.2 chmod 775 activemq
4.设置activeMQ配置环境.activemqrc
bin/activemq setup ~/.activemqrc
5.启动activeMQ
在activemq主目录键入如下命令:
bin/activemq start
然后会看到控制台日志输出如下:
INFO: Loading '/home/chenzhou/.activemqrc'
    INFO: Using java '/usr/java/jdk1.6.0_03/bin/java'
    INFO: Starting - inspect logfiles specified in      logging.properties and log4j.properties to get details
    INFO: pidfile created : '/usr/local/apache-activemq-5.8.0/data/activemq-localhost.localdomain.pid' (pid '18567')
我们也可以把日志输出到指定的日志文件中
bin/activemq start > /tmp/smlog 2>&1 &
然后日志就输出到/tmp/smlog文件中了
*注意:官方文档中标明了如果按上述的方式启动后,如果我们把linux终端窗口关闭的话,则服务也会停止*

我们在启动时最好还是加上nohup参数
启动命令如下:
nohup bin/activemq start
或者:
nohup bin/activemq start > /tmp/smlog 2>&1 &
查看启动情况:
netstat -ntlp|grep 8161
netstat -an|grep 61616
通过端口查询,activeMQ默认配置下启动会启动8161和61616两个端口,其中8161是mq自带的管理后台的端口,61616是mq服务默认端口。
访问activeMQ管理界面,http://ip:8161/admin,如果是本机就是http://localhost:8161/admin
三 修改相关配置
修改默认的管理平台用户名和密码
修改服务的用户名和密码
修改管理平台的端口
修改服务的端口
activeMQ分为2个安全配置。一个是web控制台的安全配置;另外一个是对于队列/主题的访问安全配置
1.控制台安全配置
ActiveMQ使用的是jetty服务器
1.1 打开conf/jetty.xml文件,找到
    <bean id="securityConstraint" class="org.eclipse.jetty.http.security.Constraint">
            <property name="name" value="BASIC" />
            <property name="roles" value="admin" />
            <property name="authenticate" value="false" />
    </bean>
将property name为authenticate的属性value=”false” 改为”true”。
1.2 控制台的登录用户名密码保存在conf/jetty-realm.properties文件中,内容如下:
  ## ---------------------------------------------------------------------------
    ## Licensed to the Apache Software Foundation (ASF) under one or more
    ## contributor license agreements.  See the NOTICE file distributed with
    ## this work for additional information regarding copyright ownership.
    ## The ASF licenses this file to You under the Apache License, Version 2.0
    ## (the "License"); you may not use this file except in compliance with
    ## the License.  You may obtain a copy of the License at
    ##
    ## http://www.apache.org/licenses/LICENSE-2.0
    ##
    ## Unless required by applicable law or agreed to in writing, software
    ## distributed under the License is distributed on an "AS IS" BASIS,
    ## WITHOUT WARRANTIES OR CONDITIONS OF ANY KIND, either express or implied.
    ## See the License for the specific language governing permissions and
    ## limitations under the License.
    ## ---------------------------------------------------------------------------

    # Defines users that can access the web (console, demo, etc.)
    # username: password [,rolename ...]
    admin: admin, admin
用户格式定义: 用户名:密码[,角色…] , 以上配置就是用户名为admin,密码为admin,角色为admin的用户。
重启,访问 http://127.0.0.1:8161/admin/ 将弹出:
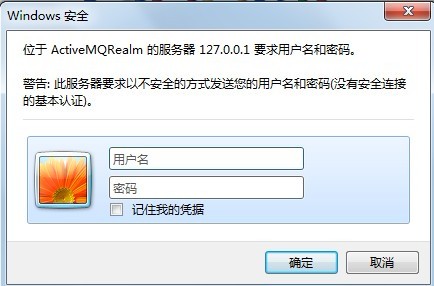
要求输入用户名密码。
2 对于JMS的安全配置
对于JMS的安全配置这里又介绍两种。现在先介绍关于“角色/权限”的一个介绍:
Authorization

In ActiveMQ we use a number of operations which you can associate with user roles and either individual queues or topics or you can use wildcards to attach to hierarchies of topics and queues.
Operation   Description
read    You can browse and consume from the destination
write   You can send messages to the destination
admin   You can lazily create the destination if it does not yet exist. This allows you fine grained control over which new destinations can be dynamically created in what part of the queue/topic hierarchy
以上是apache官网的描述.这里稍微解释下.
其实对于队列/主题的访问只有3个操作类型,read和write我就不解释了.而admin是什么呢?这是我们在写我们自己客户端程序访问activeMQ时候,如果队列/主题不存在.则admin就可指定该”角色”是否有权限建立这个队列(没错,不像weblogic的jms那样,队列/主题没有从后台建立,则客户端无法访问.)
2.1Simple Authentication(简单的身份验证)
在conf/activemq.xml文件中加入以下内容即可(如配置了systemUsage,应该放到systemUsage前):
<plugins>
<!-- Configure authentication; Username, passwords and groups -->
    <simpleAuthenticationPlugin>
        <users>
            <authenticationUser username="system" password="${activemq.password}"   groups="users,admins"/>
            <authenticationUser username="user" password="${guest.password}"  groups="users"/>
            <authenticationUser username="guest" password="${guest.password}" groups="guests"/>
        </users>
    </simpleAuthenticationPlugin>
</plugins>
以上占位引用可在conf/credential.properties中配置 。
2.2 JAAS身份验证
a)在conf/activemq.xml文件中加上:
    <plugins>
        <!--use JAAS to authenticate using the login.config file on the classpath to configure JAAS -->
        <jaasAuthenticationPlugin configuration="activemq-domain" />
        <!--  lets configure a destination based authorization mechanism -->
        <authorizationPlugin>
            <map>
                <authorizationMap>
                    <authorizationEntries>

                    <!-->表示通配符,例如USERS.>表示以USERS.开头的主题,>表示所有主题,read表示读的权限,write表示写的权限,admin表示角色组-->
                        <authorizationEntry queue=">" read="admins" write="admins" admin="admins" />
                        <authorizationEntry topic=">" read="admins" write="admins" admin="admins" />
                        <authorizationEntry queue="ActiveMQ.Advisory.>" read="admins" write="admins" admin="admins" />
                        <authorizationEntry topic="ActiveMQ.Advisory.>" read="admins" write="admins" admin="admins" />
                    </authorizationEntries>
                </authorizationMap>
            </map>
        </authorizationPlugin>
    </plugins>
在配置中 “>” 代表所有的意思. 而 “ActiveMQ.Advisory.>” 则代表.名为 “ActiveMQ.Advisory.”下的所有。
b)在conf目录下增加login.config,groups.properties,users.properties。
b1. login.config 内容如下:
    activemq-domain {
                    org.apache.activemq.jaas.PropertiesLoginModule required
                    debug=true
                    org.apache.activemq.jaas.properties.user="users.properties"
                    org.apache.activemq.jaas.properties.group="groups.properties";
                };
b2. groups.properties 内容如下:
    #group=userName
    admins=system
b3. users.properties 内容如下:
    #userName=password
    system=manager
以上两种配置方式到conf下activemq-security.xml文件都能看到,看样子这个就是配置安全的配置文件.
最后,附上官网的配置连接:http://activemq.apache.org/security.html


 3845
3845

 被折叠的 条评论
为什么被折叠?
被折叠的 条评论
为什么被折叠?
 到【灌水乐园】发言


