


关于springboot整合springmvc的源码分析可以参考以下系列文章:
- springboot整合springmvc源码分析(1)--前言
- springboot整合springmvc源码分析(2)--承上启下
- springboot整合springmvc源码分析(3)--直击内容
该源码分析系列文章分如下章节:
- springmvc源码分析(1)-- DispatcherServlet
- springmvc源码分析(2)-- HandlerMapping
- springmvc源码分析(3)-- HandlerAdapter
- springmvc源码分析(3.1)-- HandlerMethodReturnValueHandler
- springmvc源码分析(4)-- ViewResolver
DispatcherServlet干什么用的?
我们从源码注释中可以得知:
用于HTTP请求处理程序/控制器的中央调度器,例如用于web UI控制器或基于HTTP的远程服务导出器。发送到注册处理程序进行处理web请求,提供方便的映射和异常处理工具。
DispatcherServlet说实在的他就是一个Servlet,将其注册到tomcat的Servlet容器里,然后接受到请求进入到service方法然后在DispatcherServlet中产生一系列的处理之后返回到浏览器中去。具体可以查看springboot整合springmvc源码分析系列内容
我们先来看看springmvc接受到一个请求再到响应给浏览器中间经历了哪些?

从上面这个流程图中我们可以发现,这个DispatchServlet是springmvc中的一个核心,它就起到一个中央控制调度作用,其他废话就不多说了,我们直接来看看这个DispatchServlet的整个类的继承关系:

它继承了HttpServlet自然就有了该类的所有方法,那么我们就直接从DispatcherSerlvet的init方法开始,这里HttpServletBean重写了init()方法,我们打开看下:

其他那些细节我们不需要去看,我们注意到这里// Let subclasses do whatever initialization they like.
直接进入initServletBean():这里直接交由FrameworkServlet.initServletBean:

接着进行容器的初始化操作initWebApplicationContext,以下是该方法部分核心代码:

这里再调用DispatcherServlet.onRefresh:

然后接着调用initStrategies:

这里就是整个初始化过程,包括去spring容器中获取HandlerMappings处理映射器、HandlerAdapters处理适配器、ViewResolvers视图解析器。
下面接着我们再到service方法,FrameworkServlet重写了service方法:

这里只是判断是否是PATCH的请求方式,我们知道HttpServlet只有七种请求方式如下:

故这里加多了判断,但最终无论是哪种请求方式都会交由processRequest方法处理,我们可以看看FrameworkServlet重写的doGet:

所以我们直接看processRequest方法即可:

processRequest方法的前后那些乱七八糟的我们不需要去抠细节,我们直接进入核心的代码即可,doService由DispatcherServlet重写,这里面会调用到doDispatch(request, response)这个方法,我们直接进入doDispatch:
protected void doDispatch(HttpServletRequest request, HttpServletResponse response) throws Exception {
		HttpServletRequest processedRequest = request;
		HandlerExecutionChain mappedHandler = null;
		boolean multipartRequestParsed = false;
		WebAsyncManager asyncManager = WebAsyncUtils.getAsyncManager(request);
		try {
			ModelAndView mv = null;
			Exception dispatchException = null;
			try {
				processedRequest = checkMultipart(request);
				multipartRequestParsed = (processedRequest != request);
				// Determine handler for the current request.
				mappedHandler = getHandler(processedRequest);
				if (mappedHandler == null) {
					noHandlerFound(processedRequest, response);
					return;
				}
				// Determine handler adapter for the current request.
				HandlerAdapter ha = getHandlerAdapter(mappedHandler.getHandler());
				// Process last-modified header, if supported by the handler.
				String method = request.getMethod();
				boolean isGet = "GET".equals(method);
				if (isGet || "HEAD".equals(method)) {
					long lastModified = ha.getLastModified(request, mappedHandler.getHandler());
					if (new ServletWebRequest(request, response).checkNotModified(lastModified) && isGet) {
						return;
					}
				}
				if (!mappedHandler.applyPreHandle(processedRequest, response)) {
					return;
				}
				// Actually invoke the handler.
				mv = ha.handle(processedRequest, response, mappedHandler.getHandler());
				if (asyncManager.isConcurrentHandlingStarted()) {
					return;
				}
				applyDefaultViewName(processedRequest, mv);
				mappedHandler.applyPostHandle(processedRequest, response, mv);
			}
		...
			processDispatchResult(processedRequest, response, mappedHandler, mv, dispatchException);
		}
		...
从该方法上注释可以看出来,这就是中央控制器的核心代码所在,整个的调用过程都在这里,我们从流程图里一步步来先来看看请求HandlerMapping和拿到Handler这一步的过程:

调用getHandler获取一个Handler:

这里就是向HandlerMapping请求获取一个Handler,我们进到AbstractHandlerMapping.getHandler查看:
public final HandlerExecutionChain getHandler(HttpServletRequest request) throws Exception {
       Object handler = getHandlerInternal(request);
		if (handler == null) {
			handler = getDefaultHandler();
		}
		if (handler == null) {
			return null;
		}
		// Bean name or resolved handler?
		if (handler instanceof String) {
			String handlerName = (String) handler;
			handler = obtainApplicationContext().getBean(handlerName);
		}
		HandlerExecutionChain executionChain = getHandlerExecutionChain(handler, request);

		....

		if (hasCorsConfigurationSource(handler) || CorsUtils.isPreFlightRequest(request)) {
			CorsConfiguration config = (this.corsConfigurationSource != null ? this.corsConfigurationSource.getCorsConfiguration(request) : null);
			CorsConfiguration handlerConfig = getCorsConfiguration(handler, request);
			config = (config != null ? config.combine(handlerConfig) : handlerConfig);
			executionChain = getCorsHandlerExecutionChain(request, executionChain, config);
		}
		return executionChain;
	}
从getHandler该方法中可以看到,第一步调用getHandlerInternal获取Handler,我们直接看AbstractHandlerMethodMapping下的getHandlerInternal方法:

第一步获取请求地址:
String lookupPath = getUrlPathHelper().getLookupPathForRequest(request);第二部接着拿到url之后,调用lookupHandlerMethod查找HandlerMethod:
HandlerMethod handlerMethod = lookupHandlerMethod(lookupPath, request);@Nullable
protected HandlerMethod lookupHandlerMethod(String lookupPath, HttpServletRequest request) throws Exception {
List<Match> matches = new ArrayList<>();
List<T> directPathMatches = this.mappingRegistry.getMappingsByUrl(lookupPath);
if (directPathMatches != null) {
addMatchingMappings(directPathMatches, matches, request);
}
if (matches.isEmpty()) {
// No choice but to go through all mappings...
addMatchingMappings(this.mappingRegistry.getMappings().keySet(), matches, request);
}
if (!matches.isEmpty()) {
Comparator<Match> comparator = new MatchComparator(getMappingComparator(request));
matches.sort(comparator);
Match bestMatch = matches.get(0);
if (matches.size() > 1) {
if (logger.isTraceEnabled()) {
logger.trace(matches.size() + " matching mappings: " + matches);
}
if (CorsUtils.isPreFlightRequest(request)) {
return PREFLIGHT_AMBIGUOUS_MATCH;
}
Match secondBestMatch = matches.get(1);
if (comparator.compare(bestMatch, secondBestMatch) == 0) {
Method m1 = bestMatch.handlerMethod.getMethod();
Method m2 = secondBestMatch.handlerMethod.getMethod();
String uri = request.getRequestURI();
throw new IllegalStateException(
"Ambiguous handler methods mapped for '" + uri + "': {" + m1 + ", " + m2 + "}");
}
}
request.setAttribute(BEST_MATCHING_HANDLER_ATTRIBUTE, bestMatch.handlerMethod);
handleMatch(bestMatch.mapping, lookupPath, request);
return bestMatch.handlerMethod;
}
else {
return handleNoMatch(this.mappingRegistry.getMappings().keySet(), lookupPath, request);
}
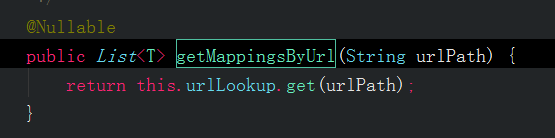
}这里调用this.mappingRegistry.getMappingsByUrl(lookupPath)获取mapping信息:
从上面代码可得知,MappingRegistry.urlLookup的map中通过url获取RequestMappingInfo返回
然后接着调用addMatchingMappings:

通过RequestMappingInfo信息调用this.mappingRegistry.getMappings().get(mapping),也就是MappingRegistry.mappingLookup的map里面通过key为RequestMappingInfo的取出HandlerMethod,具体MappingRegistry.urlLookup和MappingRegistry.mappingLookup的信息何来可以参考springmvc源码分析(2)-- HandlerMapping
接着构造成Match对象放入List<Match> matches
最后返回出去HandlerMethod

到这里我们就完成了处理器映射器的处理,也就是完成拿到了HandlerMethod
回到dispatcherServlet.doDispatch这里

接着就进入处理器适配器的选择,具体适配器的选择以及使用在该章springmvc源码分析(3)-- HandlerAdapter进行分析
我们这里自然选择的是RequestMappingHandlerAdapter来适配RequestMappingHandlerMapping,选择好适配器接着进行真正的handler调用并返回ModelView,如下图:

然后接着选择获取视图名然后选择视图进入视图解析器,进行视图的解析,如下入部分代码

这里视图解析细节可以查看该章:springmvc源码分析(4)-- ViewResolver
通过以上一系列文章对springmvc的分析,整个springmvc的调用流程我们已经很明朗了,剩下的就是一些细节的处理了,如果后续有空将会补充springmvc的题外篇,如有什么不对的地方望指出,这也是博主的一个学习过程中记下的笔记。喜欢的可以关注下,后续会继续分析各大常用开源框架的源码


 2809
2809


 被折叠的 条评论
为什么被折叠?
被折叠的 条评论
为什么被折叠?
 到【灌水乐园】发言


