


公众号首发,关注:测试充电宝
pytest集成报告
pytest-html生成报告
pytest是借助pytest-html插件生成测试测试报告, 不用自己编写生成报告代码。
- 安装:
pip install pytest-html - 执行方法:
pytest --html=./reports/report.html
测试代码:
import pytest


def login(username, password):
    """模拟登录"""
    user = "linux超"
    pwd = "linux超哥"
    if user == username and pwd == password:
        return {"code": 1001, "msg": "登录成功", "data": None}
    else:
        return {"code": 1000, "msg": "用户名或密码错误", "data": None}


test_data = [
    # 测试数据
    {
        "case": "用户名正确, 密码正确",
        "user": "linux超",
        "pwd": "linux超哥",
        "expected": {"code": 1001, "msg": "登录成功", "data": None}
    },
    {
        "case": "用户名正确, 密码为空",
        "user": "linux超",
        "pwd": "",
        "expected": {"code": 1000, "msg": "用户名或密码错误", "data": None}
    },
    {
        "case": "用户名为空, 密码正确",
        "user": "",
        "pwd": "linux超哥",
        "expected": {"code": 1000, "msg": "用户名或密码错误", "data": None}
    },
    {
        "case": "用户名错误, 密码错误",
        "user": "linux",
        "pwd": "linux",
        "expected": {"code": 1000, "msg": "用户名或密码错误", "data": None}
    }
]


class TestLogin(object):

    @pytest.mark.parametrize("data", test_data)
    def test_login(self, data):
        result = login(data["user"], data["pwd"])
        assert result == data["expected"]


if __name__ == '__main__':
    pytest.main(['-sv', "test_pytest_html", "--html", "./reports/report.html"])
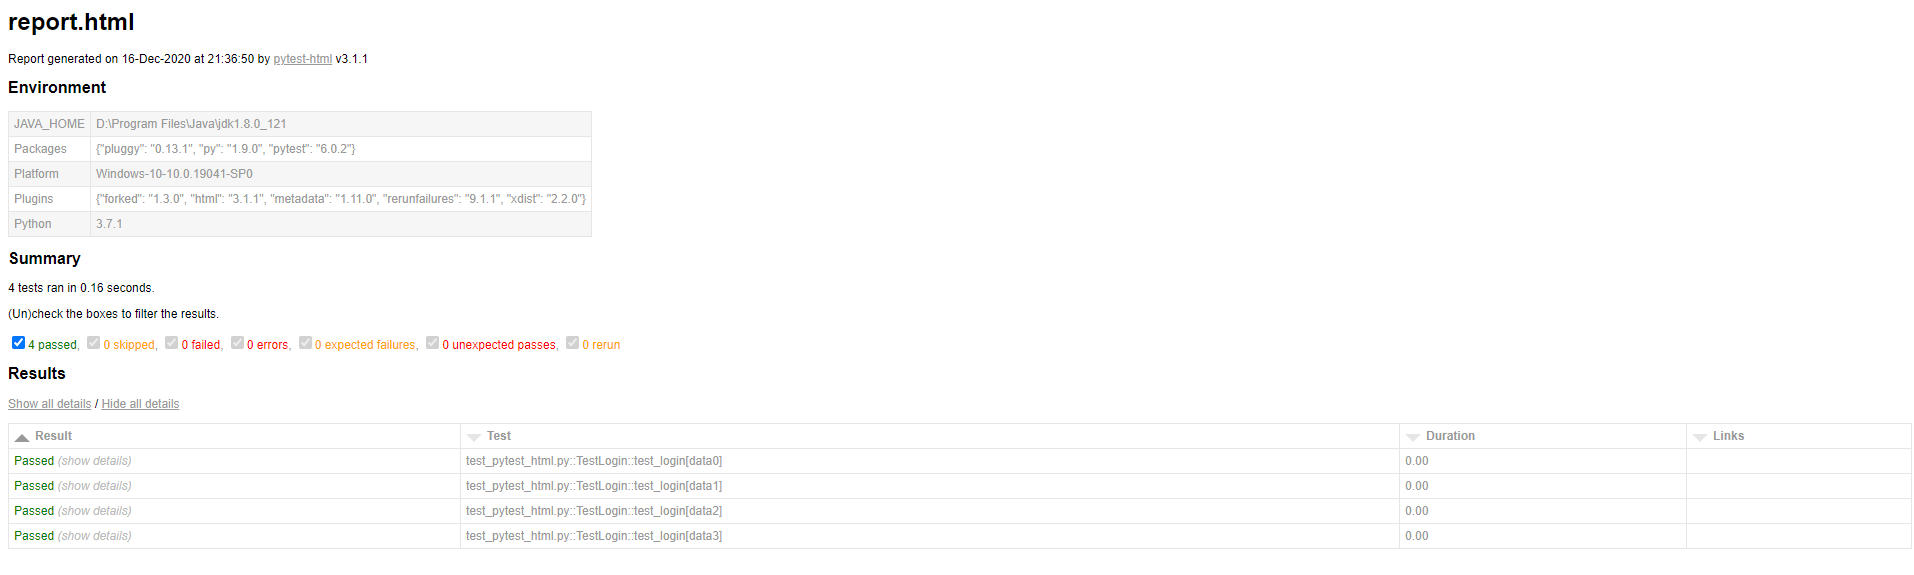
执行命令:pytest test_pytest_html.py --html=./reports/report.html则会在reports文件夹下生成一份报告,如下
pytest集成allure
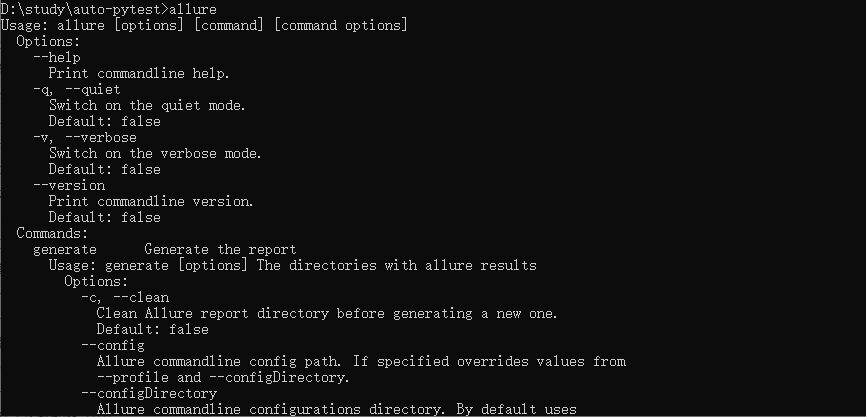
1.all下载安装
Allure 下载最新版本:https://github.com/allure-framework/allure2/releases
下载完成之后解压。然后将allure的bin目录设置环境变量。cmd 输入 allure 查看环境变量是否设置成功。
2.allure-pytest安装
下载 allure-pytest 插件,用来生成 Allure 测试报告所需要的数据。
pip install allure-pytest
3.编码如下
import pytest
import allure
@pytest.fixture(scope='function')
def login():
print("登录")
yield
print("登录完成")
@allure.feature('加入购物车')
def test_1(login):
'''将苹果加入购物车'''
print("测试用例1")
@allure.feature('加入购物车')
def test_2():
'''将橘子加入购物车'''
print("测试用例2")
if __name__ =="__main__":
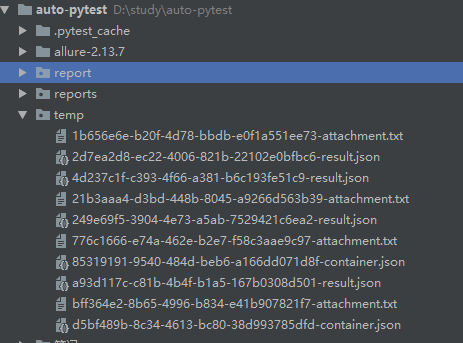
# 执行pytest单元测试,生成 Allure 报告需要的数据存在 /temp 目录
pytest.main(['--alluredir', './temp'])
@allure 装饰器中的一些功能点:
- @allure.feature :用于定义被测试的功能,被测产品的需求点
- @allure.story : 用于定义被测功能的用户场景,即子功能点
- @allure.step :用于将一个测试用例,分成几个步骤在报告中输出
- @allure.attach : 用于向测试报告中输入一些附加的信息,通常是一些测试数据信息
运行测试文件,会在temp文件夹下生成报告所需数据
在当前目录执行如下命令,生成allure报告
allure generate ./temp -o ./report --clean
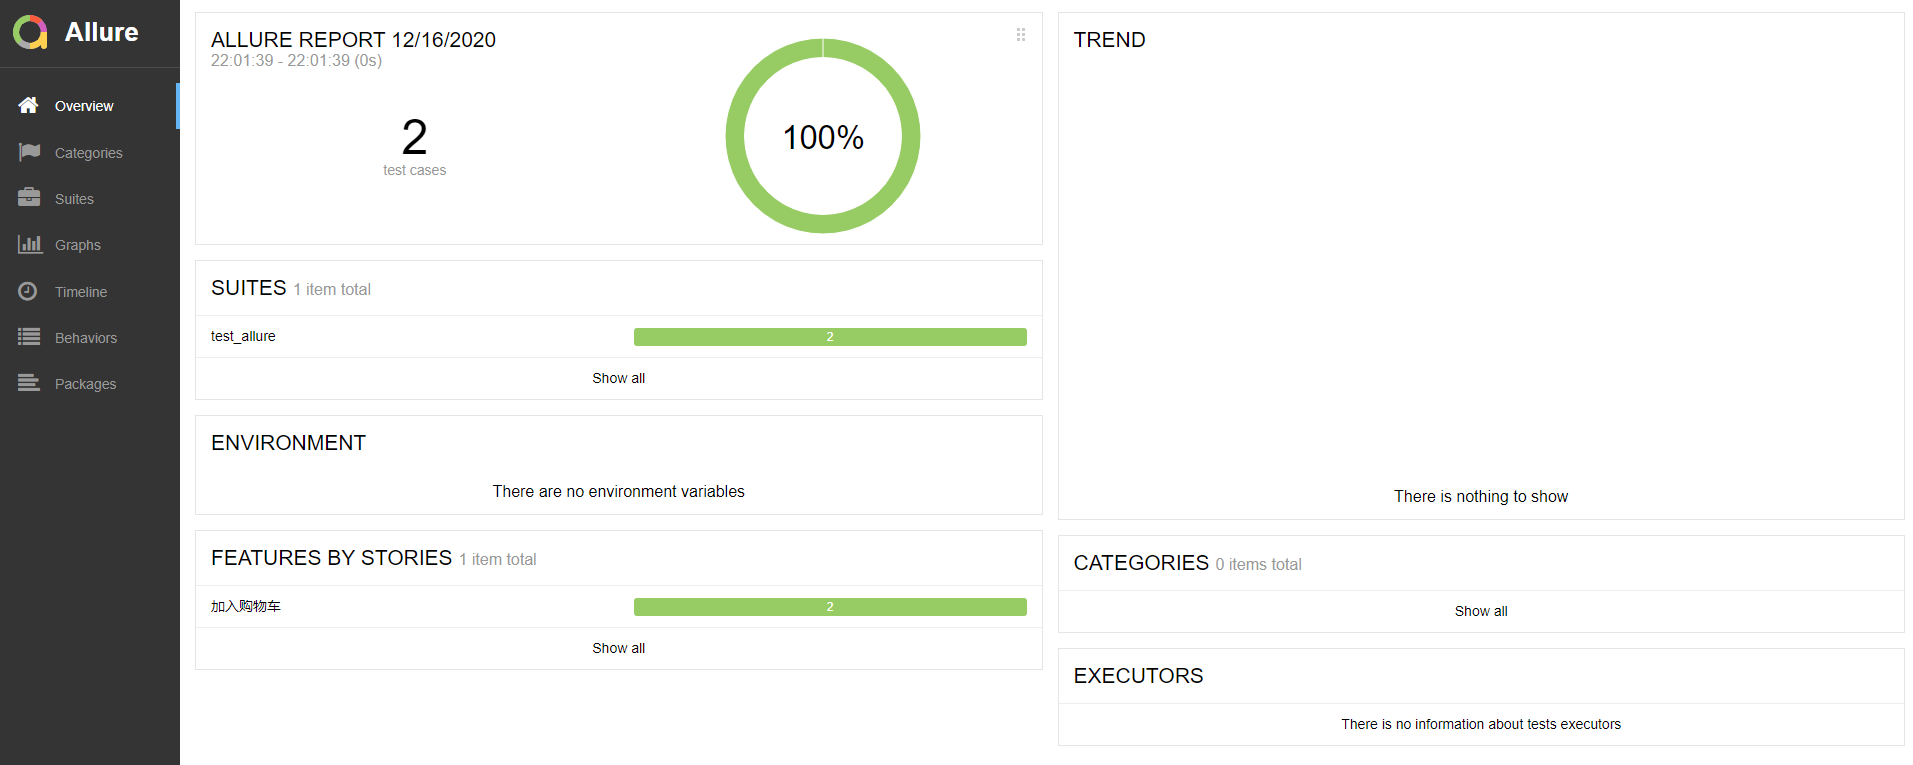
大功告成!
至此,pytest的介绍就告一段落了,还需要大家自行在工作中深入研究,本系列只是介绍大概


 575
575


 被折叠的 条评论
为什么被折叠?
被折叠的 条评论
为什么被折叠?
 到【灌水乐园】发言


