


五、SpringBoot单元测试
2、Junit4
JUnit4把所有的代码都打包到一个jar包
所需依赖
<dependency>
    <groupId>junit</groupId>
    <artifactId>junit</artifactId>
    <version>4.13.2</version>
    <scope>test</scope>
</dependency>
5.2.1、名称规范
- 单元测试类名
单元测试的类名应该起为 xxxxTest.java 表明这个一个测试类
类名应该用简洁的英文表明测试内容或函数
例如为了测试一个计算和的方法可以取名为 SumTest.java
- 单元测试方法名
测试方法上应该加上 @Test 注解以表明其是一个测试方法
5.2.2、执行测试
(1)、运行测试方法
- 方式一
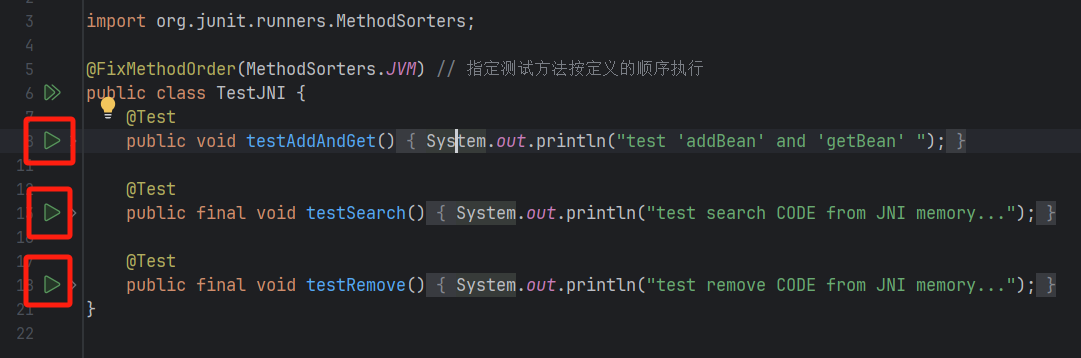
在idea 中每个测试方法前都有一个运行按钮,点击后会运行该测试方法。
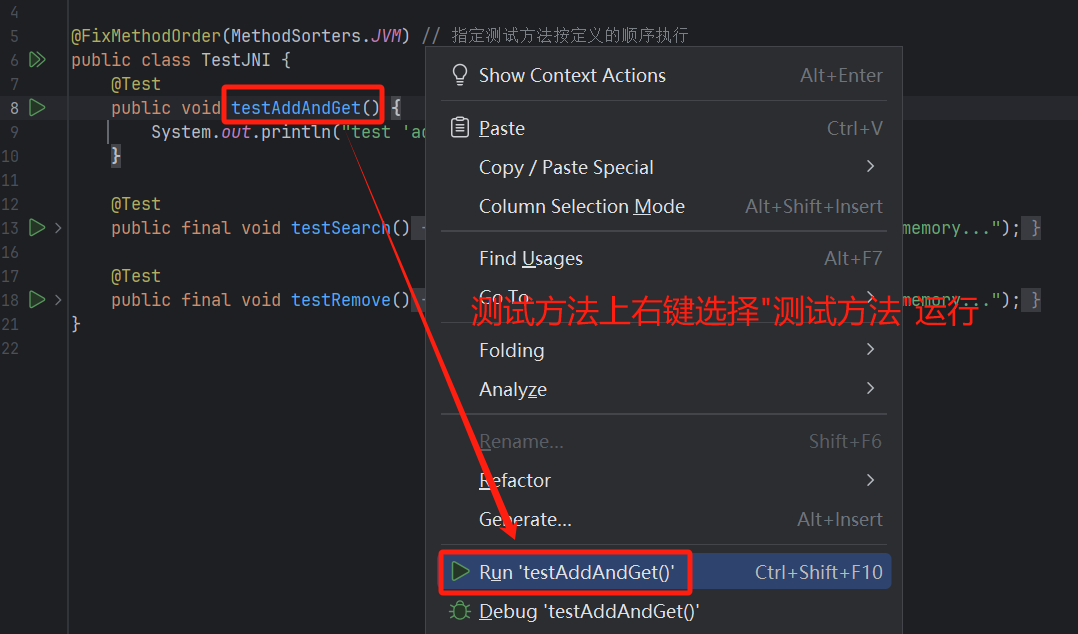
- 方式二
在测试方法上右键选择运行测试方法
(2)、运行测试类
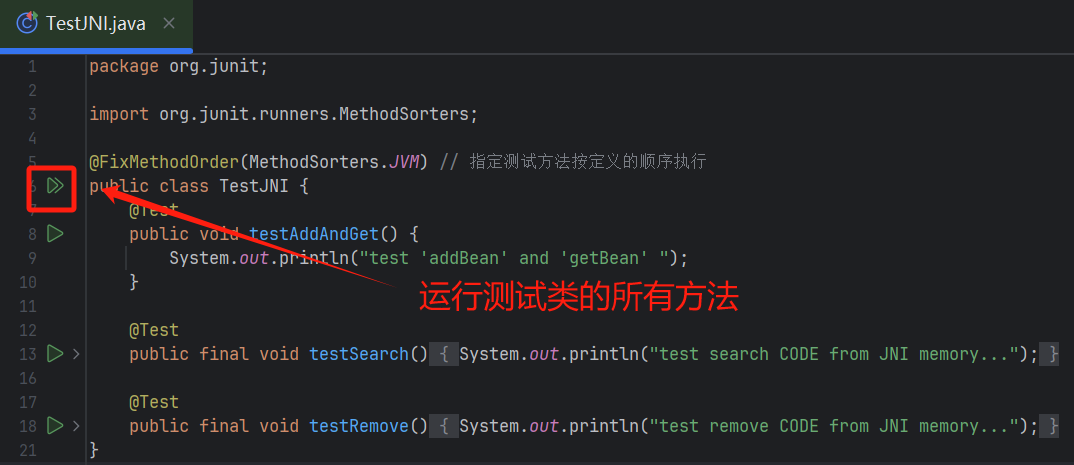
- 方式一
在idea 中在测试类的类名前面有一个运行按钮,点击后会运行当前测试类中所有的测试方法。
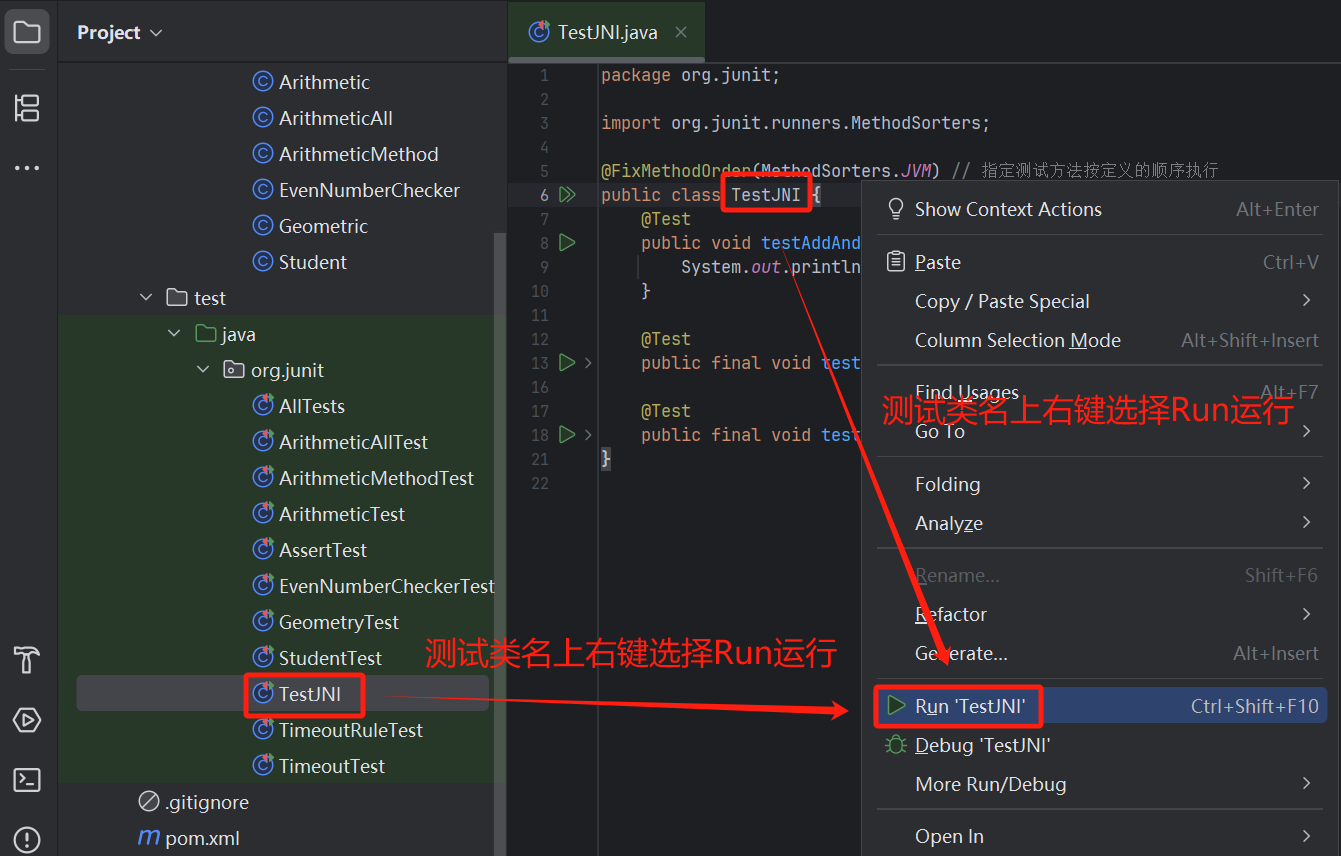
- 方式二
在测试类上右键选择运行测试类
5.2.3、查看测试覆盖率
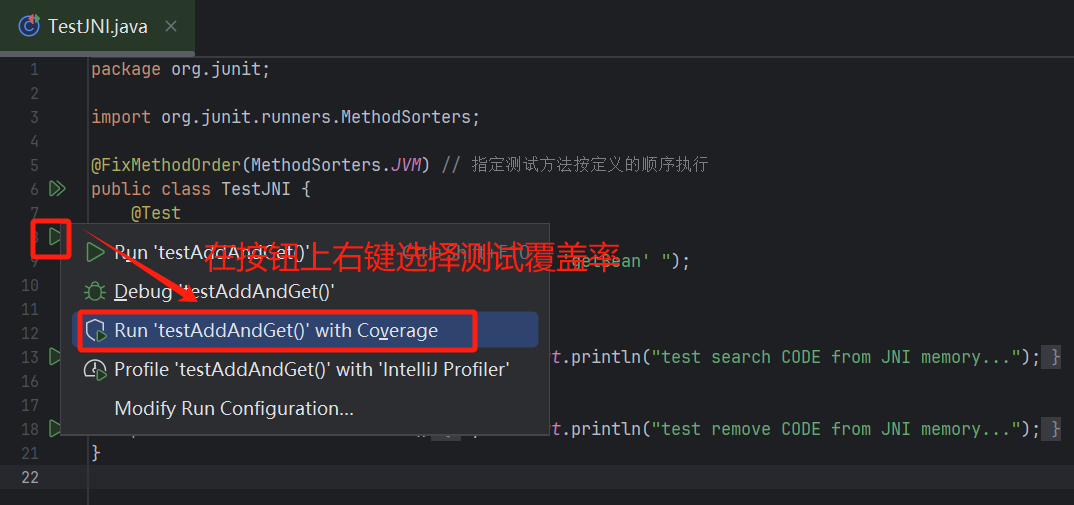
(1)、查看测试方法覆盖率
- 方式一
在idea 中每个测试方法前都有一个运行按钮,在按钮上右键选择测试覆盖率
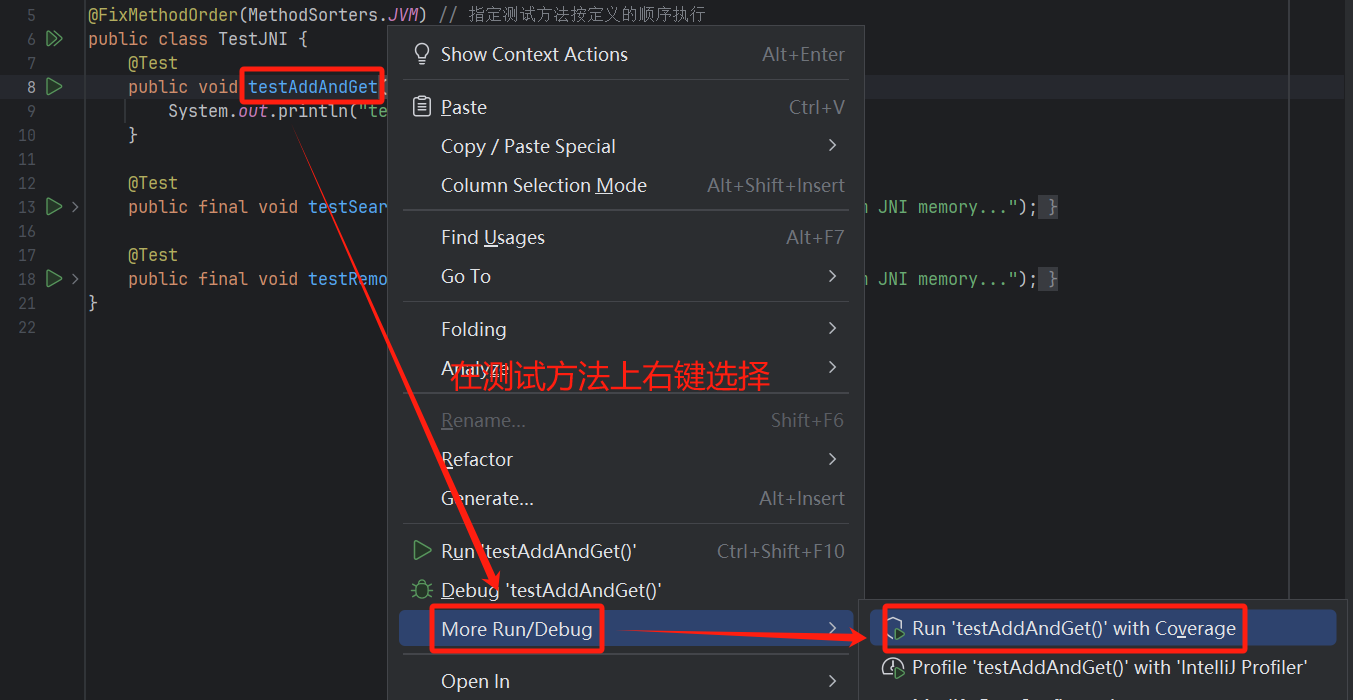
- 方式二
在测试方法上右键选择查看
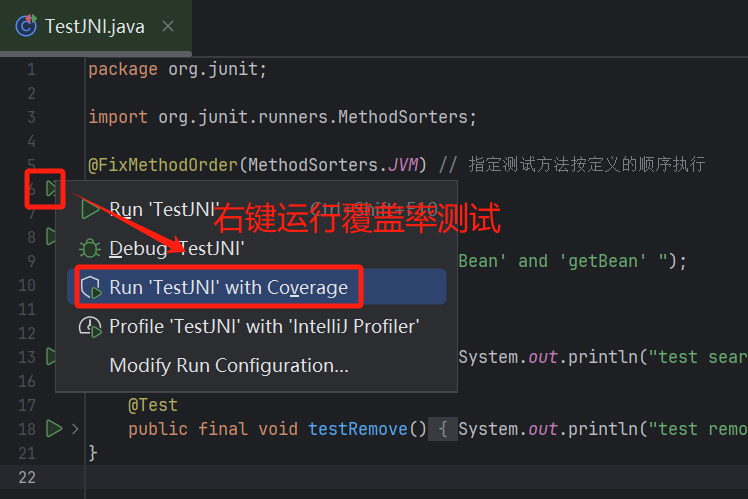
(2)、查看测试类覆盖率
- 方式一
在idea 中在测试类的类名前面有一个运行按钮,右键点开查看
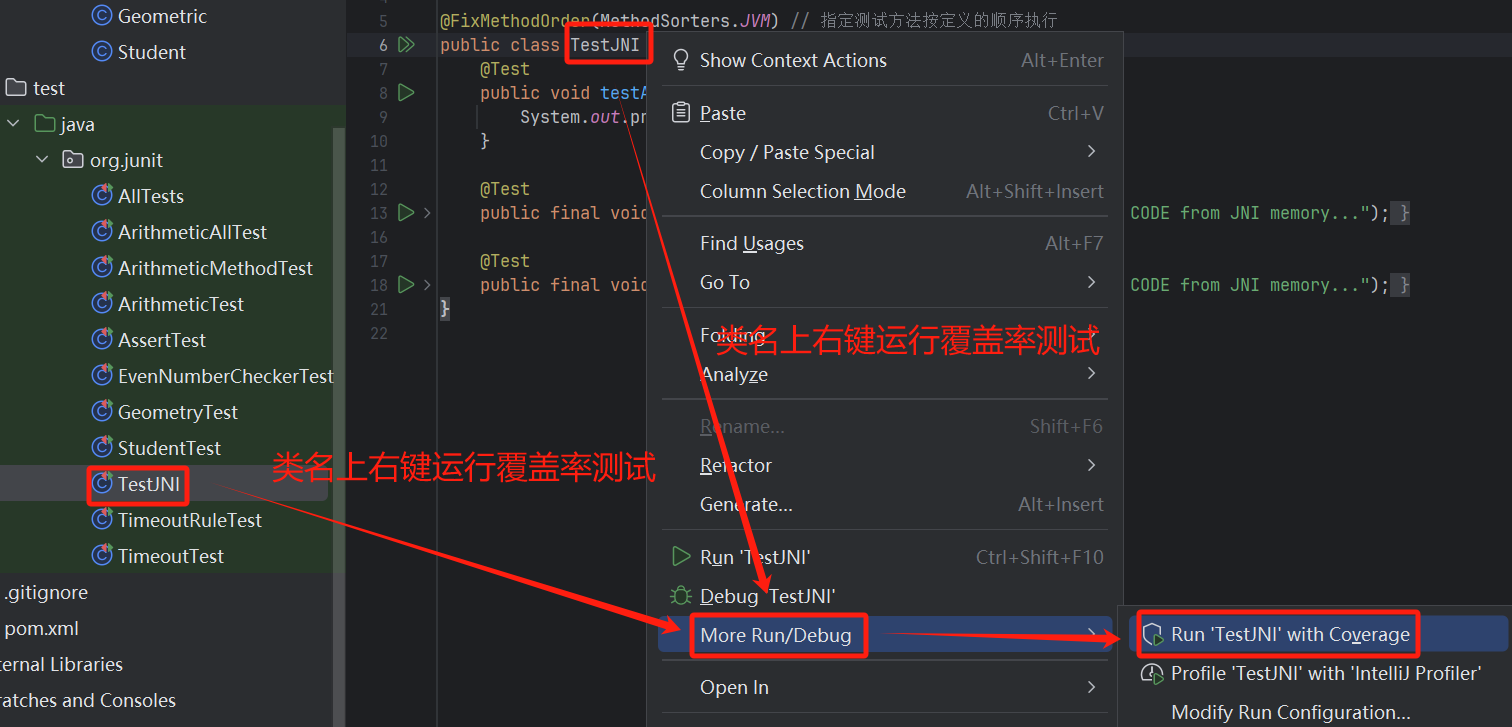
- 方式二
在测试类上右键选择查看
5.2.4、生成测试报告
可能会有很多单元测试类放在了 test/java/ 文件夹下
可以在 idea 中右侧maven页签中的 Lifecycle 下双击 test ,将会帮你运行所有的单元测试
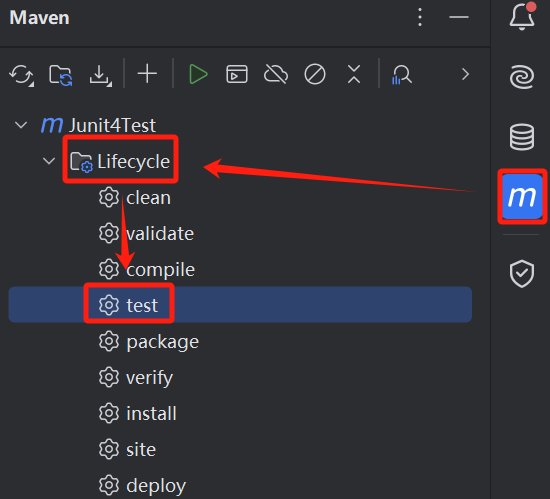
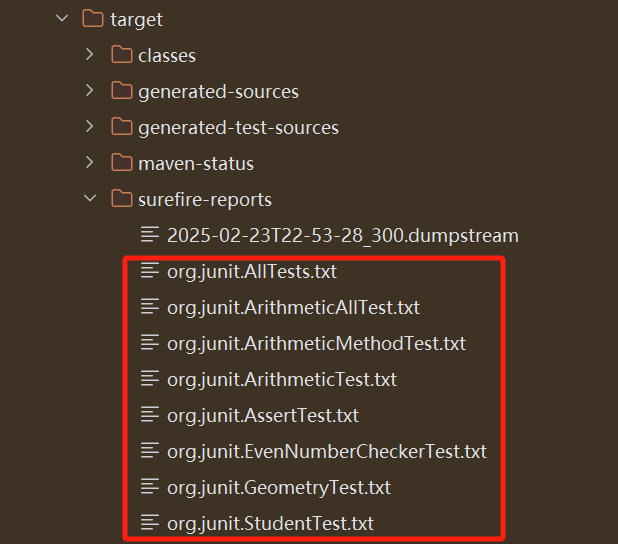
每个单元测试类都会在 target/surefire-reports 下生成 txt 报告,里面有当前单元测试类的执行成功、失败、跳过、耗时等信息
生成 txt 报告后,如果不想一个个去看每个测试类生成的 txt 报告,可以在 idea 的 Terminal 命令行窗口输入 mvn surefire-report:report 命令执行
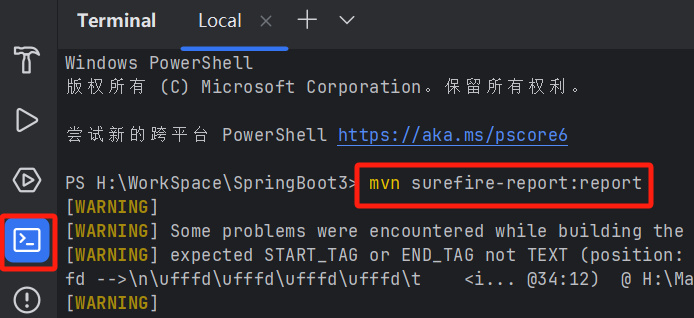
它会读取所有 txt 报告在 target/site/ 下生成 surefire-reports.html 文件,用浏览器打开该文件你就可以直观的看到所有单元测试类的所有执行情况
5.2.5、断言方法
在JUnit4中,org.junit.Assert类拥有所有的断言方法,用于判断输出的结果和期望的值是否相等
它们接受额外的错误描述信息作为方法的第一个参数
- Assert.assertEquals:检测值是否相等
- Assert.assertNotEquals:检测值是否不相等
- Assert.assertThrows():检测是否抛出异常
- Assert.assertArrayEquals():检测数组是否相同
- Assert.assertTrue():检测条件是否为真
- Assert.assertFalse():检测条件是否为假
- Assert.assertNull():检测是否为空
- Assert.assertNotNull():检测是否不为空
- Assert.assertSame():测试两个对象引用是否引用同一对象
- Assert.assertNotSame():测试两个对象引用是否不引用同一对象
5.2.6、测试示例
在模块springboot-05-000中测试
(1)、正常测试
【示例】
package org.junit;

import java.util.ArrayList;
import java.util.LinkedList;
import java.util.List;

import static java.util.Arrays.asList;
import static org.junit.Assert.*;

public class AssertTest {

    @Test
    public void testAssertions() {
        String str1 = new String("abc");
        String str2 = new String("abc");
        String str3 = null;
        String str4 = "abc";
        String str5 = "abc";
        int val1 = 5;
        int val2 = 6;
        String[] expectedArray = {"one", "two", "three"};
        String[] resultArray = {"one", "two", "three"};
        List<String> arrList = new ArrayList<>(asList("Java", "Junit", "Test"));
        List<String> linList = new LinkedList<>(asList("Java", "Junit", "Test"));
        long long1 = 10L;
        long long2 = 11L;

        assertEquals(str1, str2);//值相等测试通过
        assertNotEquals("值不相等", long1, long2);//值不相等测试通过
        assertArrayEquals(expectedArray, resultArray);//数组的元素都相等时测试通过
        assertTrue(val1 < val2);// 值为true时测试通过
        assertFalse(val1 > val2);//值为false时测试通过
        assertNull(str3);// 值为null时测试通过
        assertNotNull(str1);//值不为null时测试通过
        assertSame(str4, str5);//相同时测试通过
        assertNotSame(str1, str3);//不相同时测试通过

    }
}
(2)、参数化测试
参数化测试允许通过变化范围的参数值来测试方法
参数化测试可以通过以下简单的步骤实现
- 对测试类添加注解 @RunWith(Parameterized.class)
- 将需要使用变化范围参数值测试的参数定义为私有变量
- 使用上一步骤声明的私有变量作为入参创建构造函数
- 创建一个使用@Parameters注解的公共静态方法,它将需要测试的各种变量值通过集合的形式返回
- 使用定义的私有变量定义测试方法
【示例】
EvenNumberChecker.java 校验输入的数字是否为偶数
package org.junit;

public class EvenNumberChecker {

    /**
     * 校验输入的数字是否为偶数
     *
     * @param i
     * @return
     */
    public boolean isEven(int i) {
        if (i % 2 == 0) {
            return true;
        } else {
            return false;
        }
    }
}
EvenNumberCheckerTest.java 对 EvenNumberChecker.java 进行参数化测试
package org.junit;
import static org.junit.Assert.*;
import java.util.Arrays;
import java.util.Collection;
import org.junit.runner.RunWith;
import org.junit.runners.Parameterized;
import org.junit.runners.Parameterized.Parameters;
// 1.对测试类添加注解 @RunWith(Parameterized.class)
@RunWith(Parameterized.class)
public class EvenNumberCheckerTest {
// 2.将范围变化的测试的参数定义为私有变量
private int inputNumber;
private boolean isEven;
// 3.使用上一步骤声明的私有变量作为入参创建构造函数
public EvenNumberCheckerTest(int inputNumber, boolean isEven) {
super();
this.inputNumber = inputNumber;
this.isEven = isEven;
}
// 4.创建一个使用@Parameters注解的公共静态方法,它将需要测试的各种变量值通过集合的形式返回
@Parameters
public static Collection<Object[]> data() {
Object[][] data = new Object[][]{
{2, true},
{5, false},
{10, true}
};
return Arrays.asList(data);
}
// 5.使用定义的私有变量定义测试方法
@Test
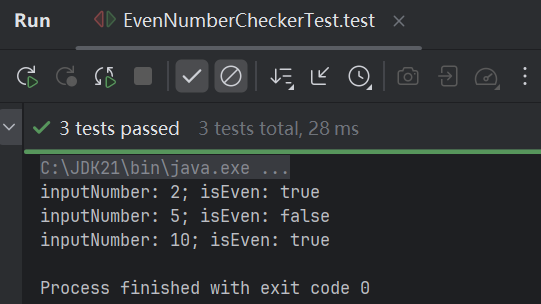
public void test() {
System.out.println("inputNumber: " + inputNumber + "; isEven: " + isEven);
EvenNumberChecker evenNumberChecker = new EvenNumberChecker();
boolean actualResult = evenNumberChecker.isEven(inputNumber);
assertEquals(isEven, actualResult);
}
}
测试结果
(3)、套件测试
Junit 4允许通过使用测试套件类批量运行测试类
为一套测试类创建一个测试套件要为测试类添加以下注解:
- @RunWith(Suite.class)
- @SuiteClasses(TestClass1.class, TestClass2.class)
当运行时所有包含在@SuiteClasses注解内的所有测试类都会被执行
【示例】
Arithmetic.java
package org.junit;

public class Arithmetic {

    public int add(int i, int j) {
        return i + j;
    }
}
ArithmeticTest.java
package org.junit;

import static org.junit.Assert.assertEquals;

public class ArithmeticTest {

    @BeforeClass
    public static void setUpClass() {
        // one time setup method
        System.out.println("@BeforeClass - executed only one time and is first method to be executed");
    }

    @AfterClass
    public static void tearDownClass() {
        // one time tear down method
        System.out.println("@AfterClass - executed only one time and is last method to be executed");
    }

    @Before
    public void setUp() {
        // set up method executed before every test method
        System.out.println("@Before - executed before every test method");
    }

    @After
    public void tearDown() {
        // tear down method executed after every test method
        System.out.println("@After - executed after every test method");
    }

    @Test
    public void testAdd() {
        Arithmetic arithmetic = new Arithmetic();
        int actualResult = arithmetic.add(3, 4);
        int expectedResult = 7;
        assertEquals(expectedResult, actualResult);
        System.out.println("@Test - defines test method");
    }
}
Geometric.java
package org.junit;

public class Geometric {
    public int squareArea(int length) {
        return length * length;
    }
}
GeometryTest.java
package org.junit;

import static org.junit.Assert.assertEquals;

public class GeometryTest {
    @Test
    public void testSquareArea() {
        Geometric geometry = new Geometric();
        int actualResult = geometry.squareArea(2);
        int expectedResult = 4;
        assertEquals(expectedResult, actualResult);
        System.out.println("GeometryTest运行");
    }
}
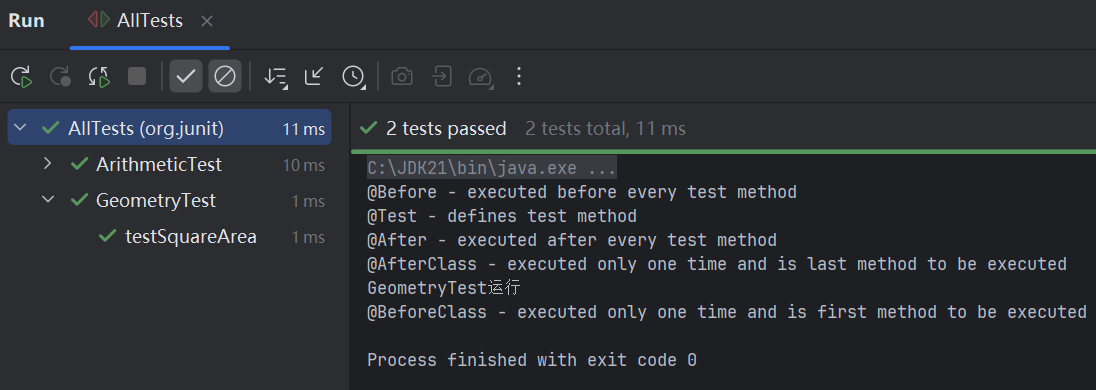
套件测试类
package org.junit;

import org.junit.runner.RunWith;
import org.junit.runners.Suite;

@RunWith(Suite.class)
@Suite.SuiteClasses({ ArithmeticTest.class, GeometryTest.class })
public class AllTests {
}
测试结果
(4)、忽略测试
Junit 4 忽略测试(Ignore test)被用来禁止执行junit测试类的某些或者全部测试方法
Junit 提供了@Ignore注解来实现忽略测试,它可以用来跳过失败、或者抛出异常的测试方法
- @Ignore可以应用到某些测试方法上
- @Ignore可以应用到整个测试类上
忽略测试方法
在需要忽略的测试方法上使用@Ignore注解
【示例】
ArithmeticMethod.java
package org.junit;

public class ArithmeticMethod {
    public int add(int i, int j) {
        return i + j;
    }

    public int substract(int i, int j) {
        return i - j;
    }
}
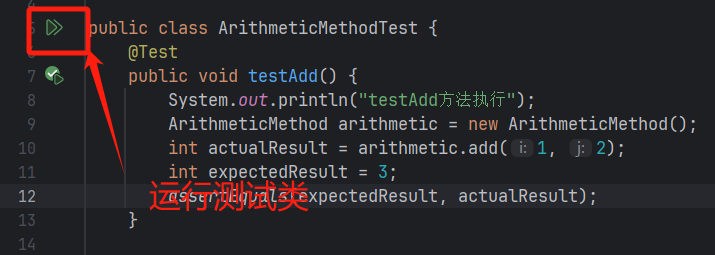
ArithmeticMethodTest.java
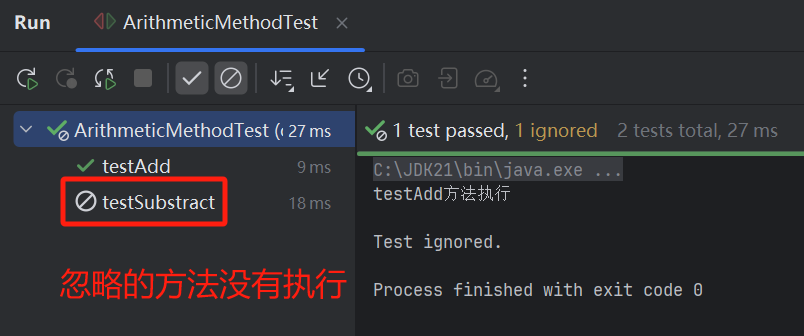
testSubstract() 方法使用了@Ignore注解
在执行测试类时此方法会被忽略
package org.junit;

import static org.junit.Assert.assertEquals;

public class ArithmeticMethodTest {
    @Test
    public void testAdd() {
        System.out.println("testAdd方法执行");
        ArithmeticMethod arithmetic = new ArithmeticMethod();
        int actualResult = arithmetic.add(1, 2);
        int expectedResult = 3;
        assertEquals(expectedResult, actualResult);
    }

    /**
     * testSubstract() 方法使用了@Ignore注解
     * 在执行测试类时此方法会被忽略
     */
    @Test
    @Ignore
    public void testSubstract() {
        System.out.println("testSubstract忽略方法执行");
        ArithmeticMethod arithmetic = new ArithmeticMethod();
        int actualResult = arithmetic.substract(4, 2);
        int expectedResult = 2;
        assertEquals(expectedResult, actualResult);
    }
}
运行测试类
测试结果
忽略整个类
需要禁止测试类上的所有方法的执行则在测试类上添加@Ignore注解即可
【示例】
package org.junit;

public class ArithmeticAll {
    public int add(int i, int j) {
        return i + j;
    }

    public int substract(int i, int j) {
        return i - j;
    }
}
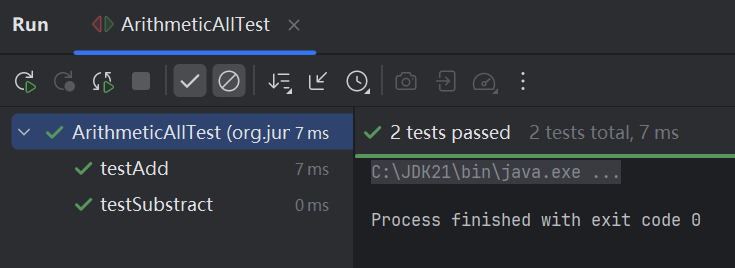
ArithmeticAllTest.java 其所有方法都将被忽略
package org.junit;

import static org.junit.Assert.*;

@Ignore
public class ArithmeticAllTest {
    /**
     * Example of test case success
     */
    @Test
    public void testAdd() {
        ArithmeticAll arithmetic = new ArithmeticAll();
        int actualResult = arithmetic.add(1, 2);
        // example of test case success
        int expectedResult = 3;
        assertEquals(expectedResult, actualResult);
    }

    /**
     * Example of @ignore annotation
     */
    @Test
    public void testSubstract() {
        ArithmeticAll arithmetic = new ArithmeticAll();
        int actualResult = arithmetic.substract(4, 2);
        int expectedResult = 2;
        // example of test case failure
        assertEquals(expectedResult, actualResult);
    }
}
运行整个测试类测试
(5)、标记测试
在JUnit4中使用@Category注解
(6)、超时测试
Junit 4超时测试(Timeout test)可以被用来测试方法的执行时间
使用方式
- 在测试类的方法上使用 @Timeout 注解
- 测试类的所有方法应用 Timeout 规则
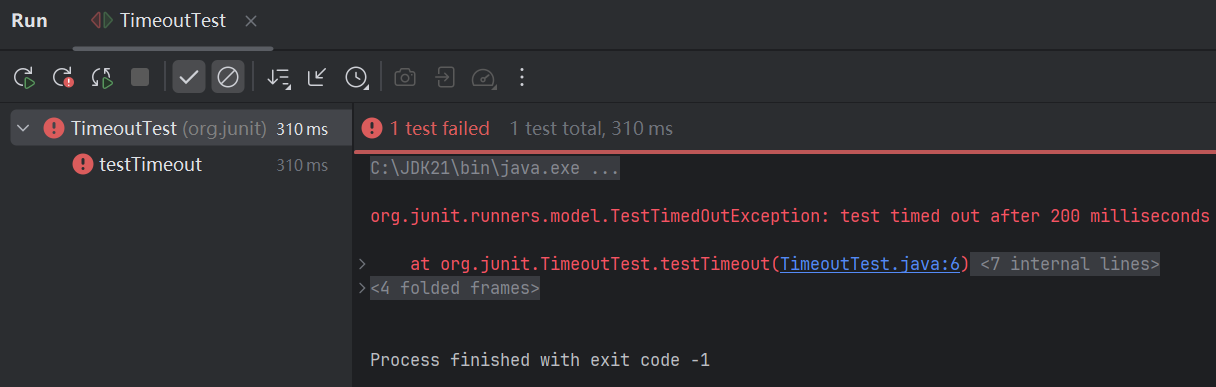
测试单个方法超时
【示例】
package org.junit;

public class TimeoutTest {
    @Test(timeout = 200)
    public void testTimeout() {
        while (true) ;
    }
}
运行测试方法测试结果
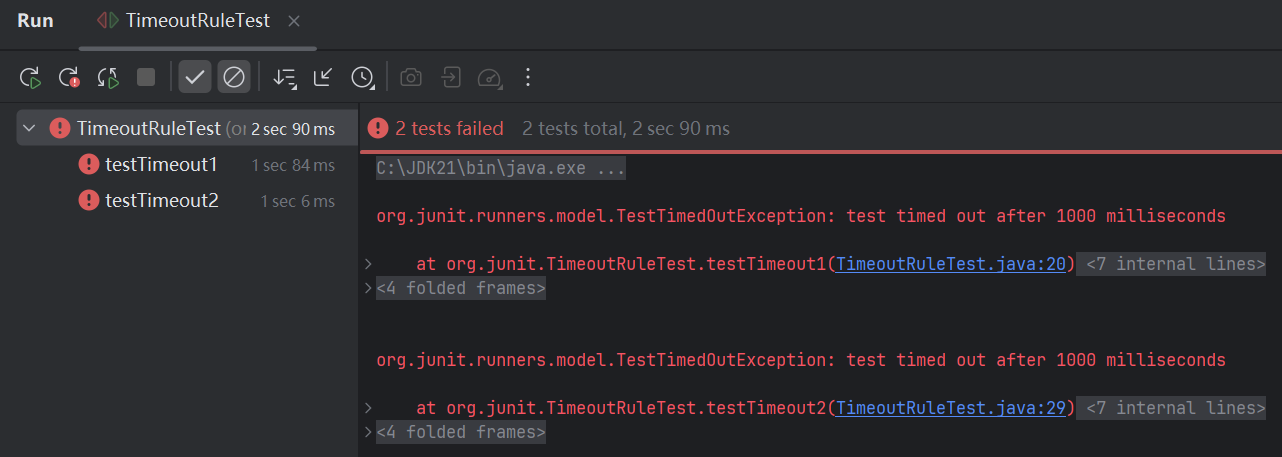
测试所有方法超时
Junit 4 提供了 Timeout 规则来测试类中的所有方法
如果类中的任意一个方法执行时间超过了在Timeout 规则中规定的值则测试方法将抛出异常,测试结果为失败
指定的超时参数是以毫秒记
使用方式
- 在测试类中使用@Rule注解标记规则
【示例】
package org.junit;

import org.junit.rules.Timeout;

public class TimeoutRuleTest {

    /**
     * Rule is applied to all methods of class
     * time is specified in milliseconds
     */
    @Rule
    public Timeout timeout = new Timeout(1000);

    /**
     * Example of timeout test.
     * Test will fail if it takes more than 1 sec to execute
     */
    @Test
    public void testTimeout1() {
        while (true) ;
    }

    /**
     * Example of timeout test.
     * Test will fail if it takes more than 1 sec to execute
     */
    @Test
    public void testTimeout2() {
        while (true) ;
    }
}
运行测试类测试结果
(7)、期望异常测试
单元测试可以检查抛出预期异常( expected exceptions)的代码
【示例】写一个测试类,定义一个canVote() 方法返回true或者false
package org.junit;

public class Student {
    public boolean canVote(int age) {
        if (age <= 0) throw new IllegalArgumentException("age should be +ve");
        if (age < 18) return false;
        else return true;
    }
}
检查抛出的异常有三种方式,它们各自都有优缺点
@Test(expected…)
@Test注解有一个可选的参数,"expected"允许你设置一个Throwable的子类
如果想要验证上面的canVote()方法抛出预期的异常可以这样写
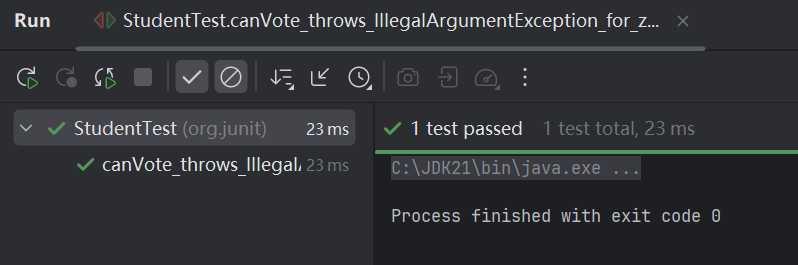
public class StudentTest {
    @Test(expected = IllegalArgumentException.class)
    public void canVote_throws_IllegalArgumentException_for_zero_age() {
        Student student = new Student();
        boolean flag=student.canVote(-1);
        System.out.println(flag);
    }
}
Debug测试方法
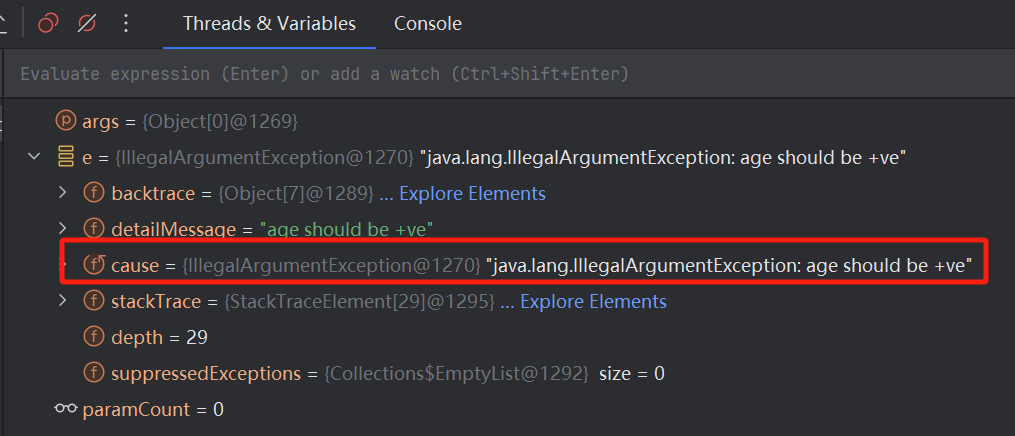
ExpectedException
如果要使用JUnit框架中的ExpectedException类需要声明ExpectedException异常
@Rule
public ExpectedException thrown = ExpectedException.none();
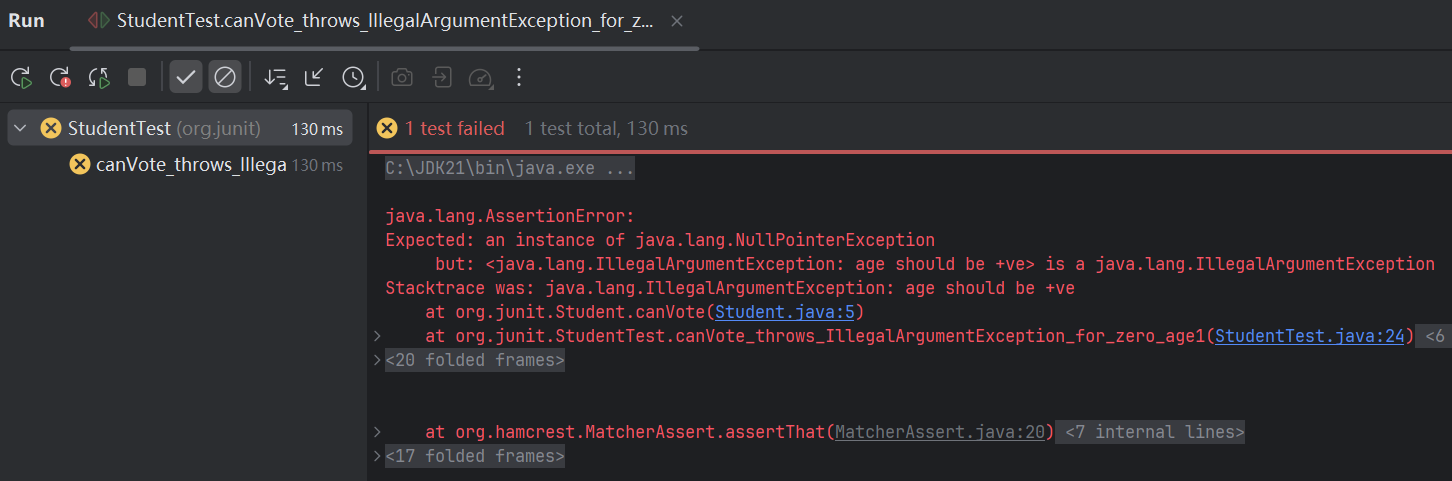
然后可以使用更加简单的方式验证预期的异常
@Test
public void canVote_throws_IllegalArgumentException_for_zero_age1() {
   Student student = new Student();
   thrown.expect(NullPointerException.class);
   student.canVote(0);
}
或者可以设置预期异常的属性信息
@Test
public void canVote_throws_IllegalArgumentException_for_zero_age2() {
	Student student = new Student();
	thrown.expect(IllegalArgumentException.class);
	thrown.expectMessage("age should be +ve");
	student.canVote(0);
}
Try/catch with assert/fail
在JUnit4之前的版本中使用try/catch语句块检查异常
@Test
public void canVote_throws_IllegalArgumentException_for_zero_age3() {
    Student student = new Student();
    try {
        student.canVote(0);
    } catch (IllegalArgumentException ex) {
        assertThat(ex.getMessage(), containsString("age should be +ve"));
    }
    fail("expected IllegalArgumentException for non +ve age");
}
尽管这种方式很老了,不过还是非常有效的
主要的缺点就是很容易忘记在catch语句块之后需要写fail()方法,如果预期异常没有抛出就会导致信息的误报
(8)、优先级测试
在写JUnit测试用例时,有时候需要按照定义顺序执行我们的单元测试方法。比如在测试数据库相关的用例时候要按照测试插入、查询、删除的顺序测试。如果不按照这个顺序测试可能会出现问题。比如删除方法在前面执行,后面的方法就都不能通过测试,因为数据已经被清空了。而JUnit测试时默认的顺序是随机的。所以这时就需要有办法要求JUnit在执行测试方法时按照我们指定的顺序来执行。
JUnit是通过@FixMethodOrder注解(annotation)来控制测试方法的执行顺序的
@FixMethodOrder注解的参数是org.junit.runners.MethodSorters对象
在枚举类org.junit.runners.MethodSorters中定义了如下三种顺序类型
-
MethodSorters.JVM
按照JVM得到的方法顺序,也就是代码中定义的方法顺序
-
MethodSorters.DEFAULT(默认的顺序)
以确定但不可预期的顺序执行
-
MethodSorters.NAME_ASCENDING
按方法名字母顺序执行
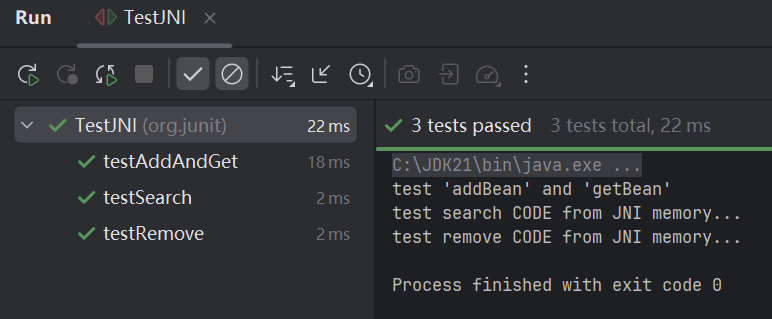
【示例】
以下的代码定义了三个方法testAddAndGet,testSearch,testRemove
设计的时候是希望三个方法按定义的顺序来执行
package org.junit;

import org.junit.runners.MethodSorters;

@FixMethodOrder(MethodSorters.JVM) // 指定测试方法按定义的顺序执行
public class TestJNI {
    @Test
    public void testAddAndGet() {
        System.out.println("test 'addBean' and 'getBean' ");
    }

    @Test
    public final void testSearch() {
        System.out.println("test search CODE from JNI memory...");
    }

    @Test
    public final void testRemove() {
        System.out.println("test remove CODE from JNI memory...");
    }
}
运行测试类测试结果
如果@FixMethodOrder定义为MethodSorters.DEFAULT或去掉代码中的@FixMethodOrder注解,那么测试用便执行的顺序是
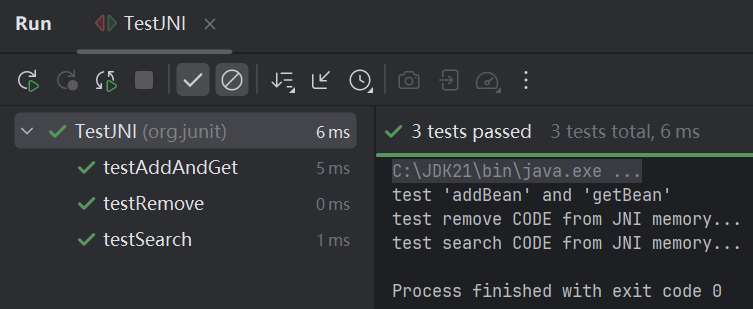
这并不是想要的结果,testRemove如果先执行了,testSearch肯定什么也找不到


 1205
1205

 被折叠的 条评论
为什么被折叠?
被折叠的 条评论
为什么被折叠?
 到【灌水乐园】发言


