


一、安装Halcon
首先需要 安装好Halcon
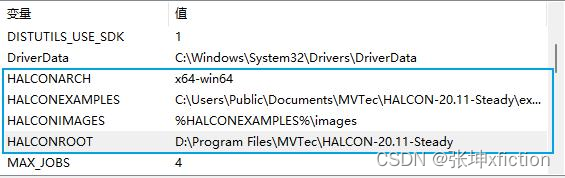
此时环境变量中应该有 HALCONARCH, HALCONEXAMPLES, HALCONIMAGES,HALCONROOT
二、VS C++配置Halcon
2.1 include
在项目属性中加入两个 附加包含目录:
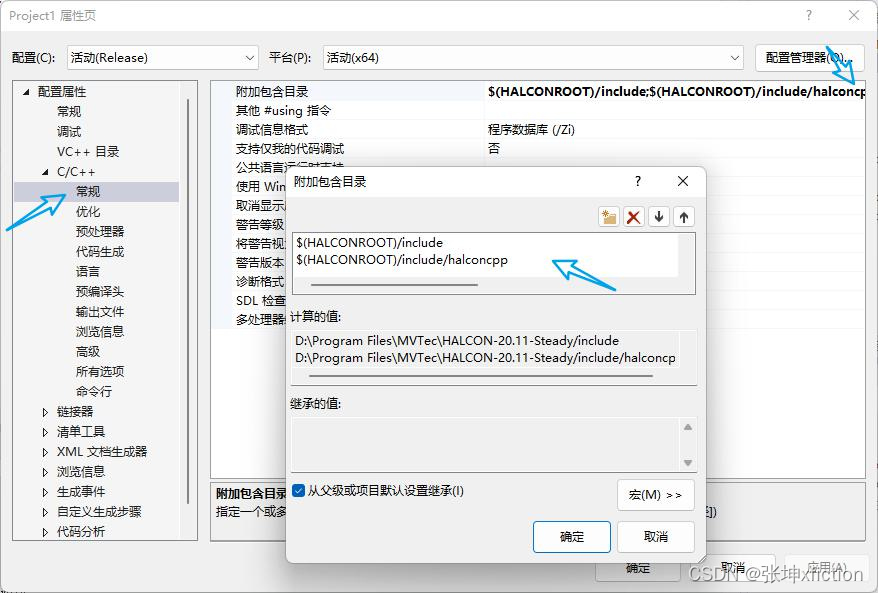
$(HALCONROOT)/include
$(HALCONROOT)/include/halconcpp
2.2 链接器
在附加库目录中添加 Halcon lib 的地址

$(HALCONROOT)\lib\$(HALCONARCH)
附加依赖项中加入两个 lib 文件:
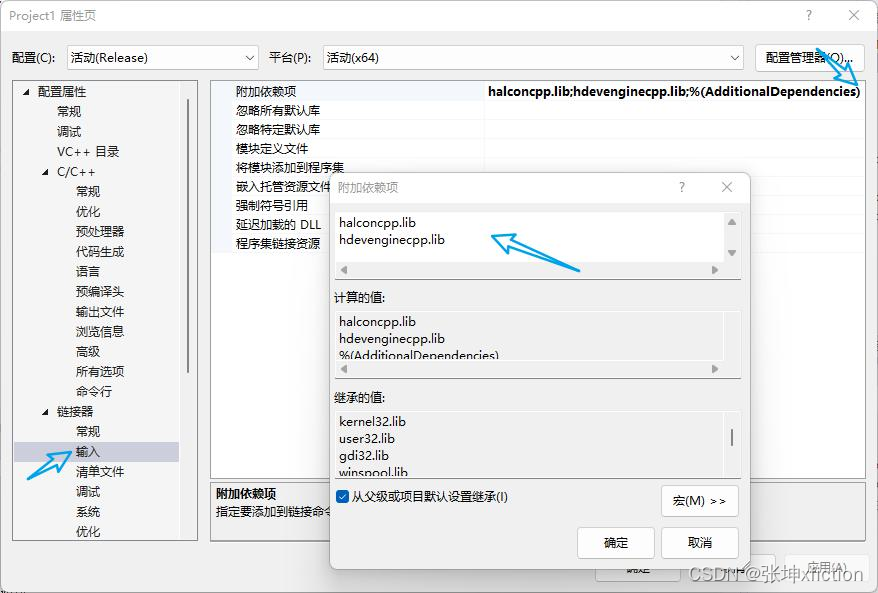
halconcpp.lib
hdevenginecpp.lib
至此完成了在 VS C++ 中 Halcon 环境的配置,可以运行 Halcon 的代码了。
2.3 示例代码
ActiveQtServerDragon.h
#include "HalconCpp.h"
#include "HDevThread.h"

using namespace HalconCpp;
int main()
{
	HImage Image("printer_chip/printer_chip_01");
}
public slots:
    void on_grayExecute_clicked();

private:
    bool HImage2QImage(HalconCpp::HImage& from, QImage& to);
void ActiveQtServerDragon::on_grayExecute_clicked() {

    QString filename = ui.txtImagePath->text();

    HImage org_image;
    HImage dest_image;
    QImage qImage;
    ReadImage(&org_image, HTuple(filename.toStdString().c_str())); // 此方法Halcon提供
    Rgb1ToGray(org_image,&dest_image);    // 此方法Halcon提供
    HImage2QImage(dest_image, qImage);
    view->DispImage(qImage);
}

bool ActiveQtServerDragon::HImage2QImage(HalconCpp::HImage& from, QImage& to)
{
    Hlong width;
    Hlong height;
    from.GetImageSize(&width, &height);

    HTuple channels = from.CountChannels();
    HTuple type = from.GetImageType();

    if (strcmp(type[0].S(), "byte")) // 如果不是 byte 类型,则失败
    {
        return false;
    }

    QImage::Format format;
    switch (channels[0].I())
    {
    case 1:
        format = QImage::Format_Grayscale8;
        break;
    case 3:
        format = QImage::Format_RGB32;
        break;
    default:
        return false;
    }

    if (to.width() != width || to.height() != height || to.format() != format)
    {
        to = QImage(static_cast<int>(width),
            static_cast<int>(height),
            format);
    }
    HString Type;
    if (channels[0].I() == 1)
    {
        unsigned char* pSrc = reinterpret_cast<unsigned char*>(from.GetImagePointer1(&Type, &width, &height));
        memcpy(to.bits(), pSrc, static_cast<size_t>(width) * static_cast<size_t>(height));
        return true;
    }
    else if (channels[0].I() == 3)
    {
        uchar* R, * G, * B;
        from.GetImagePointer3(reinterpret_cast<void**>(&R),
            reinterpret_cast<void**>(&G),
            reinterpret_cast<void**>(&B), &Type, &width, &height);

        for (int row = 0; row < height; row++)
        {
            QRgb* line = reinterpret_cast<QRgb*>(to.scanLine(row));
            for (int col = 0; col < width; col++)
            {
                line[col] = qRgb(*R++, *G++, *B++);
            }
        }
        return true;
    }

    return false;
}
三、DLL配置调试
3.1 配置调试命令
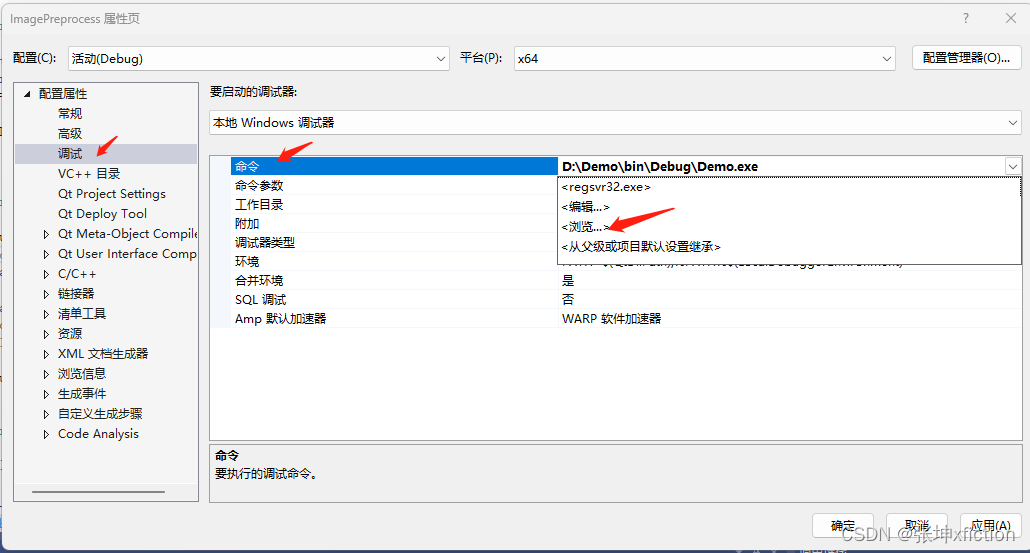
3.2 点击本地Windows调试器


四、相关问题
UI用Design打开,无法添加槽事件
直接添加slots相关函数,按照对应命名规则即可,能自动将按钮点击事件与函数绑定起来,比如:
ActiveQtServerDragon.h文件:
public slots:

    void on_grayExecute_clicked();
ActiveQtServerDragon.cpp
void ActiveQtServerDragon::on_grayExecute_clicked() {

}


 937
937

 被折叠的 条评论
为什么被折叠?
被折叠的 条评论
为什么被折叠?
 到【灌水乐园】发言


