


本节任务
学习text组件的使用
text 组件干什么的?
<text>是Weex内置的组件,用来将文本按照指定的样式呈染出来
主要教会你什么?
1.怎么给text 组件赋值
2.怎么设置组件的背景颜色和字体颜色
3.怎么给设置组建的边框颜色,宽度,样式
4.怎么设置文字斜体 加粗 下划线等
5.怎么给文字背景设置圆角
6.怎么设置文本显示的行数
7.设置文字的对齐方式:居中 左对齐 右对齐
8.设置文字的溢出隐藏
9.如何让文字放在最中间
10.设置文字的透明度
11.字体大小设置
12.动态的给文字设置内容
13.超过指定长度隐藏文字
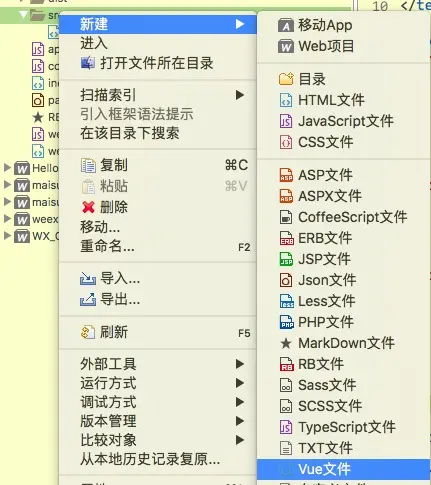
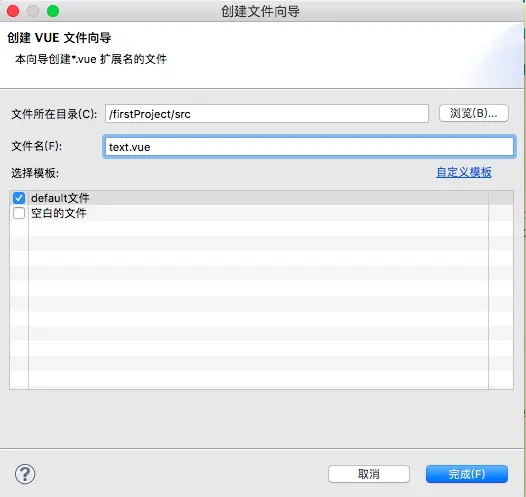
我们在之前的那个工程目录中创建一个text.vue 文件
默认您已经按照之前的教程创建好了工程,接下来我把创建文件的步骤写一些
第一步
创建文件
第二步
在打包的入口文件app.js里修改根组件为text.vue
import text from './src/text.vue'
text.el = '#root'
export default new Vue(text);
需改完成后记得保存一下 command + s (MAC快捷键)
第三步
打开两个终端窗口
分别 cd 进入工程目录 输入自动打包命令和启动服务命令
自动打包命令
xudeMacBook-Air:~ xujie$ cd /Users/xujie/Documents/weex/firstProject
xudeMacBook-Air:firstProject xujie$ npm run dev
启动服务命令
xudeMacBook-Air:~ xujie$ cd /Users/xujie/Documents/weex/firstProject
xudeMacBook-Air:firstProject xujie$ npm run serve
在google浏览器中输入localhost:8080
基本工作 我们算是完成了,下面就进入我们今天的学习目标
打开text.vue 里面初始化完成后是这个样子的
<template>
</template>

<script>
</script>

<style>
</style>
我们先设置一个最大的容器,让其子组件沿着y轴居中对齐,从父容器的开始位置开始布局,这个其实我们上一节已经讲过了,我们回顾一下!
<template>
    <div class="root">
    </div>
</template>

<script>
</script>

<style>
.root{
    display:flex;
    background-color: rgba(1,1,1,0.5);
    flex-direction: column;//  从上向下 布局
    justify-content: flex-start; // 从父容器顶部开始布局
    align-items: center; // 子组件水平居中
}
</style>
问题 ?为什么样式 align-items: center; 是让子组件水平对齐的?
因为 flex-direction: column; 布局方向是从上向下的,如果布局方式为从左向右,则排列方式为垂直居中,给两张图理解一下
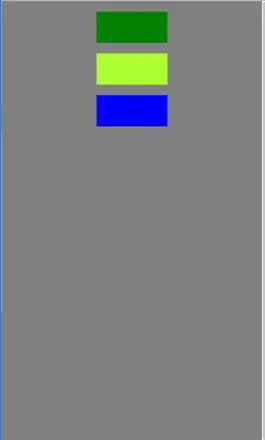
上述图的样式为
    .root{
    display:flex;
    background-color: rgba(1,1,1,0.5);
    flex-direction: column;//  从上向下 布局
    justify-content: flex-start; // 从父容器顶部开始布局
    align-items: center; // 子组件水平居中
}
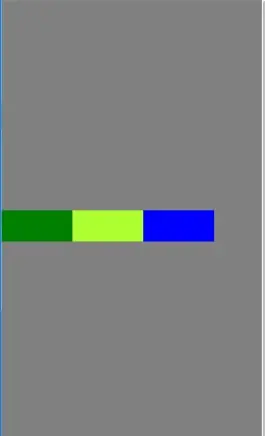
修改布局方向为从左向右 flex-direction: row;效果如下图
布局就先讲到这里,接下来 我们看组件的各种功能用法
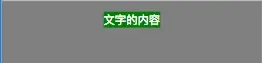
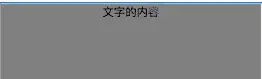
1.给文字赋值
<template>
    <div class="root">
        <text class="text">文字的内容</text>
    </div>
</template>
这个class=“text“样式,没有设置的效果如下
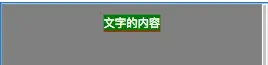
2.给文字设置颜色和背景颜色

.text{
    margin-top: 30px; // 此组件的顶部距相邻组件的距离为30px如果此组件的上面没有组件 则是离父组件的顶部为30px
    background-color: #008000;
    color:white;
}
3.设置边框颜色,宽度和样式
.text{
    margin-top: 30px;
    background-color: #008000;
    color:white;
    border-bottom-style: solid; // 样式
    border-bottom-width: 2px; //宽度
    border-bottom-color: red;// 颜色
}
我们可以分别设置 上、下、左、右边框(top,bottom,left,right)
代码和上面一样,修改一下单词bottom 为指定边框就可以了
如果要一次性设置所有边框呢?

.text{
    margin-top: 30px;
    background-color: #008000;
    color:white;
    border-style: solid;
    border-width: 3px;
    border-color: red;
}
在这里提醒各位一下
有些同学是资深web工程师,可能习惯使用简写
border: solid 3px red;网页上可以显示出来的边框,但是手机端是不会有效果的,因为weex目前暂不支持这样的简写,以后或许就支持了,请耐心等待!
4.怎么设置文字斜体/加粗/下划线
font-style: italic; // 斜体

text-decoration:underline;

注意
下滑线的颜色和字体颜色是保持一致的,如果你想要下滑线的颜色和字体颜色不一致该怎么办呢?很简单不要使用这个属性,使用两个组件进行组合使用,就能满足您的需求
font-weight: bold;

5.怎么给文字背景设置圆角
不设置组件的宽和高直接设置圆角
border-radius: 10px;

设置宽和高,设置圆角
.text{
    margin-top: 30px;
    background-color: #008000;
    color:white;
    border-style: solid;
    border-width: 3px;
    border-color: red;
    /* 圆角*/
    border-radius: 30px;
    width:200px;
    height: 60px;
}
我们发现文字超过边框并且成两行,那我们怎么设置为单行显示呢?
6.怎么设置文本显示的行数
lines:1;
注意网页上显示依然为下面这个效果,可以使用overflow: hidden; 让网页溢出隐藏,但是这个属性真机没有效果!

真机上会变成一行,请使用真机测试效果
7.设置文字的对齐方式:居中 左对齐 右对齐
text-align: center;

可以设置left center right 三种,其他两种请各自尝试一下
8.设置文字的溢出隐藏
text-overflow:ellipsis;

你会发现没有任何作用,因为这个要和lines 一起使用
lines:1;
text-overflow:ellipsis;

9.如何让文字放在最中间
.text{
    margin-top: 30px;
    background-color: #008000;
    color:white;
    text-align: center;
    width:200px;
    height: 100px;
}

我们发现text组件的值 没有垂直居中,现在我们使用下面的样式让其居中
line-height: 100px; // 设置文字的行高和组件的高度一致,也就实现了文字垂直居中的效果

10.设置文字的透明度
opacity:0.3;

11.字体大小设置
font-size: 50px;

注意一点
text 组件添加子组件
12.动态的给文字设置内容
定义变量
<script>
  export default{
    data(){
        return {
            text:'我是酷走天涯'
        }
    }
}
</script>
注意:
data 其实是一个方法 返回一个json对象
接下来看如何将数据绑定到组件上
<template>
    <div class="root">
    <text class="text" >{{text}}</text>
    </div>
</template>
语法
{{变量}},使用双大括号将变量包起来即可
此时如果方法中更改了变量的值,组件显示的值会立刻被刷新

13.超过指定长度隐藏文字
如果你设置了宽度,和行数,文字会自动隐藏,但是如果你使用了弹性布局方式呢?没有设置指定的宽度,文字不会隐藏,使用下面的方式可以解决这个问题
.content{
    line-height: 40px;
    margin-right: 10px;
    margin-right:10px;
    flex:1;
    lines:1;
}
flex:1;给text设置一个弹性值,它就会自动限制文字的宽度。
本节内容到这里就讲解完毕了,请练习一遍,如果都掌握了,请继续我们下一节内容。


 317
317

 被折叠的 条评论
为什么被折叠?
被折叠的 条评论
为什么被折叠?
 到【灌水乐园】发言


