


Centos7.0 Minimal部署Django
购买了一个VPS,部署Django,大致步骤是,安装python3,nginx,uwsgi, django使用2.2。
另外将安装celery等工具
先修改时间!!
# 修改时区
ln -sf /usr/share/zoneinfo/Asia/Shanghai /etc/localtime
# 手动修改时间
date -s "2019-12-21 01:59:00"
# 写入bios 重启不会失效
hwclock -w
自动同步校准时间
# 先检测是否已开启
systemctl status ntpd
# 安装NTP
yum -y install ntp
# 动ntpd daemon,持续校准时间
systemctl start ntpd
# 查看状态
systemctl status ntpd
# 开机启动
systemctl enable ntpd
安装工具
安装 wget
yum install -y wget
安装Python3
安装依赖包
包括gcc编译器等编译工具和python的依赖。
yum -y groupinstall "Development tools"
yum -y install zlib-devel bzip2-devel openssl-devel ncurses-devel sqlite-devel readline-devel tk-devel gdbm-devel db4-devel libpcap-devel xz-devel
下载 python3.6.2
建立文件夹并cd到该目录下
mkdir /usr/local/python36
cd /usr/local/python36
下载 python
# 华为国内镜像
https://mirrors.huaweicloud.com/python/3.6.8/Python-3.6.8.tar.xz
# 官方
wget https://www.python.org/ftp/python/3.6.8/Python-3.6.8.tar.xz
安装
解压,然后配置编译并安装
tar -xvJf  Python-3.6.8.tar.xz
cd Python-3.6.8
./configure --prefix=/usr/local/python3
make && make install
建立软链
ln -s /usr/local/python3/bin/python3 /usr/bin/python3
ln -s /usr/local/python3/bin/pip3 /usr/bin/pip3
安装nginx
配置目录
mkdir /usr/local/nginx
cd /usr/local/nginx
下载
wget https://nginx.org/download/nginx-1.14.0.tar.gz
tar zxf nginx-1.14.0.tar.gz
cd nginx-1.14.0
配置编译安装
注意这里如果要开启https协议的话,要安装加上 --with-http_ssl_module 模块
./configure --prefix=/usr/local/nginx --with-http_ssl_module
make && make install
启动停止重启
先查看安装的路径
whereis nginx
nginx: /usr/local/nginx
cd 到nginx的sbin目录
cd /usr/local/nginx/sbin
启动停止重启命令
# 启动
./nginx
# 结束 待nginx进程处理任务完毕进行停止
./nginx -s quit
# 停止 直接强制杀死进程
./nginx -s stop
# 重启
./nginx -s reload
配置软连接
建立软链
ln -s /usr/local/nginx/sbin/nginx /usr/bin/nginx
配置 http 80 端口
进入 nginx.conf 文件
vi /usr/local/nginx/conf/nginx.conf
修改为如下文件
#user  nobody;
worker_processes  auto;

#error_log  logs/error.log;
#error_log  logs/error.log  notice;
#error_log  logs/error.log  info;

#pid        logs/nginx.pid;


events {
    worker_connections  1024;
}


http {
    include       mime.types;
    default_type  application/octet-stream;

    #log_format  main  '$remote_addr - $remote_user [$time_local] "$request" '
    #                  '$status $body_bytes_sent "$http_referer" '
    #                  '"$http_user_agent" "$http_x_forwarded_for"';

    #access_log  logs/access.log  main;

    sendfile        on;
    #tcp_nopush     on;

    #keepalive_timeout  0;
    keepalive_timeout  65;

    #gzip  on;
    # 转发到 conf.d/*.conf 下
	include       conf.d/*.conf;
}
创建 conf.d 目录
mkdir conf.d
cd conf.d
编辑项目文件
vi project.conf
修改为如下文件
server {
    listen 80; #暴露给外部访问的端口
    server_name localhost;
        charset utf-8;
    location / {
        include uwsgi_params;
        # 端口为 uwsgi 配置的端口
        uwsgi_pass 127.0.0.1:8996;
    }
    location /static/ {
        root /home/www/daipao/; #项目静态路径设置
    }
}
配置 https 443 端口
将 1_bundle.crt 和 2.key 文件放在conf目录下。
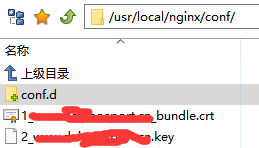
/nginx/conf/conf.d目录下
创建文件ssl.conf
vi ssl.conf
server {
        listen 443;
        server_name www.baidu.cn;# 网站
        ssl on;
        ssl_certificate 1_www.baid.cn_bundle.crt; # 更改网站
        ssl_certificate_key 2_www.daipaosport.cn.key; # 更改网站
        ssl_session_timeout 5m;
        ssl_protocols TLSv1 TLSv1.1 TLSv1.2;
        ssl_ciphers ECDHE-RSA-AES128-GCM-SHA256:HIGH:!aNULL:!MD5:!RC4:!DHE;
        ssl_prefer_server_ciphers on;

        location / {
                        include uwsgi_params;
                        uwsgi_pass 127.0.0.1:8996;
                }
                location /static/ {
                        root /home/www/xxxxx/; #更改项目跟目录
                }
    }
重启nginx,如果出现下面的错误,则是之前nginx没有安装 --with-http_ssl_module
nginx: [emerg] unknown directive "ssl" in /usr/local/nginx/conf/conf.d/ssl.conf:4
解决方法:
- 重新编译nginx,带上 SSL 模块
cd /usr/local/nginx/nginx-1.42/
./configure --prefix=/usr/local/nginx/ --with-http_ssl_module
make
//make (没有make install)
- 备份nginx的二进制文件
cp -rf /usr/local/nginx/sbin/nginx /usr/local/nginx/sbin/nginx.bak
- 覆盖nginx的二进制文件
cp objs/nginx /usr/local/nginx/sbin/nginx
cp:是否覆盖"/usr/local/nginx-1.13.5/sbin//nginx"? y
cp: 无法创建普通文件"/usr/local/nginx-1.13.5/sbin//sbin/nginx":
文本文件忙 (nginx二进制文件繁忙,可以停止nginx,再试一次就可以了)
- 重启nginx
测试发现首页没有nginx页面,端口开放情况
[root@djlee]netstat -tlnp | |grep 80
tcp        0      0 0.0.0.0:80              0.0.0.0:*               LISTEN      30579/nginx: master
端口已经开放,查看防火墙
[root@djlee conf.d]# firewall
-bash: firewall: command not found
[root@djlee conf.d]# iptables
iptables v1.4.21: no command specified
Try `iptables -h' or 'iptables --help' for more information.
即没有firewall,也没有iptables
查看发现有 firewall
[root@djlee conf.d]# ps aux | grep firewall
root       325  0.0  1.3 327548 21252 ?        Ssl  12:14   0:00 /usr/bin/python -Es /usr/sbin/firewalld --nofork --nopid
root     31424  0.0  0.0 112716   940 pts/1    S+   16:34   0:00 grep --color=auto firewall
firewalld 基本使用
firewall与iptables一样都是服务,所以可以使用systemctl服务管理工具来操作
基本命令
# 查看状态
systemctl status firewalld
# 停止
systemctl stop firewalld
# 启动
systemctl start firewalld
# 重启
systemctl restart firewalld
操作端口
# 查看端口
firewall-cmd --zone=public --list-ports

# 开启一个端口
firewall-cmd --zone=public --add-port=80/tcp --permanent
# --permanent 永久生效,没有此参数重启后失效

firewall-cmd --permanent --add-rich-rule='rule family="ipv4" source address="10.0.0.0/16" port protocol="tcp" port="8432" accept'

# 内网开放所有端口
firewall-cmd --permanent --add-rich-rule="rule family="ipv4" source address="10.0.0.0/16" accept"
# 查看rich-rules
firewall-cmd --zone=public --list-rich-rules
# 关闭一个端口
firewall-cmd --zone=public --remove-port=9898/tcp --permanent
# --permanent 表示永久生效,没有此参数重启后失效

# 拒绝ip
firewall-cmd --permanent --add-rich-rule='rule family="ipv4" source address="34.142.182.144" reject'

# 删除规则
firewall-cmd --permanent --remove-rich-rule 'rule family="ipv4" source address="34.142.182.144" reject'

# 使操作生效
firewall-cmd --reload
开放GRE协议
完整的应该是
防火墙配置
添加masquerade
firewall-cmd --add-masquerade
firewall-cmd --permanent --add-masquerade
firewall-cmd --query-masquerade
查看服务
firewall-cmd --list-services
firewall-cmd --list-port
添加PPTP端口和GRE协议
firewall-cmd --permanent --zone=public --add-port=1723/tcp
firewall-cmd --permanent --direct --add-rule ipv4 filter INPUT 0 -i ethxxx(填入网卡名称) -p gre -j ACCEPT
重启防火墙
firewall-cmd --reload
可能出现的问题
执行systemctl start firewalld 超时
解决方法:
systemctl stop firewalld;先停止
pkill -f firewalld;关闭firewalld进程
systemctl start firewalld;启动命令
官方解释可能原因: systemd didn’t know about the process that it didn’t start in the first place of course
配置 celery
先安装redis,然后再安装celery,之后配置celery和django。
安装 redis
下载并解压
mkdir /usr/local/redis
cd /usr/local/redis
wget https://download.redis.io/releases/redis-6.2.1.tar.gz
tar -zxvf redis-6.2.1.tar.gz
编译安装
cd redis-6.2.1
make MALLOC=libc
cd src && make install
配置后台启动
打开 redis-6.2.1 目录下的redis.conf
# 必须修改
将 daemonize no
设置为 daemonize yes
# 修改内网bind
bind 10.0.8.12
# 同时设置保护模式
protected-mode no
# 增加log输出
logfile "/var/log/redis.log"
# redis 检查dump文件位置
CONFIG GET dir
1) "dir"
2) "/usr/local/redis"
CONFIG GET dbfilename
1) "dbfilename"
2) "dump.rdb"
把 redis.conf 复制到 redis-6.2.1/src下,即与redis-server同一目录下。如果不复制到与 redis-server 同一目录下的话会出现
Redis "Fatal error, can't open config file ‘xxx’
然后在/usr/local/redis下创建文件 redis_6379,用于守护redis-server进程,注意使用Unix的换行(LR)
#!/bin/sh
#
# Simple Redis init.d script conceived to work on Linux systems
# as it does use of the /proc filesystem.

REDISPORT=6379
EXEC=/usr/local/redis/redis-6.2.1/src/redis-server # 此处填写redis-server的路径
CLIEXEC=/usr/local/bin/redis-cli

PIDFILE=/var/run/redis_${REDISPORT}.pid
CONF="/usr/local/redis-6.2.1/src/redis.conf" # 填写redis.conf的路径

case "$1" in
    start)
        if [ -f $PIDFILE ]
        then
                echo "$PIDFILE exists, process is already running or crashed"
        else
                echo "Starting Redis server..."
                $EXEC $CONF
        fi
        ;;
    stop)
        if [ ! -f $PIDFILE ]
        then
                echo "$PIDFILE does not exist, process is not running"
        else
                PID=$(cat $PIDFILE)
                echo "Stopping ..."
                $CLIEXEC -p $REDISPORT shutdown
                while [ -x /proc/${PID} ]
                do
                    echo "Waiting for Redis to shutdown ..."
                    sleep 1
                done
                echo "Redis stopped"
        fi
        ;;
    *)
        echo "Please use start or stop as first argument"
        ;;
esac
然后就可以启动停止redis了
# !!!!注意这里必须先cd到/usr/local/redis/再启动!!!
cd /usr/local/redis/
./redis_6379 start [stop]
安装 celery
进入虚拟环境下安装celery。以下proj均代表为项目名。
cd /home/www/proj
source venv/bin/activate
# 安装celery
pip install celery
配置 celery
以下内容大概是安装官方给出的教程配置的。
第一步:在 /etc/default 下创建 celeryd ,作为默认配置。
# Names of nodes to start
#   most people will only start one node:
CELERYD_NODES="worker"
#   but you can also start multiple and configure settings
#   for each in CELERYD_OPTS
#CELERYD_NODES="worker1 worker2 worker3"
#   alternatively, you can specify the number of nodes to start:
#CELERYD_NODES=10

# Absolute or relative path to the 'celery' command:
CELERY_BIN="/home/www/proj/venv/bin/celery" # 此处修改为项目虚拟环境下的celery
#CELERY_BIN="/virtualenvs/def/bin/celery"

# App instance to use
# comment out this line if you don't use an app
CELERY_APP="proj" # 此处修改为项目名
# or fully qualified:
#CELERY_APP="proj.tasks:app"

# Where to chdir at start.
CELERYD_CHDIR="/home/www/proj/" # 此处修改为项目路径

# Extra command-line arguments to the worker
CELERYD_OPTS="--time-limit=300 --concurrency=2" # 此处‘2’可以修改为核心数,是 celery 启动的进程数
# Configure node-specific settings by appending node name to arguments:
#CELERYD_OPTS="--time-limit=300 -c 8 -c:worker2 4 -c:worker3 2 -Ofair:worker1"

# Set logging level to DEBUG
#CELERYD_LOG_LEVEL="DEBUG"

# %n will be replaced with the first part of the nodename.
CELERYD_LOG_FILE="/var/log/celery/%n%I.log"
CELERYD_PID_FILE="/var/run/celery/%n.pid"

# Workers should run as an unprivileged user.
#   You need to create this user manually (or you can choose
#   a user/group combination that already exists (e.g., nobody).
CELERYD_USER="root"
CELERYD_GROUP="root"

# If enabled pid and log directories will be created if missing,
# and owned by the userid/group configured.
CELERY_CREATE_DIRS=1

# killed when runned 10 tasks
# worker_max_tasks_per_child = 10
第二步:配置 celery 守护进程。
官方给出的守护进程 celerybeat 和 celeryd 放在 /etc/rc.d/init.d下面
https://github.com/celery/celery/tree/3.1/extra/generic-init.d
# 先启动celeryd
/etc/rc.d/init.d/celeryd start {start|stop|force-reload|restart|try-restart|status}
# 再启动celerybeat
/etc/rc.d/init.d/celerybeat start {start|stop|force-reload|restart|try-restart|status}
这里必须先启动celeryd 再启动celerybeat,不然会出现任务结果无法写进数据库的问题
配置 django 项目
在项目下/home/www//proj/proj下创建文件 celery.py
from __future__ import absolute_import, unicode_literals
import os
from celery import Celery

# set the default Django settings module for the 'celery' program.
os.environ.setdefault('DJANGO_SETTINGS_MODULE', 'daipao.settings')

app = Celery('proj')

# Using a string here means the worker doesn't have to serialize
# the configuration object to child processes.
# - namespace='CELERY' means all celery-related configuration keys
#   should have a `CELERY_` prefix.
app.conf.broker_url = 'redis://localhost:6379/0'

# 这里我使用django orm 作为结果数据库
app.conf.result_backend = 'django-db'

app.conf.broker_transport_options = {'visibility_timeout': 3600}

# 这里规定了setting内可以以CELERY作为前辍配置celery
app.config_from_object('django.conf:settings', namespace='CELERY')

# Load task modules from all registered Django app configs.
app.autodiscover_tasks()

app.conf.update(
    CELERYBEAT_SCHEDULE={
        'keep-ps-alive': {
            'task': 'order.tasks.keep_ps_alive',
            'schedule':  1800, #这里设置的是 order App 下的task.py 下 keep_ps_alive() 函数每隔半小时运行一次,单位是秒
        }
})


@app.task(bind=True)
def debug_task(self):
    print('Request: {0!r}'.format(self.request))
这里我是使用 django orm 作为结果存储数据库,故要安装 django_celery_results 模块
pip install django_celery_results
需要在 /proj/setting.py 下引入该模块
INSTALLED_APPS = [
    'django.contrib.admin',
    'django.contrib.auth',
    'django.contrib.contenttypes',
    'django.contrib.sessions',
    'django.contrib.messages',
    'django.contrib.staticfiles',
    'xxx',
    'django_celery_results',
    'xxx',
]
然后在/proj/__init__.py下加入下面代码
from __future__ import absolute_import, unicode_literals

# This will make sure the app is always imported when
# Django starts so that shared_task will use this app.
from .celery import app as celery_app

__all__ = ('celery_app', )
部署
创建虚拟环境
pip3 install virtualenv
python3 -m virtualenv ./venv
# 进入虚拟环境
source ./venv/bin/activate
# 退出
deactivate
安装uwsgi
出现错误 python.h not found
解决方法:
1.安装编译工具
yum install -y gcc* pcre-devel openssl-devel
2.安装python-devel(重要)
yum search python36-devel
# 或者
yum search python3-devel
# 找到类似如下
python36-devel.x86_64 : Libraries and header files needed for Python development的
# 然后
yum install -y python3-devel.x86_64
之后就可去pip安装uwsgi了
启动uwsgi时一直报错sqlite3版本不对
出现错误
django.core.exceptions.ImproperlyConfigured: SQLite 3.8.3 or later
python manage.py 没有错误,但是启动uwsgi仍然报错,解决方法如下:
删除原来的版本并且安装新的版本
步骤:
1.备份旧版程序
利用命令找出旧版本的位置,将原来的程序拷贝为sqlite3_back作为备份,同时删除/usr/lib64/libsqlite3.so.0以及/usr/lib64/libsqlite3.so.0.8.6(也可以选择备份),你的文件所在位置可能与我不同,可以利用find / -name libsqlite3* 找到这两个文件,名称是一致的
2.安装新版程序
获取源码:wget https://www.sqlite.org/snapshot/sqlite-snapshot-202011020040.tar.gz
tar -zxvf sqlite-snapshot-202011020040.tar.gz&./configure &makemake install即可
3.库文件拷贝(重要)
cp /usr/local/lib/libsqlite3.so.0 /usr/lib64/
这里的目标位置就是我们刚才备份旧文件的位置
# 启动xml的
uwsgi -x xxxxx.xml
# 或者ini
uwsgi --ini xxxxx.ini
# 停止必须要有文件
uwsgi --stop uwsgi.pid
安装mysql8
python 的 mysqlclient依赖
yum install mysql-devel -y
删除 mariadb
rpm -e mariadb-libs-5.5.60-1.el7_5.x86_64 --nodeps
# 配置源
rpm -Uvh https://dev.mysql.com/get/mysql80-community-release-el7-3.noarch.rpm
# yum安装
yum --enablerepo=mysql80-community install mysql-community-server
# 开启服务
service mysqld start
# 查看状态
service mysqld status
# 获得初始密码
grep "A temporary password" /var/log/mysqld.log
# 登录
mysql -uroot -p
# 修改密码
ALTER USER 'root'@'localhost' IDENTIFIED WITH mysql_native_password BY 'password'
# 密码无法修改,设置密码策略
set global validate_password.policy=0;
# 修改root@loacalhost为%
use mysql;
update user set host = '%' where user ='root';
ALTER USER 'root'@'%' IDENTIFIED BY 'password' PASSWORD EXPIRE NEVER; #更改加密方式
ALTER USER 'root'@'%' IDENTIFIED WITH mysql_native_password BY 'password'
# 创建用户
create user 'username'@'%' IDENTIFIED WITH mysql_native_password BY 'password'
# 授权
# 允许用户对db1进行任何操作
grant all privileges on db1.* to "username"@'%';
# 查看编码
show variables like 'character%';
其他参照
https://blog.csdn.net/our_times/article/details/98882701
修改数据文件位置
参考https://www.jianshu.com/p/fb0422d76db4
但是不要用mv 要用cp复制原来的文件过去
配置supervisor
# 安装
yum -y install supervisor
# 开机自启
systemctl enable supervisord
# 启动sup
systemctl start supervisord
# 必须要先执行这个命令!
supervisord [-c /etc/supervisord.conf]
# 查看状态
systemctl status supervisord
默认配置文件/etc/supervisord.conf 中已经配置了include supervisord.d/*.ini
在/etc/supervisord.d/中增加类似如下配置
[program:beatscript]
directory=/home/www/AnchorManagement
command= /home/www/AnchorManagement/venv/bin/python manage.py beatscript
user=root
autostart=false
startsecs=5
autorestart=true
startretries=3
redirect_stderr=true
stopasgroup=true
killasgroup=true
loglevel=info
stdout_logfile=/var/log/beatscript/out.log # 这里要先创建指定的文件
stderr_logfile=/var/log/beatscript/err.log # 这里要先创建指定的文件
运行supervisor指令
#启动supervisor,-c制定让其读取的配置文件
supervisord [-c /etc/supervisord.conf]
#关闭supervisor
supervisorctl shutdown

#重新加载supervisor配置文件,并重启superivisor
supervisorctl reload

#添加或删除配置文件后更新
supervisorctl update

#管理supervisor的服务
###启动程序
supervisorctl start all
supervisorctl start program_name
###关闭程序
supervisorctl stop all
supervisorctl stop program_name
###查看程序
supervisorctl status [program_name]
###重新启动所有程序或者是某个程序
supervisorctl restart all
supervisorctl restart program_name
配置V.P.N
就4个命令

yum install -y pptp pptp-setup
pptpsetup --create VPN_NAME --server VPN_IP --username VPN用户名 --password VPN密码 --encrypt
cp /usr/share/doc/ppp-2.4.5/scripts/po{n,ff} /sbin/
chmod 755 /sbin/po{n,ff}

然后就可以用命令来连接和断开连接
pon VPN_NAME
poff VPN_NAME


 325
325


 被折叠的 条评论
为什么被折叠?
被折叠的 条评论
为什么被折叠?
 到【灌水乐园】发言


