


当APP中存在很多一样的布局时,为提高编程效率,让代码架构更加简洁清晰,可以将相同的布局进行组件化开发。
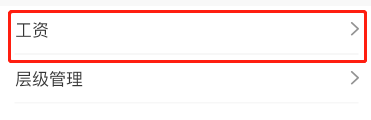
比如上图中红线中的布局,在APP中经常出现,就可以将其进行组件化开发,开发步骤如下:
1.在layout文件夹下创建公共布局文件list_item.xml,代码如下:
<?xml version="1.0" encoding="utf-8"?>
<LinearLayout xmlns:android="http://schemas.android.com/apk/res/android"
    android:id="@+id/btn"
    android:layout_width="match_parent"
    android:layout_height="48dp"
    android:orientation="vertical">
    <RelativeLayout
        android:layout_width="match_parent"
        android:layout_height="wrap_content">
        <RelativeLayout
            android:layout_width="wrap_content"
            android:layout_height="wrap_content">
            <TextView
                android:id="@+id/title"
                android:layout_width="wrap_content"
                android:layout_height="wrap_content"
                android:layout_marginTop="12dp"
                android:layout_marginBottom="12dp"
                android:layout_marginLeft="16dp"
                android:textSize="17sp"
                android:textColor="@color/title_font_color"/>
        </RelativeLayout>
        <RelativeLayout
            android:layout_width="22dp"
            android:layout_height="wrap_content"
            android:layout_centerVertical="true"
            android:layout_alignParentRight="true">
            <ImageView
                android:layout_width="9dp"
                android:layout_height="13dp"
                android:layout_alignParentRight="true"
                android:layout_centerInParent="true"
                android:layout_marginRight="13dp"
                android:src="@drawable/arrow" />
        </RelativeLayout>
    </RelativeLayout>
    <LinearLayout
        android:layout_height="1dp"
        android:layout_width="match_parent"
        android:orientation="vertical"
        android:layout_marginLeft="16dp"
        android:layout_marginRight="15dp"
        android:divider="@drawable/divider"
        android:showDividers="end"/>
</LinearLayout>
2.编写组件类ListItem,代码如下:
import android.content.Context;
import android.content.res.TypedArray;
import android.util.AttributeSet;
import android.view.LayoutInflater;
import android.view.View;
import android.widget.LinearLayout;
import android.widget.TextView;
import cn.app.R;

public class ListItem extends LinearLayout {
    //上下文
    private Context mContext;
    //公共布局视图
    private View mView;
    //左侧标题视图
    private TextView textView;
    //线性布局视图
    private LinearLayout btn;
    //左侧标题名称
    private String title;

    public ListItem(Context context) {
        this(context, null);
    }

    public ListItem(Context context, AttributeSet attrs) {
        this(context, attrs, 0);
    }

    public ListItem(Context context, AttributeSet attrs, int defStyleAttr) {
        super(context, attrs, defStyleAttr);
        init(context, attrs);
    }

    private void init(Context context, AttributeSet attrs) {
        mContext = context;
        LayoutInflater inflater = (LayoutInflater) mContext.getSystemService(Context.LAYOUT_INFLATER_SERVICE);
        //赋值公共布局视图
        mView = inflater.inflate(R.layout.list_item, this, true);
        //赋值左侧标题视图
        textView = mView.findViewById(R.id.title);
        //赋值线性布局视图
        btn = mView.findViewById(R.id.btn);
        //R.styleable.ListItem,ListItem须在自定义组件文件中配置
        TypedArray a = mContext.obtainStyledAttributes(attrs, R.styleable.ListItem);
        //关联组件属性title与左侧标题视图属性text
        setTitle(a.getString(R.styleable.ListItem_title));
    }

    public String getTitle() {
        return title;
    }

    /**
     * 视图属性title等价于左侧标题视图TextView的text属性
     * @param title
     */
    public void setTitle(String title) {
        this.title = title;
        textView.setText(title);
    }

    /**
     * 设置公共布局点击事件
     * @param clickListener
     */
    public void setClickListener(OnClickListener clickListener) {
        btn.setOnClickListener(clickListener);
    }
}
注意:ListItem(Context context)、ListItem(Context context, AttributeSet attrs)、ListItem(Context context, AttributeSet attrs, int defStyleAttr)三个构造方法必须要有。
3.在values文件夹下创建自定义组件属性attrs.xml
<?xml version="1.0" encoding="utf-8"?>
<resources>
    <declare-styleable name="TopNavLayout">
        <attr name="title_text" format="string" />
        <attr name="bgColor" format="integer" />
        <attr name="show" format="string" />
    </declare-styleable>
</resources>
注意:只有定义属性文件,第二步中才能拿到自定义组件属性R.styleable.ListItem_title
以上就完成了自定义组件的开发,接下来看下如何使用:
<?xml version="1.0" encoding="utf-8"?>
<LinearLayout xmlns:android="http://schemas.android.com/apk/res/android"
    xmlns:app="http://schemas.android.com/apk/res-auto"
    android:orientation="vertical"
    android:layout_width="match_parent"
    android:layout_height="match_parent"
    android:background="@color/white">
    <cn.app.widget.ListItem
        android:id="@+id/salary"
        android:layout_width="match_parent"
        android:layout_height="wrap_content"
        app:title="工资"/>
    <cn.app.widget.ListItem
        android:id="@+id/level"
        android:layout_width="match_parent"
        android:layout_height="wrap_content"
        app:title="层级管理"/>
</LinearLayout>
直接在布局中使用ListItem视图,组件属性通过app标签进行设置,通过id可在java代码中获取视图,然后设置点击事件


 6489
6489


 被折叠的 条评论
为什么被折叠?
被折叠的 条评论
为什么被折叠?
 到【灌水乐园】发言


