


三个框架这里不做具体的介绍,根据整合好的代码来介绍SSM相互之间是如何工作的,这里将从JSP—>Action—>Service—>Dao—>DataBase的顺序来讲解代码。
一、代码结构
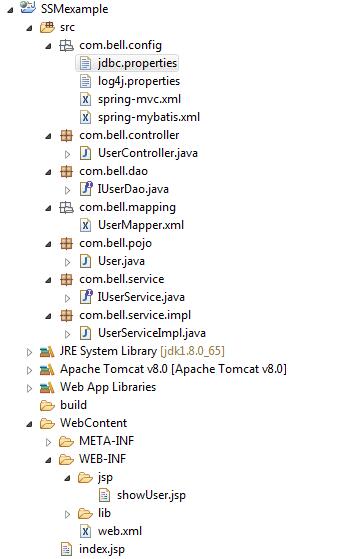
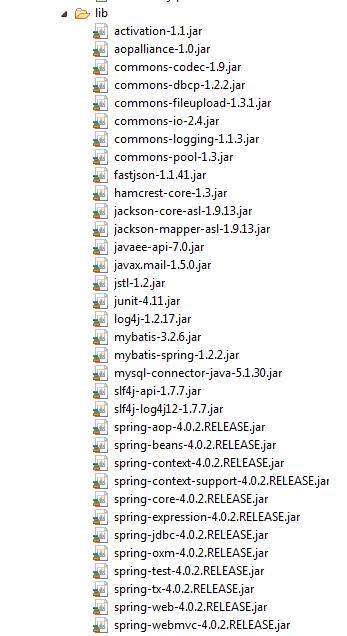
上面左图为Eclipse中的工程结构,右图为左图中lib中使用的库
二、代码运行结果
下图显示的是index.jsp文件
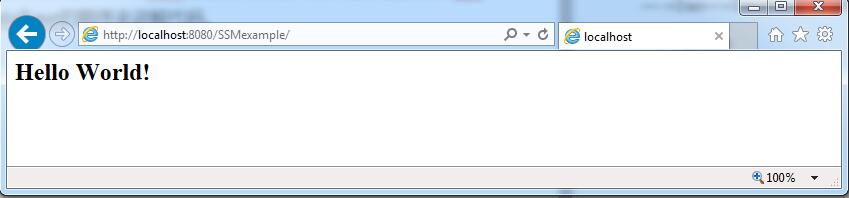
index.jsp
<html>
<body>
<h2>Hello World!</h2>
</body>
</html>
下图显示的是showUser.jsp文件
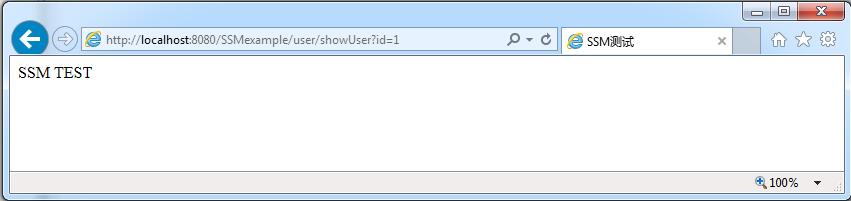
showUser.jsp
<%@ page language="java"  pageEncoding="utf-8"%>
<!DOCTYPE HTML PUBLIC "-//W3C//DTD HTML 4.01 Transitional//EN">
<html>
  <head>
    <title>SSM测试</title>
  </head>

  <body>
    SSM ${user.userName}
  </body>
</html>
三、Action
Action是由SpringMVC来实现的,这里主要涉及两个文件spring-mvc.xml和UserController
spring-mvc.xml
<?xml version="1.0" encoding="UTF-8"?>
<beans xmlns="http://www.springframework.org/schema/beans"
    xmlns:xsi="http://www.w3.org/2001/XMLSchema-instance" xmlns:p="http://www.springframework.org/schema/p"
    xmlns:context="http://www.springframework.org/schema/context"
    xmlns:mvc="http://www.springframework.org/schema/mvc"
    xsi:schemaLocation="http://www.springframework.org/schema/beans
                        http://www.springframework.org/schema/beans/spring-beans-3.1.xsd
                        http://www.springframework.org/schema/context
                        http://www.springframework.org/schema/context/spring-context-3.1.xsd
                        http://www.springframework.org/schema/mvc
                        http://www.springframework.org/schema/mvc/spring-mvc-4.0.xsd">
    <!-- 自动扫描包com.bell.controller,SpringMVC会将@controller注解的类是当做是控制器 -->
    <context:component-scan base-package="com.bell.controller" />
    <!--避免IE执行AJAX时,返回JSON出现下载文件 -->
    <bean id="mappingJacksonHttpMessageConverter"
        class="org.springframework.http.converter.json.MappingJacksonHttpMessageConverter">
        <property name="supportedMediaTypes">
            <list>
                <value>text/html;charset=UTF-8</value>
            </list>
        </property>
    </bean>
    <!-- 启动SpringMVC的注解功能 -->
    <bean class="org.springframework.web.servlet.mvc.annotation.AnnotationMethodHandlerAdapter">
        <property name="messageConverters">
            <list>
                <ref bean="mappingJacksonHttpMessageConverter" />   <!-- JSON转换器 -->
            </list>
        </property>
    </bean>
    <!-- 定义跳转的文件的前后缀 ,视图模式配置-->
    <bean class="org.springframework.web.servlet.view.InternalResourceViewResolver">
        <property name="prefix" value="/WEB-INF/jsp/" />
        <property name="suffix" value=".jsp" />
    </bean>
</beans>
UserController.java
package com.bell.controller;

import javax.annotation.Resource;
import javax.servlet.http.HttpServletRequest;

import org.springframework.stereotype.Controller;
import org.springframework.ui.Model;
import org.springframework.web.bind.annotation.RequestMapping;

import com.bell.pojo.User;
import com.bell.service.IUserService;

@Controller//表示该类为springMVC的控制器
@RequestMapping("/user") //http://localhost:8080/SSMexample/user
public class UserController {
    @Resource//spring会生成对象userService
    private IUserService userService;

    @RequestMapping("/showUser") //http://localhost:8080/SSMexample/user/showUser
    public String toIndex(HttpServletRequest request, Model model ) {
        //userId根据http://localhost:8080/SSMexample/user/showUser?id=1中的id获得,此处id=1
        int userId = Integer.parseInt(request.getParameter("id"));
        User user = userService.getUserById(userId);
        //将获得的user放入model中,主要在JSP文件中就可以通过${}来获得user的属性,如上面的showUser.jsp文件中的${user.userName}
        model.addAttribute("user", user);
        return "showUser";
    }
}
四、Service
Service涉及两个文件IUserService.java和UserServiceImpl.java,前者是接口,后者实现了该接口。
IUserService.java
package com.bell.service;

import com.bell.pojo.User;

public interface IUserService {
    public User getUserById(int userId);
}
UserServiceImpl.java
package com.bell.service.impl;

import javax.annotation.Resource;
import org.springframework.stereotype.Service;
import com.bell.dao.IUserDao;
import com.bell.pojo.User;
import com.bell.service.IUserService;

@Service("userService")//与Controller中的userService对应
public class UserServiceImpl implements IUserService {
    @Resource//Spring生成对象userDAO,spring-mybatis会自动实现接口IUserDao
    private IUserDao userDao;

    @Override
    public User getUserById(int userId) {
        return this.userDao.selectByPrimaryKey(userId);
    }

}
五、DAO
DAO是对数据库的操作,这里DAO只有一个接口类IUserDAO.java
IUserDAO.java
package com.bell.dao;

import com.bell.pojo.User;

public interface IUserDao {
    int deleteByPrimaryKey(Integer id);

    int insert(User record);

    int insertSelective(User record);

    User selectByPrimaryKey(Integer id);

    int updateByPrimaryKeySelective(User record);

    int updateByPrimaryKey(User record);
}
再看看User.java
package com.bell.pojo;

public class User {
    private Integer id;
    private String userName;
    private String password;
    private Integer age;
    public Integer getId() {
        return id;
    }
    public void setId(Integer id) {
        this.id = id;
    }
    public String getUserName() {
        return userName;
    }
    public void setUserName(String userName) {
        this.userName = userName==null ? null:userName.trim();
    }
    public String getPassword() {
        return password;
    }
    public void setPassword(String password) {
        this.password = password==null ? null:password.trim();
    }
    public Integer getAge() {
        return age;
    }
    public void setAge(Integer age) {
        this.age = age;
    }
}
mybatis以实现接口IUserDao的方式来实现数据库的访问,映射文件如下:
UserMapper.xml
<?xml version="1.0" encoding="UTF-8" ?>
<!DOCTYPE mapper PUBLIC "-//mybatis.org//DTD Mapper 3.0//EN" "http://mybatis.org/dtd/mybatis-3-mapper.dtd" >
<mapper namespace="com.bell.dao.IUserDao">
    <resultMap type="com.bell.pojo.User" id="BaseResultMap">
        <id column="id" property="id" jdbcType="INTEGER"/>
        <result column="user_name" property="userName" jdbcType="VARCHAR"/>
        <result column="password" property="password" jdbcType="VARCHAR"/>
        <result column="age" property="age" jdbcType="INTEGER" />
    </resultMap>
    <sql id="Base_Column_List" >
    id, user_name, password, age
  </sql>
  <select id="selectByPrimaryKey" resultMap="BaseResultMap" parameterType="java.lang.Integer" >
    select
    <include refid="Base_Column_List" />
    from user_t
    where id = #{id,jdbcType=INTEGER}
  </select>
  <delete id="deleteByPrimaryKey" parameterType="java.lang.Integer" >
    delete from user_t
    where id = #{id,jdbcType=INTEGER}
  </delete>
  <insert id="insert" parameterType="com.bell.pojo.User" >
    insert into user_t (id, user_name, password, age)
    values (#{id,jdbcType=INTEGER}, #{userName,jdbcType=VARCHAR}, #{password,jdbcType=VARCHAR},
      #{age,jdbcType=INTEGER})
  </insert>
  <insert id="insertSelective" parameterType="com.bell.pojo.User" >
    insert into user_t
    <trim prefix="(" suffix=")" suffixOverrides="," >
      <if test="id != null" >
        id,
      </if>
      <if test="userName != null" >
        user_name,
      </if>
      <if test="password != null" >
        password,
      </if>
      <if test="age != null" >
        age,
      </if>
    </trim>
    <trim prefix="values (" suffix=")" suffixOverrides="," >
      <if test="id != null" >
        #{id,jdbcType=INTEGER},
      </if>
      <if test="userName != null" >
        #{userName,jdbcType=VARCHAR},
      </if>
      <if test="password != null" >
        #{password,jdbcType=VARCHAR},
      </if>
      <if test="age != null" >
        #{age,jdbcType=INTEGER},
      </if>
    </trim>
  </insert>
  <update id="updateByPrimaryKeySelective" parameterType="com.bell.pojo.User" >
    update user_t
    <set >
      <if test="userName != null" >
        user_name = #{userName,jdbcType=VARCHAR},
      </if>
      <if test="password != null" >
        password = #{password,jdbcType=VARCHAR},
      </if>
      <if test="age != null" >
        age = #{age,jdbcType=INTEGER},
      </if>
    </set>
    where id = #{id,jdbcType=INTEGER}
  </update>
  <update id="updateByPrimaryKey" parameterType="com.bell.pojo.User" >
    update user_t
    set user_name = #{userName,jdbcType=VARCHAR},
      password = #{password,jdbcType=VARCHAR},
      age = #{age,jdbcType=INTEGER}
    where id = #{id,jdbcType=INTEGER}
  </update>
</mapper>
要在spring容器中实现IUserDAO接口,必须配置spring。
jdbc.properties
driver=com.mysql.jdbc.Driver
url=jdbc:mysql://localhost:3306/ssm_test?useSSL=false
username=root
password=root
#定义初始连接数
initialSize=0
#定义最大连接数
maxActive=20
#定义最大空闲
maxIdle=20
#定义最小空闲
minIdle=1
#定义最长等待时间
maxWait=60000
spring-mybatis.xml
<?xml version="1.0" encoding="UTF-8"?>
<beans xmlns="http://www.springframework.org/schema/beans"
    xmlns:xsi="http://www.w3.org/2001/XMLSchema-instance" xmlns:p="http://www.springframework.org/schema/p"
    xmlns:context="http://www.springframework.org/schema/context"
    xmlns:mvc="http://www.springframework.org/schema/mvc"
    xsi:schemaLocation="http://www.springframework.org/schema/beans
                        http://www.springframework.org/schema/beans/spring-beans-3.1.xsd
                        http://www.springframework.org/schema/context
                        http://www.springframework.org/schema/context/spring-context-3.1.xsd
                        http://www.springframework.org/schema/mvc
                        http://www.springframework.org/schema/mvc/spring-mvc-4.0.xsd">
    <!-- 自动扫描 -->
    <context:component-scan base-package="com.bell" />
    <!-- 引入配置文件 -->
    <bean id="propertyConfigurer"
        class="org.springframework.beans.factory.config.PropertyPlaceholderConfigurer">
        <property name="location" value="classpath:com/bell/config/jdbc.properties" />
    </bean>

    <bean id="dataSource" class="org.apache.commons.dbcp.BasicDataSource"
        destroy-method="close">
        <property name="driverClassName" value="${driver}" />
        <property name="url" value="${url}" />
        <property name="username" value="${username}" />
        <property name="password" value="${password}" />
        <!-- 初始化连接大小 -->
        <property name="initialSize" value="${initialSize}"></property>
        <!-- 连接池最大数量 -->
        <property name="maxActive" value="${maxActive}"></property>
        <!-- 连接池最大空闲 -->
        <property name="maxIdle" value="${maxIdle}"></property>
        <!-- 连接池最小空闲 -->
        <property name="minIdle" value="${minIdle}"></property>
        <!-- 获取连接最大等待时间 -->
        <property name="maxWait" value="${maxWait}"></property>
    </bean>

    <!-- spring和MyBatis的整合设置,无需mybatis的配置映射文件 -->
    <bean id="sqlSessionFactory" class="org.mybatis.spring.SqlSessionFactoryBean">
        <property name="dataSource" ref="dataSource" />
        <!-- 自动扫描mapping.xml文件 -->
        <property name="mapperLocations" value="classpath:com/bell/mapping/*.xml"></property>
    </bean>

    <!-- DAO接口所在包名,Spring会自动查找其下的类 -->
    <bean class="org.mybatis.spring.mapper.MapperScannerConfigurer">
        <property name="basePackage" value="com.bell.dao" />
        <property name="sqlSessionFactoryBeanName" value="sqlSessionFactory"></property>
    </bean>

    <!-- (事务管理)transaction manager, use JtaTransactionManager for global tx -->
    <bean id="transactionManager"
        class="org.springframework.jdbc.datasource.DataSourceTransactionManager">
        <property name="dataSource" ref="dataSource" />
    </bean>
</beans>
六、DataBase
最后只是数据库的创建了。
ssm_test.sql
DROP TABLE IF EXISTS user_t;

CREATE TABLE user_t (
  id int(11) NOT NULL AUTO_INCREMENT,
  user_name varchar(40) NOT NULL,
  password varchar(255) NOT NULL,
  age int(4) NOT NULL,
  PRIMARY KEY (id)
) ENGINE=InnoDB AUTO_INCREMENT=2 DEFAULT CHARSET=utf8;

insert  into user_t(id,user_name,password,age) values (1,'TEST','bell1234',25);
至此,SSM的整合已经全部完成。
本人水平有限,如有错误,欢迎指出。


 678
678

 被折叠的 条评论
为什么被折叠?
被折叠的 条评论
为什么被折叠?
 到【灌水乐园】发言


