1. 前言
为了增加用户的隐私和安全,需保护您的应用中的敏感信息或付费内容,一种方法是请求生物识别身份验证,例如使用人脸识别或指纹识别。本篇文章介绍了如何在您的应用中支持生物识别登录流程。
2. 声明应用支持的身份验证类型
如需定义您的应用支持的身份验证类型,请使用 BiometricManager.Authenticators 接口。系统支持您声明以下类型的身份验证, 根据其欺骗和冒名顶替接受率以及生物识别管道的安全性,生物识别传感器可分为3级(强)、2级(弱)、1级(便利)
2.1 BIOMETRIC_STRONG
该Flag 表示支持3种生物识别:人脸,指纹,虹膜, 强度级别为 3级
2.2 BIOMETRIC_WEAK
该Flag 表示支持3种生物识别:人脸,指纹,虹膜, 强度级别为 2级
2.3 DEVICE_CREDENTIAL
该Flag 用于保护设备的非生物识别凭证,用的是 图案, PIN码,数字密码验证, 强度级别 1级
如需开始使用身份验证器,用户需要创建 PIN 码、解锁图案或密码。如果用户尚无 PIN 码、解锁图案或密码,生物识别注册流程会引导提示用户创建一个。
如需定义您的应用接受的生物识别身份验证类型,请向 setAllowedAuthenticators() 方法传递一个身份验证类型或按位类型组合。以下代码段展示了如何使用 3 类生物识别或屏幕锁定凭据支持身份验证。
// Lets user authenticate using either a Class 3 biometric or
// their lock screen credential (PIN, pattern, or password).
promptInfo = new BiometricPrompt.PromptInfo.Builder()
                .setTitle("Biometric login for my app")
                .setSubtitle("Log in using your biometric credential")
                .setNegativeButtonText("Use account password")
                .setAllowedAuthenticators(BIOMETRIC_STRONG)
.build();注意1:不能在调用 BiometricPrompt.PromptInfo.Builder 实例时, 同时调用 setNegativeButtonText() 和 setAllowedAuthenticators(... or DEVICE_CREDENTIAL)。
注意2: 在Android 11(API 30)之前,并不是所有认证器类型的组合都受支持。具体而言:
API 30之前不单独支持{DEVICE_REDENTIAL},在>= API30(Andorid11)的版本上,可以单独设置此属性。
API 28-29不支持{ BIOMETRIC_STRONG | DEVICE_CREENTIAL} 组合,
如果配合不正确的话,再创建对话框的时候就会报错。
2.4 检查生物识别身份验证是否可用
也就是说,如果要出现指纹/人脸 验证的对话框的话,前提是你先录制指纹或录制人脸,如果没有录制,会提示引导用户先去录制,如下代码是检验并引导.
BiometricManager biometricManager = BiometricManager.from(this);
switch (biometricManager.canAuthenticate(BIOMETRIC_STRONG | DEVICE_CREDENTIAL)) {
    case BiometricManager.BIOMETRIC_SUCCESS:
        Log.d("MY_APP_TAG", "App can authenticate using biometrics.");
        break;
    case BiometricManager.BIOMETRIC_ERROR_NO_HARDWARE:
        Log.e("MY_APP_TAG", "No biometric features available on this device.");
        break;
    case BiometricManager.BIOMETRIC_ERROR_HW_UNAVAILABLE:
        Log.e("MY_APP_TAG", "Biometric features are currently unavailable.");
        break;


    //如果是走这个分支的话,就是跳转到设置模块中去录制指纹/录制人脸
    //当然不同的Andorid版本 这里的代码不一样,需要自己去适配
    case BiometricManager.BIOMETRIC_ERROR_NONE_ENROLLED:
        // Prompts the user to create credentials that your app accepts.
        final Intent enrollIntent = new Intent(Settings.ACTION_BIOMETRIC_ENROLL);
        enrollIntent.putExtra(Settings.EXTRA_BIOMETRIC_AUTHENTICATORS_ALLOWED,
                BIOMETRIC_STRONG | DEVICE_CREDENTIAL);
        startActivityForResult(enrollIntent, REQUEST_CODE);
        break;
}
3. 使用步骤
3.1 使用 Biometric 库
使用 Biometric 库向应用添加生物识别身份验证,请按照以下步骤操作:
1. 在应用模块的 build.gradle 文件中,添加 androidx.biometric 库的依赖项。
    // 增加如下库
    implementation "androidx.biometric:biometric:1.1.0"
2. 在AndroidManifest.xml增加 android.permission.USE_BIOMETRIC 权限
<permission android:name="android.permission.USE_BIOMETRIC" />
3.2 核心代码
在托管生物识别登录对话框的 Activity 或 Fragment 中,使用以下代码段中所示的逻辑显示对话框, 就是创建promptInfo 这个Buider对象:
private Executor executor;
private BiometricPrompt biometricPrompt;
private BiometricPrompt.PromptInfo promptInfo;

@Override
protected void onCreate(Bundle savedInstanceState) {
    super.onCreate(savedInstanceState);
    setContentView(R.layout.activity_login);
    executor = ContextCompat.getMainExecutor(this);
    biometricPrompt = new BiometricPrompt(MainActivity.this,
            executor, new BiometricPrompt.AuthenticationCallback() {
        @Override
        public void onAuthenticationError(int errorCode,
                @NonNull CharSequence errString) {
            super.onAuthenticationError(errorCode, errString);
            Toast.makeText(getApplicationContext(),
                "Authentication error: " + errString, Toast.LENGTH_SHORT)
                .show();
        }

        @Override
        public void onAuthenticationSucceeded(
                @NonNull BiometricPrompt.AuthenticationResult result) {
            super.onAuthenticationSucceeded(result);
            Toast.makeText(getApplicationContext(),
                "Authentication succeeded!", Toast.LENGTH_SHORT).show();
        }

        @Override
        public void onAuthenticationFailed() {
            super.onAuthenticationFailed();
            Toast.makeText(getApplicationContext(), "Authentication failed",
                Toast.LENGTH_SHORT)
                .show();
        }
    });

    promptInfo = new BiometricPrompt.PromptInfo.Builder()
            .setTitle("Biometric login for my app")
            .setSubtitle("Log in using your biometric credential")
            .setNegativeButtonText("Use account password")
            .setAllowedAuthenticators(BIOMETRIC_STRONG)
            .build();

    // Prompt appears when user clicks "Log in".
    // Consider integrating with the keystore to unlock cryptographic operations,
    // if needed by your app.
    Button biometricLoginButton = findViewById(R.id.biometric_login);
    biometricLoginButton.setOnClickListener(view -> {
            biometricPrompt.authenticate(promptInfo);
    });
}
3.3 效果图
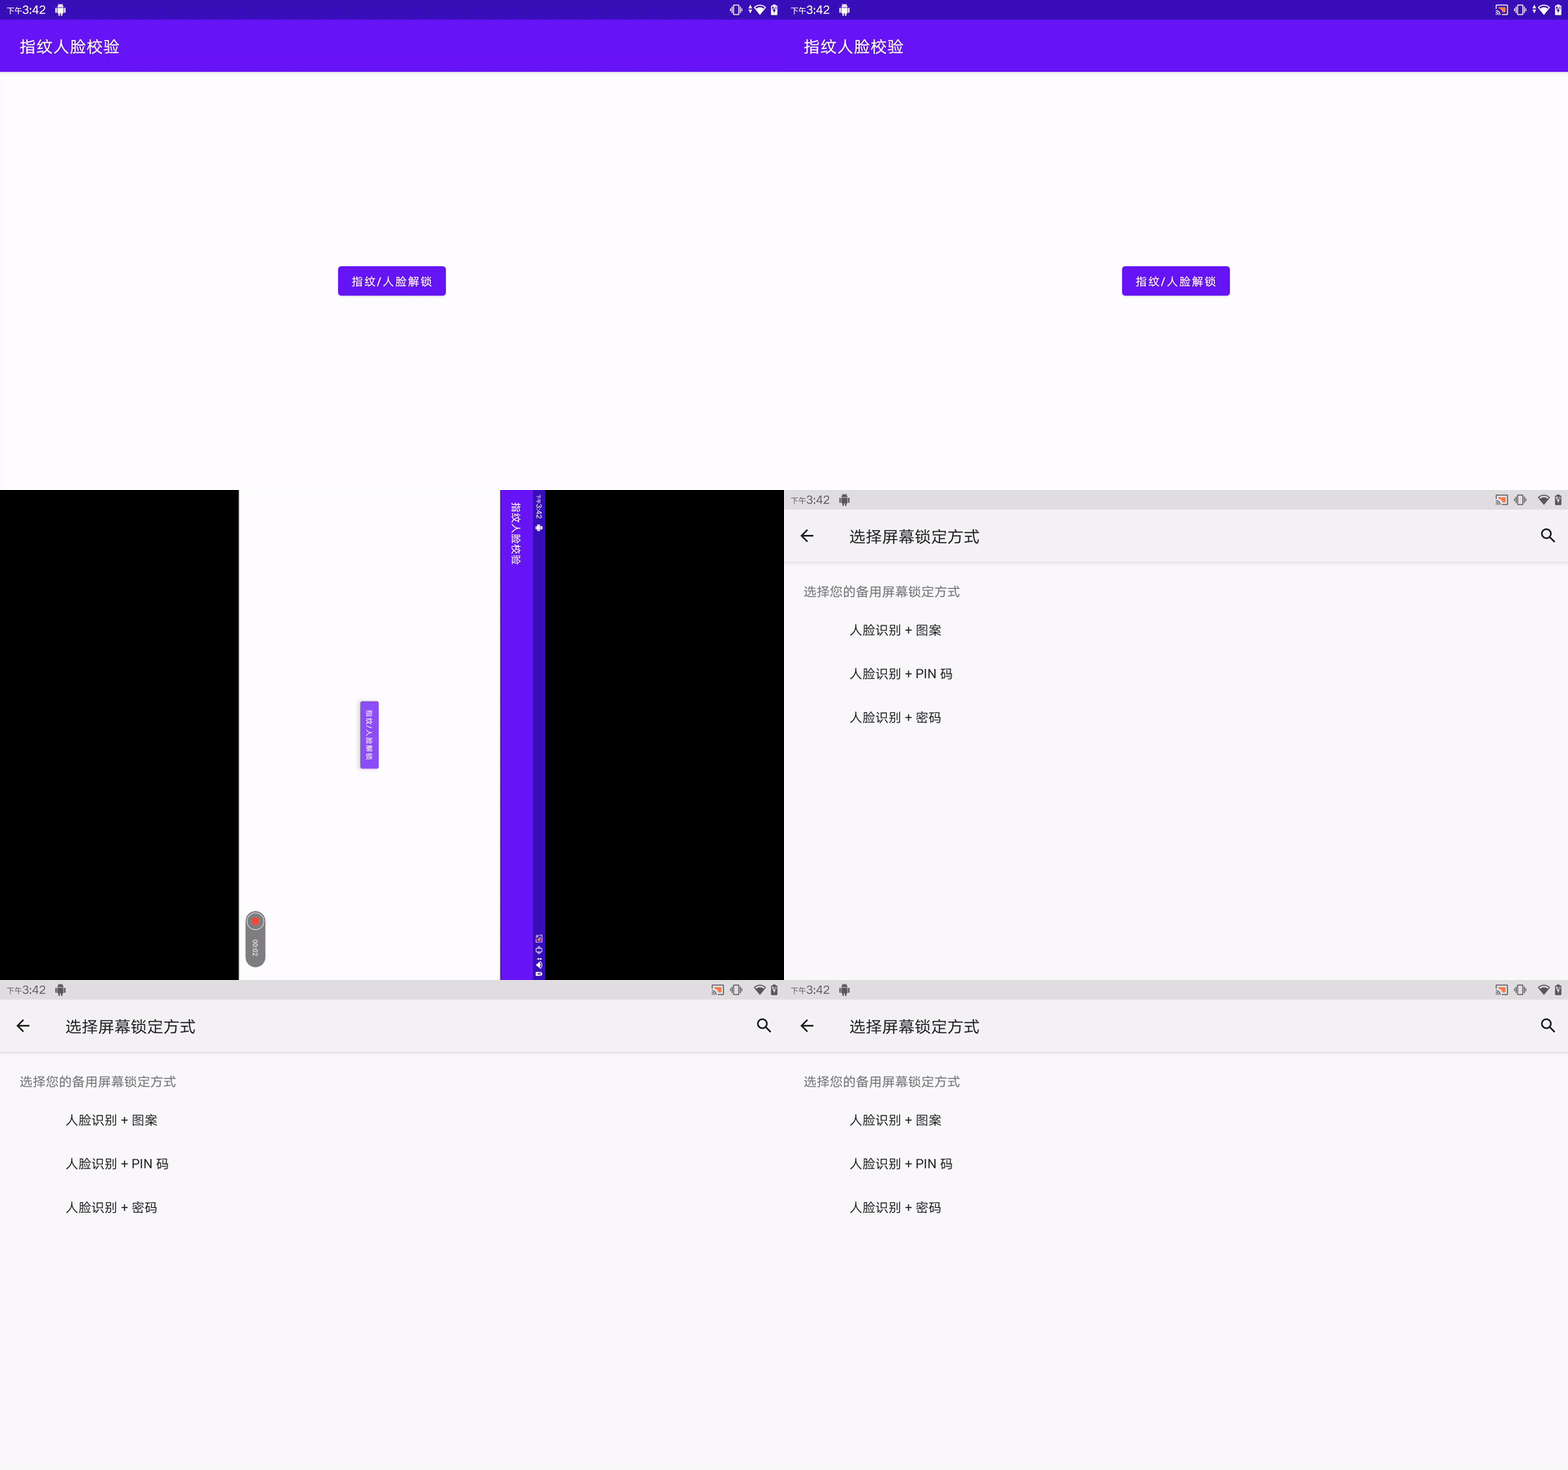
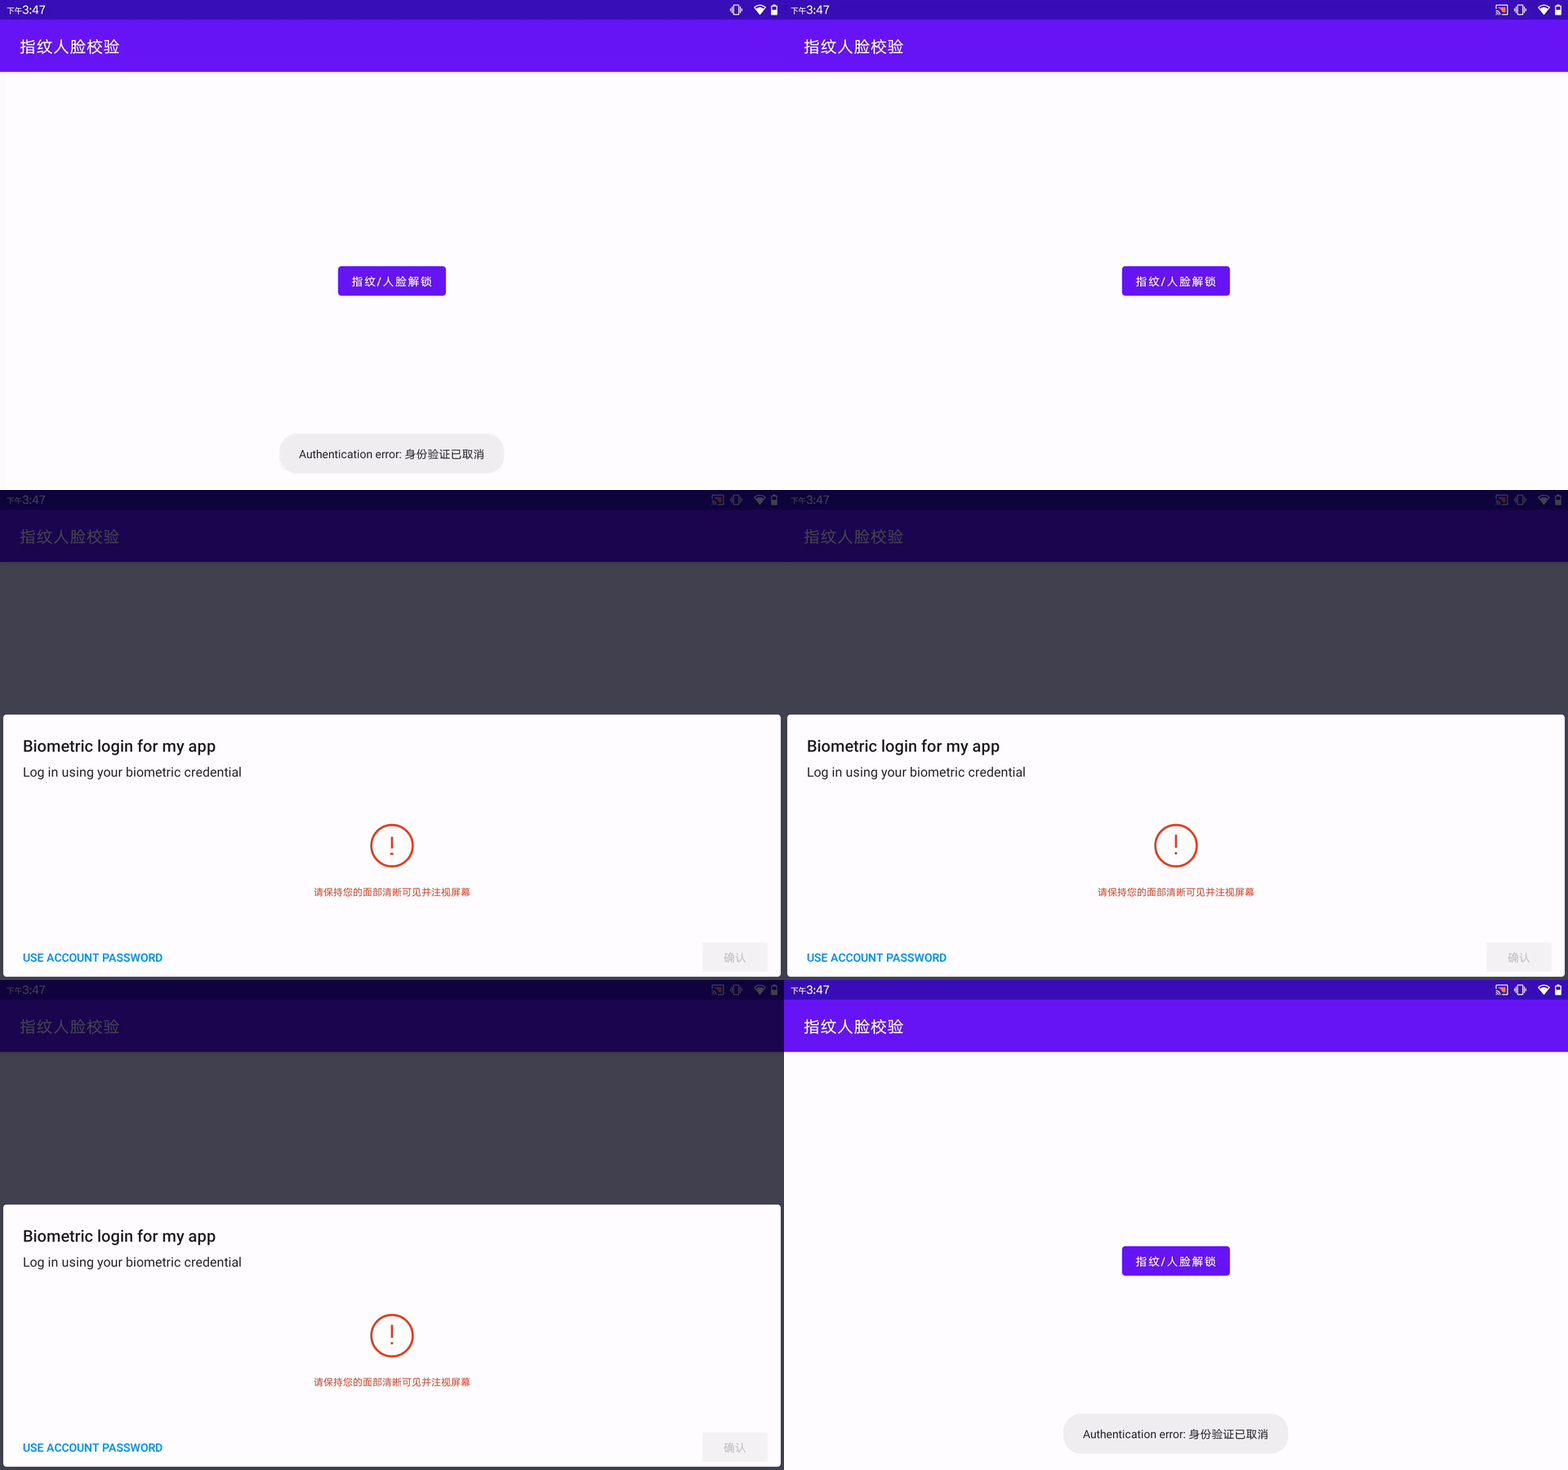
如果你的设备没有录制指纹 或 录制人脸 ,则会有提示你去录制指纹 或 录制人脸, 这是我在一款Android.10设备上的演示效果
1. 没有录制指纹人脸,则会跳转到引导界面

2. 录制了人脸,则会跳转到校验人脸对话框界面

重要备注:
在android10以上 系统默认静止第三方app 设置人脸解锁 android.provider.Settings.Secure.FACE_UNLOCK_APP_ENABLED
所以验证的时候需要我们配置一下:
adb shell settings put secure face_unlock_app_enabled 1
这是在一款Android9 设备上 指纹 校验演示效果图:

备注:如果你的设备既支持指纹 又支持人脸的话,优先弹出指纹的校验对话框,因为指纹的安全 级别强度高于人脸。
4. 完整Demo
已上传CSDN : https://download.csdn.net/download/u012514113/87428486
有需要的可以下载参考!


 997
997

 被折叠的 条评论
为什么被折叠?


