


一、volatile 关键字
valatile关键字主要作用是使变量再多个线程间可见性。不能保证变量具备有原子性。不能实现多线程间数据同步共享。
public class RunThread extends Thread{
//加上volatile关键字实现主线程和rt线程之间变量的可见性
private volatile boolean isRunning = true;
private void setRunning(boolean isRunning){
this.isRunning = isRunning;
}
public void run(){
System.out.println("进入run方法..");
int i = 0;
while(isRunning == true){
//..
}
System.out.println("线程停止");
}
public static void main(String[] args) throws InterruptedException {
RunThread rt = new RunThread();
rt.start();
Thread.sleep(1000);
rt.setRunning(false);
System.out.println("isRunning的值已经被设置了false");
}
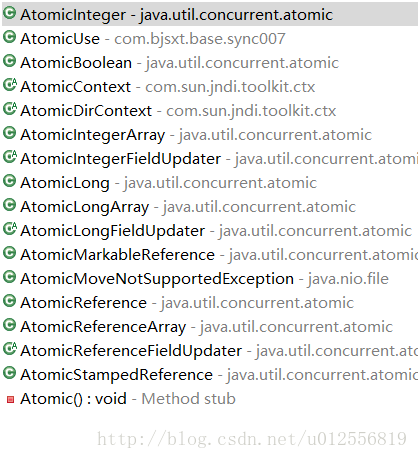
}Atomic开头的对象都具有线程安全数据的原子性,具备多线程间数据同步原子性
/**
 * volatile关键字不具备synchronized关键字的原子性(同步)
 * @author alienware
 *
 */
public class VolatileNoAtomic extends Thread{

	//private static volatile int count;
	private static AtomicInteger count = new AtomicInteger(0);
	private static void addCount(){
		for (int i = 0; i < 1000; i++) {
			//count++ ;
			count.incrementAndGet();
		}
		System.out.println(count);
	}

	public void run(){
		addCount();
	}

	public static void main(String[] args) {

		VolatileNoAtomic[] arr = new VolatileNoAtomic[100];
		for (int i = 0; i < 10; i++) {
			arr[i] = new VolatileNoAtomic();
		}

		for (int i = 0; i < 10; i++) {
			arr[i].start();
		}
	}

}
实例总结:
volatile关键字虽然拥有多个线程之间的可见性,但是却不具备同步性(也就是原子性),可以算上是一个轻量级的synchronized,性能要比synchronized强很多,不会造成阻塞(在很多开源的架构里),比如netty的底层代码就大量使用volatile,可见netty性能一定是非常不错的。)这里需要注意:一般volatile用于只针对于多个线程可见的变量操作,并不能代替synchronized的同步功能。
public class AtomicUse {

	private static AtomicInteger count = new AtomicInteger(0);

	//多个addAndGet在一个方法内是非原子性的,需要加synchronized进行修饰,保证4个addAndGet整体原子性
	/**synchronized*/
	public synchronized int multiAdd(){
			try {
				Thread.sleep(100);
			} catch (InterruptedException e) {
				e.printStackTrace();
			}
			count.addAndGet(1);
			count.addAndGet(2);  //多个方法就不能保证数据的原子性,所以要在方法上添加synchronized关键字,保证数据原子性
			count.addAndGet(3);
			count.addAndGet(4); //+10
			return count.get();
	}


	public static void main(String[] args) {

		final AtomicUse au = new AtomicUse();

		List<Thread> ts = new ArrayList<Thread>();
		for (int i = 0; i < 100; i++) {
			ts.add(new Thread(new Runnable() {
				@Override
				public void run() {
					System.out.println(au.multiAdd());
				}
			}));
		}

		for(Thread t : ts){
			t.start();
		}

	}
}
volatile关键字只具有可见性,没有原子性。要实现原子性建议使用atomic类的系列对象,支持原子性操作(注意atomic类只保证本身方法原子性,并不保证多次操作的原子性)
二、线程之间通信
线程通信概念:线程是操作系统中独立的个体,但这些个体如果不经过特殊的处理就不能成为一个整体,线程间的通信就成为整体的必用法师之一。当线程存在通信指挥,系统间的交互性更强大,在提高CPU利用率的同时还会使开发人员对线程任务在处理的过程中进行有效的把控于监督。
使用wait/notify方法实现线程间的通信。(注意两个方法都是object的类的方法,换句话说java为所有的对象都提供了这两个方法)
1、wait和notify必须配合synchronized关键字使用
2、wait方法释放锁,notify方法不释放锁。
 ☆ java线程知识汇总:
 1.java类必须实现Runnable接口,重写run()方法

买票知识回顾:
     class Ticket implements Runnable{
                    private int tickets=100;
                    public void run(){
                        while(true){
                            if(tickes>0){
                              try{
                                    Thread.sleep(10);//线程延迟(睡10毫秒)
                                        }catch(Exception e){  }
                            system.out.println(Thread.currentThread().getName()+"售出......."+tickets--);
                                }
                            }
                        }

            }

    class TicketDemo {

            public static void main(String ...args){
                      Ticket  tic = new Ticket();
                      Thread t1 = new Thread(tic);
                      Thread t2 = new Thread(tic);
                      Thread t3 = new Thread(tic);
                      Thread t4 = new Thread(tic);
                       t1.start();  //开启t1 线程
                       t2.start();  //开启t2 线程
                       t3.start();  //开启t3 线程
                       t4.start();  //开启t4 线程
            }
    }

运行结果: 出现了负数票(为了解决这个负数票问题,我们采用同步机制线程锁synchronized(对象 ))


class Ticket implements Runnable{
                    private int tickets=100;
                    public void run(){
                        while(true){
                            if(tickes>0){
                                synchronized(this){  //参数为对象  任意对象,本对象可以用this,非静态方法用this就可以了

                              try{
                                    Thread.sleep(10);//线程延迟(睡10毫秒)
                                        }catch(Exception e){  }
                            system.out.println(Thread.currentThread().getName()+"售出......."+tickets--);

                                    }
                                }
                           }
                    }

            }

    class TicketDemo {

            public static void main(String ...args){
                     Ticket  tic = new Ticket();
                      Thread t1 = new Thread(tic);
                      Thread t2 = new Thread(tic);
                      Thread t3 = new Thread(tic);
                      Thread t4 = new Thread(tic);
                       t1.start();  //开启t1 线程
                       t2.start();  //开启t2 线程
                       t3.start();  //开启t3 线程
                       t4.start();  //开启t4 线程
            }
    }
运行结果:(解决了负数票的问题)


2.线程通信资源对象


图片

/*
  线程间的通信
  思考:1.为什么出现了错误的数据
        2. wait notify控制线程的,不写在Thread类,写在Object类
 需要锁的支持,而锁是任意的对象,对象是由类创建的出来的
 所以任何类都是Object的子类,new 出来的任意对象,都具有线程控制的三个方法

3. sleep wait 区别是什么
 sleep是Thread类的一个静态方法 ,运行不需要锁
 wait是Object类的一个非静态方法,运行必须有锁的支持

 sleep 指定时间,到时间线程自己醒来
 wait 必须被其他的线程唤醒才可以

 sleep方法,线程睡眠的过程中,不放锁
 wait方法,线程等待的过程中,释放锁
 一旦被其他线程唤醒(notify)
 线程从哪里等待的,还从哪里被唤醒,获取锁后,才能继续执行

  如果加上同步以后,数据还是不对
  从两个方面下手
    1. 同步后的代码是不都是线程操作的共享数据
2. 同步后,同步代码块中,用的是不是同一把锁
*/

//定义资源对象
class Resoruce
{
String name;
String sex;
//定义一个标记,标记是false,没有赋值,输入线程可以操作,操作完毕标记改成true
          //   标记是true,已经赋值完毕,等待输出线程,输出的线程操作,操作完毕后改成False
boolean b = false;
}
//定义输入线程,为Resoruce成员变量赋值
class Input implements Runnable
{
Resoruce r ;
Input( Resoruce r){this.r = r;}
public void run(){
  int x = 0 ;
  while(true){
synchronized(r){
if(r.b==true)
try{
r.wait();
}catch(Exception e){}
   if(x%2==0){
          r.name = "张三";
      r.sex = "男";
 }else{
      r.name = "lisi";
      r.sex = "nv";
 }
 x++;
 //标记改会true
 r.b = true;
     r.notify();
}
  }
}
}

//定义输出线程,打印Resoruce变量
class Output implements Runnable
{
Resoruce r ;
Output( Resoruce r){this.r = r;}
public void run(){
  while(true){
 synchronized(r){

 if(r.b==false)
try{
r.wait();
}catch(Exception e){}
     System.out.println(r.name+"..."+r.sex);
 r.b = false;
 r.notify();
  }
  }
}
}

class ResourceDemo
{
public static void main(String[] args)
{
Resoruce r = new Resoruce();
Input i = new Input(r);
Output o = new Output(r);

Thread t1 = new Thread(i);
Thread t2 = new Thread(o);

t1.start();
t2.start();
//System.out.println("Hello World!");
}
}


-----------------------------------------------------------------------------------------------------------------------------------------------------------
 class Resoruce
{
private String name;
private String sex;

public  synchronized void set(String name,String sex){
if(b)
try{this.wait();}catch(Exception e){}
this.name = name;
this.sex = sex;
b = true;
this.notify();
}

public synchronized void get(){
if(!b)
try{this.wait();}catch(Exception e){}
System.out.println(name+"..."+sex);
b = false;
this.notify();
}
private boolean b = false;
}
//定义输入线程,为Resoruce成员变量赋值
class Input implements Runnable
{
Resoruce r ;
Input( Resoruce r){this.r = r;}
public void run(){
  int x = 0 ;
  while(true){
   if(x%2==0){
         // r.name = "张三";
      //r.sex = "男";
  r.set("张三","男");
 }else{
      r.set("lisi","nv");
 }
 x++;
 //标记改会true
}

}
}

//定义输出线程,打印Resoruce变量
class Output implements Runnable
{
Resoruce r ;
Output( Resoruce r){this.r = r;}
public void run(){
  while(true){

    // System.out.println(r.name+"..."+r.sex);
r.get();

  }
  }
}

class ResourceDemo1
{
public static void main(String[] args)
{
Resoruce r = new Resoruce();
Input i = new Input(r);
Output o = new Output(r);

Thread t1 = new Thread(i);
Thread t2 = new Thread(o);

t1.start();
t2.start();

//System.out.println("Hello World!");
}
}

--------------------------------------------------------------------------------------------------------------------------------------------------------------------
 /*
   多线程,生产者与消费者案例
   要求:生产一个(多个),消费一个(多个)
*/

//定义产品,生产有消费
class Resource
{
private String name;//产品名
private int count = 0 ;//计数器
    private boolean b = false;
//定义生产的方法
public synchronized void set(String name){
  while(b)
  try{this.wait();}catch(Exception e){}

  this.name = name + count;
  count++;
  System.out.println(Thread.currentThread().getName()+"生产---"+this.name);
  b = true;
  this.notifyAll();
}

//定义消费的方法
public  synchronized void get(){
while(!b)
  try{this.wait();}catch(Exception e){}
  System.out.println(Thread.currentThread().getName()+"消费======="+this.name);
  b = false;
  this.notifyAll();
}
}

//生产者线程
class Pro implements Runnable
{
private Resource r;
Pro(Resource r){ this.r = r;}
public void run(){
  while(true){
     r.set("鼠标");
  }
}
}

//消费者线程
class Cus implements Runnable
{
private Resource r;
Cus(Resource r){ this.r = r;}
public void run(){
  while(true){
     r.get();
  }
}
}

class ProCusDemo
{
public static void main(String[] args)
{
Resource r = new Resource();

Pro p = new Pro(r);
Cus c = new Cus(r);

Thread t1 = new Thread(p);
Thread t2 = new Thread(p);
Thread t3 = new Thread(p);
Thread t4 = new Thread(p);
Thread t5 = new Thread(p);
Thread t6 = new Thread(p);
Thread t7 = new Thread(p);
Thread t8 = new Thread(p);

Thread t9 = new Thread(c);
Thread t10 = new Thread(c);
Thread t11 = new Thread(c);
Thread t12 = new Thread(c);
Thread t13 = new Thread(c);
Thread t14 = new Thread(c);
Thread t15 = new Thread(c);
Thread t16 = new Thread(c);
t1.start();
t2.start();
t3.start();
t4.start();
t5.start();
t6.start();
t7.start();
t8.start();
t9.start();
t10.start();
t11.start();
t12.start();
t13.start();
t14.start();
t15.start();
t16.start();
//System.out.println("Hello World!");
}
}


-----------------------------------------------------------------------------------------------------------------------------------------------------------------
 /*
   多线程,生产者与消费者案例
   要求:生产一个(多个),消费一个(多个)

   JDK1.5版本后,出现了一个新的功能,lock锁
   java.util.concurrent.locks

    Lock锁,替换了同步关键字 synchronized{}
lock()获取锁 unlock()释放锁
ReentrantLock 是Lock接口的实现类对象

锁被lock替代了。锁上的方法wait notify
Condition对象中的方法,替代了Object中的 wait notify notifyAll

Lock接口中的方法 Condition newCondition()
          返回绑定到此 Lock 实例的新 Condition 实例。
*/
import java.util.concurrent.locks.*;

//定义产品,生产有消费
class Resource
{
private String name;//产品名
private int count = 0 ;//计数器
    private boolean b = false;

   private Lock lock = new ReentrantLock();
  //创建绑定锁的Condition对象
  //lock锁,可以绑定多个Condition对象,实现线程的分组控制
   Condition pro = lock.newCondition();
   Condition cus = lock.newCondition();
//定义生产的方法
public  void set(String name){
lock.lock();
  while(b)
  try{pro.await();}catch(Exception e){}

  this.name = name + count;
  count++;
  System.out.println(Thread.currentThread().getName()+"生产---"+this.name);
  b = true;
  cus.signal();
  lock.unlock();
}

//定义消费的方法
public   void get(){
lock.lock();
while(!b)
  try{cus.await();}catch(Exception e){}
  System.out.println(Thread.currentThread().getName()+"消费======="+this.name);
  b = false;
  pro.signal();
  lock.unlock();
}
}

//生产者线程
class Pro implements Runnable
{
private Resource r;
Pro(Resource r){ this.r = r;}
public void run(){
  while(true){
     r.set("鼠标");
  }
}
}

//消费者线程
class Cus implements Runnable
{
private Resource r;
Cus(Resource r){ this.r = r;}
public void run(){
  while(true){
     r.get();
  }
}
}

class ProCusDemo1
{
public static void main(String[] args)
{
Resource r = new Resource();

Pro p = new Pro(r);
Cus c = new Cus(r);

Thread t1 = new Thread(p);
Thread t2 = new Thread(p);
Thread t3 = new Thread(p);
Thread t4 = new Thread(p);
Thread t5 = new Thread(p);
Thread t6 = new Thread(p);
Thread t7 = new Thread(p);
Thread t8 = new Thread(p);

Thread t9 = new Thread(c);
Thread t10 = new Thread(c);
Thread t11 = new Thread(c);
Thread t12 = new Thread(c);
Thread t13 = new Thread(c);
Thread t14 = new Thread(c);
Thread t15 = new Thread(c);
Thread t16 = new Thread(c);
t1.start();
t2.start();
t3.start();
t4.start();
t5.start();
t6.start();
t7.start();
t8.start();
t9.start();
t10.start();
t11.start();
t12.start();
t13.start();
t14.start();
t15.start();
t16.start();
//System.out.println("Hello World!");
}
}

------------------------------------------------------------------------------------------------------------------------------------------------------
/*
   守护线程

   又叫做后台线程。
   当一个程序中所有的线程都是守护线程的时候,JVM退出

   main主线程,开启了t这个线程
   t线程设置为了守护线程
   t是保护主线程
   main主线程死了,保护主线程的t线程,还有存在的意义吗
   跟着主线程一起死

   好比 圣斗士星矢  圣斗士
   银河战争篇  黄金十二宫篇 北欧篇 海皇篇  冥王篇  极乐净土篇

   星矢 保护 智慧女神雅典娜  城户沙织
*/
class Demo implements Runnable
{
public void run(){
   while(true){
  System.out.println("Hello run!");
}
}
}

class DaemonThreadDemo
{
public static void main(String[] args)
{
Demo d = new Demo();
Thread t = new Thread(d);
//void setDaemon(boolean on)
     //     将该线程标记为守护线程或用户线程。
t.setDaemon(true);
t.start();
}
}

---------------------------------------------------------------------------------------------------------------------------------------------
/*
  线程中的其他方法
  toString
  setPriority(int newPriority) 1 5 10
          更改线程的优先级。
    static int MAX_PRIORITY
          线程可以具有的最高优先级。
static int MIN_PRIORITY
          线程可以具有的最低优先级。
static int NORM_PRIORITY
          分配给线程的默认优先级。

join()加入
void join()
          等待该线程终止。
static yield() 线程让步
*/

class Demo implements Runnable
{
public void run(){
for(int x = 0 ; x < 50 ;x++){
Thread.yield();
System.out.println(Thread.currentThread().getName()+"run...");
}
}
}

class OtherThread
{
public static void main(String[] args) throws Exception
{
Demo d = new Demo();
Thread t1 = new Thread(d);
Thread t2 = new Thread(d);
//t1.setPriority(Thread.MAX_PRIORITY );
t1.start();
//t1.join();
t2.start();
for(int x = 0 ; x < 50 ;x++){
System.out.println("main...");
}
//System.out.println(t);
}
}
 ========================================================================================================

多线程知识总结:

1. 多线程的通信,等待与唤醒机制
  理解多线程的通信,必须有一个明确的框架模式,线程什么时候等,什么时候醒
  三个监视器方法 java.lang.Object  wait notify  notifyAll
  必须拥有锁,没有锁三个方法一执行就会发生异常
  可以采用同步函数,采用同步代码块,用对象锁调用监视器方法

  sleep wait  sleep休眠的时候不释放锁,wait等待的时候,释放锁,可能出现在面试中

2. 线程通信中,重要的案例 是生产者与消费者
  用到了线程的监视器对象方法,notifyAll()

  JDK1.5的新的特性,增加了一个lock 锁
  使用的时候导入包 java.util.concurrent.locks.*
  Lock接口,替代了synchronized(代码块,函数)机制
  两个方法 获取锁lock()  释放锁 unlock()
  newCondition()方法返回Condition对象 ,这个对象替代Object中的三个监视器方法
  wait() -- await()  notify()-- signal()  notifyAll() -- signalAll()
  三个新的方法,不能被对象锁调用,用Condition对象才可以调用

  一个lock锁,可以挂多组condition对象,达到唤醒对方的目的

3. 线程其他方法
  停止线程:
    |-- 结束run方法
    |-- 利用异常 InterruptedException。停止线程
       当线程在wait状态的时候,使用thread类中的非静态方法interrupt,可以引发
       等待状态中的线程异常
    |-- stop()方法,不要用,已经过时了

  守护线程setDaemon(boolean b)
    当所有运行的程序都是守护线程的时候,java虚拟机退出
    谁开启的这个线程,就守护谁,当开启者线程死亡,守护线程随着死亡

  返回线程的字符串表现形式 toString()
    线程名字 优先级  线程组

  设置线程的优先级方法 setPriority(int newPriority)
  int类型的参数,参照Thread类的静态常量

   等待线程终止 join()
   调用了join方法的线程,只有他结束了,才会让别的线程执行

   线程的让步 static yield()
两个线程通一把锁
线程1 启动 wait等待 释放锁
线程2 启动 notify唤醒另一个线程,不释放锁 走完方法后才释放锁。
sleep 睡眠不释放锁
/**
 * wait notfiy 方法,wait释放锁,notfiy不释放锁
 * @author alienware
 *
 */
public class ListAdd2 {
	private volatile static List list = new ArrayList();

	public void add(){
		list.add("bjsxt");
	}
	public int size(){
		return list.size();
	}

	public static void main(String[] args) {

		final ListAdd2 list2 = new ListAdd2();

		// 1 实例化出来一个 lock
		// 当使用wait 和 notify 的时候 , 一定要配合着synchronized关键字去使用
		final Object lock = new Object();

		//final CountDownLatch countDownLatch = new CountDownLatch(1);

		Thread t1 = new Thread(new Runnable() {
			@Override
			public void run() {
				try {
					//synchronized (lock) {
						for(int i = 0; i <10; i++){
							list2.add();
							System.out.println("当前线程:" + Thread.currentThread().getName() + "添加了一个元素..");
							Thread.sleep(500);
							if(list2.size() == 5){
								System.out.println("已经发出通知..");
								//countDownLatch.countDown();
								lock.notify();
							}
						}
					//}
				} catch (InterruptedException e) {
					e.printStackTrace();
				}

			}
		}, "t1");

		Thread t2 = new Thread(new Runnable() {
			@Override
			public void run() {
				synchronized (lock) {
					if(list2.size() != 5){
						try {
							System.out.println("t2进入...");
							lock.wait();
						//	countDownLatch.await();
						} catch (InterruptedException e) {
							e.printStackTrace();
						}
					}
					System.out.println("当前线程:" + Thread.currentThread().getName() + "收到通知线程停止..");
					throw new RuntimeException();
				}
			}
		}, "t2");

		t2.start();
		t1.start();
	}
}
wait 、notify 可以用 实现的上边代码相同业务功能
/**
 * wait notfiy 方法,wait释放锁,notfiy不释放锁
 * @author alienware
 *
 *改成CountDownLatch  实现相同功能,其实就是wait、notify的升级版本
 */
public class ListAdd2 {
	private volatile static List list = new ArrayList();

	public void add(){
		list.add("bjsxt");
	}
	public int size(){
		return list.size();
	}

	public static void main(String[] args) {

		final ListAdd2 list2 = new ListAdd2();

		// 1 实例化出来一个 lock
		// 当使用wait 和 notify 的时候 , 一定要配合着synchronized关键字去使用
		//final Object lock = new Object();

		//并发包下的一个类
		final CountDownLatch countDownLatch = new CountDownLatch(1);//改成2 就是必须写两次countDownLatch.countDown();

		Thread t1 = new Thread(new Runnable() {
			@Override
			public void run() {
				try {
					//synchronized (lock) {
						for(int i = 0; i <10; i++){
							list2.add();
							System.out.println("当前线程:" + Thread.currentThread().getName() + "添加了一个元素..");
							Thread.sleep(1000);
							if(list2.size() == 5){
								System.out.println("已经发出通知..");
								countDownLatch.countDown(); // wait、notify的升级版
								//lock.notify();
							}
						}
					//}
				} catch (InterruptedException e) {
					e.printStackTrace();
				}

			}
		}, "t1");

		Thread t2 = new Thread(new Runnable() {
			@Override
			public void run() {
				//synchronized (lock) {
					if(list2.size() != 5){
						try {
							//System.out.println("t2进入...");
							//lock.wait();
							countDownLatch.await();
						} catch (InterruptedException e) {
							e.printStackTrace();
						}
					}
					System.out.println("当前线程:" + Thread.currentThread().getName() + "收到通知线程停止..");
					throw new RuntimeException();
				//}
			}
		}, "t2");

		t2.start();
		t1.start();

	}

}


 575
575

 被折叠的 条评论
为什么被折叠?
被折叠的 条评论
为什么被折叠?
 到【灌水乐园】发言


