


 超级会员免费看
前言
在实际的开发项目中,一个对外暴露的接口往往会面临很多次请求,我们来解释一下幂等的概念:任意多次执行所产生的影响均与一次执行的影响相同。按照这个含义,最终的含义就是 对数据库的影响只能是一次性的,不能重复处理。如何保证其幂等性,通常有以下手段:
- 数据库建立唯一性索引,可以保证最终插入数据库的只有一条数据
- token机制,每次接口请求前先获取一个token,然后再下次请求的时候在请求的header体中加上这个token,后台进行验证,如果验证通过删除token,下次请求再次判断token
- 悲观锁或者乐观锁,悲观锁可以保证每次for update的时候其他sql无法update数据(在数据库引擎是innodb的时候,select的条件必须是唯一索引,防止锁全表)
- 先查询后判断,首先通过查询数据库是否存在数据,如果存在证明已经请求过了,直接拒绝该请求,如果没有存在,就证明是第一次进来,直接放行。
redis实现自动幂等的原理图:
一、自定义注解AutoIdempotent
/**
 * @ClassName AutoIdempotent
 * @Description (自动幂等注解:把它添加在需要实现幂等的方法上,凡是某个方法注解了它,都会实现自动幂等。后台利用反射如果扫描到这个注解,就会处理这个方法实现自动幂等)
 * @author ZHY
 * @date 2020年4月1日 上午10:51:10
 * @Copyright © 2020【www.zhy.com Inc. All rights reserved.】
 */
@Target({ElementType.METHOD})
@Retention(RetentionPolicy.RUNTIME)
public @interface AutoIdempotent {

}
二、Token的创建与校验
/**
* @method checkIdempotentToken(校验幂等的token)
* @param request
* @return Boolean
* @author ZHY
* @date 2020年4月1日 下午6:58:48
*/
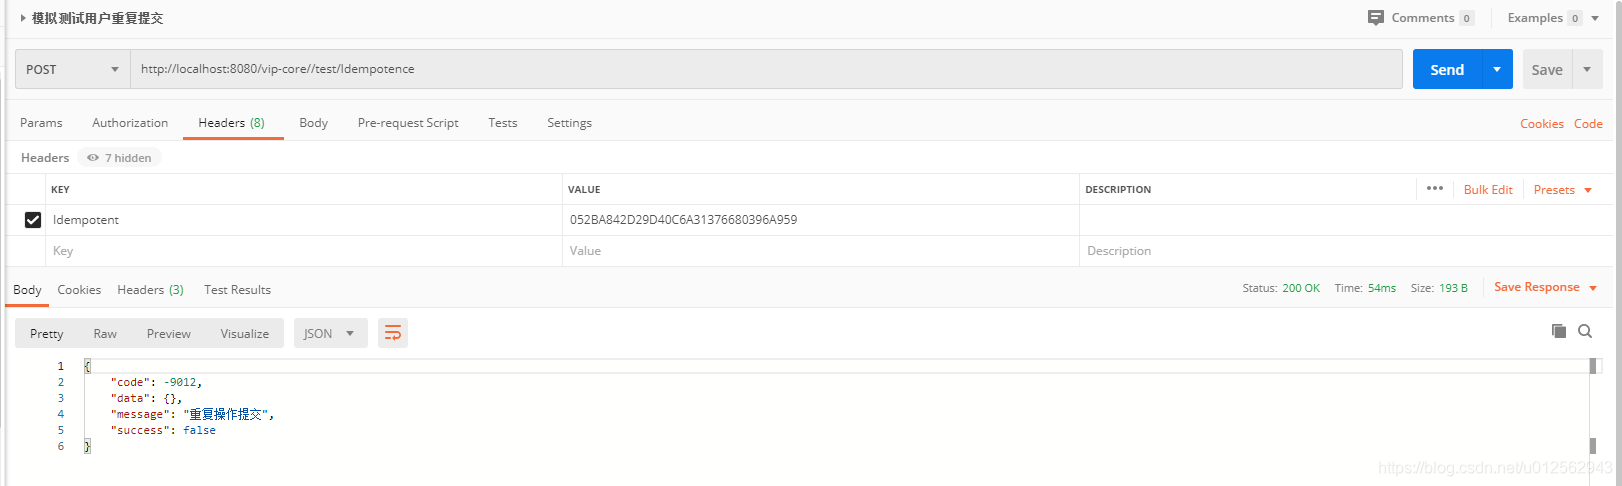
public static Boolean checkIdempotentToken(HttpServletRequest request) {
String token = request.getHeader(SysConstants.HTTP_IDEMPOTENT_HEADER_NAME);
// header中不存在Idempotent Token
if (StringUtils.isBlank(token)) {
throw new VipException(ServiceErrorEnum.IDEMPOTENT_TOKEN_FAILURE);
}
boolean exists = J2CacheUtil.existsKey(SysConstants.IDEMPOTENT_TOKEN_REGION, token);
if (!exists) {
// 重复操作
throw new VipException(ServiceErrorEnum.REPETITIVE_OPERATION);
}
J2CacheUtil.remove(SysConstants.IDEMPOTENT_TOKEN_REGION, token);
return true;
}
/**
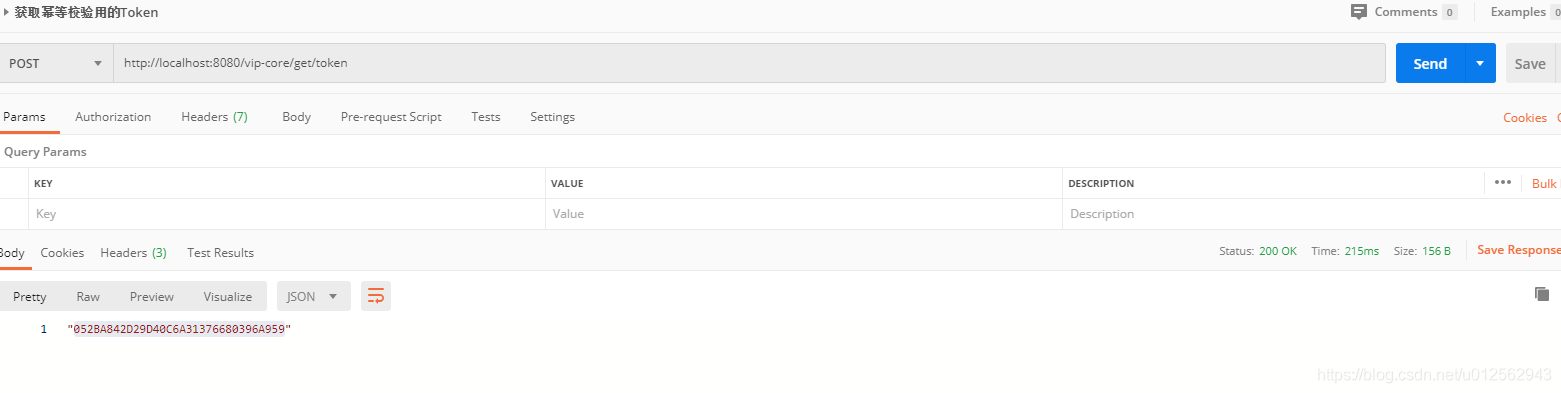
* @method createIdempotentToken(创建幂等校验用的token并且缓存)
* @return String
* @author ZHY
* @date 2020年4月1日 下午7:21:21
*/
public static String createIdempotentToken() {
String idepotentToken = TokenUtil.generateToken();
J2CacheUtil.set(SysConstants.IDEMPOTENT_TOKEN_REGION, idepotentToken, idepotentToken);
return idepotentToken;
}四、拦截器的配置
/**
 * @ClassName AutoIdempotentInterceptor
 * @Description (自动幂等拦截器)
 * @author ZHY
 * @date 2020年4月1日 上午10:57:12
 * @Copyright © 2020【www.zhy.com Inc. All rights reserved.】
 */
@Component
public class AutoIdempotentInterceptor implements HandlerInterceptor {

	@Override
	public boolean preHandle(HttpServletRequest request, HttpServletResponse response, Object handler) throws Exception {

		if (!(handler instanceof HandlerMethod)) {
			return true;
		}
		HandlerMethod handlerMethod = (HandlerMethod) handler;
		Method method = handlerMethod.getMethod();
		// 获取带有ApiIdempotment标记的注解方法
		AutoIdempotent methodAnnotation = method.getAnnotation(AutoIdempotent.class);
		if (methodAnnotation != null) {
			Boolean checkIdempotentToken = VipCoreUtil.checkIdempotentToken(request);
			// 幂等性校验, 校验通过则放行, 校验失败则抛出异常, 并通过统一异常处理返回友好提示
			if (!checkIdempotentToken) {
				throw new VipException(ServiceErrorEnum.IDEMPOTENT_CHECK_FAIL);
			}
		}
		return true;
	}
}
/**
* @ClassName WebMvcConfig
* @Description (webmvc 配置)
* @author ZHY
* @date 2020年4月1日 上午9:21:12
* @Copyright © 2020【www.zhy.com Inc. All rights reserved.】
*/
@Configuration
public class WebMvcConfig implements WebMvcConfigurer {
@Autowired
private AuthorizationInterceptor authorizationInterceptor;
@Autowired
private AutoIdempotentInterceptor autoIdempotentInterceptor;
@Override
public void addInterceptors(InterceptorRegistry registry) {
registry.addInterceptor(authorizationInterceptor).addPathPatterns("/**");
registry.addInterceptor(autoIdempotentInterceptor);
}
@Bean
public HttpMessageConverters fastJsonHttpMessageConverters() {
FastJsonHttpMessageConverter fastJsonHttpMessageConverter = new FastJsonHttpMessageConverter();
FastJsonConfig fastJsonConfig = new FastJsonConfig();
fastJsonConfig.setSerializerFeatures(SerializerFeature.WriteMapNullValue);
List<MediaType> fastMediaTypes = new ArrayList<>();
fastMediaTypes.add(MediaType.APPLICATION_JSON_UTF8);
fastJsonHttpMessageConverter.setSupportedMediaTypes(fastMediaTypes);
fastJsonHttpMessageConverter.setFastJsonConfig(fastJsonConfig);
HttpMessageConverter<?> converter = fastJsonHttpMessageConverter;
return new HttpMessageConverters(converter);
}
}五、测试用例
@RestController
public class TestAutoIdempotentController {

	@PostMapping("/get/token")
	public String getToken() {
		return ZhyUtil.createIdempotentToken();
	}

	@AutoIdempotent
	@PostMapping("/test/Idempotence")
	public String testIdempotence() {

		return "success";
	}
}
六、总结
对于幂等在实际的开发过程中是十分重要的,因为一个接口可能会被无数的客户端调用,如何保证其不影响后台的业务处理,如何保证其只影响数据一次是非常重要的,它可以防止产生脏数据或者乱数据,也可以减少并发量,实乃十分有益的一件事。而传统的做法是每次判断数据,这种做法不够智能化和自动化,比较麻烦。通过注解的这种自动化处理也可以提升程序的伸缩性。


 8208
8208


 被折叠的 条评论
为什么被折叠?
被折叠的 条评论
为什么被折叠?
 到【灌水乐园】发言


