


1.创建Plugin工程
如果Module SDK中没有可选的SDK,那么点击New新添加一个SDK,目录就选择Intellij的安装位置即可。

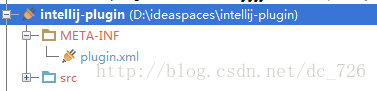
创建出的Plugin项目结构很简单,只是在META-INF下多了一个plugin.xml配置文件,后文会介绍到它的用处。
2.让插件Say哈喽
2.1添加Component
在src目录上Alt+Insert,可以看到New对话框中列出有三种组件,分别对应三种级别:Application、Project、Module Component。
这里我们选择Application Component作为实例,在弹出框中输入一个名字例如MyComponent,这样一个组件就创建出来了。

然后在MyComponent中添加一个SayHello的方法,其他方法暂不实现,源代码如下所示:
package
com.cdai.plugin.rapidg;
import
com.intellij.openapi.components.ApplicationComponent;
import
com.intellij.openapi.ui.Messages;
import
org.jetbrains.annotations.NotNull;
/**
* My Component
* User: cdai
* Date: 13-11-4
* Time: 上午10:08
*/
public
class
MyComponent
implements
ApplicationComponent {
public
MyComponent() {
}
public
void
initComponent() {
// TODO: insert component initialization logic here
}
public
void
disposeComponent() {
// TODO: insert component disposal logic here
}
@NotNull
public
String getComponentName() {
return
"MyComponent"
;
}
public
void
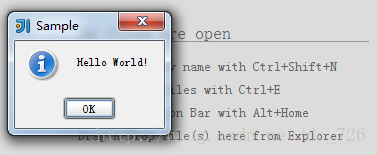
sayHello() {
// Show dialog with message
Messages.showMessageDialog(
"Hello World!"
,
"Sample"
,
Messages.getInformationIcon()
);
}
}
|
2.2添加Action
现在需要添加一个Action让使用我们插件的用户可以通过菜单或其他方式点击到插件。

Action主要工作是创建一个Application和MyComponent对象,代码如下:
|
1
2
3
4
5
6
7
8
9
10
11
12
13
14
15
16
17
18
19
20
21
22
23
|
package
com.cdai.plugin.rapidg;
import
com.intellij.openapi.actionSystem.AnAction;
import
com.intellij.openapi.actionSystem.AnActionEvent;
import
com.intellij.openapi.application.Application;
import
com.intellij.openapi.application.ApplicationManager;
/**
* Say Hello Action
* User: cdai
* Date: 13-11-4
* Time: 上午10:16
*/
public
class
SayHelloAction
extends
AnAction {
@Override
public
void
actionPerformed(AnActionEvent e) {
Application application = ApplicationManager.getApplication();
MyComponent myComponent = application.getComponent(MyComponent.
class
);
myComponent.sayHello();
}
}
|
2.3配置文件
其实前面两步新建Component和Action的同时,IDEA在帮我们自动将它们注册到META-INF/plugin.xml中。
我们刚才添加的Application Component和Action会在<application-components>结点下,plugin.xml最终是下面的样子:
|
1
2
3
4
5
6
7
8
9
10
11
12
13
14
15
16
17
18
19
20
21
22
23
24
25
26
27
28
29
30
31
32
33
34
35
36
37
38
39
40
41
42
43
44
45
46
47
48
|
<
idea-plugin
version
=
"2"
>
<
id
>com.cdai.plugin.rapidg</
id
>
<
name
>CDai's Rapid Generator Plugin</
name
>
<
version
>1.0</
version
>
<
description
>
<![CDATA[
Enter short description for your plugin here.<br>
<small>most HTML tags may be used</small>
]]>
</
description
>
<
change-notes
>
<![CDATA[
Add change notes here.<br>
<small>most HTML tags may be used</small>
]]>
</
change-notes
>
<!-- please see http://confluence.jetbrains.net/display/IDEADEV/Build+Number+Ranges for description -->
<
idea-version
since-build
=
"107.105"
/>
<!-- please see http://confluence.jetbrains.net/display/IDEADEV/Plugin+Compatibility+with+IntelliJ+Platform+Products
on how to target different products -->
<!-- uncomment to enable plugin in all products
<depends>com.intellij.modules.lang</depends>
-->
<
application-components
>
<!-- Add your application components here -->
<
component
>
<
implementation-class
>com.cdai.plugin.rapidg.MyComponent</
implementation-class
>
</
component
>
</
application-components
>
<
project-components
>
<!-- Add your project components here -->
</
project-components
>
<
actions
>
<!-- Add your actions here -->
<
action
id
=
"SayHello"
class
=
"com.cdai.plugin.rapidg.SayHelloAction"
text
=
"Say Hello!"
>
<
add-to-group
group-id
=
"WindowMenu"
anchor
=
"first"
/>
</
action
>
</
actions
>
<
extensions
defaultExtensionNs
=
"com.intellij"
>
<!-- Add your extensions here -->
</
extensions
>
</
idea-plugin
>
|
3.运行调试
打开Run/Debug配置对话框,新加一个Plugin类型的,Use classpath of module选择刚才的示例项目。

运行起来就会发现,原来会启动一个新的Intellij IDEA实例,重新走一遍启动配置过程,可以看到插件的名字就是plugin.xml中<name>中的值。
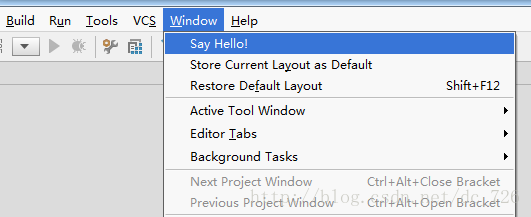
我们可以只选中我们刚开发的插件,忽略掉其他的。现在通过Window->Say Hello!就可以触发我们的插件了,效果就是会弹出个对话框。


 473
473

 被折叠的 条评论
为什么被折叠?
被折叠的 条评论
为什么被折叠?
 到【灌水乐园】发言


