


1.背景
Ambari是一个强大的大数据集群管理平台。在实际使用中,我们使用的大数据组件不会局限于官网提供的那些。那如何在Ambari中集成进去其他组件呢?下面我们就开展来说明吧~
Ambari中stacks相关的配置信息位于:
-
源代码包:
/ambari-server/src/main/resources/stacks -
安装后:
/var/lib/ ambari - server /resources/stacks
Ambari源码下载地址:https://dlcdn.apache.org/ambari/
1.1 Stack Properties
Stack定义的结构如下:
|_ stacks
   |_ <stack_name>
      |_ <stack_version>
         metainfo.xml
         |_ hooks
         |_ repos
            repoinfo.xml
         |_ services
            |_ <service_name>
               metainfo.xml
               metrics.json
               |_ configuration
                  {configuration files}
               |_ package
                  {files, scripts, templates}
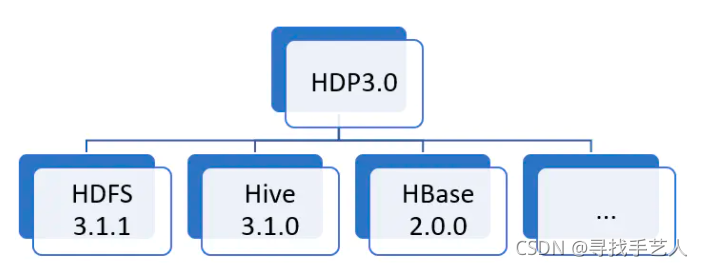
Stack为一系列service的集合。可以在Ambari中定义多个不同版本的stacks。比如HDP3.1为一个stack,可以包含Hadoop, Spark等等多个特定版本的service。
common-services目录位于源码包的ambari-server/src/main/resources/common-services目录中。如果某个服务需要在多个stacks之中共享,需要将此service定义在common-services中。通常来说common-services中给出了各个service的公用配置。

如图所示,以HDFS为例,每个service的组成部分解释如下:
- Service ID:通常为大写,为Service名称。
configuration:存放了service对应的配置文件。该配置文件为XML格式。这些XML文件描述了service的配置项如何Ambari的组件配置页面展示(即service的图形化配置页面的配置文件,配置该页面包含什么配置项)。 - package:该目录包含了多个子目录。其中用service控制脚本(启动,停止和自定义操作等)和组件的配置文件模板。
- alert.json:service的告警信息定义。
- kerberos.json:service和Kerberos结合使用的配置信息。
- metainfo.xml:service最为重要的配置文件。其中定义的service的名称,版本号,简介和控制脚本名称等等信息。
- metrics.json:service的监控信息配置文件。
- widgets.json:service的监控图形界面展示的配置。
1.2 定义服务和组件
1.2.1 service metainfo.xml的基础配置项
以Hive服务为例:
<services>
    <service>
        <name>HIVE</name>
        <displayName>Hive</displayName>
        <comment>Data warehouse system ...</comment>
        <version>0.12.0.2.0</version>
    </service>
</services>
displayName,comment和version中的内容会展示在安装service的第一步,勾选所需组件的列表中。
1.2.2 component相关配置
component配置组规定了该服务下每个组件的部署方式和控制脚本等内容。
服务中的metainfo.xml文件描述了服务、服务的组件和用于执行命令的管理脚本。服务的组件可以是MASTER、SLAVE或CLIENT类别。告诉Ambari应该使用哪些默认命令来管理和监视组件。
| 主键类别 | 默认生命周期命令 |
|---|---|
| MASTER | install, start, stop, configure, status |
| SLAVE | install, start, stop, configure, status |
| CLIENT | install, configure, status |
对于每个组件,在执行命令时指定要使用的。组件必须支持一组定义好的默认命令:
例如,在YARN服务中,ResourceManager组件在metainfo.xml中描述如下:
<component>
  <name>RESOURCEMANAGER</name>
  <category>MASTER</category>
  <commandScript>
    <script>scripts/resourcemanager.py</script>
    <scriptType>PYTHON</scriptType>
    <timeout>600</timeout>
  </commandScript>
  <customCommands>
    <customCommand>
      <name>DECOMMISSION</name>
      <commandScript>
        <script>scripts/resourcemanager.py</script>
        <scriptType>PYTHON</scriptType>
        <timeout>600</timeout>
      </commandScript>
    </customCommand>
  </customCommands>
</component>
ResourceManager是一个MASTER组件,命令脚本为scripts/ ResourceManager .py,可以在services/YARN/package目录下找到。该命令脚本是PYTHON,该脚本将默认的生命周期命令作为PYTHON方法实现。这是默认install命令的安装方法:
class Resourcemanager(Script):
  def install(self, env):
    self.install_packages(env)
    self.configure(env)
你还可以看到一个自定义命令被定义为DECOMMISSION,这意味着在那个python命令脚本中也有一个DECOMMISSION方法:
def decommission(self, env):
  import params

  ...

  Execute(yarn_refresh_cmd,
          user=yarn_user
  )
  pass
其中各个配置项的解释:
 - name:组件名称。
 - displayName:组件显示的名称。
 - category:组件的类型,包含MASTER,SLAVE和CLIENT三种。其中MASTER和SLAVE是有状态的(启动和停止),CLIENT是无状态的。
 - cardinality:该组件可以安装几个实例。可以支持如下格式。1:一个实例。1-2:1个至2个实例。1+:1个或多个实例。
 - commandScript:组件的控制脚本配置。
 - logs:为log search服务提供日志接入。
其中commandScript中的配置项含义如下:
 - script:该组件的控制脚本相对路径。
 - scriptType:脚本类型,通常我们使用Python脚本。
 - timeout:脚本执行的超时时间。
1.2.2 使用stack继承
stack可以扩展其他stack以共享命令脚本和配置。这减少了stack之间的代码复制。
例如,HDP 3.1栈扩展了HDP3.0栈,所以只有适用于HDP 3.1栈的变化才会出现在栈定义中。这个扩展定义在metainfo.xml为HDP 3.1stacks:
cd var/lib/ambari-server/resources/stacks/HDP/3.1
<metainfo>
  <versions>
    <active>true</active>
  </versions>
  <extends>3.0</extends>
  <minjdk>1.8</minjdk>
  <maxjdk>1.8</maxjdk>
</metainfo>
以HDP这个stack为例,各个版本的HDP存在继承关系,高版本的HDP的各个组件的配置继承自低版本的HDP。这条继承线可以一直追溯至HDP2.0.6。
此时common-services中的配置为何可以共用就得到了解释。common-services中的service配置之所以会生效,是因为在最基础的HDP stack(2.0.6)中,每个service都继承了common-services中的对应配置。
更为详细的介绍请参考官方文档:https://cwiki.apache.org/confluence/display/AMBARI/Writing+metainfo.xml
2. 案例:实现自定义服务
在本例中,我们将创建一个名为“SAMPLESRV”的自定义服务,并将其添加到现有的stack定义中。该服务包括MASTER、SLAVE和CLIENT组件。
- 在Ambari Server上,浏览到/var/lib/ Ambari - Server /resources/stacks/HDP/3.1/services目录。在本例中,我们将浏览到HDP 3.1stack定义
cd /var/lib/ambari-server/resources/stacks/HDP/3.1/services
- 创建一个目录/var/lib/ ambali -server/resources/stacks/HDP/2.0.6/services/SAMPLESRV,其中包含SAMPLESRV的服务定义
mkdir /var/lib/ambari-server/resources/stacks/HDP/3.1/services/SAMPLESRV
cd /var/lib/ambari-server/resources/stacks/HDP/3.1/services/SAMPLESRV
- 浏览到新创建的SAMPLESRV目录,创建一个描述新服务的metainfo.xml文件。例如:
<?xml version="1.0"?>
<metainfo>
    <schemaVersion>2.0</schemaVersion>
    <services>
        <service>
            <name>SAMPLESRV</name>
            <displayName>New Sample Service</displayName>
            <comment>A New Sample Service</comment>
            <version>1.0.0</version>
            <components>
                <component>
                    <name>SAMPLESRV_MASTER</name>
                    <displayName>Sample Srv Master</displayName>
                    <category>MASTER</category>
                    <cardinality>1</cardinality>
                    <commandScript>
                        <script>scripts/master.py</script>
                        <scriptType>PYTHON</scriptType>
                        <timeout>600</timeout>
                    </commandScript>
                </component>
                <component>
                    <name>SAMPLESRV_SLAVE</name>
                    <displayName>Sample Srv Slave</displayName>
                    <category>SLAVE</category>
                    <cardinality>1+</cardinality>
                    <commandScript>
                        <script>scripts/slave.py</script>
                        <scriptType>PYTHON</scriptType>
                        <timeout>600</timeout>
                    </commandScript>
                </component>
                <component>
                    <name>SAMPLESRV_CLIENT</name>
                    <displayName>Sample Srv Client</displayName>
                    <category>CLIENT</category>
                    <cardinality>1+</cardinality>
                    <commandScript>
                        <script>scripts/sample_client.py</script>
                        <scriptType>PYTHON</scriptType>
                        <timeout>600</timeout>
                    </commandScript>
                </component>
            </components>
            <osSpecifics>
                <osSpecific>
                    <osFamily>any</osFamily>  <!-- note: use osType rather than osFamily for Ambari 1.5.0 and 1.5.1 -->
                </osSpecific>
            </osSpecifics>
        </service>
    </services>
</metainfo>
- 在上面,我的服务名称是“SAMPLESRV”,它包含:
- 一个主组件“SAMPLESRV_MASTER”
- 一个从组件“SAMPLESRV_SLAVE”
- 一个客户端组件“SAMPLESRV_CLIENT”
- 接下来,让我们创建命令脚本。为我们在服务元数据中指定的命令脚本/var/lib/ambari-server/resources/stacks/HDP/3.1/services/SAMPLESRV/package/scripts创建一个目录。
mkdir -p /var/lib/ambari-server/resources/stacks/HDP/2.0.6/services/SAMPLESRV/package/scripts
cd /var/lib/ambari-server/resources/stacks/HDP/2.0.6/services/SAMPLESRV/package/scripts
- 浏览到scripts目录并创建.py命令脚本文件
例如master.py文件:
import sys
from resource_management import *
class Master(Script):
  def install(self, env):
    print 'Install the Sample Srv Master';
  def stop(self, env):
    print 'Stop the Sample Srv Master';
  def start(self, env):
    print 'Start the Sample Srv Master';

  def status(self, env):
    print 'Status of the Sample Srv Master';
  def configure(self, env):
    print 'Configure the Sample Srv Master';
if __name__ == "__main__":
  Master().execute()
例如slave.py文件:
import sys
from resource_management import *
class Slave(Script):
  def install(self, env):
    print 'Install the Sample Srv Slave';
  def stop(self, env):
    print 'Stop the Sample Srv Slave';
  def start(self, env):
    print 'Start the Sample Srv Slave';
  def status(self, env):
    print 'Status of the Sample Srv Slave';
  def configure(self, env):
    print 'Configure the Sample Srv Slave';
if __name__ == "__main__":
  Slave().execute()
例如sample_client.py文件:
import sys
from resource_management import *
class SampleClient(Script):
  def install(self, env):
    print 'Install the Sample Srv Client';
  def configure(self, env):
    print 'Configure the Sample Srv Client';
if __name__ == "__main__":
  SampleClient().execute()
- 现在,重新启动Ambari Server,以便将这个新的服务定义分发到集群中的所有代理。
ambari-server restart
3. 其他更多的配置项,请参考官方文档:
https://cwiki.apache.org/confluence/display/AMBARI/Configuration+support+in+Ambari
4. Ambari官网参考资料
https://cwiki.apache.org/confluence/display/AMBARI/Defining+a+Custom+Stack+and+Services


 1806
1806


 被折叠的 条评论
为什么被折叠?
被折叠的 条评论
为什么被折叠?
 到【灌水乐园】发言


