


前言
在上篇介绍了android动画的一些基本用法,如果仔细看过的话,要对付一般的动画效果,想必是没有太大问题的,但是对于某些特殊需求,单纯用最基本的用法是没法实现的,很明显,这些都是需要我们自己去定义的东西。
今天我来讲讲android动画的高级用法。下面我将从以下几方面来讲这个高级用法:
LayoutAnimation
先来讲讲这个LayoutAnimation(布局动画),算是对上篇View动画的补充。
布局动画xml用法
我们先看看如何用布局来实现。
首先看看主布局文件:
<?xml version="1.0" encoding="utf-8"?>
<LinearLayout
    xmlns:android="http://schemas.android.com/apk/res/android"
    android:id="@+id/activity_main"
    android:layout_width="match_parent"
    android:layout_height="match_parent"
    android:orientation="vertical">

    <LinearLayout
        android:layout_width="match_parent"
        android:layout_height="wrap_content"
        android:orientation="horizontal">

        <Button
            android:layout_width="0dp"
            android:layout_height="wrap_content"
            android:layout_weight="1"
            android:onClick="ShowListView"
            android:text="显示列表"/>

        <Button
            android:layout_width="0dp"
            android:layout_height="wrap_content"
            android:layout_weight="1"
            android:onClick="HideListView"
            android:text="隐藏列表"/>
    </LinearLayout>

    <ListView
        android:layout_width="match_parent"
        android:layout_height="0dp"
        android:layout_weight="1"
        android:visibility="gone"
        android:layoutAnimation="@anim/layout_animation"
        android:id="@+id/testListView">
    </ListView>

</LinearLayout>
定义了两个按钮和一个列表视图,按钮来控制列表的显示和隐藏。
然后是布局动画的定义以及动画的定义
<?xml version="1.0" encoding="utf-8"?>
<layoutAnimation xmlns:android="http://schemas.android.com/apk/res/android"
    android:delay="0.5"
    android:animation="@anim/test_animation"
    android:animationOrder="normal">

</layoutAnimation>
<?xml version="1.0" encoding="utf-8"?>
<set xmlns:android="http://schemas.android.com/apk/res/android"
android:duration="2000">
<alpha android:fromAlpha="0"
android:toAlpha="1">
</alpha>
<rotate android:fromDegrees="0"
android:toDegrees="360">
</rotate>
</set>代码非常简洁,就一个旋转和渐变。
最后是代码的调用:
public class MainActivity extends AppCompatActivity {

    private ListView mListView;
    private ArrayAdapter<String> mAdapter;

    @Override
    protected void onCreate(Bundle savedInstanceState) {
        super.onCreate(savedInstanceState);
        setContentView(R.layout.activity_main);

        mListView = (ListView) findViewById(R.id.testListView);

        String[] list = {"1", "2", "3", "4", "5", "6", "7"};
        mAdapter = new ArrayAdapter<String>(this, android.R.layout
                .simple_list_item_1, list);
        mListView.setAdapter(mAdapter);
    }

    public void ShowListView(View v) {
        mListView.setVisibility(View.VISIBLE);
    }

    public void HideListView(View v) {
        mListView.setVisibility(View.INVISIBLE);
    }
}
我们来看看效果:
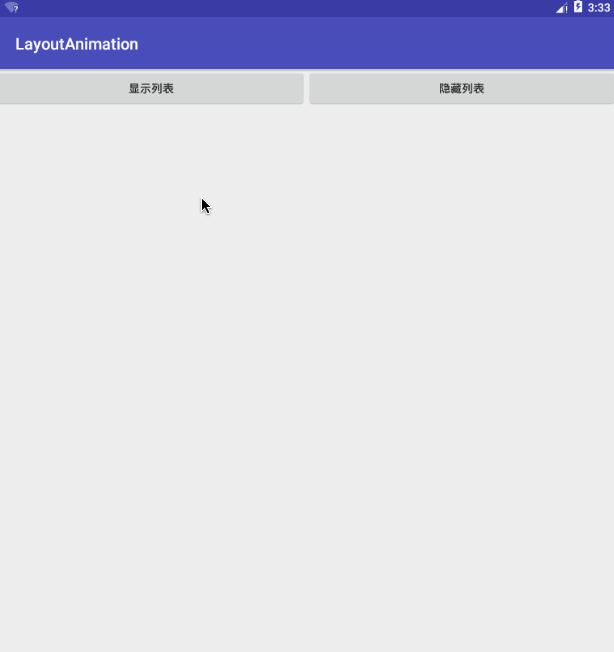
从上面的gif图可以看出,第一次显示的时候是执行动画的,但是再次显示的时候就没有动画效果了,也就是说,布局动画只有在你设置布局动画的控件第一次显示的时候有效果,在之后就没有效果了,如果要动画效果,就只能按照上篇介绍的自己设置动画效果了。
布局动画代码用法
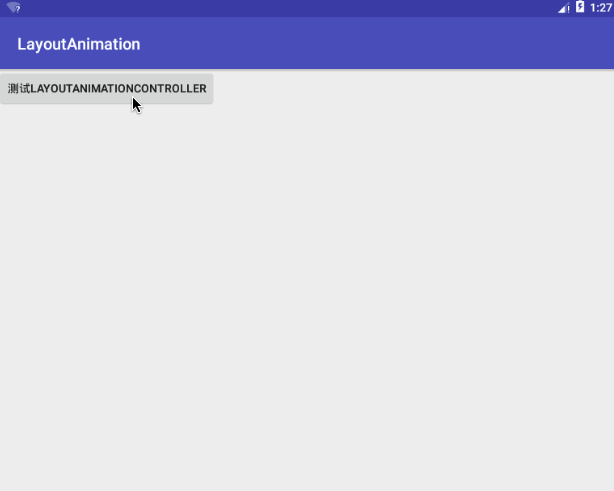
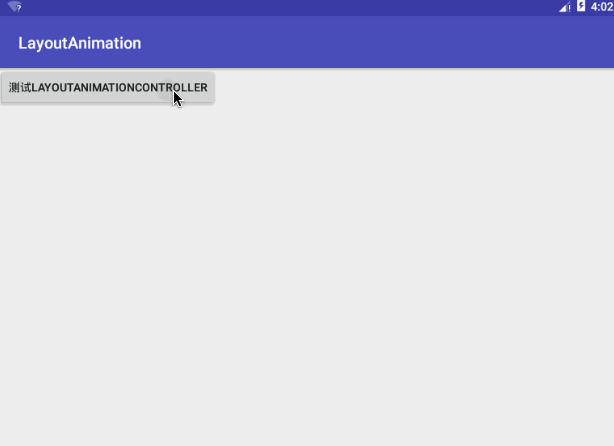
代码用法其实就是使用LayoutAnimationController,我们直接看代码吧:
Animation animation = AnimationUtils.loadAnimation(this,R.anim.test_animation);
        LayoutAnimationController controller = new LayoutAnimationController(animation);
        controller.setDelay(0.5f);
        controller.setOrder(LayoutAnimationController.ORDER_NORMAL);
        mListView.setLayoutAnimation(controller);
将布局中的android:layoutAnimation=”@anim/layout_animation”取消,并在代码中添加上述代码,就可以通过代码来实现布局动画了,效果和上面一样,就不发图了。
自定义布局动画的播放顺序
之前我们使用了LayoutAnimation,并且使用了setOrder来控制播放的顺序,系统默认提供的顺序只有三种:
public class LayoutAnimationController {
    /**
     * Distributes the animation delays in the order in which view were added
     * to their view group.
     */
    public static final int ORDER_NORMAL  = 0;

    /**
     * Distributes the animation delays in the reverse order in which view were
     * added to their view group.
     */
    public static final int ORDER_REVERSE = 1;

    /**
     * Randomly distributes the animation delays.
     */
    public static final int ORDER_RANDOM  = 2;
    ...
 }
分别是顺序、反序以及随机,有时候这三种方式不一定能满足我们的需求,此时,我们就需要自己实现动画的播放顺序,那么,如何实现呢,查看LayoutAnimationController的源码可以发现有这么两个方法
- getDelayForView(View view):返回当前view动画播放的延迟时间
- getTransformedIndex(AnimationParameters params):返回动画的播放顺序
我们来看下这两个方法。先看第二个方法,该方法返回动画播放的顺序,当顺序时,该顺序为0、1、2、3… n;当反序时,该顺序为n、n - 1… 0;当随机时,为0~n中的随机数;下面来看看第一个方法,第一个方法才是真正计算动画的延迟时间的,它会调用第二个方法,并根据其返回的播放顺序来计算延迟时间,可看如下源码:
final float delay = mDelay * mAnimation.getDuration();
final long viewDelay = (long) (getTransformedIndex(params) * delay);
这个动画的播放顺序影响着延迟时间,而延迟时间就是决定动画执行先后的根源,因此,我们只需要重写getTransformedIndex这个方法即可改变动画执行的顺序,当然你也可以重写getDelayForView方法,自己来定义动画的延迟时间。下面我们来看看如何实现。
首先自定义一个LayoutAnimationController类
public class CustomLayoutAnimationController extends LayoutAnimationController {

    public final static int CUSTOM_ORDER = 7;
    private CurrentIndexListener mListener;


    public CustomLayoutAnimationController(Context context, AttributeSet attrs) {
        super(context, attrs);
    }

    public CustomLayoutAnimationController(Animation animation) {
        super(animation);
    }

    public CustomLayoutAnimationController(Animation animation, float delay) {
        super(animation, delay);
    }

    public void setCurrentIndexListener(CurrentIndexListener listener){
        this.mListener = listener;
    }

    @Override
    protected int getTransformedIndex(AnimationParameters params) {
        if (mListener != null && getOrder() == CUSTOM_ORDER) {
            return mListener.currentIndex(this, params.count, params.index);
        } else {
            return super.getTransformedIndex(params);
        }
    }

    public interface CurrentIndexListener {
        int currentIndex(CustomLayoutAnimationController controller, int count, int index);
    }
}
自定义一个CUSTOM_ORDER参数,重写getTransformedIndex方法并流出接口来自定义播放顺序,下面我们来看看如何自定义播放顺序,直接上完整代码了
public class TestCustomLayoutAnimationController extends AppCompatActivity implements
        CustomLayoutAnimationController.CurrentIndexListener {

    private GridLayout gridLayout;

    @Override
    protected void onCreate(@Nullable Bundle savedInstanceState) {
        super.onCreate(savedInstanceState);
        setContentView(R.layout.activity_layout_animation_controller);

        gridLayout = (GridLayout) findViewById(R.id.gridLayout);


        ScaleAnimation animation = new ScaleAnimation(1, 0, 1, 0, Animation.RELATIVE_TO_SELF,
                0.5f, Animation.RELATIVE_TO_SELF, 0.5f);
        animation.setDuration(500);
        animation.setFillAfter(true);

        CustomLayoutAnimationController customLayoutAnimationController = new
                CustomLayoutAnimationController(animation);
        customLayoutAnimationController.setOrder(CustomLayoutAnimationController.CUSTOM_ORDER);
        customLayoutAnimationController.setDelay(0.2f);
        customLayoutAnimationController.setCurrentIndexListener(this);
        gridLayout.setLayoutAnimation(customLayoutAnimationController);
    }

    @Override
    public int currentIndex(CustomLayoutAnimationController controller, int count, int index) {
        int result = 1;
        switch (index % 4) {
            case 0:
                result = 3;
                break;
            case 1:
                result = 4;
                break;
            case 2:
                result = 5;
                break;
            case 3:
                result = 6;
                break;
        }
        return  result;
    }
}
新建自定义类的实例对象,然后实现CurrentIndexListener接口,并且使用自定义参数CUSTOM_ORDER作为播放顺序参数。这里我设置的播放顺序是从左往右每两个view进行动画变化,只做参考用,大家可修改为自己想要的。
下面来看看布局:
<?xml version="1.0" encoding="utf-8"?>
<GridLayout xmlns:android="http://schemas.android.com/apk/res/android"
            android:layout_width="match_parent"
            android:layout_height="match_parent"
            android:columnCount="4"
            android:rowCount="2"
            android:id="@+id/gridLayout"
            android:orientation="horizontal">

    <ImageView
        android:layout_width="96dp"
        android:layout_height="96dp"
        android:background="@android:color/holo_blue_light"/>

    <ImageView
        android:layout_width="96dp"
        android:layout_height="96dp"
        android:background="@android:color/holo_orange_light"/>

    <ImageView
        android:layout_width="96dp"
        android:layout_height="96dp"
        android:background="@android:color/holo_green_light"/>

    <ImageView
        android:layout_width="96dp"
        android:layout_height="96dp"
        android:background="@android:color/holo_red_light"/>

    <ImageView
        android:layout_width="96dp"
        android:layout_height="96dp"
        android:background="@android:color/holo_red_light"/>

    <ImageView
        android:layout_width="96dp"
        android:layout_height="96dp"
        android:background="@android:color/holo_green_light"/>

    <ImageView
        android:layout_width="96dp"
        android:layout_height="96dp"
        android:background="@android:color/holo_orange_light"/>

    <ImageView
        android:layout_width="96dp"
        android:layout_height="96dp"
        android:background="@android:color/holo_blue_light"/>

</GridLayout>
布局没啥好说的,直接看效果吧:
下面我来介绍一种更简单的方法GridLayoutAnimationController。
GridLayoutAnimationController
GridLayoutAnimationController是LayoutAnimationController的子类,它主要用于grid布局的动画,但是当我使用GridLayout来使用这个动画时,总是报LayoutAnimationController.AnimationParameters can not be cast to GridLayoutAnimationController.AnimationParameters,可能GridLayoutAnimationController只能作用于GridView吧,下面我就以GridView来谈谈这个动画。
我们先看看GridLayoutAnimation:
<gridLayoutAnimation xmlns:android="http://schemas.android.com/apk/res/android"
    android:columnDelay="0.5"
    android:rowDelay="0"
    android:direction="left_to_right"
    android:directionPriority="none"
    android:animation="@anim/test_animation">

</gridLayoutAnimation>- android:columnDelay:行动画延迟,取值0~1的浮点数,也可以取百分数
- android:rowDelay:行动画延迟,取值同上
- android:direction:动画执行方向,可选左至右、上至下、下至上、右至左,可以组合使用
- android:directionPriority:方向优先级,有row、column和none三个值,分别代表列优先、行优先以及行列同时进行。关于优先级我就以row来讲解,列优先时,动画会从第一列的第一个元素开始然后经过列延迟,执行第一列的第二个元素,以此类推,并且此时会忽略行动画延迟;同样的,行优先时忽略列延迟;none时,行列延迟都需要考虑。
下面我们看看具体的实现吧,先看布局:
<?xml version="1.0" encoding="utf-8"?>
<LinearLayout xmlns:android="http://schemas.android.com/apk/res/android"
              android:layout_width="wrap_content"
              android:layout_height="wrap_content">

    <GridView
        android:id="@+id/gridView"
        android:layout_width="match_parent"
        android:layout_height="wrap_content"
        android:columnWidth="96dp"
        android:horizontalSpacing="2dp"
        android:numColumns="4"
        android:stretchMode="none"
        android:verticalSpacing="2dp"></GridView>
</LinearLayout>
然后是代码中的实现:
        mGridView = (GridView) findViewById(R.id.gridView);
        List<Integer> colorList = new ArrayList<Integer>();
        colorList.add(android.R.color.holo_blue_light);
        colorList.add(android.R.color.holo_orange_light);
        colorList.add(android.R.color.holo_green_light);
        colorList.add(android.R.color.holo_red_light);
        colorList.add(android.R.color.holo_red_light);
        colorList.add(android.R.color.holo_green_light);
        colorList.add(android.R.color.holo_orange_light);
        colorList.add(android.R.color.holo_blue_light);
        GridAdapter mAdapter = new GridAdapter(this,colorList);
        mGridView.setAdapter(mAdapter);

        ScaleAnimation animation = new ScaleAnimation(1, 0, 1, 0, Animation.RELATIVE_TO_SELF,
                0.5f, Animation.RELATIVE_TO_SELF, 0.5f);
        animation.setStartOffset(600);
        animation.setDuration(500);
        animation.setFillAfter(true);

        GridLayoutAnimationController controller = new GridLayoutAnimationController(animation,0.2f,0f);
        controller.setDirection(GridLayoutAnimationController.DIRECTION_LEFT_TO_RIGHT);
        controller.setDirectionPriority(GridLayoutAnimationController.PRIORITY_NONE);
        mGridView.setLayoutAnimation(controller);
这里我用的是代码来实现GridLayoutAnimationController,和xml中实现没区别。
关于GridView适配器的实现我也把代码贴出来吧:
public class GridAdapter extends BaseAdapter {

    private List<Integer> colorList;
    private AppCompatActivity mContext;
    private LayoutInflater mInflater;

    public GridAdapter(AppCompatActivity context, List<Integer> list){
        this.colorList = list;
        this.mContext = context;
        mInflater = context.getLayoutInflater();
    }

    @Override
    public int getCount() {
        return colorList.size();
    }

    @Override
    public Object getItem(int position) {
        return colorList.get(position);
    }

    @Override
    public long getItemId(int position) {
        return position;
    }

    @Override
    public View getView(int position, View convertView, ViewGroup parent) {
        ViewHolder viewHolder;
        if(convertView == null){
            convertView = mInflater.inflate(R.layout.activity_gridview,null);
            viewHolder = new ViewHolder();
            viewHolder.imageView = (ImageView) convertView.findViewById(R.id.imageView);
            convertView.setTag(viewHolder);
        }else {
            viewHolder = (ViewHolder) convertView.getTag();
        }
        viewHolder.imageView.setBackgroundResource(colorList.get(position));
        return convertView;
    }

    class ViewHolder{
        ImageView imageView;
    }

}
最后看看效果:
效果是不是和上面完全一样?除了每个控件之间间隔2dp。使用GridLayoutAnimationController来实现这种grid布局的动画效果非常的方便。
LayoutTransition
LayoutTransition与LayoutAnimation的区别之处在于LayoutTransition使用的是属性动画,而LayoutAnimation使用的是View动画。在介绍LayoutTransition之前我们先来介绍andoird默认的布局动画。
animateLayoutChanges
凡是派生自ViewGroup的控件都有该属性,当返回true时,将打开该ViewGroup下的默认过渡动画,即该ViewGroup中的子控件显示时都拥有默认的过渡动画;将返回false时不具备过渡效果。下面我们来看看该属性的效果。
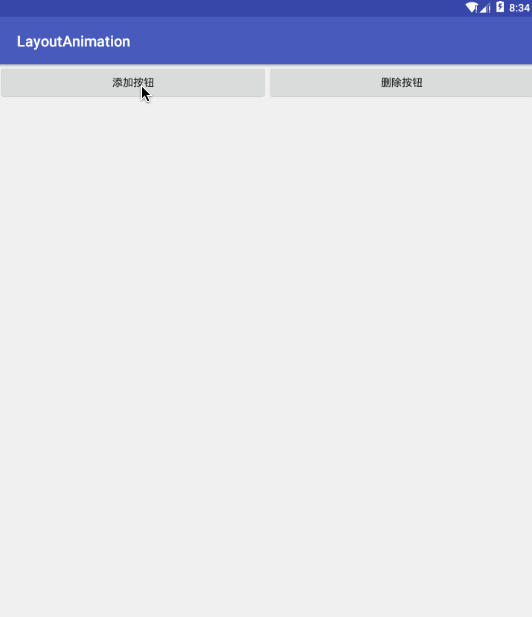
先来看看布局代码,非常简单,只需要添加该条属性即可:
<?xml version="1.0" encoding="utf-8"?>
<LinearLayout
    android:id="@+id/activity_main"
    xmlns:android="http://schemas.android.com/apk/res/android"
    android:layout_width="match_parent"
    android:orientation="vertical"
    android:animateLayoutChanges="true"
    android:layout_height="match_parent">


    <LinearLayout
        android:layout_width="match_parent"
        android:layout_height="wrap_content"
        android:orientation="horizontal">

        <Button
            android:layout_width="0dp"
            android:layout_height="wrap_content"
            android:layout_weight="1"
            android:onClick="AddButton"
            android:text="添加按钮"/>

        <Button
            android:layout_width="0dp"
            android:layout_height="wrap_content"
            android:layout_weight="1"
            android:onClick="RemoveButton"
            android:text="删除按钮"/>

    </LinearLayout>

</LinearLayout>
下面看看代码中的实现:
public class MainActivity extends AppCompatActivity {

    private LinearLayout mLayout;
    private int num = 0;

    @Override
    protected void onCreate(Bundle savedInstanceState) {
        super.onCreate(savedInstanceState);
        setContentView(R.layout.activity_main);

        mLayout = (LinearLayout) findViewById(R.id.activity_main);

    }

    public void AddButton(View v) {
        num++;
        Button button = new Button(this);
        button.setText("Button" + num);
        LinearLayout.LayoutParams params = new LinearLayout.LayoutParams(ViewGroup.LayoutParams
                .WRAP_CONTENT, ViewGroup.LayoutParams.WRAP_CONTENT);
        button.setLayoutParams(params);
        mLayout.addView(button, num);
    }

    public void RemoveButton(View v) {
        if (num > 0) {
            Button button = (Button) mLayout.getChildAt(num);
            mLayout.removeView(button);
            num--;
        }
    }
}
以上代码非常容易理解,就是在LinearLayout中添加按钮和删除按钮。
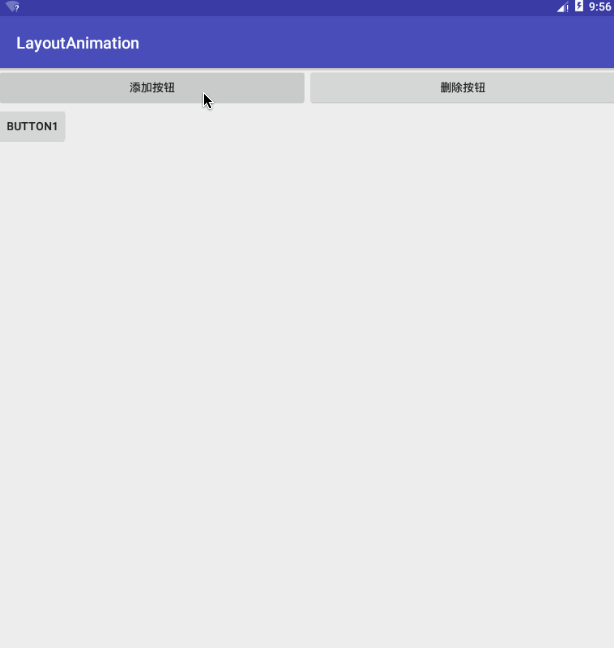
最后我们来看看效果:
会有一个逐渐显现的过渡效果。
LayoutTransition的实现
android默认的布局动画效果无法进行自定义,因此要实现自定义布局动画,我们可以使用LayoutTransition来实现,下面先来看看LayoutTransition的四个标志:
public class LayoutTransition {

    /**
     * A flag indicating the animation that runs on those items that are changing
     * due to a new item appearing in the container.
     */
    public static final int CHANGE_APPEARING = 0;

    /**
     * A flag indicating the animation that runs on those items that are changing
     * due to an item disappearing from the container.
     */
    public static final int CHANGE_DISAPPEARING = 1;

    /**
     * A flag indicating the animation that runs on those items that are appearing
     * in the container.
     */
    public static final int APPEARING = 2;

    /**
     * A flag indicating the animation that runs on those items that are disappearing
     * from the container.
     */
    public static final int DISAPPEARING = 3;

    /**
     * A flag indicating the animation that runs on those items that are changing
     * due to a layout change not caused by items being added to or removed
     * from the container. This transition type is not enabled by default; it can be
     * enabled via {@link #enableTransitionType(int)}.
     */
    public static final int CHANGING = 4;
    ...
}- CHANGE_APPEARING:当ViewGroup中一个新的控件显示时其他控件所执行的动画标志;
- CHANGE_DISAPPEARING:当ViewGroup中一个控件消失时其他控件所执行的动画标志;
- APPEARING:当ViewGroup中一个新的控件显示时所执行的动画标志;
- DISAPPEARING:当ViewGroup中一个控件消失时所执行的动画标志;
- CHANGING:子View在容器中位置改变时的过渡动画,不涉及删除或者添加操作,这个暂时不做介绍了,默认是不开启的。
通过这4个标志,我们不仅可以对新加入和移除的控件执行动画,也可以在此时对该ViewGroup内其他控件执行动画效果,下面来看看具体实现。
先看看主布局文件:
<?xml version="1.0" encoding="utf-8"?>
<LinearLayout xmlns:android="http://schemas.android.com/apk/res/android"
              android:layout_width="match_parent"
              android:layout_height="match_parent"
              android:id="@+id/linearLayout"
              android:orientation="vertical">

    <LinearLayout
        android:layout_width="match_parent"
        android:layout_height="wrap_content"
        android:orientation="horizontal">

        <Button
            android:layout_width="0dp"
            android:layout_height="wrap_content"
            android:layout_weight="1"
            android:onClick="AddButton"
            android:text="添加按钮"/>

        <Button
            android:layout_width="0dp"
            android:layout_height="wrap_content"
            android:layout_weight="1"
            android:onClick="DeleteButton"
            android:text="删除按钮"/>
    </LinearLayout>
</LinearLayout>
接着来看看代码中的实现:
public class TestLayoutTransition extends AppCompatActivity {

    private LinearLayout mLinearLayout;
    private int num = 0;

    @Override
    protected void onCreate(@Nullable Bundle savedInstanceState) {
        super.onCreate(savedInstanceState);
        setContentView(R.layout.test_layout_transition);

        mLinearLayout = (LinearLayout) findViewById(R.id.linearLayout);

        LayoutTransition transition = new LayoutTransition();

        //appearing动画
        ObjectAnimator animator1 = ObjectAnimator.ofFloat(null, "translationX", 0f, 100f);
        //disappearing动画
        ObjectAnimator animator2 = ObjectAnimator.ofFloat(null, "rotation", 0f, 90f, 0f);
        /* 这里得额外注意!使用change_appearing和change_disappearing时必须使用PropertyValuesHolder来构建,
        并且必须使用以下4个中的两个,如果相关属性不想变动的话,那么就都设置一样的值,比如(0,0),另外,如果想要
        动画生效,必须保证开始和结尾的值相同,比如(0,1,0)就是有效的,(100,100)是无效的*/
        PropertyValuesHolder pvhLeft = PropertyValuesHolder.ofInt("left", 0, 0);
        PropertyValuesHolder pvhTop = PropertyValuesHolder.ofInt("top", 0, 0);
        PropertyValuesHolder pvhRight = PropertyValuesHolder.ofInt("right", 0, 0);
        PropertyValuesHolder pvhBottom = PropertyValuesHolder.ofInt("bottom", 0, 0);

        //change_appearing动画
        PropertyValuesHolder animatorA = PropertyValuesHolder.ofFloat("scaleX", 1f, 2f, 1f);
        ObjectAnimator animator3 = ObjectAnimator.ofPropertyValuesHolder(mLinearLayout, pvhLeft,
                pvhTop, pvhRight, pvhBottom, animatorA);

        //change_disappearing动画
        PropertyValuesHolder animatorD = PropertyValuesHolder.ofFloat("scaleX", 1f, 0.5f, 1f);
        ObjectAnimator animator4 = ObjectAnimator.ofPropertyValuesHolder(mLinearLayout, pvhLeft,
                pvhTop, pvhRight, pvhBottom, animatorD);

        //设置各个阶段的动画
        transition.setAnimator(LayoutTransition.APPEARING, animator1);
        transition.setAnimator(LayoutTransition.DISAPPEARING, animator2);
        transition.setAnimator(LayoutTransition.CHANGE_APPEARING, animator3);
        transition.setAnimator(LayoutTransition.CHANGE_DISAPPEARING, animator4);

        //分别设置各类型动画的执行时间,不设置也没关系,系统默认是300ms
        transition.setDuration(LayoutTransition.APPEARING, 500);
        transition.setDuration(LayoutTransition.DISAPPEARING, 500);
        transition.setDuration(LayoutTransition.CHANGE_APPEARING, 1000);
        transition.setDuration(LayoutTransition.CHANGE_DISAPPEARING, 1000);

        //设置change_appearing和change_disappearing时各个子item执行动画的延迟时间
        transition.setStagger(LayoutTransition.CHANGE_APPEARING, 100);
        transition.setStagger(LayoutTransition.CHANGE_DISAPPEARING, 100);

        mLinearLayout.setLayoutTransition(transition);
    }

    public void AddButton(View v) {
        num++;
        Button button = new Button(this);
        button.setText("Button" + num);
        LinearLayout.LayoutParams params = new LinearLayout.LayoutParams(ViewGroup.LayoutParams
                .WRAP_CONTENT, ViewGroup.LayoutParams.WRAP_CONTENT);
        button.setLayoutParams(params);
        mLinearLayout.addView(button, 1);
    }

    public void DeleteButton(View v) {
        if (num > 0) {
            mLinearLayout.removeViewAt(1);
            num--;
        }
    }
}
上面代码注解的已经非常详细了,主要还是change_appearing和change_disappearing时比较特殊,一定要记住,如果直接使用ObjectAnimator是无效的,大家可以自己去尝试下加深印象。
最后看看效果:
使用了setStagger就是上面的效果,不然所有item是同时执行动画的。
属性动画之get和set
关于属性动画的基本用法,上篇我们已经介绍过了,不过,在使用属性动画的时候有一点是需要注意的,我先贴出一段ObjectAnimator源码中的文字介绍:
Appropriate set/get functions are then determined internally and the animation will call these functions as necessary to animate the property.什么意思呢,就是说使用属性动画时,要使用动画的属性必须含有set和get方法,这和属性动画的原理是一致的,因为属性动画其实就是通过set方法来根据相应时间进行属性值的改变并以此达到动画的效果。所以,如果一个属性不支持get和set方法,那么就没法使用属性动画,那么,如何让任何属性都支持属性动画呢,请看下面的例子。
先上布局:
<?xml version="1.0" encoding="utf-8"?>
<LinearLayout xmlns:android="http://schemas.android.com/apk/res/android"
android:orientation="vertical"
android:layout_width="match_parent"
android:layout_height="match_parent">
<Button
android:layout_width="wrap_content"
android:layout_height="wrap_content"
android:text="执行动画"
android:onClick="DoAnimator"/>
<ListView
android:layout_width="200dp"
android:layout_height="wrap_content"
android:id="@+id/animatorListView"></ListView>
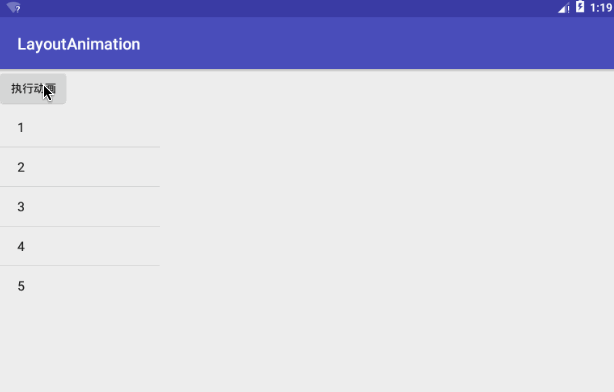
</LinearLayout>布局没啥好说的,一个按钮和一个listView。
下面上代码中的实现:
public class TestSetAndGet extends AppCompatActivity {

    private ListView mListView;

    @Override
    protected void onCreate(@Nullable Bundle savedInstanceState) {
        super.onCreate(savedInstanceState);
        setContentView(R.layout.activity_set_and_get);

        mListView = (ListView) findViewById(R.id.animatorListView);

        String[] numList = {"1", "2", "3", "4", "5"};
        ArrayAdapter<String> mAdapter = new ArrayAdapter<String>(this, android.R.layout
                .simple_list_item_1, numList);
        mListView.setAdapter(mAdapter);
    }

    public void DoAnimator(View v) {

        /* 直接使用此方法不行
        ObjectAnimator animator = ObjectAnimator.ofInt(mListView,"width",200,300,200);
        animator.setDuration(2000);
        animator.start();
        */

        /* 第一种方法(推荐)*/
        ViewWrapper viewWrapper = new ViewWrapper(mListView);
        ObjectAnimator animator = ObjectAnimator.ofInt(viewWrapper,"width",200,300,200);
        animator.setDuration(2000);
        animator.start();

        /* 第二种方法 */
//        ValueAnimator valueAnimator = ValueAnimator.ofInt(200,300,200);
//        valueAnimator.addUpdateListener(new ValueAnimator.AnimatorUpdateListener() {
//
//            private IntEvaluator evaluator = new IntEvaluator();
//
//            @Override
//            public void onAnimationUpdate(ValueAnimator animator) {
//
//                /* 第一种写法
//                float fraction = animator.getAnimatedFraction();
//                System.out.println("fraction:" + fraction);
//                if(fraction < 0.5f){
//                    mListView.getLayoutParams().width = evaluator.evaluate(fraction,200,400);
//                    System.out.println("<0.5:" + evaluator.evaluate(fraction,200,400));
//                }else {
//                    mListView.getLayoutParams().width = evaluator.evaluate(fraction,400,200);
//                    System.out.println(">0.5:" + evaluator.evaluate(fraction,400,200));
//                }
//                mListView.requestLayout();
//                */
//
//                /* 第二种写法 */
//                int currentValue = (int) animator.getAnimatedValue();
//                System.out.println("currentValue:" + currentValue);
//                mListView.getLayoutParams().width = currentValue;
//                mListView.requestLayout();
//            }
//        });
//        valueAnimator.setDuration(2000);
//        valueAnimator.start();

    }

    private static class ViewWrapper{

        private View targetView;

        public ViewWrapper(View view){
            this.targetView = view;
        }

        public int getWidth(){
            return  targetView.getLayoutParams().width;
        }

        public void setWidth(int widthValue){
            targetView.getLayoutParams().width = widthValue;
            targetView.requestLayout();
        }
    }
}
上面的代码注释写的很清楚了,主要介绍了两种实现的方式:
- 通过包装View来间接提供set和get方法,比较推荐;
- 通过监听ValueAnimator的动画过程,实现属性的改变,其中,又有两种实现方式:
- 直接通过animator返回的当前值来设置
- 通过animator返回的fraction(可以理解为时间片,取值0.0~1.0)自己来计算,其中要注意的是代码中将width从200~300~200,其中实际上变化的总量有200,所以计算时,需要从200开始,400结束,这样计算的值才不会出错,即(400 - 200) * 0.5 = 100,如果是300结束,那么在0.5时变化量为(300 - 200) * 0.5 = 50,就出错了,这点要注意。
最后看下效果图,两种实现方式都是相同的:
自定义估值器
估值器我们在上面已经用过了,用的是IntEvaluator,除了这个整形估值器外,还有ArgbEvaluator, FloatArrayEvaluator, FloatEvaluator, IntArrayEvaluator,PointFEvaluator, RectEvaluator。它的主要作用就是根据当前属性改变的时间百分比来计算改变后的属性值。一般来说系统给出的这些估值器已经够用了,除非是自己定义的属性类,需要自定义估值器。
比如我需要实现一个imageView的平移、旋转、缩放和透明度渐变,除了可以用AnimatorSet和PropertyValueHolder来实现组合动画外,还可以通过自定义估值器来进行实现,下面看看具体实现。
先上布局,只有一个按钮和imageView:
<?xml version="1.0" encoding="utf-8"?>
<RelativeLayout xmlns:android="http://schemas.android.com/apk/res/android"
              android:layout_width="match_parent"
              android:layout_height="match_parent">

    <Button
        android:layout_width="wrap_content"
        android:layout_height="wrap_content"
        android:onClick="StartAnimation"
        android:layout_centerInParent="true"
        android:text="开启动画"/>

    <ImageView
        android:id="@+id/dialogIv"
        android:layout_width="30dp"
        android:layout_height="30dp"
        android:background="@drawable/dialog"/>

</RelativeLayout>
下面看看自定义属性类的实现:
public class CustomProperty {

    private int rotationAngel;//旋转的角度
    private float alpha;//透明度
    private float scale;//缩放的大小
    private float x;
    private float y;

    public CustomProperty(int rotationAngel, float alpha, float scale, float x, float y) {
        this.rotationAngel = rotationAngel;
        this.alpha = alpha;
        this.scale = scale;
        this.x = x;
        this.y = y;
    }

    public int getRotationAngel() {
        return rotationAngel;
    }

    public void setRotationAngel(int rotationAngel) {
        this.rotationAngel = rotationAngel;
    }

    public float getAlpha() {
        return alpha;
    }

    public void setAlpha(float alpha) {
        this.alpha = alpha;
    }

    public float getScale() {
        return scale;
    }

    public void setScale(float scale) {
        this.scale = scale;
    }

    public float getX() {
        return x;
    }

    public void setX(float x) {
        this.x = x;
    }

    public float getY() {
        return y;
    }

    public void setY(float y) {
        this.y = y;
    }
}
很普通的class实现,包含x、y、scale、rotation以及alpha。
接着是自定义估值器的实现,我们可以看一些系统内置估值器的实现,主要就是evaluate这个方法,因此,我们只需要重写这个evaluate方法即可:
public class CustomEvaluator implements TypeEvaluator<CustomProperty> {

    @Override
    public CustomProperty evaluate(float fraction, CustomProperty startValue, CustomProperty
            endValue) {
        CustomProperty customProperty = new CustomProperty(0,0,0,0,0);
        customProperty.setX(400 * fraction);
        customProperty.setY(400 * fraction * fraction);
        customProperty.setAlpha(0.5f + fraction);
        customProperty.setRotationAngel((int) (1080 * fraction));
        customProperty.setScale(1 + fraction);
        return customProperty;
    }
}
很简单,自己通过计算返回一个customProperty,这里可以根据需求自行更改,反正返回一个自己想要的值。
然后我们看看代码中如何实现:
public class TestEvaluator extends AppCompatActivity {

    private ImageView dialogIv;

    @Override
    protected void onCreate(@Nullable Bundle savedInstanceState) {
        super.onCreate(savedInstanceState);
        setContentView(R.layout.activity_evaluator);

        dialogIv = (ImageView) findViewById(R.id.dialogIv);
    }

    public void StartAnimation(View v){
        ValueAnimator valueAnimator = new ValueAnimator();
        valueAnimator.setDuration(3000);
        valueAnimator.setObjectValues(new CustomProperty(0,0,0,0,0));
        //这里需要注意的是不能和下一句代码位置相反
        // 不然就报错,我这里就设置了endValue,如果设置多个,就是startValue和endValue都设置,也是可以的,不影响
        valueAnimator.setEvaluator(new CustomEvaluator());
        valueAnimator.start();
        valueAnimator.addUpdateListener(new ValueAnimator.AnimatorUpdateListener() {
            @Override
            public void onAnimationUpdate(ValueAnimator animation) {
                CustomProperty customProperty = (CustomProperty) animation.getAnimatedValue();
                dialogIv.setRotation(customProperty.getRotationAngel());
                dialogIv.setScaleX(customProperty.getScale());
                dialogIv.setScaleY(customProperty.getScale());
                dialogIv.setAlpha(customProperty.getAlpha());
                dialogIv.setX(customProperty.getX());
                dialogIv.setY(customProperty.getY());
                dialogIv.requestLayout();
            }
        });
    }
}
在onAnimationUpdate这个回调方法中通过getAnimatedValue()获取估值器返回的自定义属性类的值,再根据这些值给控件设置动画效果,其中的注意点已经写出来了,最后别忘了调用requestLayout()。
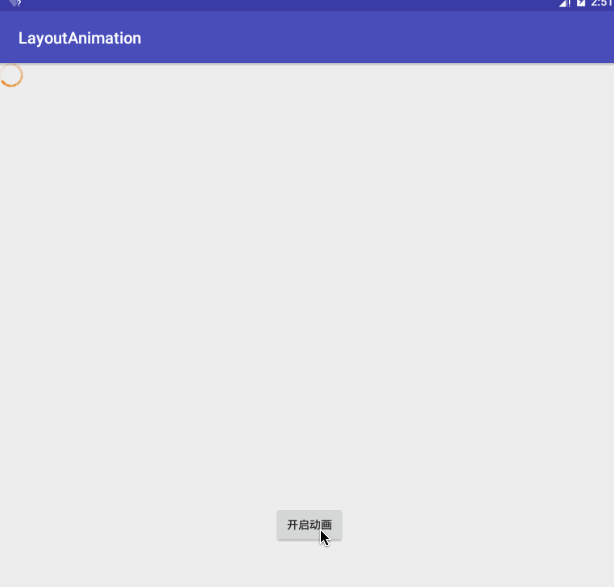
最后我们看下效果:
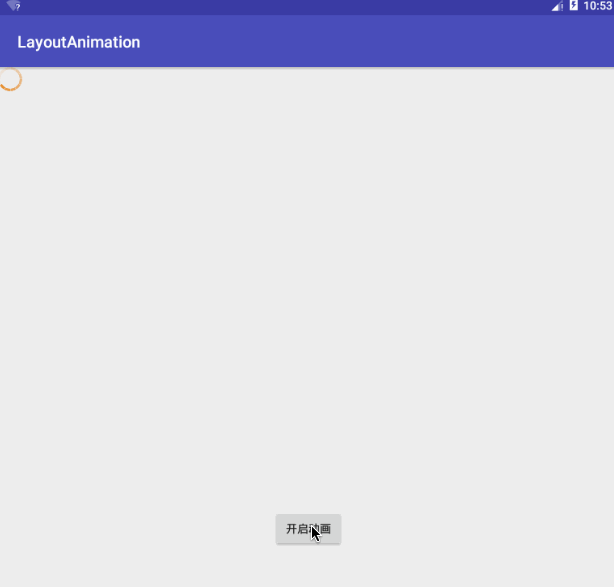
成一个抛物线移动、绕z轴旋转3圈、放大2倍并且透明度从0.5~1渐变。
自定义插值器
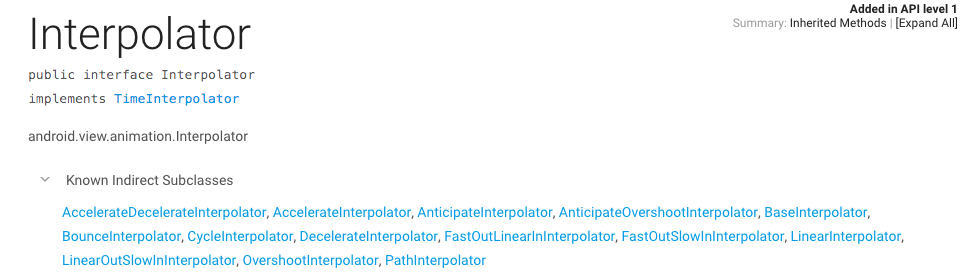
关于插值器,想必大家都不陌生,动画默认的插值器的是线性插值器,系统内置的插值器有很多,看下图:
这里我就不一一讲解了,感兴趣的可以自己去尝试下,比较常用的有AccelerateDecelerateInterpolator(加速减速),AccelerateInterpolator(加速),BounceInterpolator(小球回弹效果),DecelerateInterpolator(减速)等等。
如果现成的插值器都不能满足我们的需求,那么我们就需要自定义插值器。自定义插值器也非常方便,因为它和估值器一样,都只需要关注一个方法即可,在估值器中我们关注的是evaluate这个方法,在插值器中我们只需要关注getInterpolation这个方法即可,当然从其他插值器的源码中我们也可以看出都是对这个方法的操作来实现不同的效果。
下面我们来看看这个getInterpolation方法:
public float getInterpolation(float input) {
    ...
}
只有一个参数input,改值的范围是0~1,是系统根据动画时间计算出来的值。值得一提的是,还记得估值器中evaluate的第一个参数fraction吗,它也是一个0~1的值,而且也是系统根据动画时间计算出来的值,但其实它和input是有不同的,input是系统根据动画时间以及刷新率一帧帧算出来的,而fraction就是getInterpolation(float input)这个方法返回的值,所以当使用默认插值器,也就是线性插值器时,由于线性插值器输入值与输出值相同,此时input和fraction的值才是相同的,其余情况,两者是不同的。
下面我们来实现先减速后加速的插值器效果,从效果上分析,可以由三阶贝塞尔曲线构造出,可以登录此网站来修改效果:三阶贝塞尔曲线参数,这里我用的是(.12,.88,.96,.2),再根据三阶贝塞尔的公式:

代入x坐标能求出x的值,代入y坐标能求而出y的值。
下面我们看具体实现,布局什么的和上面的相同,直接看自定义插值器的实现:
public class CustomInterpolator implements Interpolator {

    public CustomInterpolator() {
    }

    @Override
    public float getInterpolation(float input) {
        //三阶贝塞尔,4个控制点为(0,0)、(0.12,0.88)、(0.96,0.2)以及(1,1)
        //如果都用x坐标带进去,求的是x的值
        //如果都用y坐标带进去,求得是y的值
        float r1 = (float) (0 * Math.pow(1 - input, 3));
        float r2 = (float) (3 * 0.88 * Math.pow(1 - input, 2) * input);
        float r3 = (float) (3 * 0.2 * (1 - input) * Math.pow(input, 2));
        float r4 = (float) (1 * Math.pow(input, 3));
        System.out.println(">>>>>>>" + (r1 + r2 + r3 + r4));
        return r1 + r2 + r3 + r4;
    }
}
然后只需要在代码中使用:
valueAnimator.setInterpolator(new CustomInterpolator());其他代码同上,我就不贴出来了,最后我们看效果吧:
很明显,先减速然后再加速。


 1558
1558

 被折叠的 条评论
为什么被折叠?
被折叠的 条评论
为什么被折叠?
 到【灌水乐园】发言


