


大话springboot
我们聊一聊最近很火的springboot,它可以很快捷,快速的创建一个spring的web项目。说白一点,他是spring+springMVC+持久层框架+数据源连接池+web容器+。。。的脚手架。
springboot的设计目的是用来简化新Spring应用的初始搭建以及开发过程。对于很熟练的开发(以我所见,起码是处于开发一线3年以上期间的才算熟练),spingboot的出现无疑是福音。否则,强行去运用springboot反而适得其反,黑盒开发。如果一定要用springboot,那么一定要多动脑,多思考,多去开源社区走走开发前辈趟出来坑。
导包
<parent>
    <groupId>org.springframework.boot</groupId>
    <artifactId>spring-boot-starter-parent</artifactId>
    <version>1.5.8.RELEASE</version>
</parent>
<dependencies>
    <dependency>
        <groupId>org.springframework.boot</groupId>
        <artifactId>spring-boot-starter</artifactId>
    </dependency>
    <dependency>
        <groupId>org.springframework.boot</groupId>
        <artifactId>spring-boot-starter-test</artifactId>
        <scope>test</scope>
    </dependency>
    <dependency>
        <groupId>org.springframework.boot</groupId>
        <artifactId>spring-boot-starter-web</artifactId>
    </dependency>
</dependencies>
导入以上jar包即可进行简单的spingboot项目开发
配置文件和启动入口
resources文件夹下新建application.yml 文件。文件内容如下
spring:
  profiles:
    active: dev
resources文件夹下新建application-dev.yml 文件。文件内容如下
server:
  port: 9527
src文件夹下建包并创建java文件,内容如下:
@SpringBootApplication
public class SpringbootConfigApplication {
    public static void main(String[] args){
        SpringApplication.run(SpringbootConfigApplication.class,args) ;
    }
}
此时已经创建好基于springboot的web项目,可以启动SpringbootConfigApplication的main方法,然后用telnet localhost 9527 能够连接上服务。
读取项目配置文件内容
在resources文件夹下新建test.properties,内容如下
com.hsy.name=heshiyuan
com.hsy.age=18
在SpringbootConfigApplication所在包下新建bean包(很重要,springboot只会扫描入口类层级一下的注解),并新建user.java文件,内容如下
@Configuration
@PropertySource(value = "classpath:test.properties")
@ConfigurationProperties(prefix = "com.hsy")
public class User {
    private String name;
    private int age;

    public String getName() {
        return name;
    }

    public void setName(String name) {
        this.name = name;
    }

    public int getAge() {
        return age;
    }

    public void setAge(int age) {
        this.age = age;
    }
}
在application.yml添加如下内容,实现第二种配置属性读取。
my:
 name: heshiyuan
 age: 18
 number:  ${random.int}
 uuid : ${random.uuid}
 max: ${random.int(10)}
 value: ${random.value}
 greeting: hi,i'm  ${my.name}
bean包下新建ConfigBean.java.
@ConfigurationProperties(prefix = "my")
@Component
public class ConfigBean {

    private String name;
    private int age;
    private int number;
    private String uuid;
    private int max;
    private String value;
    private String greeting;
    //...省略seter,getter方法
}
提供http api接口
在bean包统计目录创建controller包,并新建RestfulController.java
@RestController
@RequestMapping(value="/api/restful/")
@EnableConfigurationProperties({ConfigBean.class,User.class})
public class RestfulController {
@Autowired
ConfigBean configBean;
@RequestMapping(value = "/v1.0/configBean",method = RequestMethod.GET)
public String beanValue(){
return configBean.getGreeting()+" >>>>"+configBean.getName()+" >>>>"+ configBean.getUuid()+" >>>>"+configBean.getMax();
}
@Autowired
User user;
@RequestMapping(value = {"/v1.0/user/list","/users"},method = RequestMethod.GET,produces = MediaType.APPLICATION_JSON_UTF8_VALUE)
public String user(){
return user.getName()+user.getAge();
}
@Value("${my.name}")
private String name;
@Value("${my.age}")
private int age;
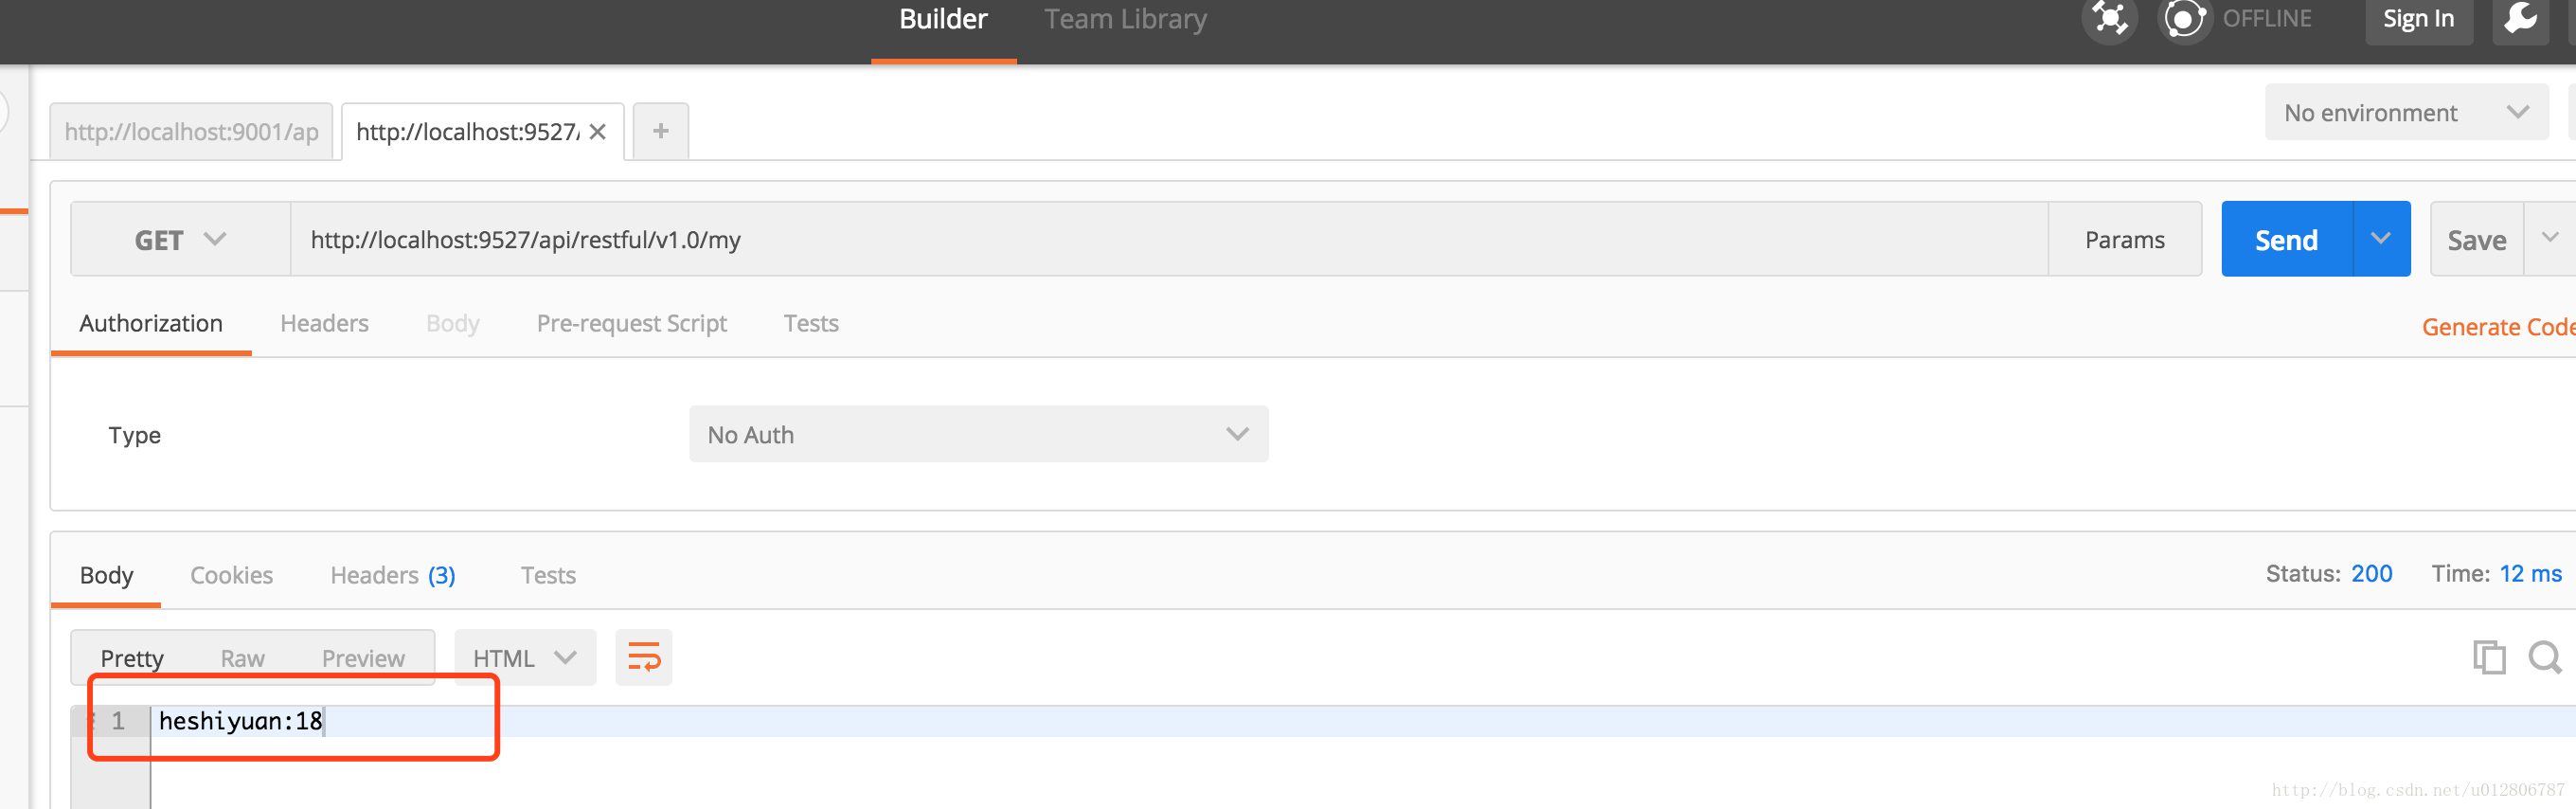
@RequestMapping(value = "/v1.0/my",method = RequestMethod.GET)
public String dataValue(){
return name+":"+age;
}
}测试
用postman api工具进行测试


 7034
7034

 被折叠的 条评论
为什么被折叠?
被折叠的 条评论
为什么被折叠?
 到【灌水乐园】发言


