


使用vue-cli创建的vue项目,如何在这种项目中使用组建?
首先创建项目、启动项目
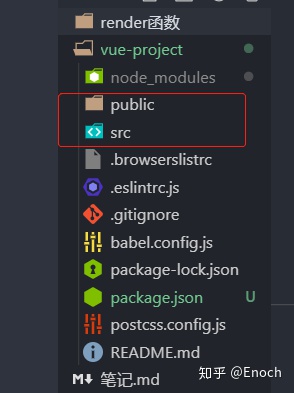
我们再来了解一下目录结构,src文件夹是写逻辑代码的地方,public是最终渲染到浏览器的地方。
在public下index.html中的id="app"和浏览器中的id="app"不是一样的,pulic下的index.html中的id="app"是指vue挂载的地方,浏览器中id="app"是会覆盖index.html节点中的id的东西。
入口文件是main.js(可配置),通过模块化的方式引入了vue(在node_modules下),也可以使用es6语法,并new了一个vue控制#app的html
        // main.js初始文件
import Vue from 'vue'
import App from './App.vue'

Vue.config.productionTip = false

new Vue({
    render: h => h(App),
}).$mount('#app')
.$mount('#app')等价el: "#app"
这个时候我们可以写两个模板(已知)。
html模板: 可以写当前id="app"的这段div,可以在里面写{{}},v-on等vue语法
template模板: 可以在当前模板中写template字段来使用vue,并且template模板会覆盖html模板
但是这里写的是render函数。什么是render函数?
模板 -> 进行编译 -> 生成ast树 -> 数据绑定 -> 成render函数 -> 成虚拟dom -> 真实dom
如果直接使用render函数,就省略了模板的编译过程,vue运行的更快。
--------------岔开一下: render函数基础用法----------------------------
第一种用法:
- 在render函数中会自动注入一个createElement参数
2. return createElement(这是一个函数)
3 .createElement第一参数是想渲染的dom元素,第二参数是对该dom节点的配置(如id,class等,可忽略,到第三参数),第三参数是一个数组
4. 第一参数为一个父元素(也会覆盖html模板),第三参数是一个数组,数组里的为子元素(实验中传文本节点)
5. 若还要创建元素,可以数组中继续写createElement函数,在里头再创建一个p标签
6. 总结: 感觉这样写繁琐,但是html模板和template模板最终都会渲染成render函数,所以还是render函数执行效率高
        <!DOCTYPE html>
<html lang="zh">
<head>
    <meta charset="UTF-8">
    <title>render函数</title>
</head>
<body>
    <div id="app">

    </div>
<script src="https://cdn.jsdelivr.net/npm/vue"></script>
<script>
 new Vue({
      el: "#app",
      render: function(createElement) {
          return createElement('div', ['hello, world!', createElement('p', ['fanghuayong'])])
      }
 })
</script>
</body>
</html>
第二种用法: 只传一个参数(是对象 组件的配置项)
回顾一下组件: 第一参数是名称,第二参数是配置项
        // 第一参数组件名称
// 第二参数组件配置项
Vue.component("my-com", {
    template: "<div>{{ name }}</div>",
    data(){
        return {
            name: "fanghuayong"
        }
    }
})
把组件配置项赋值给一个变量,再传入createElement函数中
代码如下: 组件配置项也可以有两种写法
template模版: 好写,但还是要编译
render函数: 不好写,但是不需要编译,执行效率高
        var app = {
    // template: "<div>{{ name }}</div>",
    // 这种方法也是需要编译的
    render: function(createElement) {
    // 这种方式不需要编译了,但是写起来更麻烦
        return createElement('div', ['fanghuayong1', '0000'])
        },
        data(){
            return {
                name: "fanghuayong"
            }
        }
}
new Vue({
    el: "#app",
    render: function(createElement) {
        return createElement(app)
        // 把组件配置项传入
        }
})
---------------------回到单文件组件中------------------------
使用es5还原main.js中的render函数
- return出去默认传进来的h(自定义)函数(已知)
- 因为直传了一个参数,不可能是第一种用法,所有是第二种用法。
        new Vue({
    render: function(h) {
        return h(App)
    }
}).$mount('#app')
特殊的配置项: 这个App是vue组件的一个配置项
console.log(App)
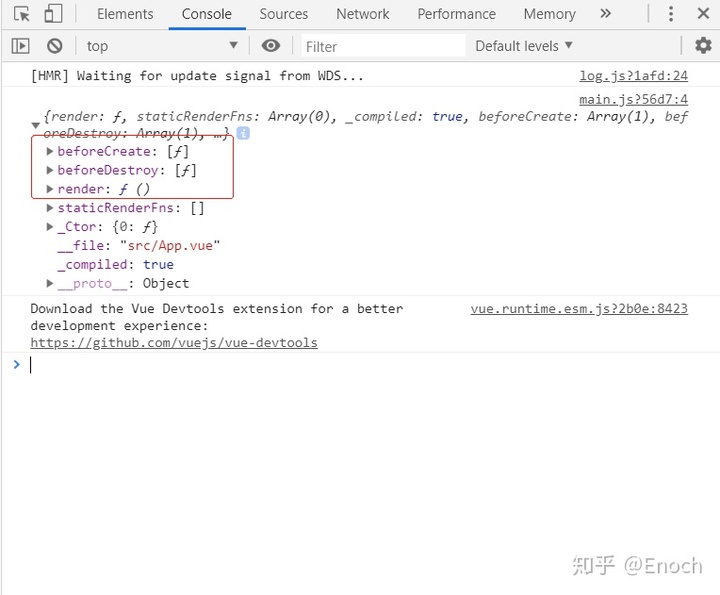
确实是一个配置项,有beforeCreate、beforeDestroy等这些钩子函数,还有render函数
App.vue在编译成配置项的同时,Vue会把template内容编译成render函数(vue做的事情)
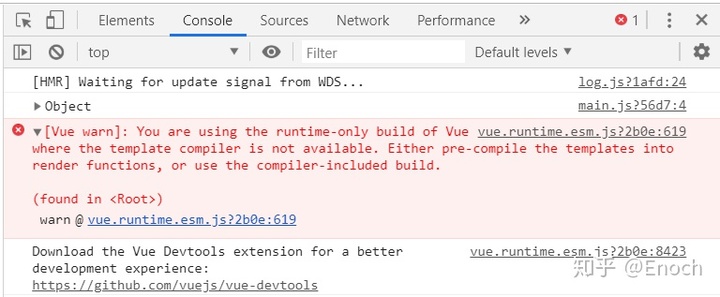
假设我们不想用render函数,使用template模版的话,
        // main.js文件
new Vue({
  template: "<div>name</div>"
 // render: function(h) {
 //   return h(App)
 // }
}).$mount('#app')
会报错: 你正在使用仅仅是运行时候的构架环境vue
如果我们想把template模板编译成ast渲染成render函数,它应该在vue的源码中编译这部分的逻辑操作,如果把这部分的逻辑删了,源码就会变得更小,整个项目就更小,然后App编译的过程就交给package.json中的依赖项"vue-template-compiler"来做(这是webpack做的事情),所有组件渲染出来以后都是render函数,没有template模板。
- vue页面渲染的更加快
- vue源码中把编译的这部分去掉了,只是个运行的环境,少了vue源码,所有只写template模板就不好用了。(当前vue是去掉了编译部分的vue)
总结: 如何用.vue这个文件组件,就是把组件的配置项写成了一个文件的形式,template里写的就是component组件中的template字段,script中写其他的配置项
        // App.vue文件
<template>
  <div id="app1">
    <img alt="Vue logo" src="./assets/logo.png">
    {{ name }}
    <HelloWorld msg="Welcome to Your Vue.js App"/>
  </div>
</template>

<script>
import HelloWorld from './components/HelloWorld.vue'

export default {
  name: 'app',
 data() {
 return {
      name: "fanghuayong"
    }
  },
  components: {
    HelloWorld
  }
}
</script>

<style>
#app1 {
 font-family: 'Avenir', Helvetica, Arial, sans-serif;
 -webkit-font-smoothing: antialiased;
 -moz-osx-font-smoothing: grayscale;
 text-align: center;
 color: #2c3e50;
 margin-top: 60px;
}
</style>
-------------写个小项目-----------------------------
提醒: template模版需要一个根节点
可以直接写在App.vue中,但是我们要进行组件化开发
注册全局组件
- 在src下创建一个server.vue文件
server.vue的代码
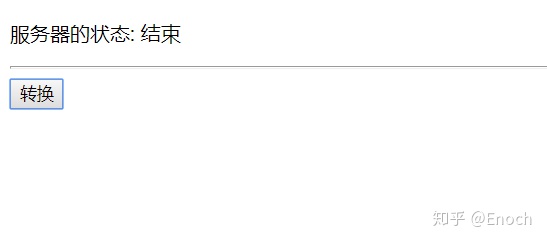
        // server.vue的代码
<template>
    <div>
        <p>服务器的状态: {{ status }}</p>
        <hr>
        <button @click="changeStatus">转换</button>
    </div>
</template>
<script>
export default {
 data() {
 return {
     status: '运行中',
 }
},
 methods: {
  changeStatus: function() {
   this.status == '运行中' ? this.status = '结束' : this.status = '运行中'
  }
 }
}
</script>
2. 现在组件配置项写好了,开始在main.js中注册全局组件
main.js的代码
        import Vue from 'vue'
import App from './App.vue'
import Server from './server.vue'

Vue.config.productionTip = false
// 注册全局组件
Vue.component('app-server', Server)
new Vue({
 render: function(h) {
  return h(App)
  }
}).$mount('#app')
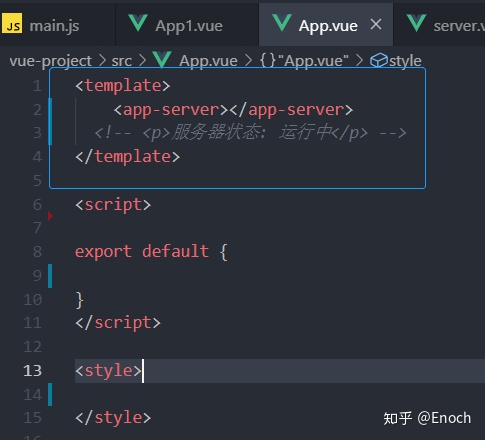
3. 现在注册好组件了,我们去App.vue中使用组件
App.vue中的代码
        <template>
    // 直接使用标签就可以了
    <app-server></app-server>
</template>

<script>

export default {

}
</script>

<style>

</style>
注册局部组件
在src下新建一个serverStatus.vue文件
serverStatus.vue代码
        <template>
    <div>
        <p>服务器的状态: {{ status }}</p>
        <hr>
        <button @click="changeStatus">转换</button>
    </div>
</template>
<script>
export default {
 data() {
 return {
            status: '运行中',
        }
    },
    methods: {
 changeStatus: function() {
 this.status == '运行中' ? this.status = '结束' : this.status = '运行中'
        }
    }
}
</script>
server.vue代码
        <template>
    <app-server-status></app-server-status>
</template>
<script>
// 引入它的配置项
import ServerStatus from "./serverStatus.vue"

export default {
 // 注册局部组件
    components: {
 "app-server-status" : ServerStatus
    }

}
</script>
main.js代码
        import Vue from 'vue'
import App from './App.vue'
import Server from './server.vue'
console.log(App)
Vue.config.productionTip = false
// 注册全局组件
Vue.component('app-server', Server)

new Vue({
 render: function(h) {
 return h(App)
  }
}).$mount('#app')
App.vue代码
        <template>
    <app-server></app-server>
 <!-- 这是一个全局组件 -->
</template>

<script>

export default {

}
</script>

<style>

</style>
小结: 入口文件main.js的配置项是App.vue,App.vue中有一个全局组件标签app-server,这个标签是server.vue中的,server.vue中又有局部组件serverStatus.vue


 1510
1510


 被折叠的 条评论
为什么被折叠?
被折叠的 条评论
为什么被折叠?
 到【灌水乐园】发言


