


1. 为什么做单测
单测的好处
减少bug
快速定位bug
提高代码质量
减少调试时间
放心重构
不得不写单测的原因
在成为大牛的路上,单测是必备技能
单测可以给你信心
保住面子
难处
难于坚持,在快速迭代开发过程中,可供写单测的时间过少
扩展
TDD(Test Drive Develop):测试驱动开发,是一种非常高效的开发方式
2. 测试框架
2.1 概述
 junit4.12 (单测框架)
 mockito1.9.5(mock工具)
 robolectric3.1.2 (模拟Android虚拟机)
2.2 junit4.12
Junit测试是程序员测试,即所谓白盒测试,因为程序员知道被测试的软件如何(How)完成功能和完成什么样(What)的功能。Junit是一套框架,继承TestCase类,就可以用Junit进行自动测试了。
示例代码:
@Before: 执行单测之前的初始化操作。
@After:单测完成后收尾工作。
      @Before
      public void setUp() throws Exception {
      }
      @After
      public void tearDown() throws Exception {
      }
assume: 用于判断测试用例的入参是否有业务含义的工具,如果入参不符合预期时会抛出
assumptionViolatedException、assumeTrue/assumeFalse、 assumeNotNull、 assumeThat、 assumeNoException
@RunWith(Theories.class)
public class AssumeTest
{
    @DataPoints
    public static String[] names = {"LiLei", "HanMeiMei"};

    @DataPoints
    public static int[] ages = {10, -2, 12};

    @Theory
    public void printAge(String name, int age)
    {
        Assume.assumeTrue(age > 0);
        System.out.println(String.format("%s's Name is %s.", name, age));
    }
}
assert :用于常用的测试结果验证
AssertTrue、AssertFalse:结果的true、false。
AssertThat:使用Matcher做自定义的校验。
AssertEquals、AssertNotEquals:判断两个对象是否相等。
AssertNull、AssertNotNull:判断对象是否为空。
AssertSame:判断两个对象是否为同一个,不同于equals这里是使用“==”判断。
AssertArrayEquals:判断两个数组是否相等。
    @Test
    public void sum() throws Exception {
        assertEquals(mCalculator.sum(3, 4), 7);
    }
verify : 主要用于验证方法是否执行
    @Test
    public void testVerify() {
        List mockedList = mock(List.class);
        mockedList.add("one");
        mockedList.clear();
        mockedList.add("3");
        // verification
        verify(mockedList).add("one");
        verify(mockedList).clear();
    }
其他高级用法:
@Test(timeout = 1000): 限时操作,若超过制定时间,强制停止
@Test(expected = ArithmeticException.class): 预测抛出指定异常
2.3 mockito1.9.5
创建mock对象不能对final,Anonymous ,primitive类进行mock。
用法:
when… thenRetrun; when… thenThrow
doNothing().doRetrun();
doNothing.doThrow()
anyInt、anyString、anyMap…..(参数匹配器)
    @Test
    public void argumentMatcherTest2(){
        Map
2.4 robolectric3.1.2
实现一套JVM能运行的Android代码,从而做到脱离Android环境进行测试
1.测试跳转
    /**
     * Activity跳转测试
     */
    @Test
    public void testStartActivity() {
        //按钮点击后跳转到下一个Activity
        forwardBtn.performClick();
        Intent expectedIntent = new Intent(sampleActivity, LoginActivity.class);
        Intent actualIntent = ShadowApplication.getInstance().getNextStartedActivity();
        assertEquals(expectedIntent.getComponent(), actualIntent.getComponent());
    }
2.模拟activity
sampleActivity = Robolectric.setupActivity(SampleActivity.class);
- UI测试:
    /**
     * Toast的测试
     */
    @Test
    public void testToast() {
        //点击按钮,出现吐司
        toastBtn.performClick();
        assertEquals(ShadowToast.getTextOfLatestToast(), "we love UT");
    }
    /**
     * Dialog的测试
     */
    @Test
    public void testDialog() {
        //点击按钮,出现对话框
        dialogBtn.performClick();
        AlertDialog latestAlertDialog = ShadowAlertDialog.getLatestAlertDialog();
        assertNotNull(latestAlertDialog);
    }
    /**
     * 测试控件状态
     */
    @Test
    public void testViewState() {
        CheckBox checkBox = (CheckBox) sampleActivity.findViewById(R.id.checkbox);
        Button inverseBtn = (Button) sampleActivity.findViewById(R.id.btn_inverse);
        assertTrue(inverseBtn.isEnabled());
        checkBox.setChecked(true);
        //点击按钮,CheckBox反选
        inverseBtn.performClick();
        assertTrue(!checkBox.isChecked());
        inverseBtn.performClick();
        assertTrue(checkBox.isChecked());
    }
    /**
     * 资源文件访问测试
     */
    @Test
    public void testResources() {
        Application application = RuntimeEnvironment.application;
        String appName = application.getString(R.string.app_name);
        String activityTitle = application.getString(R.string.title_activity_simple);
        assertEquals("LoveUT", appName);
        assertEquals("SimpleActivity", activityTitle);
    }
    /**
     * 测试广播
     */
    @Test
    public void testBoradcast() {
        ShadowApplication shadowApplication = ShadowApplication.getInstance();
        String action = "com.geniusmart.loveut.login";
        Intent intent = new Intent(action);
        intent.putExtra("EXTRA_USERNAME", "geniusmart");
        //测试是否注册广播接收者
        assertTrue(shadowApplication.hasReceiverForIntent(intent));
        //以下测试广播接受者的处理逻辑是否正确
        MyReceiver myReceiver = new MyReceiver();
        myReceiver.onReceive(RuntimeEnvironment.application, intent);
        SharedPreferences preferences = RuntimeEnvironment.application.getSharedPreferences("account", Context.MODE_PRIVATE);
        assertEquals("geniusmart", preferences.getString("USERNAME", ""));
    }
    /**
     * 测试Fragment
     */
    @Test
    public void testFragment() {
        SampleFragment sampleFragment = new SampleFragment();
        //此api可以主动添加Fragment到Activity中,因此会触发Fragment的onCreateView()
        SupportFragmentTestUtil.startFragment(sampleFragment);
        assertNotNull(sampleFragment.getView());
    }
  4.登录场景测试
    @Test
    public void loginSuccess() {
        emailView.setText("zhangzhan35@gmail.com");
        passwordView.setText("123");
        button.performClick();
        ShadowApplication application = ShadowApplication.getInstance();
        assertThat("Next activity has started", application.getNextStartedActivity(), is(notNullValue()));
    }
    @Test
    public void loginWithEmptyUsernameAndPassword() {
        button.performClick();
        ShadowApplication application = ShadowApplication.getInstance();
        assertThat("Next activity should not started", application.getNextStartedActivity(), is(nullValue()));
        assertThat("Show error for Email field ", emailView.getError(), is(notNullValue()));
        assertThat("Show error for Password field ", passwordView.getError(), is(notNullValue()));
        assertEquals(emailView.getError().toString(), RuntimeEnvironment.application.getString(R.string.error_field_required));
    }
    @Test
    public void loginFailure() {
        emailView.setText("invalid@email");
        passwordView.setText("invalidpassword");
        button.performClick();
        ShadowApplication application = ShadowApplication.getInstance();
        assertThat("Next activity should not started", application.getNextStartedActivity(), is(nullValue()));
        assertThat("Show error for Email field ", emailView.getError(), is(notNullValue()));
        assertThat("Show error for Password field ", passwordView.getError(), is(notNullValue()));
    }
更多场景还需探索。。。
与espresso的对比
Google 官方提供的一个易于测试 Android UI 的开源框架 , 于2013年10月推出它的 released 版本 , 目前最新版本已更新到2.x . 并且在AndroidStudio 2.2 预览版中已经默认集成该测试库 。
ViewMatchers - 在当前View层级去匹配指定的View .
ViewActions - 执行Views的某些行为,如点击事件 .
ViewAssertions - 检查Views的某些状态,如是否显示 .
@RunWith(AndroidJUnit4.class)
public class LoginUITest {
    @Rule
    public ActivityTestRule rule=new ActivityTestRule(LogingActivity.class,true);
    @Test
    public void login(){
        //login
        onView(withId(R.id.userName)).perform(typeText("Jack"),closeSoftKeyboard());
        onView(withId(R.id.password)).perform(typeText("1234"),closeSoftKeyboard());
        onView(withText("登录")).perform(click());
        //verify
        onView(withId(R.id.content)).check(matches(isDisplayed()));
    }
}
espresso更偏向于自动化测试,集成后执行单元测试需要跑在Android手机上,其有个高级功能,根据你的点击轨迹,自动生成自动测试代码。
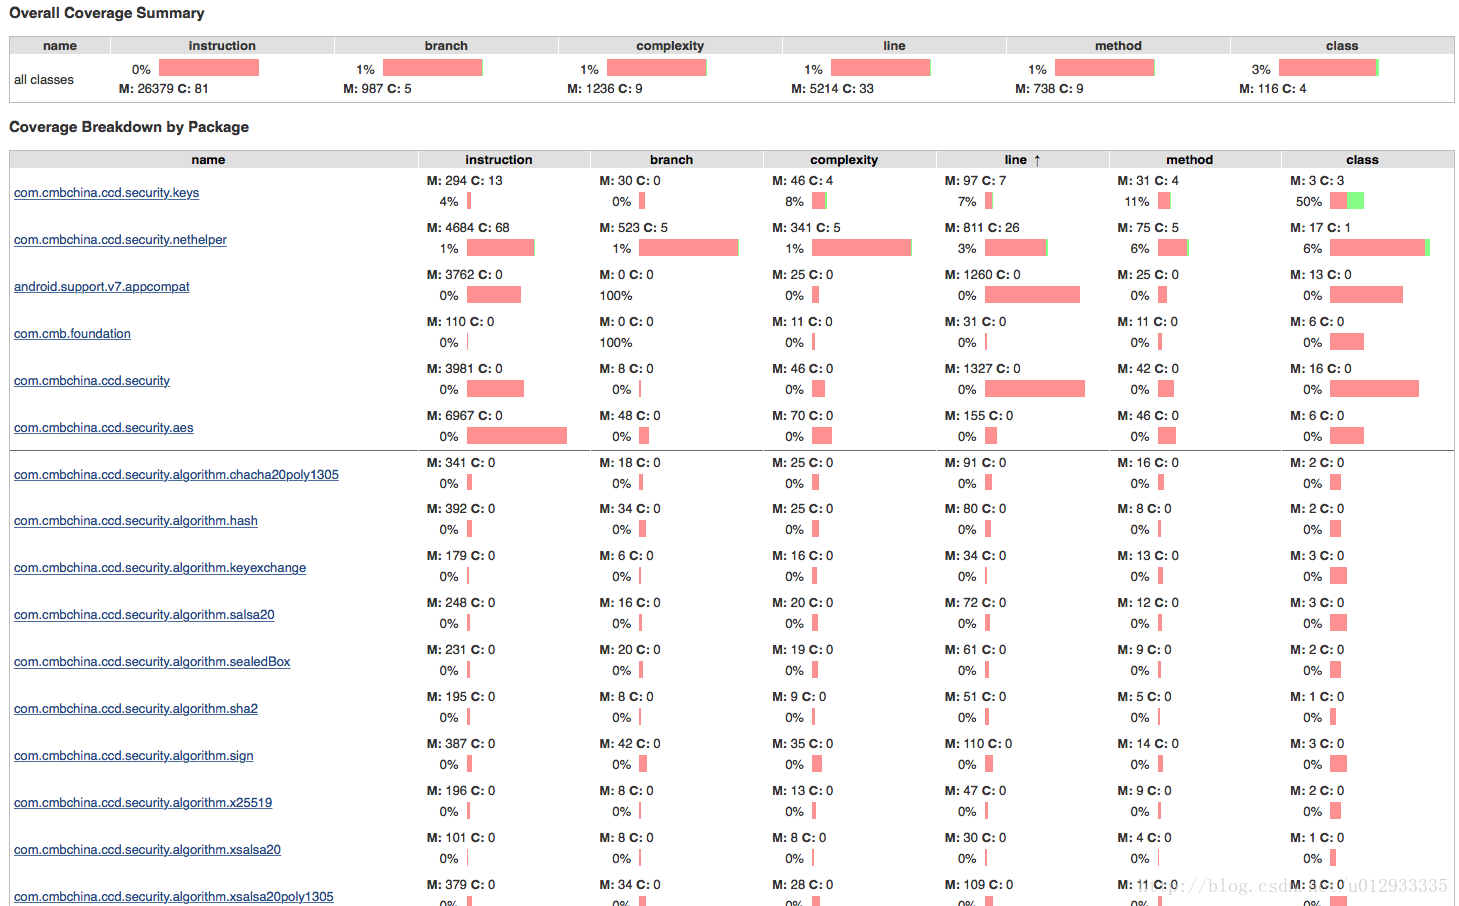
3. 覆盖率
jacoco:Android Studio自带的生成单元测试覆盖率报告的工具。
行覆盖率:度量被测程序的每行代码是否被执行,判断标准行中是否至少有一个指令被执行。
类覆盖率:度量计算class类文件是否被执行。
分支覆盖率:度量if和switch语句的分支覆盖情况,计算一个方法里面的
总分支数,确定执行和不执行的 分支数量。
方法覆盖率:度量被测程序的方法执行情况,是否执行取决于方法中是否有至少一个指令被执行。
指令覆盖:计数单元是单个java二进制代码指令,指令覆盖率提供了代码是否被执行的信息,度量完全 独立源码格式。
圈复杂度:在(线性)组合中,计算在一个方法里面所有可能路径的最小数目,缺失的复杂度同样表示测试案例没有完全覆盖到这个模块。
参考自:http://blog.csdn.net/tmq1225/article/details/52221187
集成配置:
apply plugin: 'jacoco'
android {

    buildTypes {
        release {
            minifyEnabled false
            proguardFiles getDefaultProguardFile('proguard-android.txt'), 'proguard-rules.pro'
        }
        debug{
            testCoverageEnabled true
        }
    }
}
jacoco {
    toolVersion = "0.7.5.201505241946"
}
jacoco覆盖率报告分为两种:
   1. 只生成java层代码覆盖率报告

   2. 在运行app期间执行的覆盖率报告
task jacocoTestReport(type:JacocoReport, dependsOn: "testDebugUnitTest") {
    println("=========jacocoTestReport start");
    group = "Reporting"
    description = "Generate Jacoco coverage reports"
    classDirectories = fileTree(
            dir: "${project.buildDir}/intermediates/classes/debug",
            excludes: ['**/R.class',
                       '**/R$*.class',
                       '**/*$ViewInjector*.*',
                       '**/BuildConfig.*',
                       '**/Manifest*.*']
    )
    println("path==========>>" + "${project.buildDir}/intermediates/classes/debug")
    def coverageSourceDirs = "${project.projectDir}/src/main/java"
    println("coverageSourceDirs==========>>" + coverageSourceDirs)
    additionalSourceDirs = files(coverageSourceDirs)
    sourceDirectories = files(coverageSourceDirs)
    executionData = fileTree(dir: project.projectDir, includes:['**/*.exec', '**/*.ec'])
    reports {
        xml.enabled = true
        html.enabled = true
    }
}

task jacocoAndroidTestReport(type:JacocoReport,dependsOn:"connectedAndroidTest"){
    group = "Reporting"
    description = "Generate Jacoco coverage reports after running tests."
    reports{
        xml.enabled = true
        html.enabled = true
        csv.enabled = false
    }
    classDirectories = fileTree(
            dir : "$buildDir/intermediates/classes/debug",
            excludes : [
                    '**/*Test.class',
                    '**/R.class',
                    '**/R$*.class',
                    '**/BuildConfig.*',
                    '**/Manifest*.*'
            ]
    )
    def coverageSourceDirs = ['src/main/java']
    additionalSourceDirs = files(coverageSourceDirs)
    sourceDirectories = files(coverageSourceDirs)
    additionalClassDirs = files(coverageSourceDirs)
    executionData = files("$buildDir/outputs/code-coverage/connected/coverage.ec")
}
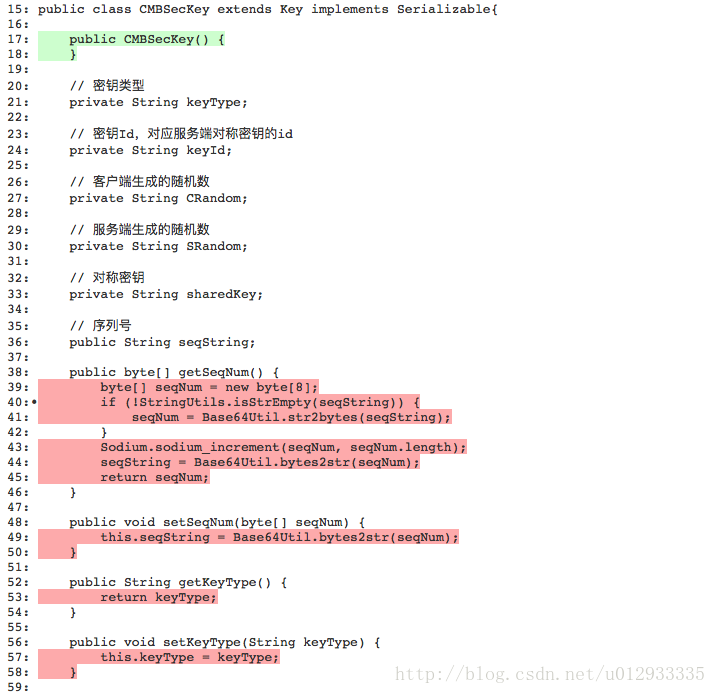
结果展示
总结
单元测试的一些原则
- 在最低的功能/参数上验证程序的正确性
- 单元测试过后,机器状态保持不变。(数据库,sp等)
- 单元测试应该产生可重复、一致的结果。(尽量减少一切随机)
- 独立性,单元测试的运行/通过/失败不依赖于别的测试,可以人为构造数据,以保持单元测试的独立性
- 单元测试应该覆盖所有代码路径,包括错误处理路径,为了保证单元测试的代码覆盖率,单元测试必须测试公开的和私有的函数/方法
- 单元测试必须和产品代码一起保存和维护。
- 单元测试要快(一个测试运行时间是几秒钟,而不是几分钟)


 576
576

 被折叠的 条评论
为什么被折叠?
被折叠的 条评论
为什么被折叠?
 到【灌水乐园】发言


