


一、编译
1、指定 Python 的版本
export PYTHON_PATH=python;2、指定编译的平台
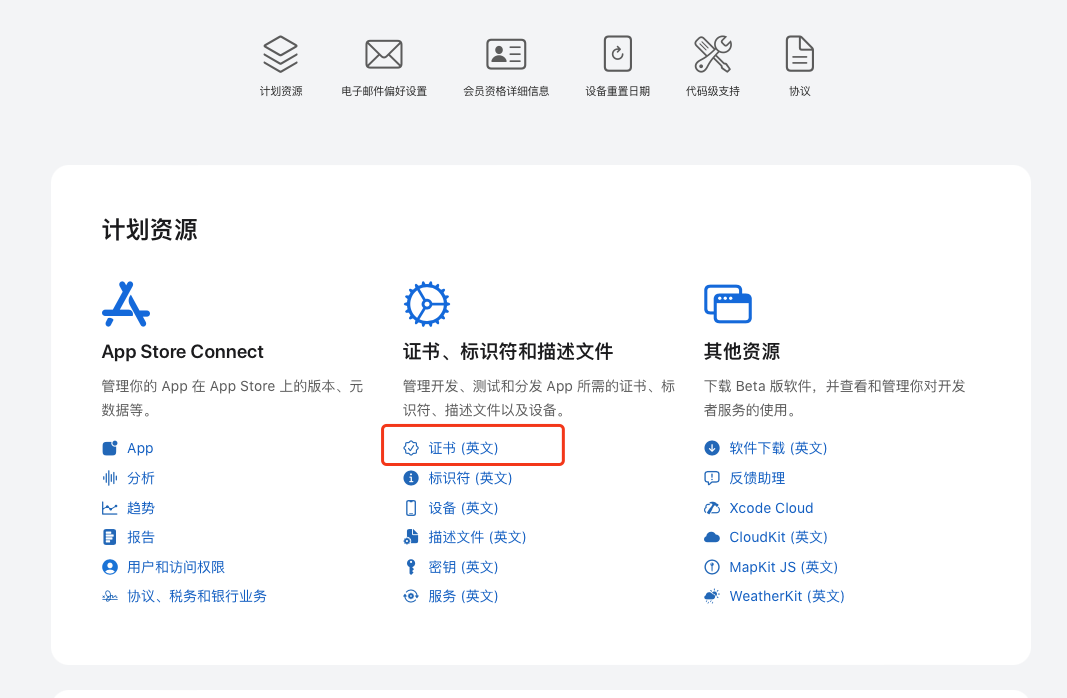
vue-cli-service electron:build --mac二、签名 https://developer.apple.com/cn/developer-id/
1、登录苹果开发者平台:https://developer.apple.com/account
2、点击证书
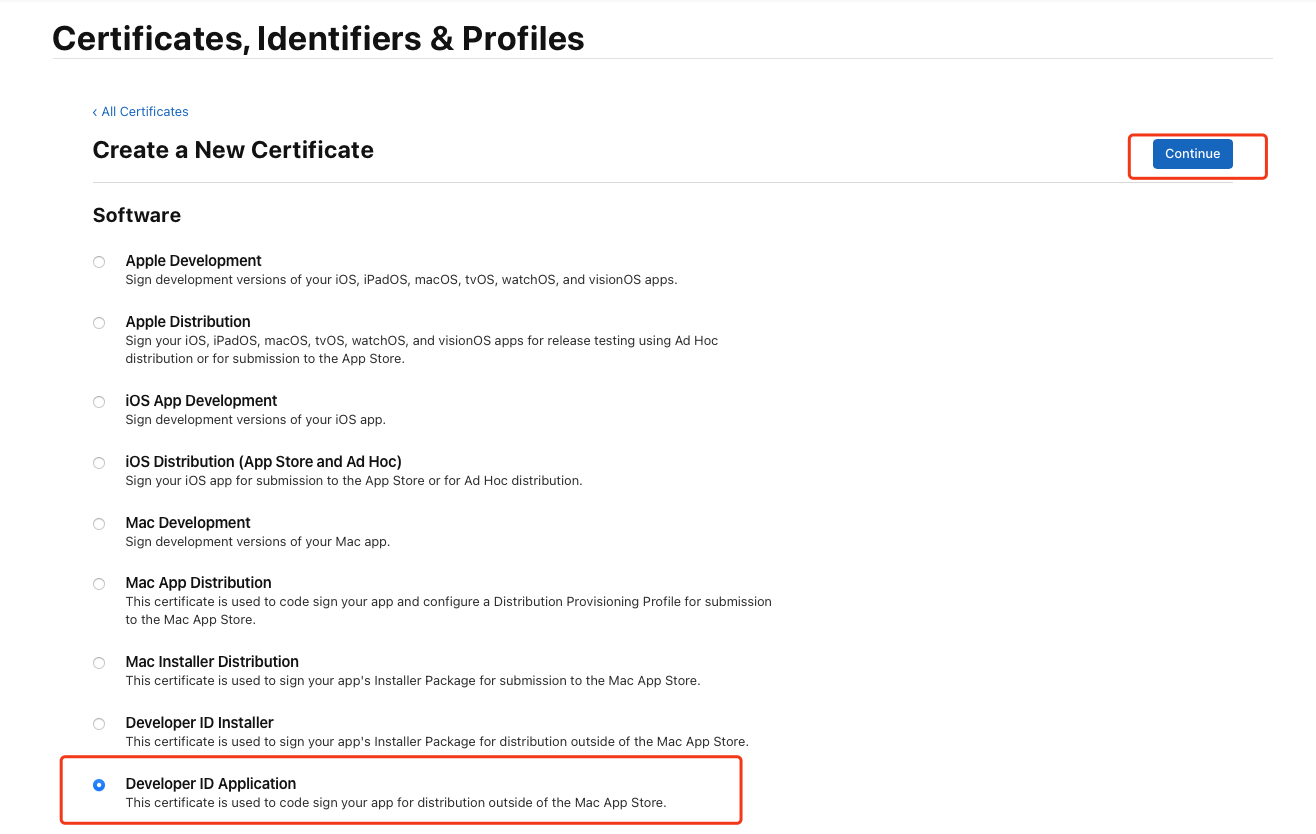
3、创建新的证书

4、下载创建成功的证书

5、安装下载的证书
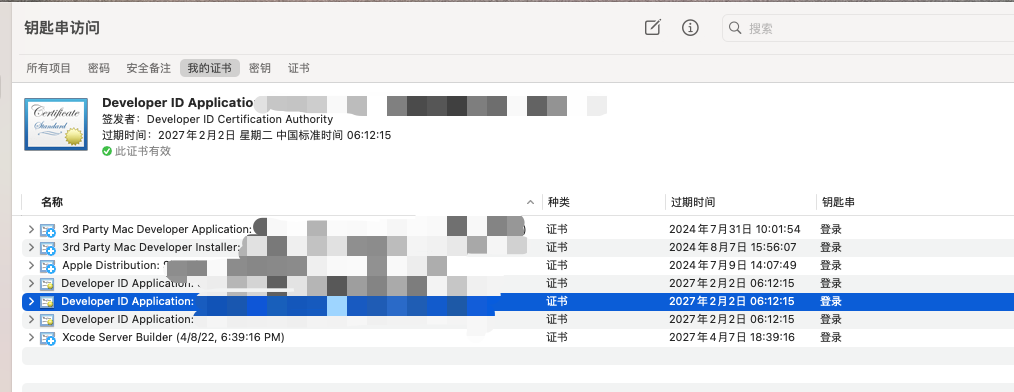
6、打开"钥匙串访问" > 右击导出 .p12
7、配置编辑环境
export CSC_LINK=[.p12路径];export CSC_KEY_PASSWORD=******;三、公证
1、在钥匙串中创建要公证app的profile(公证用)
xcrun notarytool store-credentials "mac_app" --apple-id "xxxxxxxx@xxx.com" --team-id "XXXXXXXXXX" --password "xxxx-xxxx-xxxx-xxxx"a、参数说明
store-credentials:名字,建议全英文
apple-id:Apple ID
team-id:团队ID developer.apple.com/account/可以查看到
password:App专用密码,可以在AppleID管理!!那里生成 格式为“****-****-****-****”
b、P.S. 生成 App 专用密码
登录:https://appleid.apple.com/sign-in

2、校验公证的钥匙串
xcrun altool --list-providers -u "********@***.com" -p "****-****-****-****"

# 返回结果
# ProviderName  ProviderShortname  PublicID  WWDRTeamID
# ------------  -----------------  --------  ----------
# ** Co., Ltd.  *****              ****      ****
3、配置编译信息(electron-builder 为例)
{
  ...
  build:{
    afterSign: "notarize.js",
    ...
    mac: {
      hardenedRuntime: true,
      gatekeeperAssess: false,
      target: [{
        target: 'dmg'
      }],
      ...
    },
    ...
    dmg: {
      sign: false,
      ...
    }
  }
  ...
}
a、notarize.js 说明
全局安装认证工具
npm install -g electron-notarize配置
const {notarize} = require('electron-notarize');
exports.default = async function notarizing(context) {
  const {electronPlatformName, appOutDir} = context;
  if (electronPlatformName !== 'darwin') {
    return;
  }

  const appName = context.packager.appInfo.productFilename;

  return await notarize({
    appBundleId: 'com.***.***', // app的包名
    appPath: 'dist/mac/****.app', // 生成的app的路径
    appleId: '********@***.com', // 苹果AppleId
    appleIdPassword: '****-****-****-****', // 上述生成的APP专属密码
  });
};


 1094
1094


 被折叠的 条评论
为什么被折叠?
被折叠的 条评论
为什么被折叠?
 到【灌水乐园】发言


