AsyncTask的基本使用方法
在Day25我们讲解了Handler, 可以实现子线程数据传递到主线程(UI线程) 中去, 这样可以解决一些网络下载, 文件传输等需要子线程的完成的工作, 但是它也有一个小瑕疵 , 就是封装性不够好, 那就今天我们就要来说一下AsyncTask
介绍一下如何使用
1, 继承AsyncTask
public class MyTask extends AsyncTask<Params, Progrss, Result> 我们来说一下这三个泛型的作用:
Params: 调用异步任务时传入的类型 ;
Progress : 字面意思上说是进度条, 实际上就是动态的由子线程向主线程publish数据的类型
Result : 返回结果的类型
2, 重写这个类的抽象方法doInBackground, 当然它也有几个方法需要重写, 我们一一看来
doInBackground(抽象方法, 必须实现)
/* 唯一执行在子线程中的方法
 *   所以不可以进行UI的更新
 * @param params
 * @return
 */
@Override//返回值: Result       参数: Param
protected String doInBackground(TextView... params) {
    text = params[0];
    Random random = new Random();
    for (int i = 0; i < 50; i++) {
        //要进行进度的更新
        publishProgress(i);
        //不能直接调用onProgressUpdate方法,
        //这样会使得onProgressUpdate在子线程中运行
        try {
            Thread.sleep(random.nextInt(10) * 10);
        } catch (InterruptedException e) {
            e.printStackTrace();
        }
    }
    return "已完成";
}
下面三个方法根据具体情况选择使用
   //执行doInBackground之前调用
    @Override
    protected void onPreExecute() {
        super.onPreExecute();
} @Override//与publishProgress(i)对应
protected void onProgressUpdate(Integer... values) {
super.onProgressUpdate(values);
text.setText(String.valueOf(values[0]));
} //在doInBackground之后执行
@Override // 参数s为 Result
protected void onPostExecute(String s) {
super.onPostExecute(s);
text.setText(s);
}3, 执行异步任务
有两种方式, 我已经把区别写在了注释中
/*
 直接execute异步任务, 都是同一线程去执行
*/

text = (TextView) findViewById(R.id.main_text1);
new MyTask().execute(text);
text = (TextView) findViewById(R.id.main_text2);
new MyTask().execute(text);
text = (TextView) findViewById(R.id.main_text3);
new MyTask().execute(text);
text = (TextView) findViewById(R.id.main_text4);
new MyTask().execute(text);
/*
启动多条线程来执行异步任务
API11以上可以使用
*/
ScheduledThreadPoolExecutor executor = new ScheduledThreadPoolExecutor(4);
text = (TextView) findViewById(R.id.main_text1);
new MyTask().executeOnExecutor(executor, text);
text = (TextView) findViewById(R.id.main_text2);
new MyTask().executeOnExecutor(executor, text);
text = (TextView) findViewById(R.id.main_text3);
new MyTask().executeOnExecutor(executor, text);
text = (TextView) findViewById(R.id.main_text4);
new MyTask().executeOnExecutor(executor, text);注意: 如果我们直接去execute我们的任务, 它(任务) 只会在同一个子线程中运行, 所以上述第一种方式启动时, 四个任务顺次执行(就是一个任务执行完了再执行另一个); 而第二种方式, 给它创建了线程池, 这样会自动给它创建新的子线程, 所有的任务不是顺序执行, 而是几个线程”同时执行”
获取网络数据呈现在Webview和下载图片和其共存的案例
1, 首先我们要来一个布局, 具体需求是这样的, 在WebView之上有个ImageView, 并且, ImageView可以随WebView滚动, 所以这个时候我们想到了用ScrollView, 但是大家一定不要忘记, ScrollView只能包含一个控件, 所以我们可以用LinearLayout包裹一下即可
<ScrollView
    android:layout_width="match_parent"
    android:layout_height="match_parent">
    <LinearLayout
        android:orientation="vertical"
        android:layout_width="match_parent"
        android:layout_height="match_parent">
        <ImageView
            android:id="@+id/main2_image"
            android:layout_width="wrap_content"
            android:layout_height="wrap_content" />
        <WebView
            android:id="@+id/main2_web"
            android:layout_width="match_parent"
            android:layout_height="match_parent"/>
    </LinearLayout>
</ScrollView>
2, 接下来我们要有一个实体类, 用来存放从网页上下载的内容(这里加注解原因在于我们要使用GSON解析来自网页的内容)
public class Entry {
    @SerializedName("title")
    private String title;
    @SerializedName("message")
    private String message;
    @SerializedName("img")
    private String image;

    public String getTitle() {
        return title;
    }
    ...//省略其余getter和setter方法
    public void setImage(String image) {
        this.image = image;
    }
}
3, 那我们接下解决的问题就是 如何下载图片? 如何下载web内容? , 那我们写两个通用的工具类
下载工具类(通用型)
/**
 * Created by Lulu on 2016/8/31.
 * <p/>
 * 通用下载工具类
 */
public class NetWorkTask<T> extends AsyncTask<NetWorkTask.Callback<T>, Void, Object> {

    private NetWorkTask.Callback<T> callback;
    private Class<T> t;
    private String url;

    public NetWorkTask(String url, Class<T> t) {
        this.url = url;
        this.t = t;
    }
    @Override
    protected Object doInBackground(Callback<T>... params) {
        callback = params[0];

        try {

            HttpURLConnection connection = (HttpURLConnection) new URL(url).openConnection();
            connection.setRequestMethod("GET");
            connection.setDoInput(true);
            int code = connection.getResponseCode();
            if (code == 200) {
                InputStream is = connection.getInputStream();
                ByteArrayOutputStream bos = new ByteArrayOutputStream();
                byte[] buffer = new byte[102400];
                int length;
                while ((length = is.read(buffer)) != -1) {
                    bos.write(buffer, 0, length);
                }
               return bos.toString("UTF-8");
            } else {
                return  new RuntimeException("服务器异常");
            }

        } catch (Exception e) {
            e.printStackTrace();
            return e;
        }

    }

    @Override
    protected void onPostExecute(Object o) {
        super.onPostExecute(o);
        if(o instanceof String) {
            String str = (String) o;
            Gson gson = new Gson();
            T t = gson.fromJson(str, this.t);
            callback.onSuccess(t);
        }
        if( o instanceof Exception) {
            Exception e = (Exception) o;
            callback.onFailed(e);
        }
    }
    public interface Callback<S> {
        void onSuccess(S t);
        void onFailed(Exception e);
    }
}
图片加载器(通用型)
/**
 * Created by Lulu on 2016/8/31.
 * 图片网络加载器
 * 下载成功返回Bitmap
 * 否则返回null
 */
public class ImageLoader extends AsyncTask<String, Void, Bitmap>{

    private ImageView image;

    public ImageLoader(ImageView image) {
        this.image = image;
        image.setImageResource(R.mipmap.ic_launcher);
    }

    @Override
    protected void onPreExecute() {
        super.onPreExecute();

    }

    @Override
    protected Bitmap doInBackground(String... params) {
        String url = params[0];
        try {
            HttpURLConnection connection = (HttpURLConnection) new URL(url).openConnection();
            connection.setRequestMethod("GET");
            connection.setDoInput(true);
            int code = connection.getResponseCode();
            if (code == 200) {
                InputStream is = connection.getInputStream();
                return BitmapFactory.decodeStream(is);
            }
        } catch (IOException e) {
            e.printStackTrace();
        }
        return null;
    }


    @Override
    protected void onPostExecute(Bitmap bitmap) {
        super.onPostExecute(bitmap);
        if (bitmap != null) {
            image.setImageBitmap(bitmap);
        } else {
            image.setImageResource(R.mipmap.failed);
        }
    }
}
4, 测试Activity
注意: 看如何解决大图在webView中不左右滑动的问题!
public class Main2Activity extends AppCompatActivity implements NetWorkTask.Callback<Entry>{
    private WebView web;
    private ImageView image;
    //解决大图在webView中不左右滑动的问题
    private static final String CSS = "<style>img{max-width:100%} </style>";
    private String title;
    @Override
    protected void onCreate(Bundle savedInstanceState) {
        super.onCreate(savedInstanceState);
        setContentView(R.layout.activity_main2);
        web = (WebView) findViewById(R.id.main2_web);
        image = (ImageView) findViewById(R.id.main2_image);
        new NetWorkTask<>("http://www.tngou.net/api/top/show?id=13122", Entry.class).execute(this);
    }
    @Override
    public void onSuccess(Entry t) {
        web.loadDataWithBaseURL("", t.getMessage(), "text/html; charset=utf-8", "UTF-8", null);
        new ImageLoader(image).execute("https://img-blog.csdn.net/20160829134937003");
    }
    @Override
    public void onFailed(Exception e) {
        web.loadDataWithBaseURL("", "加载失败", "text/html; charset=utf-8", "UTF-8", null);
    }
}
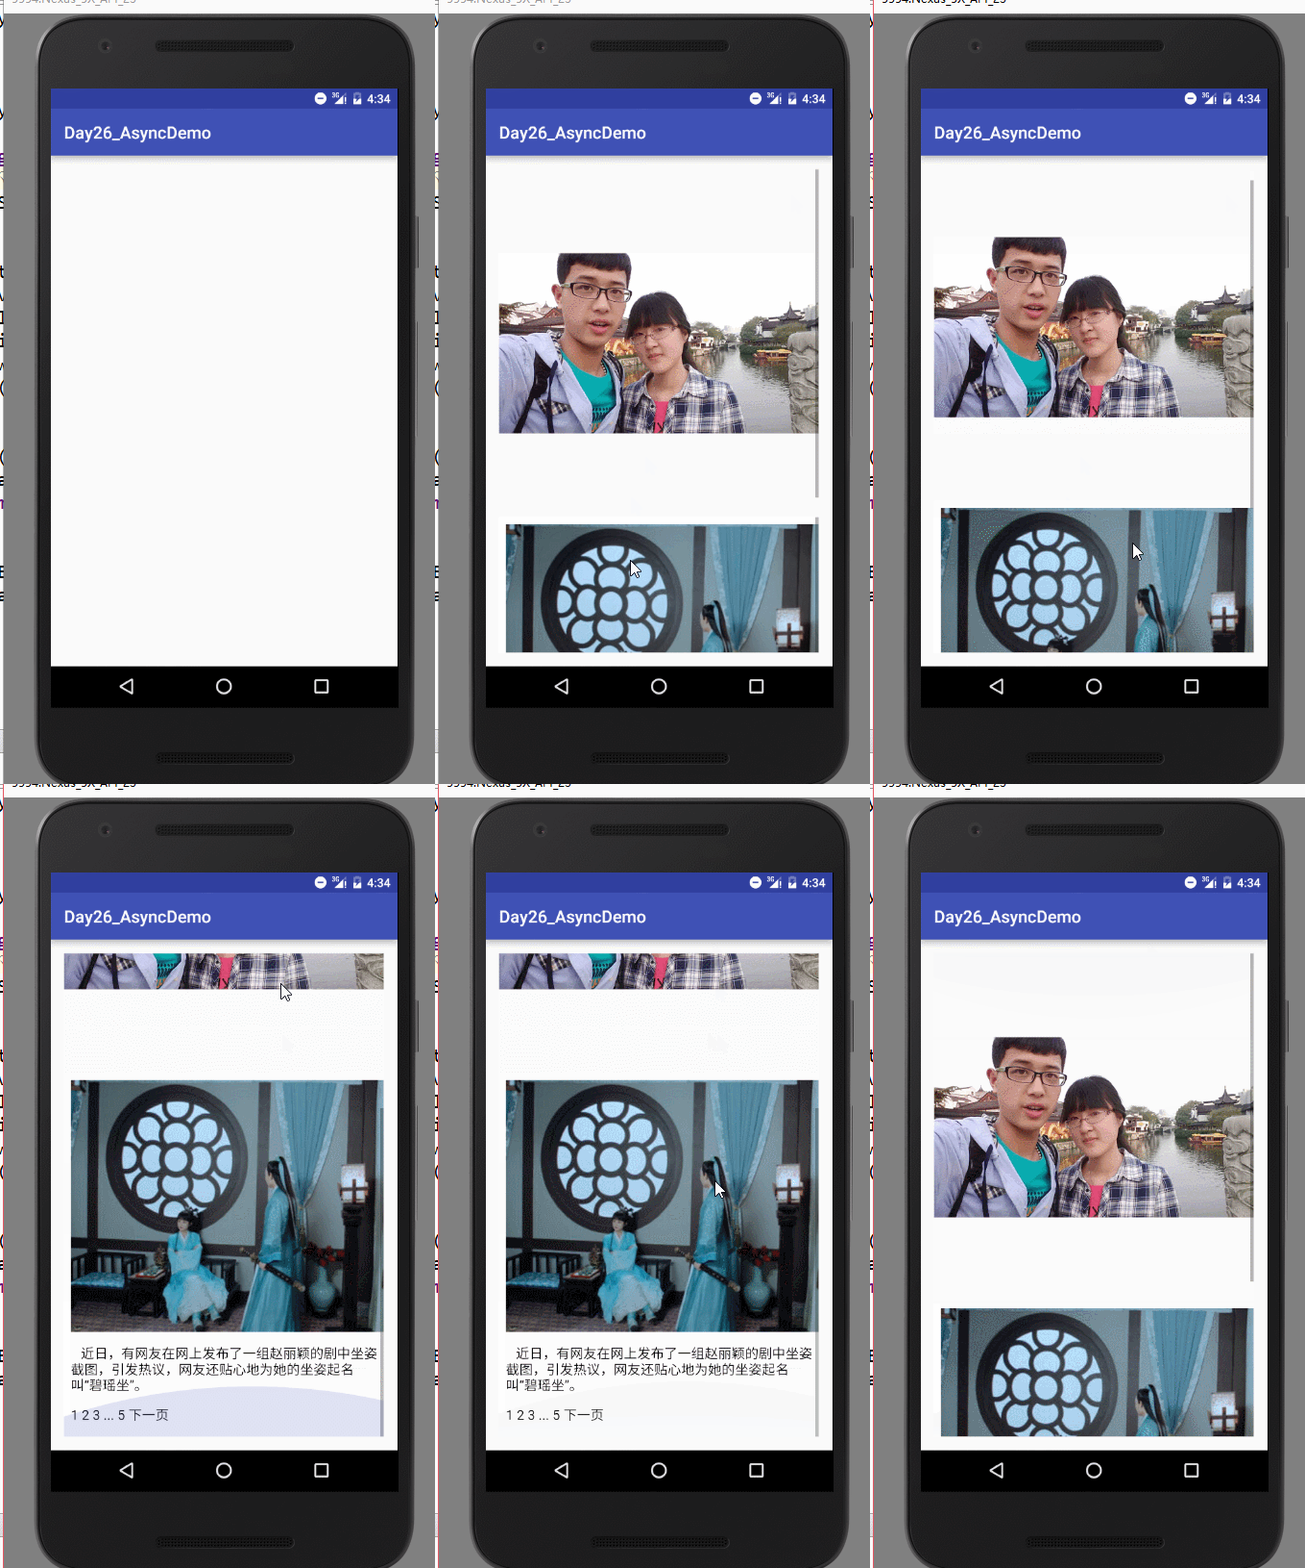
5, 效果图:


 4399
4399

 被折叠的 条评论
为什么被折叠?


