


压缩软件算的上是我们工作当中经常会使用到的一种小的工具软件,目前市面上这种软件,收费和免费的都很多,像360压缩、winrar等,都是大家使用比较多的,但是有时候这些免费软件也会弹出一些个广告来,总让人有些不悦,今天我就跟大家分享一个如何使用.NET 来开发一个自己的好用的压缩软件。
一、开发环境准备
开发环境: VS2017
开发语言: C#
开源组件: SharpZipLib
首先大家准备好VS2017开发环境,新建一个WPF项目,名称为:EasyZipTools
然后再新建一个classlib的c# dll 项目:EasyZipMenu
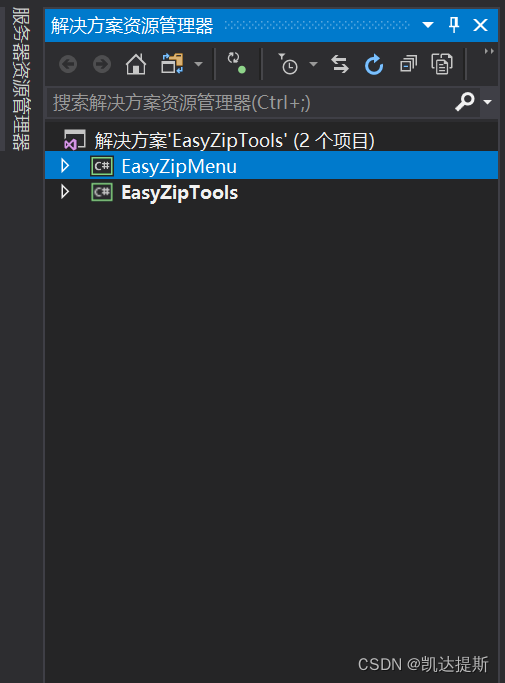
EasyZipTools是WPF项目,是压缩的主程序,负责主要的界面功能展示和主逻辑,
EasyZipMenu是个dll,主要是用来注册系统的菜单用的,这个就是说我们的程序安装完成以后会自动添加菜单项到系统右键菜单里面,方便使用
二、主程序开发
接下来我们一起来看下主程序的开发,主程序的核心是实现压缩和解压缩功能,这块使用的是开源的组件:SharpZipLib,大家再EasyZipTools这个工程上右键,管理nuget包,添加相关依赖到项目里面:
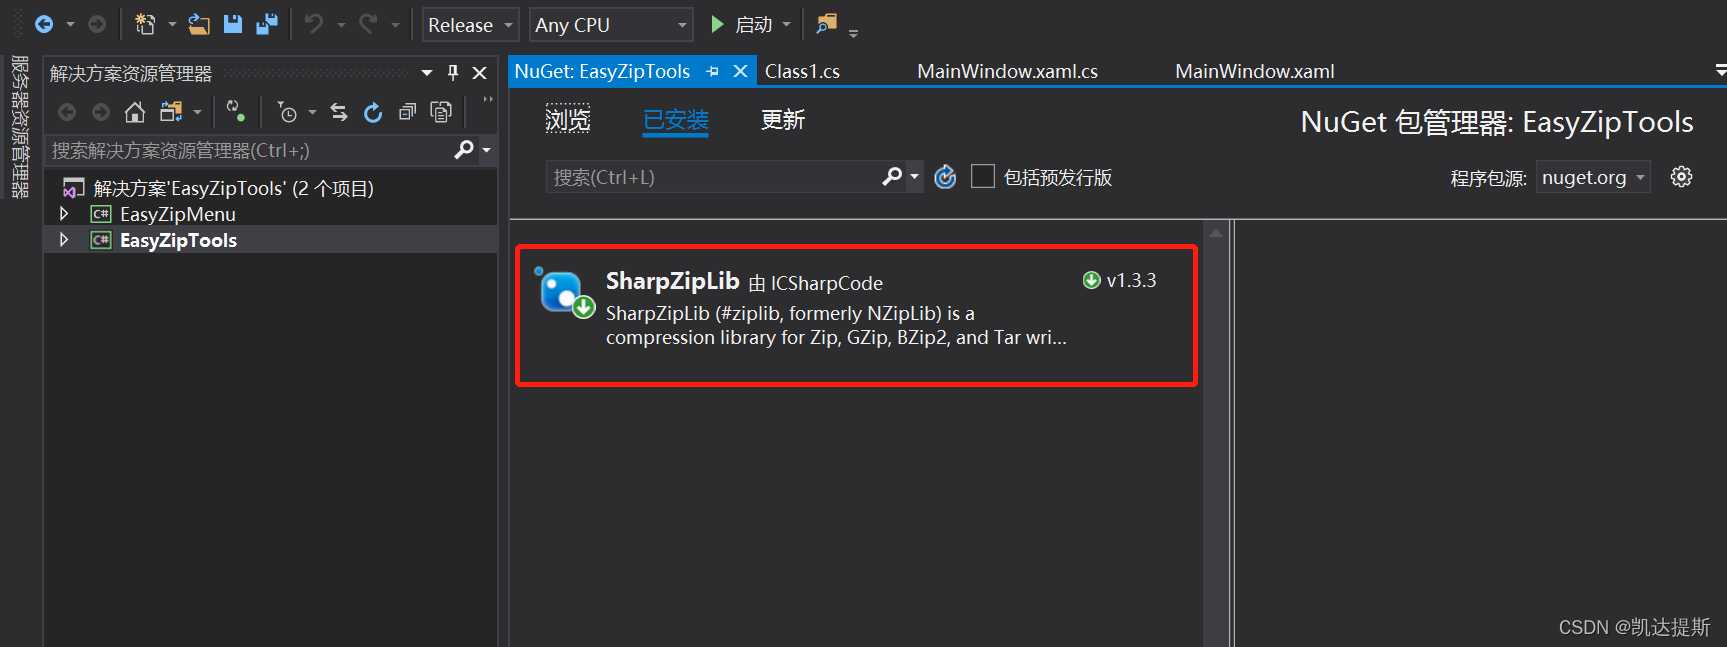
这个包提供了我们需要的核心功能,详细的开发文档大家可以去https://icsharpcode.github.io/SharpZipLib/help/api/index.html
查看,这里我主要跟大家分享一下 zip包的文件流式压缩方法,zip包的压缩方法:
压缩核心代码
                using (ZipOutputStream s = new ZipOutputStream(File.Create(target)))
                {

                    isCompressing = true;

                    s.SetLevel(9); // 0 - store only to 9 - means best compression


                    foreach (FileEntry fileEntry in filesToCompress)
                    {
                        if (isAbortCompress)
                        {
                            break;
                        }
                        runFile = System.IO.Path.GetFileName(fileEntry.FileFullPath);

                        ZipEntry entry = new ZipEntry(fileEntry.FileZipPath);
                        s.PutNextEntry(entry);

                        using (FileStream fs = File.OpenRead(fileEntry.FileFullPath))
                        {
                            StreamUtils.Copy(fs, s, buffer, progressHandler, new TimeSpan(0, 0, 0, 1), this, runFile);
                        }
                    }
                    s.CloseEntry();
                    EndProcess(s);
                }
这里主要说一下StreamUtils这个工具类,这个类它提供了一个Copy方法,能够在写入数据的同时给到我们相关的压缩进度,这块是我们想要的,如果你直接使用的是ZipFile来压缩的话,就得不到压缩进度,显得不友好了,那么它这个压缩的进度是通过一个委托回调回来的,委托的原型是:
void ProgressBack(object sender, ProgressEventArgs e)
        {
            e.ContinueRunning = !isAbortCompress;
            UpdateProgress(e.Name, e.PercentComplete);
        }
ProgressEventArgs里面就包含了当前的压缩进度
其他的压缩方法,我们也是使用类似的方法,比如tar:
using (TarOutputStream s = new TarOutputStream(File.Create(target), Encoding.UTF8))
{

           isCompressing = true;

           foreach (FileEntry file in filesToCompress)
           {
                  if (isAbortCompress)
                  {
                       break;
                  }
                  runFile = System.IO.Path.GetFileName(file.FileFullPath);


                   TarEntry entry = TarEntry.CreateEntryFromFile(file.FileFullPath);
                    entry.Name = file.FileZipPath;
                    s.PutNextEntry(entry);

                   using (FileStream fs = File.OpenRead(file.FileFullPath))
                   {
                         StreamUtils.Copy(fs, s, buffer, progressHandler, new TimeSpan(0, 0, 0, 1), this, "12233");
                         fs.Close();
                   }
                   s.CloseEntry();
           }

           EndProcess(s);
}
对于GZip,和 bzip2的压缩格式,如果式文件夹压缩,一般的做法是先进行tar归档压缩,然后再使用gzip或者bzip来压缩,所以我们的程序里面也是分两步来完成:
                using (TarOutputStream s = new TarOutputStream(File.Create(first_target), Encoding.UTF8))
                {

                    isCompressing = true;

                    foreach (FileEntry file in filesToCompress)
                    {
                        if (isAbortCompress)
                        {
                            break;
                        }
                        runFile = System.IO.Path.GetFileName(file.FileFullPath);

                        TarEntry entry = TarEntry.CreateEntryFromFile(file.FileFullPath);
                        entry.Name = file.FileZipPath;
                        s.PutNextEntry(entry);

                        using (FileStream fs = File.OpenRead(file.FileFullPath))
                        {
                            StreamUtils.Copy(fs, s, buffer, progressHandler, new TimeSpan(0, 0, 0, 1), this, "12233");
                            fs.Close();
                        }
                        s.CloseEntry();
                    }
                }

                using (GZipOutputStream s = new GZipOutputStream(File.Create(target)))
                {

                    isCompressing = true;

                    using (FileStream fs = File.OpenRead(first_target))
                    {
                        byte[] buffer1 = new byte[2048];
                        StreamUtils.Copy(fs, s, buffer1, progressHandler, new TimeSpan(0, 0, 0, 1), this, target);
                        fs.Close();
                    }

                    EndProcess(s);

                    File.Delete(first_target);
                }
以上就是核心的压缩代码大家可以参考,想要完整的代码,文末有我开源的完整源码地址
解压核心代码:
ZIP解压:
using (ZipInputStream s = new ZipInputStream(File.OpenRead(zipFile)))
            {

                ZipEntry theEntry;
                const int size = 2048;
                byte[] data = new byte[size];

                string cpSubdir = string.Empty;

                while ((theEntry = s.GetNextEntry()) != null)
                {
                    if(isAbortCompress)
                    {
                        break;
                    }

                    if (theEntry.IsFile)
                    {
                        string fullPath = targetPath;
                        string directoryName = System.IO.Path.GetDirectoryName(theEntry.Name);
                        string fileName = System.IO.Path.GetFileName(theEntry.Name);
                        fullPath = fullPath + "\\"+ directoryName;
                        if(!Directory.Exists(fullPath))
                        {
                            Directory.CreateDirectory(fullPath);
                        }
                        FileStream targetFileStream = File.Create(fullPath + "\\"+ fileName);

                        StreamUtils.Copy(s, targetFileStream, data, progressHandler, new TimeSpan(0, 0, 0, 1), this, fileName);

                        targetFileStream.Close();

                    }
                }
                EndProcess(s);
            }
其他格式的解压代码类似,这里就不贴了。
界面开发:
界面这块的话,是直接使用WPF开发的,大家看下效果图:
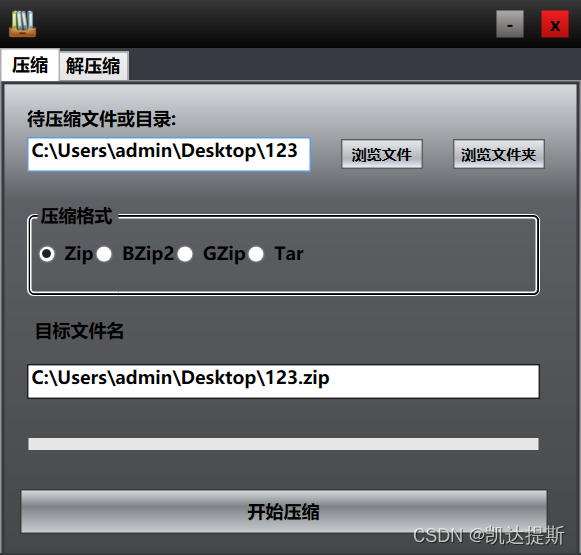
这块主要就是拖控件,然后调整它的一个UI风格,这个是根据我个人的喜好来调整的风格,大家可以自己尝试其他风格和布局。
三、系统菜单项的开发
因为压缩工具类,一般安装完成后都会注册自己的菜单项到系统的菜单里面,这样你鼠标右键一个文件或者文件夹的时候,就可以使用压缩工具了,比较方便,那这个功能怎么实现呢,我这里使用的也是一个开源的组件名称叫sharpshell,它来帮助我们实现系统的右键菜单,具体来说的话,你需要创建一个c#的dll,然后通过命令注册到系统,dll的核心代码:
 [ComVisible(true)]
    [COMServerAssociation(AssociationType.AllFiles), COMServerAssociation(AssociationType.Directory)]
    public class EasyMenu : SharpContextMenu
    {
        protected override bool CanShowMenu()
        {
            return true;
        }

        protected override ContextMenuStrip CreateMenu()
        {

            var reg = Registry.CurrentUser.OpenSubKey(@"SOFTWARE\doubledr\EasyCompress");
            string curPath = (string)reg.GetValue("Path");
            //  Create the menu strip
            var menu = new ContextMenuStrip();

            //  Create a 'count lines' item
            var itemZip = new ToolStripMenuItem
            {
                Text = "使用easyZip压缩文件",
                Image = Image.FromFile(curPath+"\\menu.ico")
            };

            //  When we click, we'll count the lines
            itemZip.Click += (sender, args) => CompressZip();

            //  Create a 'count lines' item
            var itemExractZip = new ToolStripMenuItem
            {
                Text = "使用easyZip解压文件",
                Image = Image.FromFile(curPath+"\\menu.ico")
            };

            //  When we click, we'll count the lines
            itemExractZip.Click += (sender, args) => ExractZip();

            //  Add the item to the context menu.
            menu.Items.Add(itemZip);
            menu.Items.Add(itemExractZip);

            //  Return the menu
            return menu;
        }

        private void ExractZip()
        {
            //  Go through each file.
            string args = string.Empty;
            args = "dp";

            args += " ";

            foreach (var filePath in SelectedItemPaths)
            {
                //  Count the lines
                args += filePath;
                break;

            }
            var reg = Registry.CurrentUser.OpenSubKey(@"SOFTWARE\doubledr\EasyCompress");
            string curPath = (string)reg.GetValue("Path");
            Process process = new Process();
            process.StartInfo.FileName = curPath + @"\EasyZipTools.exe";
            process.StartInfo.Arguments = args;
            process.StartInfo.UseShellExecute = true;
            process.Start();
        }
        /// <summary>
        /// Counts the lines in the selected files
        /// </summary>
        private void CompressZip()
        {
            //  Builder for the output
            var builder = new StringBuilder();

            //  Go through each file.
            string args = string.Empty;
            args = "cp";

            foreach (var filePath in SelectedItemPaths)
            {
                //  Count the lines
                args += " ";
                args += filePath;

            }

            var reg = Registry.CurrentUser.OpenSubKey(@"SOFTWARE\doubledr\EasyCompress");
            string curPath = (string)reg.GetValue("Path");

            Process process = new Process();
            process.StartInfo.FileName = curPath + @"\EasyZipTools.exe";
            process.StartInfo.Arguments = args;
            process.StartInfo.UseShellExecute = true;
            process.Start();
        }
这里向系统菜单添加了两个菜单项,一个负责压缩,一个负责解压缩,功能上都是打开我们的主程序进程来完成工作。
另外就是注册菜单,这里需要使用asm来注册,命令是:
C:\WINDOWS\Microsoft.NET\Framework64\v4.0.30319\regasm /register /codebase EasyZipMenu.dll
C:\WINDOWS\Microsoft.NET\Framework64\v4.0.30319\regasm /unregister /codebase EasyZipMenu.dll
总结:
以上就是我们的一个简单的压缩工具的开发过程,希望对大家有所帮助,完整的代码开源地址:
EasyZipTools
欢迎大家star


 637
637


 被折叠的 条评论
为什么被折叠?
被折叠的 条评论
为什么被折叠?
 到【灌水乐园】发言


