


 本文详细记录了如何通过步骤操作新建项目agct1#20220620,包括设置变频器IP、配置ModuleAddresses标签,完成与变频器的网络连接。重点介绍了如何设置目标站、网络连接和加载配置的过程。
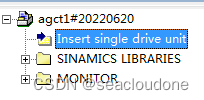
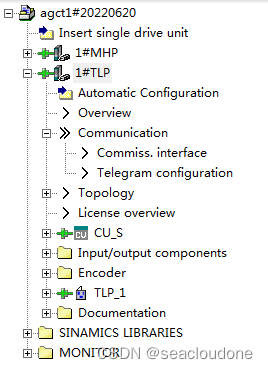
1. 新建项目
1.1 新建项目“agct1#20220620”,双击“Insert single drive unit”
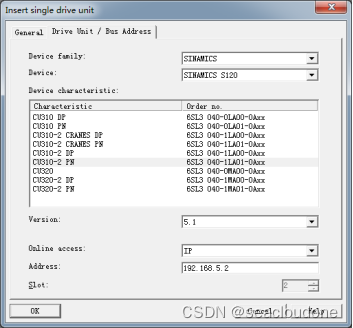
1.2 选择变频器“Version”,输入变频器IP“Address”,单击“OK”
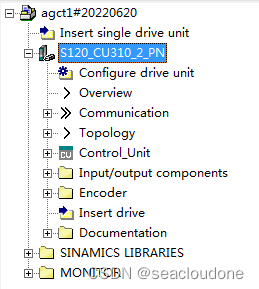
1.3 项目树更新
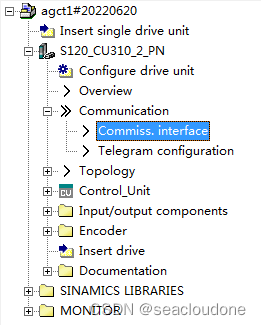
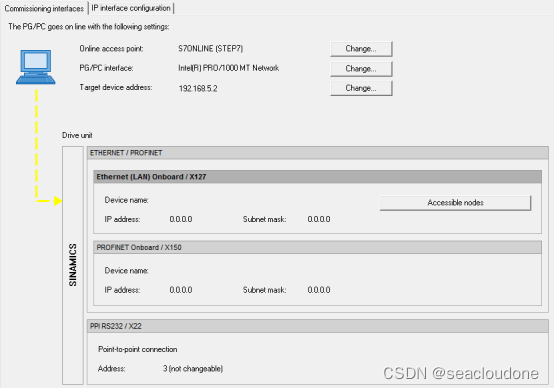
1.4 双击“Commiss,interface”
1.5 单击“Change...”
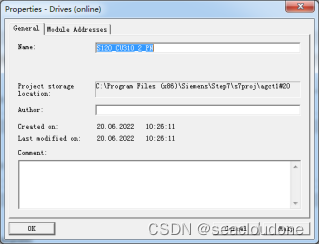
1.6 选择“Module Addresses”标签
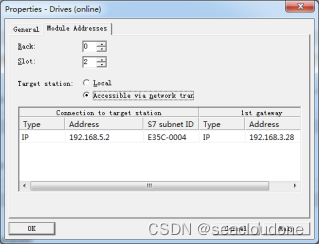
1.7 选择“Accessible bia network tran”,输入“Connection to target station”、“1st gateway”相应字段内容,单击“OK”
1.8 在准备连接传动上右击,在快捷菜单上单击“Connect target device”
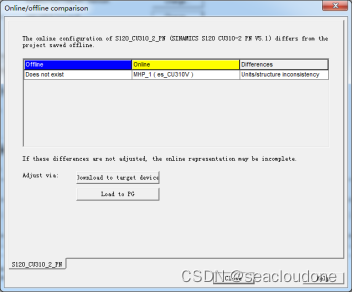
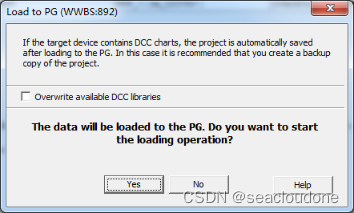
1.9 单击“Load to PG”
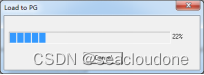
1.10 单击“Yes”
1.11 单击“Close”
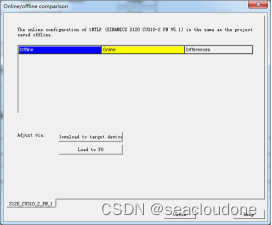
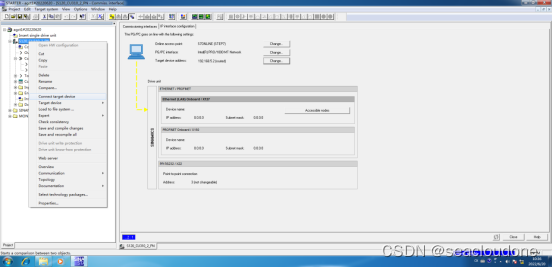
1.12 显示连接状态,与变频器建立连接,
2. Module Addresses标签内容解析
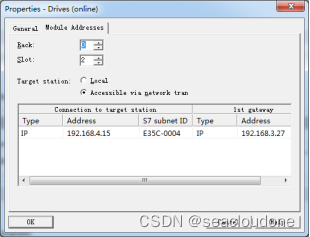
Module Addresses
You can specifically define the connection of the drive unit to the application in the Module addresses tab.
Module addresses tab
Field/button Meaning/information
Rack Select the rack here. Select Rack 0 for drive units.
Slot Select the slot here. Select Slot 2 for drive units.
Target station Select the type of connection from the drive unit to the application here. Activate Local if the drive unit is to be connected to the application via a direct connection (PROFIBUS DP or USS). Activate Accessible via network transition if the drive unit is connected to the application via a gateway. The network configuration must then be performed with NetPro and loaded to the CPU.
Connection to target station
Type Select PROFIBUS here, even if the drive unit is to be accessed via USS.
Address Enter the PROFIBUS address or USS address depending on which local interface is used to access the drive unit.
S7 subnet ID Enter the S7 subnet ID here. This is the ID of the subnet to which the target station is connected. The subnet is uniquely described in the project with the S7 subnet ID. In this network configuration, the subnet ID is determined via the Properties dialog box of the subnet. The S7 subnet ID is printed with the network configuration.
1st gateway
Is only displayed if Accessible via network transition is activated at the target station.
Type The network type via which the application is connected is displayed here.
Address Enter the address of the station via which the application accesses the drive unit.
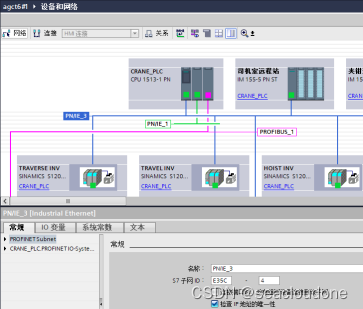
S7 subnet ID:填变频器所在S7子网标识,可在博途 -> 设备和网络 -> 子网属性,本例变频器连接在PN/IE_3子网,ID为:“E35C-0004”


 8787
8787

 被折叠的 条评论
为什么被折叠?
被折叠的 条评论
为什么被折叠?
 到【灌水乐园】发言


