


Bacula网络备份环境搭建
本人学生党一名,选修课程中与设计到bacula网络备份的部分,特地将此部分写入博客,因对bacula了解不多,而且距离自己搭建环境的时间有点长,若有错误的地方,欢迎大家拍砖!
前提声明:本人搭建环境为Director端、SD端在一台名为master的机器上,FD端在一台名为slave1的机器上,master地址为192.168.10.1,slave1地址为192.168.10.2。
版本介绍:
Linux:CentOS-5.8-x86_64-bin-DVD-1of2.iso
Bacula:bacula-7.2.0.tar.gz
- 部署的操作步骤
- 部署成功后的使用方法
- 部署后的截图
- 部署过程中出现的问题
一、部署的操作步骤;
1、创建两个虚拟机,修改IP和hostname,修改/etc/hosts文件
1)修改IP
vi /etc/sysconfig/network-scripts/ifcfg-eth0
BOOTPROTO=static
IPADDR=192.168.10.1  (192.168.10.2,可自行设置)
NETMASK=255.255.255.0
GATEWAY=192.168.10.253 (可自行设置)
2)修改主机名
vi /etc/sysconfig/network
NETWORKING=yes
HOSTNAME=master(slave1)
3)配置/etc/hosts文件
vi /etc/hosts
192.168.10.1    master
192.168.10.2    slave1
127.0.0.1   localhost
4)立即生效:
service network restart5)修改虚拟机网络选项,可使用putty进行操作。
仅主机host-only 适配器
2、安装GCC编译器和MySQL
1)配置yum源,使用光盘作为yum源
cd /etc/yum.repos.d/创建目录备份配置文件
mkdir /backup/yum -p
mv CentOS-Base.repo /backup/yum
mv CentOS-Debuginfo.repo /backup/yum
mv CentOS-Vault.repo /backup/yum
修改配置文件
vi CentOS-Media.repo
baseurl=file:///mnt/cdrom
gpgcheck=1
enabled=1
创建光盘挂载目录
mkdir /mnt/cdrom
挂载光盘(人工操作)
挂载
mount /dev/cdrom /mnt/cdrom2) 安装基础工具包,开发工具包,开发类库,MySQL
yum groupinstall "Base"
yum groupinstall "Development tools" -y
yum groupinstall  "Development Libraries" -y
yum install mysql mysql-devel mysql-server
3) 挂载光盘退出前的操作
umount /dev/cdrom
退出挂载光盘
3、Bacula安装
在服务器端和客户端都进行的操作:
1)下载bacula-7.2.0.tar.gz,本人为bacula选择的路径为/application/bacula。
#mkdir -p /application/bacula2)使用filezilla.exe小软件将Windows下的压缩包上传到Linux的/application/bacula路径下。(scp等各种方法都可以)
3)解压缩bacula文件
#tar zxvf bacula-7.2.0.tar.gz在服务器端进行的操作:
#cd bacula-7.2.0
#./configure --prefix=/application/bacula --with-mysql(因为是yum安装,所以无需指定MySQL路径)
#make
#make install
安装bacula过后,需要创建bacula对应的MySQL数据库及访问数据库的授权。
首先为保证不出错,将MySQL启动,以用户名为root,且密码为空的方式登录MySQL
#service mysqld start
#mysql -uroot -p
#:[输入enter键]
mysql>exit

#cd /application/bacula/etc
#./grant_mysql_privileges
#./create_mysql_database
#./make_mysql_tables
之后可以在MySQL中查看是否已建立表格。
在客户端进行的操作:
#cd bacula-7.2.0
#./configure --prefix=/application/bacula --enable-client-only
#make
#make install
配置服务器端
服务器端主要配置三个文件,分别是bconsole.conf,bacula-dir.conf和bacula-sd.conf。其中是bconsole.conf配置console端的文件,bacula-dir.conf是bacula核心配置文件,bacula-sd.conf是配置SD端的文件。
1)vi /application/bacula/etc/bconsole.conf
注意Director的Name和password,这几个配置文件中有多个密码选项,为以防万一,将所有密码设为一样的是正道!address是服务器端的地址,至于端口号选项,Director为9101,FD端口号为9102,SD端口号为9102,这应该不需要修改,若配置文件有错误,可参考。
2)vi /application/bacula/etc/bacula-dir.conf
在bacula-dir.conf中共有10个逻辑段:
Director 定义全局设置
Jobdefs 定义执行任务的一些共同属性,可以让任务继承,如果有冲突则以job中的为准。
job 自定义一个备份或恢复的任务
Fileset 定义备份哪些数据,不备份哪些数据
Sehedule 定义备份时间策略
Client 定义需要被备份的主机地址,也就是客户端地址
Storage 定义数据的存储方式
Catalog 定义后台数据库
Message 定义发送日志报告和记录日志的位置
Pool 定义供job使用的池属性
注意需要修改的包含:
Director的Password
Client的Password
FileSet中Include一项File=../../../,说明自己要进行备份的文件包含内容
Storage中Password,Device,Media Type选项,要分别与bacula-sd.conf配置文件中的device、Media Type逻辑段name相同
3)vi /application/bacula/etc/bacula-sd.conf
需要修改的选项:
Director的Name、Password,要与bacula-dir.conf中的director信息相同
Director的Name、Password,与bacula-dir.conf中的console信息相同
配置客户端
客户端需要配置的有两个文件:bconsole.conf和bacula-fd.conf
1)vi /application/bacula/etc/bconsole.conf
需要修改的选项:
Director的Name、Password,要与bconsole.conf中的director信息相同
2)vi /application/bacula/etc/bacula-fd.conf
需要修改的选项:
Director的Name、Password,要与bacula-dir.conf中的director信息相同
Director的Name、Password,与bacula-dir.conf中的console信息相同
FileDaemon的Name
就此已完成bacula所有文件的配置。
二、部署成功后的使用方法;
1、服务器端启动MySQL
[root@master etc]# service mysqld start
Starting MySQL:                                            [  OK  ]
2、服务器端启动bacula
切换到/application/bacula/sbin,执行操作
[root@master etc]# cd /application/bacula/sbin/
[root@master sbin]# ./bacula start
Starting the Bacula Storage daemon
Starting the Bacula File daemon
Starting the Bacula Director daemon
3、客户端启动bacula
切换到/application/bacula/sbin,执行操作
[root@master etc]# cd /application/bacula/sbin/
[root@slave1 sbin]# ./bacula start
Starting the Bacula File daemon
此时已全部启动,进行一下备份操作。
服务器端:
[root@master sbin]# ./bconsole
Connecting to Director master:9101
1000 OK: 102 master-dir Version: 7.2.0 (14 August 2015)
Enter a period to cancel a command.
*label          #建立备份文件
Automatically selected Catalog: MyCatalog
Using Catalog "MyCatalog"
The defined Storage resources are:
     1: File1
     2: File2
Select Storage resource (1-2): 1    #选择File1的备份文件存储类型
Enter new Volume name: test_01_11_15_52 #为新建备份文件命名,建于01-11 15:52
Defined Pools:
     1: Default
     2: File
     3: Scratch
Select the Pool (1-3): 1        # 指定备份使用的pool属性
Connecting to Storage daemon File1 at master:9103 ...
Sending label command for Volume "test_01_11_15_52" Slot 0 ...
3000 OK label. VolBytes=204 VolABytes=0 VolType=1 Volume="test_01_11_15_52" Device="FileChgr1-Dev1" (/tmp)
Catalog record for Volume "test_01_11_15_52", Slot 0  successfully created.
Requesting to mount FileChgr1-Dev1 ...
3906 File device ""FileChgr1-Dev1" (/tmp)" is always mounted.
*exit       #创建备份文件成功即可退出。
客户端:
[root@slave1 sbin]# ./bconsole
Connecting to Director master:9101
1000 OK: 102 master-dir Version: 7.2.0 (14 August 2015)
Enter a period to cancel a command.
*run        #执行备份任务
Automatically selected Catalog: MyCatalog
Using Catalog "MyCatalog"
A job name must be specified.
The defined Job resources are:
     1: BackupClient1
     2: BackupCatalog
     3: RestoreFiles
Select Job resource (1-3): 1    #选择BackupClient1类型任务
Run Backup job
JobName:  BackupClient1
Level:    Incremental
Client:   master-fd
FileSet:  Full Set
Pool:     File (From Job resource)
Storage:  File1 (From Job resource)
When:     2016-01-11 16:01:28
Priority: 10
OK to run? (yes/mod/no): yes    #确认运行
Job queued. JobId=11
You have messages.
*status     #查看状态
Status available for:
     1: Director
     2: Storage
     3: Client
     4: Scheduled
     5: All
Select daemon type for status (1-5): 3      #选择查看客户端状态
Automatically selected Client: master-fd
Connecting to Client master-fd at slave1:9102

master-fd Version: 7.2.0 (14 August 2015)  x86_64-unknown-linux-gnu redhat
Daemon started 11-Jan-16 16:00. Jobs: run=1 running=0.
 Heap: heap=524,288 smbytes=94,985 max_bytes=167,697 bufs=65 max_bufs=98
 Sizes: boffset_t=8 size_t=8 debug=0 trace=0 mode=0 bwlimit=0kB/s

Running Jobs:
Director connected at: 11-Jan-16 16:02
No Jobs running.
====
Terminated Jobs:
 JobId  Level    Files      Bytes   Status   Finished        Name
===================================================================
     4  Full          5    1.026 M  OK       10-Jan-16 22:29 BackupClient1
     5  Full          0         0   OK       10-Jan-16 22:59 BackupClient1
     6  Incr          0         0   OK       10-Jan-16 22:59 BackupClient1
     7  Incr          1         0   OK       10-Jan-16 23:02 BackupClient1
     8  Diff          0         0   OK       10-Jan-16 23:04 BackupClient1
     9                6    1.026 M  OK       10-Jan-16 23:07 RestoreFiles
    10  Full          0         0   OK       10-Jan-16 23:09 BackupCatalog
    11  Incr          4         0   OK       11-Jan-16 16:02 BackupClient1
====
*exit       #退出
下面尝试删除客户端备份的文件,随后进行备份的恢复工作,查看时否能够成功恢复。
BackupClient1任务进行备份的路径为/application/bacula/test,test文件中包含文件如下,并进行删除操作。
[root@slave1 ~]# cd /application/bacula/sbin/
[root@slave1 sbin]# ./bconsole
Connecting to Director master:9101
1000 OK: 102 master-dir Version: 7.2.0 (14 August 2015)
Enter a period to cancel a command.
*restore        #进行恢复任务
Automatically selected Catalog: MyCatalog
Using Catalog "MyCatalog"

First you select one or more JobIds that contain files
to be restored. You will be presented several methods
of specifying the JobIds. Then you will be allowed to
select which files from those JobIds are to be restored.

To select the JobIds, you have the following choices:
     1: List last 20 Jobs run
     2: List Jobs where a given File is saved
     3: Enter list of comma separated JobIds to select
     4: Enter SQL list command
     5: Select the most recent backup for a client
     6: Select backup for a client before a specified time
     7: Enter a list of files to restore
     8: Enter a list of files to restore before a specified time
     9: Find the JobIds of the most recent backup for a client
    10: Find the JobIds for a backup for a client before a specified time
    11: Enter a list of directories to restore for found JobIds
    12: Select full restore to a specified Job date
    13: Cancel
Select item:  (1-13): 3         #选择输入某一特定的任务ID
Enter JobId(s), comma separated, to restore: 11
You have selected the following JobId: 11

Building directory tree for JobId(s) 11 ...
3 files inserted into the tree.

You are now entering file selection mode where you add (mark) and
remove (unmark) files to be restored. No files are initially added, unless
you used the "all" keyword on the command line.
Enter "done" to leave this mode.

cwd is: /
$ mark *           #添加所有文件
4 files marked.
$ done
Bootstrap records written to /opt/bacula/working/master-dir.restore.2.bsr
Bootstrap records written to /opt/bacula/working/master-dir.restore.2.bsr

The Job will require the following (*=>InChanger):
   Volume(s)                 Storage(s)                SD Device(s)
===========================================================================

    Vol-0008                  File1                     FileChgr1-Dev1

Volumes marked with "*" are in the Autochanger.


4 files selected to be restored.

Automatically selected Client: master-fd
Using Catalog "MyCatalog"
Run Restore job
JobName:         RestoreFiles
Bootstrap:       /opt/bacula/working/master-dir.restore.2.bsr
Where:           /tmp/bacula-restores
Replace:         Always
FileSet:         Full Set
Backup Client:   master-fd
Restore Client:  master-fd
Storage:         File1
When:            2016-01-11 16:48:13
Catalog:         MyCatalog
Priority:        10
Plugin Options:
OK to run? (yes/mod/no): mod        #对以上restore任务的内容进行修改
Parameters to modify:
     1: Level
     2: Storage
     3: Job
     4: FileSet
     5: Restore Client
     6: When
     7: Priority
     8: Bootstrap
     9: Where
    10: File Relocation
    11: Replace
    12: JobId
    13: Plugin Options
Select parameter to modify (1-13): 9
Please enter the full path prefix for restore (/ for none): /       #文件路径无前缀
Run Restore job
JobName:         RestoreFiles
Bootstrap:       /opt/bacula/working/master-dir.restore.3.bsr
Where:
Replace:         Always
FileSet:         Full Set
Backup Client:   master-fd
Restore Client:  master-fd
Storage:         File1
When:            2016-01-11 16:49:49
Catalog:         MyCatalog
Priority:        10
Plugin Options:
OK to run? (yes/mod/no):yes     #确认运行
Job queued. JobId=15
You have messages.
*exit
恢复部分已结束,现在查看原路径下是否有test文件,由下图可知,成功恢复了test文件。
三、部署后的截图
以bacula启动为例,证明bacula已部署。
图三展示的是在服务器端启动MySQL和bacula,随后远程登录到客户端启动bacula。
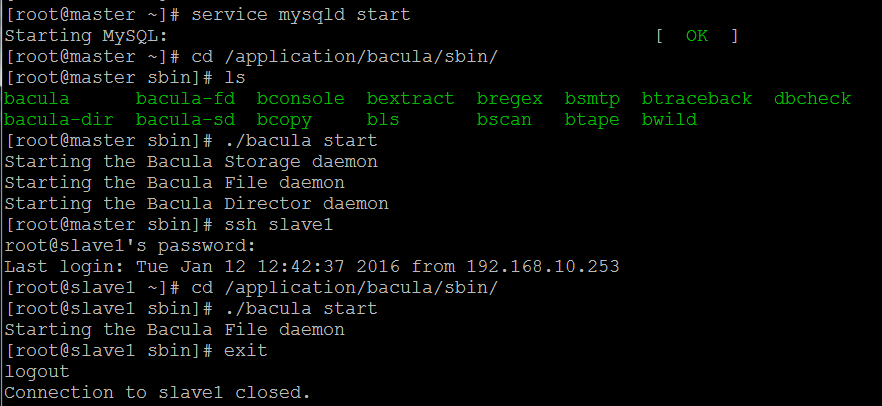
具体的使用截图可参考第二部分的使用方法,其中有关命令执行部分的文字是直接在putty上复制得来。
四、部署过程中出现的问题。
1、在bacula安装完成之后,要建立bacula对应的数据库信息,执行以下三个命令:
#./grant_mysql_privileges
#./create_mysql_database
#./make_mysql_tables
但是在执行第一个命令时,提示找不到/var/lib/mysql中找不到mysql.sock文件。
解决方法:参考网上安装bacula的步骤,要求创建bacula数据库时用户密码为空,就想到虽然MySQL已安装,但是还没有用任何一个用户登录过,所以执行mysql -uroot -p命令,令密码为空之后,登录到了MySQL,退出后在执行以上三条语句就可以顺利通过了。
2、在配置服务器端的三个配置文件时,有众多的名称和密码,为保证出现密码不一致的情况,最好的方法是将所有密码设为统一的字符串。


 273
273

 被折叠的 条评论
为什么被折叠?
被折叠的 条评论
为什么被折叠?
 到【灌水乐园】发言


