


8.控制节点-Horizon服务组件
OpenStack部署系列文章
OpenStack Victoria版 安装部署系列教程
OpenStack Ussuri版 离线安装部署系列教程(全)
OpenStack Train版 离线安装部署系列教程(全)
欢迎留言沟通,共同进步。
文章目录
一、服务说明
OpenStack仪表板Dashboard服务的项目名称是Horizon,它所需的唯一服务是身份服务keystone,开发语言是python的web框架Django。
从Stein版本开始,Horizon支持以下服务:
- cinder:块状存储
- glance:镜像管理
- neutron:网络
- nova:计算
- swift:对象存储
- 如果已配置好服务keystone的endpoint,那么Horizon将对其进行检测并自动启用其支持。
Horizon还通过插件支持更多其他OpenStack服务。
注:
①可以选择在计算节点(compute01)上安装仪表板服务horizon。由于horizon运行需要apache,为了不影响控制节点上的keystone等其他服务使用的apache,亦可在计算节点上安装。
②安装之前确认以前安装的服务是否正常启动。
③本系列教程是在控制节点安装。
二、安装与配置dashboard相关软件
1.安装软件包
dnf install openstack-dashboard -y
2.配置文件修改
(1)local_settings
编辑 vim /etc/openstack-dashboard/local_settings 文件,修改以下文件内容
cp /etc/openstack-dashboard/local_settings /etc/openstack-dashboard/local_settings.bak
vim /etc/openstack-dashboard/local_settings
可以使用sed命令进行配置
注意官网ubuntu系统的教程可能存在大坑,导致登录报错
官网为
OPENSTACK_KEYSTONE_URL = "http://%s/identity/v3" % OPENSTACK_HOST
加上端口号
OPENSTACK_KEYSTONE_URL = "http://%s:5000/identity/v3" % OPENSTACK_HOST
OPENSTACK_KEYSTONE_URL = "http://%s:5000/v3" % OPENSTACK_HOST
----------------------------------------------------------
# 配置仪表盘在controller节点上使用openstack服务
OPENSTACK_HOST = "controller"
# 配置运行访问仪表盘的主机,星号表示运行所有主机访问
ALLOWED_HOSTS = ['*']
# 配置memcached会话存储服务
SESSION_ENGINE = 'django.contrib.sessions.backends.cache'
CACHES = {
    'default': {
         'BACKEND': 'django.core.cache.backends.memcached.MemcachedCache',
         'LOCATION': 'controller:11211',
    }
}
# 启用身份API版本3
OPENSTACK_KEYSTONE_URL = "http://%s:5000/v3" % OPENSTACK_HOST
TIME_ZONE = "Asia/Shanghai"
# 上面几项修改即可,以下为新增信息
# 启用对域的支持
OPENSTACK_KEYSTONE_MULTIDOMAIN_SUPPORT = True
# 配置API版本
OPENSTACK_API_VERSIONS = {
    "identity": 3,
    "image": 2,
    "volume": 3,
}
# 配置默认域
OPENSTACK_KEYSTONE_DEFAULT_DOMAIN = "Default"
# 配置默认角色
OPENSTACK_KEYSTONE_DEFAULT_ROLE = "user"
# 启用对第3层网络服务的支持,若是公有网络则需要禁用,将True改为False
OPENSTACK_NEUTRON_NETWORK = {
    'enable_router': True,
    'enable_quotas': True,
    'enable_distributed_router': True,
    'enable_ha_router': True,
    'enable_lb': True,
    'enable_firewall': True,
    'enable_vpn': True,
    'enable_fip_topology_check': True,
}
----------------------------------------------------------
示例文件/etc/openstack-dashboard/local_settings
# -*- coding: utf-8 -*-

# ----------------------------------------------------------------------
# NOTE: The default values of the settings are defined in
# openstack_dashboard/defaults.py. Previously most available settings
# were listed in this example file, but it is no longer true.
# For available settings, see openstack_dashboard/defaults.py and
# the horizon setting reference found at
# https://docs.openstack.org/horizon/latest/configuration/settings.html.
#
# Django related settings and HORIZON_CONFIG still exist here.
# Keep in my mind that they will be revisit in upcoming releases.
# ----------------------------------------------------------------------

import os

from django.utils.translation import ugettext_lazy as _


from openstack_dashboard.settings import HORIZON_CONFIG

DEBUG = False

# This setting controls whether or not compression is enabled. Disabling
# compression makes Horizon considerably slower, but makes it much easier
# to debug JS and CSS changes
#COMPRESS_ENABLED = not DEBUG

# This setting controls whether compression happens on the fly, or offline
# with `python manage.py compress`
# See https://django-compressor.readthedocs.io/en/latest/usage/#offline-compression
# for more information
#COMPRESS_OFFLINE = not DEBUG

# If horizon is running in production (DEBUG is False), set this
# with the list of host/domain names that the application can serve.
# For more information see:
# https://docs.djangoproject.com/en/dev/ref/settings/#allowed-hosts
#ALLOWED_HOSTS = ['horizon.example.com', 'localhost']

ALLOWED_HOSTS = ['*']

# Set SSL proxy settings:
# Pass this header from the proxy after terminating the SSL,
# and don't forget to strip it from the client's request.
# For more information see:
# https://docs.djangoproject.com/en/dev/ref/settings/#secure-proxy-ssl-header
#SECURE_PROXY_SSL_HEADER = ('HTTP_X_FORWARDED_PROTO', 'https')

# If Horizon is being served through SSL, then uncomment the following two
# settings to better secure the cookies from security exploits
#CSRF_COOKIE_SECURE = True
#SESSION_COOKIE_SECURE = True

# If provided, a "Report Bug" link will be displayed in the site header
# which links to the value of this setting (ideally a URL containing
# information on how to report issues).
#HORIZON_CONFIG["bug_url"] = "http://bug-report.example.com"

# Show backdrop element outside the modal, do not close the modal
# after clicking on backdrop.
#HORIZON_CONFIG["modal_backdrop"] = "static"

# Specify a regular expression to validate user passwords.
#HORIZON_CONFIG["password_validator"] = {
#    "regex": '.*',
#    "help_text": _("Your password does not meet the requirements."),
#}

# Turn off browser autocompletion for forms including the login form and
# the database creation workflow if so desired.
#HORIZON_CONFIG["password_autocomplete"] = "off"

# Setting this to True will disable the reveal button for password fields,
# including on the login form.
#HORIZON_CONFIG["disable_password_reveal"] = False

LOCAL_PATH = '/tmp'

# Set custom secret key:
# You can either set it to a specific value or you can let horizon generate a
# default secret key that is unique on this machine, e.i. regardless of the
# amount of Python WSGI workers (if used behind Apache+mod_wsgi): However,
# there may be situations where you would want to set this explicitly, e.g.
# when multiple dashboard instances are distributed on different machines
# (usually behind a load-balancer). Either you have to make sure that a session
# gets all requests routed to the same dashboard instance or you set the same
# SECRET_KEY for all of them.
SECRET_KEY='1b09527cbf787132e822'

# We recommend you use memcached for development; otherwise after every reload
# of the django development server, you will have to login again. To use
# memcached set CACHES to something like below.
# For more information, see
# https://docs.djangoproject.com/en/1.11/topics/http/sessions/.
#CACHES = {
#    'default': {
#        'BACKEND': 'django.core.cache.backends.memcached.MemcachedCache',
#        'LOCATION': '127.0.0.1:11211',
#    },
#}

CACHES = {
    'default': {
         'BACKEND': 'django.core.cache.backends.memcached.MemcachedCache',
         'LOCATION': 'controller:11211',
    }
}


# If you use ``tox -e runserver`` for developments,then configure
# SESSION_ENGINE to django.contrib.sessions.backends.signed_cookies
# as shown below:
#SESSION_ENGINE = 'django.contrib.sessions.backends.signed_cookies'

SESSION_ENGINE = 'django.contrib.sessions.backends.cache'

# Send email to the console by default
EMAIL_BACKEND = 'django.core.mail.backends.console.EmailBackend'
# Or send them to /dev/null
#EMAIL_BACKEND = 'django.core.mail.backends.dummy.EmailBackend'

# Configure these for your outgoing email host
#EMAIL_HOST = 'smtp.my-company.com'
#EMAIL_PORT = 25
#EMAIL_HOST_USER = 'djangomail'
#EMAIL_HOST_PASSWORD = 'top-secret!'

#OPENSTACK_HOST = "127.0.0.1"
OPENSTACK_HOST = "controller"

#OPENSTACK_KEYSTONE_URL = "http://%s/identity/v3" % OPENSTACK_HOST
OPENSTACK_KEYSTONE_URL = "http://%s:5000/v3" % OPENSTACK_HOST
# The timezone of the server. This should correspond with the timezone
# of your entire OpenStack installation, and hopefully be in UTC.
#TIME_ZONE = "UTC"
TIME_ZONE = "Asia/Shanghai"


OPENSTACK_KEYSTONE_MULTIDOMAIN_SUPPORT = True
OPENSTACK_API_VERSIONS = {
    "identity": 3,
    "image": 2,
    "volume": 3,
}
OPENSTACK_KEYSTONE_DEFAULT_DOMAIN = "Default"
OPENSTACK_KEYSTONE_DEFAULT_ROLE = "user"

OPENSTACK_NEUTRON_NETWORK = {
    'enable_router': True,
    'enable_quotas': True,
    'enable_distributed_router': True,
    'enable_ha_router': True,
    'enable_lb': True,
    'enable_firewall': True,
    'enable_vpn': True,
    'enable_fip_topology_check': True,
}


# Change this patch to the appropriate list of tuples containing
# a key, label and static directory containing two files:
# _variables.scss and _styles.scss
#AVAILABLE_THEMES = [
#    ('default', 'Default', 'themes/default'),
#    ('material', 'Material', 'themes/material'),
#    ('example', 'Example', 'themes/example'),
#]

LOGGING = {
    'version': 1,
    # When set to True this will disable all logging except
    # for loggers specified in this configuration dictionary. Note that
    # if nothing is specified here and disable_existing_loggers is True,
    # django.db.backends will still log unless it is disabled explicitly.
    'disable_existing_loggers': False,
    # If apache2 mod_wsgi is used to deploy OpenStack dashboard
    # timestamp is output by mod_wsgi. If WSGI framework you use does not
    # output timestamp for logging, add %(asctime)s in the following
    # format definitions.
    'formatters': {
        'console': {
            'format': '%(levelname)s %(name)s %(message)s'
        },
        'operation': {
            # The format of "%(message)s" is defined by
            # OPERATION_LOG_OPTIONS['format']
            'format': '%(message)s'
        },
    },
    'handlers': {
        'null': {
            'level': 'DEBUG',
            'class': 'logging.NullHandler',
        },
        'console': {
            # Set the level to "DEBUG" for verbose output logging.
            'level': 'DEBUG' if DEBUG else 'INFO',
            'class': 'logging.StreamHandler',
            'formatter': 'console',
        },
        'operation': {
            'level': 'INFO',
            'class': 'logging.StreamHandler',
            'formatter': 'operation',
        },
    },
    'loggers': {
        'horizon': {
            'handlers': ['console'],
            'level': 'DEBUG',
            'propagate': False,
        },
        'horizon.operation_log': {
            'handlers': ['operation'],
            'level': 'INFO',
            'propagate': False,
        },
        'openstack_dashboard': {
            'handlers': ['console'],
            'level': 'DEBUG',
            'propagate': False,
        },
        'novaclient': {
            'handlers': ['console'],
            'level': 'DEBUG',
            'propagate': False,
        },
        'cinderclient': {
            'handlers': ['console'],
            'level': 'DEBUG',
            'propagate': False,
        },
        'keystoneauth': {
            'handlers': ['console'],
            'level': 'DEBUG',
            'propagate': False,
        },
        'keystoneclient': {
            'handlers': ['console'],
            'level': 'DEBUG',
            'propagate': False,
        },
        'glanceclient': {
            'handlers': ['console'],
            'level': 'DEBUG',
            'propagate': False,
        },
        'neutronclient': {
            'handlers': ['console'],
            'level': 'DEBUG',
            'propagate': False,
        },
        'swiftclient': {
            'handlers': ['console'],
            'level': 'DEBUG',
            'propagate': False,
        },
        'oslo_policy': {
            'handlers': ['console'],
            'level': 'DEBUG',
            'propagate': False,
        },
        'openstack_auth': {
            'handlers': ['console'],
            'level': 'DEBUG',
            'propagate': False,
        },
        'django': {
            'handlers': ['console'],
            'level': 'DEBUG',
            'propagate': False,
        },
        # Logging from django.db.backends is VERY verbose, send to null
        # by default.
        'django.db.backends': {
            'handlers': ['null'],
            'propagate': False,
        },
        'requests': {
            'handlers': ['null'],
            'propagate': False,
        },
        'urllib3': {
            'handlers': ['null'],
            'propagate': False,
        },
        'chardet.charsetprober': {
            'handlers': ['null'],
            'propagate': False,
        },
        'iso8601': {
            'handlers': ['null'],
            'propagate': False,
        },
        'scss': {
            'handlers': ['null'],
            'propagate': False,
        },
    },
}

# 'direction' should not be specified for all_tcp/udp/icmp.
# It is specified in the form.
SECURITY_GROUP_RULES = {
    'all_tcp': {
        'name': _('All TCP'),
        'ip_protocol': 'tcp',
        'from_port': '1',
        'to_port': '65535',
    },
    'all_udp': {
        'name': _('All UDP'),
        'ip_protocol': 'udp',
        'from_port': '1',
        'to_port': '65535',
    },
    'all_icmp': {
        'name': _('All ICMP'),
        'ip_protocol': 'icmp',
        'from_port': '-1',
        'to_port': '-1',
    },
    'ssh': {
        'name': 'SSH',
        'ip_protocol': 'tcp',
        'from_port': '22',
        'to_port': '22',
    },
    'smtp': {
        'name': 'SMTP',
        'ip_protocol': 'tcp',
        'from_port': '25',
        'to_port': '25',
    },
    'dns': {
        'name': 'DNS',
        'ip_protocol': 'tcp',
        'from_port': '53',
        'to_port': '53',
    },
    'http': {
        'name': 'HTTP',
        'ip_protocol': 'tcp',
        'from_port': '80',
        'to_port': '80',
    },
    'pop3': {
        'name': 'POP3',
        'ip_protocol': 'tcp',
        'from_port': '110',
        'to_port': '110',
    },
    'imap': {
        'name': 'IMAP',
        'ip_protocol': 'tcp',
        'from_port': '143',
        'to_port': '143',
    },
    'ldap': {
        'name': 'LDAP',
        'ip_protocol': 'tcp',
        'from_port': '389',
        'to_port': '389',
    },
    'https': {
        'name': 'HTTPS',
        'ip_protocol': 'tcp',
        'from_port': '443',
        'to_port': '443',
    },
    'smtps': {
        'name': 'SMTPS',
        'ip_protocol': 'tcp',
        'from_port': '465',
        'to_port': '465',
    },
    'imaps': {
        'name': 'IMAPS',
        'ip_protocol': 'tcp',
        'from_port': '993',
        'to_port': '993',
    },
    'pop3s': {
        'name': 'POP3S',
        'ip_protocol': 'tcp',
        'from_port': '995',
        'to_port': '995',
    },
    'ms_sql': {
        'name': 'MS SQL',
        'ip_protocol': 'tcp',
        'from_port': '1433',
        'to_port': '1433',
    },
    'mysql': {
        'name': 'MYSQL',
        'ip_protocol': 'tcp',
        'from_port': '3306',
        'to_port': '3306',
    },
    'rdp': {
        'name': 'RDP',
        'ip_protocol': 'tcp',
        'from_port': '3389',
        'to_port': '3389',
    },
}

# Help URL can be made available for the client. To provide a help URL, edit the
# following attribute to the URL of your choice.
#HORIZON_CONFIG["help_url"] = "http://openstack.mycompany.org"
(2)openstack-dashboard.conf
编辑vim /etc/httpd/conf.d/openstack-dashboard.conf文件,添加以下内容
cp /etc/httpd/conf.d/openstack-dashboard.conf /etc/httpd/conf.d/openstack-dashboard.conf.bak
vim /etc/httpd/conf.d/openstack-dashboard.conf
WSGIApplicationGroup %{GLOBAL}
重启Apache服务、会话存储服务
systemctl restart httpd.service memcached.service
3.重建apache的dashboard配置文件
cd /usr/share/openstack-dashboard
ls
python3 manage.py make_web_conf --apache > /etc/httpd/conf.d/openstack-dashboard.conf
建立策略文件(policy.json)的软链接
ln -s /etc/openstack-dashboard /usr/share/openstack-dashboard/openstack_dashboard/conf
4.重启Web服务器和会话存储服务
systemctl enable httpd.service memcached.service
systemctl restart httpd.service memcached.service
5.访问Dashboard
http://10.0.0.11
文件配置正确会自动填入域Default,否则可能配置有问题,手动输入也会登录失败,若不记得用户名密码可以查看环境变量脚本.
至此,可以访问
echo ‘http://controller:80/dashboard’
echo ‘域:default’
echo ‘用户名:admin’
echo “密码:”${ADMIN_PASS}""
在Dashboard中可以分别创建不同网络选项的实例来验证安装。
附:快速创建实例类型
cd
source admin-openrc.sh
openstack flavor create --id 0 --vcpus 1 --ram 256 --disk 0 1U256M0G
openstack flavor create --id 2 --vcpus 1 --ram 1024 --disk 0 1U1G0G
openstack flavor create --id 3 --vcpus 1 --ram 2048 --disk 0 1U2G0G
附:修改novncproxy_base_url
在安装完成后注意修改:novncproxy_base_url为IP地址,IP地址为供应商地址,当除了管理网以外有多个IP地址时,选择合适的作为外部访问地址。
crudini --set /etc/nova/nova.conf vnc novncproxy_base_url http://192.168.2.11:6080/vnc_auto.html
OpenStack的基本组件安装完成,后续可以安装卷服务、高可用等。
二、访问问题
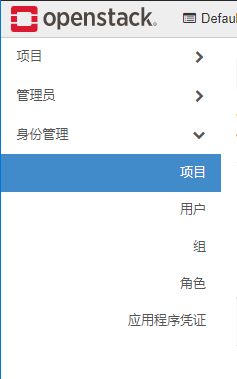
1.身份管理子项error
-
(1)问题描述
管理员访问dashboard的身份管理的各个子项遇到以下问题。

-
(2)解决问题
OpenStack离线Train版安装系列—8.控制节点-Horizon服务组件
OpenStack Ussuri版安装系列—8.控制节点-Horizon服务组件
OpenStack使用常见小问题小技巧
【openstack】无法访问身份管理下的项目、用户、组的解决办法


 3785
3785


 被折叠的 条评论
为什么被折叠?
被折叠的 条评论
为什么被折叠?
 到【灌水乐园】发言


