


安装MySQL(这里我们安装的是mysql-5.6.32-linux-glibc2.5-x86_64.tar.gz)
先检查系统自带的mysql:
rpm–qa|grep –i mysql

卸载掉:
rpm-e --nodeps mysql-libs-5.1.71-1.el6.x86_64

解压mysql到指定安装目录下/app/apps:
cd/tmp/software
tarzxvf mysql-5.6.32-linux-glibc2.5-x86_64.tar.gz -C /app/apps/

设置mysql的配置文件:
cp /app/apps/mysql-5.6.32-linux-glibc2.5-x86_64/support-files/my-default.cnf/etc/my.cnf
编辑配置my.cnf
vim /etc/my.cnf
内容如下(红字为需要添加的内容):
[root@hl-gftest1etc]# vi /etc/my.cnf
# For advice on how to change settingsplease see
# http://dev.mysql.com/doc/refman/5.6/en/server-configuration-defaults.html
# *** DO NOT EDIT THIS FILE. It's atemplate which will be copied to the
# *** default location during install, andwill be replaced if you
# *** upgrade to a newer version of MySQL.
[mysqld]
# Remove leading # and set to the amount ofRAM for the most important data
# cache in MySQL. Start at 70% of total RAMfor dedicated server, else 10%.
# innodb_buffer_pool_size = 128M
# Remove leading # to turn on a veryimportant data integrity option: logging
# changes to the binary log betweenbackups.
# log_bin
# These are commonly set, remove the # andset as required.
basedir=/app/apps/mysql-5.6.32-linux-glibc2.5-x86_64
datadir=/app/apps/mysql-5.6.32-linux-glibc2.5-x86_64/data
max_allowed_packet=200M
# port = .....
# server_id = .....
# socket = .....
character_set_server =utf8
init_connect = 'SET NAMESutf8'
# Remove leading # to set options mainlyuseful for reporting servers.
# The server defaults are faster fortransactions and fast SELECTs.
# Adjust sizes as needed, experiment tofind the optimal values.
# join_buffer_size = 128M
# sort_buffer_size = 2M
# read_rnd_buffer_size = 2M
sql_mode=NO_ENGINE_SUBSTITUTION,STRICT_TRANS_TABLES
lower_case_table_names=1
[mysql]
default-character-set =utf8
[mysql.server]
default-character-set =utf8
[mysqld_safe]
default-character-set =utf8
[client]
default-character-set =utf8
将mysql配置到环境变量:
vim /etc/profile
在PATH中添加mysql的安装目录和bin目录:
/app/apps/mysql-5.6.32-linux-glibc2.5-x86_64:/app/apps/mysql-5.6.32-linux-glibc2.5-x86_64/bin:
添加位置如下:

重新连接服务器使得配置文件生效。添加mysql到系统服务开机启动:
cp -ar /app/apps/mysql-5.6.32-linux-glibc2.5-x86_64/support-files/mysql.server/etc/init.d/mysqld
添加用户mysql:依次执行下面语句:注意最后两行后面是有点的
groupadd mysql
useradd -r -g mysql mysql
cd/app/apps/mysql-5.6.32-linux-glibc2.5-x86_64/
chown -R mysql .
chgrp -R mysql .

用mysql用户初始化数据库。
cd /app/apps/mysql-5.6.32-linux-glibc2.5-x86_64/
scripts/mysql_install_db --user=mysql --defaults-file=/etc/my.cnf
启动mysql服务:
service mysqld start

cd/app/apps/mysql-5.6.32-linux-glibc2.5-x86_64/bin/
修改root密码:
mysqladmin -uroot password '123qwe!@#'

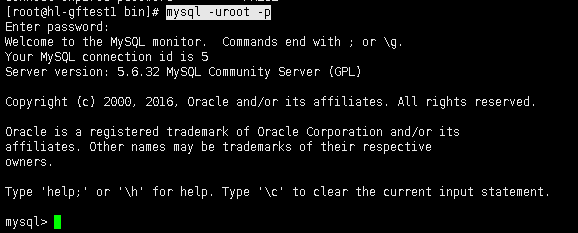
登陆查看字符集:
mysql -uroot –p
然后输入密码回车进入数据库:
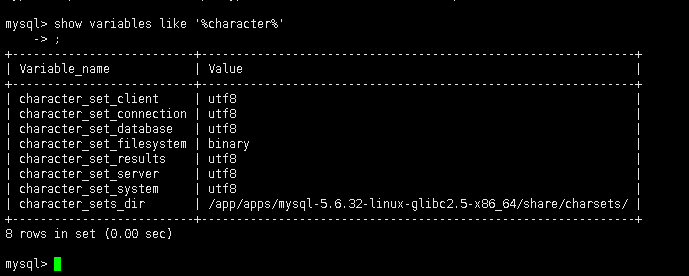
查看字符集设置是否正确:
show variables like '%character%';
开启远程连接:选择要使用的mysql数据库,修改远程连接的基本信息。
use mysql

更改远程连接设置:
GRANTALL PRIVILEGES ON *.* TO 'root'@'%' IDENTIFIED BY '123qwe!@#' WITH GRANTOPTION;
刷新刚才修改的权限,使其生效
flushprivileges;
查看修改是否成功:
selecthost,user from user;

有红框里的东西就成功,退出重启mysql。
退出mysql:mysql>quit
service mysqld restart

Mysql至此安装完毕,安装mysql比较容易出错,我们只要根据mysql的data目录下生成的xxxx.err日志文件信息来调整就行了。
资源:
链接:http://pan.baidu.com/s/1slLHvyd 密码:towp


 624
624

 被折叠的 条评论
为什么被折叠?
被折叠的 条评论
为什么被折叠?
 到【灌水乐园】发言


