loadClass()和forName()的区别

类加载的方式

主要有两种:

  • 隐式加载:使用 new + 构造方法时,隐式的调用类加载器,加载对应的类到 JVM 中,是最常见的类加载方式。
  • 显式加载:使用 loadClass()、forName() 等方法显式的加载需要的类,对于显式加载这种类加载方式来讲,当我们获取到了 Class 对象后,需要调用 Class 对象的 newInstance() 方法来生成对象的实例。

两种类加载方式的区别:

  • 隐式加载能够直接获取对象的实例,而显式加载需要调用 Class 对象的 newInstance() 方法来生成对象的实例。
  • 隐式加载能够使用有参的构造函数,而使用 Class 对象的 newInstance() 不支持传入参数,如果想使用有参的构造函数,必须通过反射的方式,来获取到该类的有参构造方法。

关于 Java 虚拟机类加载机制更多的内容请参考我另一篇文章:虚拟机类加载机制总结
 

loadClass() 和 forName() 的区别

首先,不管是使用 loadClass() 还是 forName(),对于任意一个类,我们都能够知道这个类的所有属性和方法;对于任意一个对象,都能够调用它的任意一个方法和属性。这也是实现反射的重要方法。

那么这两个方法的区别在哪呢?我们通过源码来分析。

1. loadClass()

public Class<?> loadClass(String name) throws ClassNotFoundException {
        return loadClass(name, false);
}

protected Class<?> loadClass(String name, boolean resolve)
        throws ClassNotFoundException
    {
        synchronized (getClassLoadingLock(name)) {
            // First, check if the class has already been loaded
            Class<?> c = findLoadedClass(name);
            if (c == null) {
                long t0 = System.nanoTime();
                try {
                    if (parent != null) {
                        c = parent.loadClass(name, false);
                    } else {
                        c = findBootstrapClassOrNull(name);
                    }
                } catch (ClassNotFoundException e) {
                    // ClassNotFoundException thrown if class not found
                    // from the non-null parent class loader
                }

                if (c == null) {
                    // If still not found, then invoke findClass in order
                    // to find the class.
                    long t1 = System.nanoTime();
                    c = findClass(name);

                    // this is the defining class loader; record the stats
                    sun.misc.PerfCounter.getParentDelegationTime().addTime(t1 - t0);
                    sun.misc.PerfCounter.getFindClassTime().addElapsedTimeFrom(t1);
                    sun.misc.PerfCounter.getFindClasses().increment();
                }
            }
            if (resolve) {
                resolveClass(c);
            }
            return c;
        }
}

protected final void resolveClass(Class<?> c) {
        resolveClass0(c);
}

private native void resolveClass0(Class<?> c);

我们主要来看一下 resolve 这个布尔变量,resolve 即解析,我们可以看到,在重载的 loadClass() 方法中,如果 resolve 为 true 的话,会执行 resolveClass() 这个方法。我们再来看一下 resolveClass() 这个方法中的这一句注释。
在这里插入图片描述
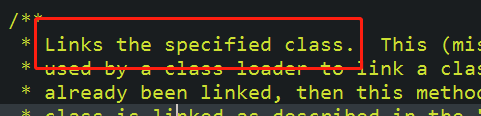
我圈红框的这里,Links the specified class :链接指定的类。

我们再回过头来看看,return loadClass(name, false);,默认的 loadClass() 方法会传入 false,也就是说,使用默认的 loadClass() 方法获得的 Class 对象是还没有执行链接的。那如果你了解 Java 虚拟机的类加载机制的话,这个时候你便应该知道,使用 loadClass() 方法获得的 Class 对象只完成了类加载过程中的第一步:加载,后续的操作均未进行。

2. forName()

@CallerSensitive
public static Class<?> forName(String className)
                throws ClassNotFoundException {
        Class<?> caller = Reflection.getCallerClass();
        return forName0(className, true, ClassLoader.getClassLoader(caller), caller);
}

@CallerSensitive
public static Class<?> forName(String name, boolean initialize,
                                   ClassLoader loader)
        throws ClassNotFoundException
    {
        Class<?> caller = null;
        SecurityManager sm = System.getSecurityManager();
        if (sm != null) {
            // Reflective call to get caller class is only needed if a security manager
            // is present.  Avoid the overhead of making this call otherwise.
            caller = Reflection.getCallerClass();
            if (sun.misc.VM.isSystemDomainLoader(loader)) {
                ClassLoader ccl = ClassLoader.getClassLoader(caller);
                if (!sun.misc.VM.isSystemDomainLoader(ccl)) {
                    sm.checkPermission(
                        SecurityConstants.GET_CLASSLOADER_PERMISSION);
                }
            }
        }
        return forName0(name, initialize, loader, caller);
}

我们也是来重点关注一个布尔变量,那就是 initialize 变量。initialize 即初始化。

return forName0(className, true, ClassLoader.getClassLoader(caller), caller);

我们可以看到,默认传入的 initialize 为 true.说明使用 Class.forName() 方法获得 Class 对象是已经执行完初始化的了(注意这里指的是类加载过程中的最后一步:初始化,而非是实例化对象操作的初始化

所以,看到这里相信大家也明白了,这两个方法的区别:

  • 使用 loadClass() 方法获得的 Class 对象只完成了类加载过程中的第一步:加载,后续的操作均未进行。
  • 使用 Class.forName() 方法获得 Class 对象是已经执行完初始化的了


两者的使用场景

对于 Class.forName() 方法,相信大家并不陌生,因为在 Web 开发中,经常会用到使用这个方法来加载 MySQL 的驱动,Class.forName("com.mysql.jdbc.Driver");

我们看一下驱动的源码会发现在类 Driver 中有这样一个静态代码块,静态代码块会在类加载过程中的初始化阶段执行。

所以我们现在应该知道了什么时候使用 Class.forName() 方法:在需要对类进行初始化的时候。

 static {  
          try {
                //往DriverManager中注册自身驱动
                java.sql.DriverManager.registerDriver(new Driver());  
           } catch (SQLException E) {  
                throw new RuntimeException("Can't register driver!");  
           }
}

那么为什么还要有 loadClass() 呢?

举个小例子,在 Spring IOC 中,在资源加载器获取要读入的字节的时候,即读取一些 Bean 的配置的时候,如果是以 classpath 的方式来加载,就需要使用 ClassLoader 的 loadClass() 方法来加载。之所以这样做,是和 Spring IOC 的 Lazy Loading 有关,即延迟加载。Spring IOC 为了加快初始化的速度,大量的使用了延迟加载技术,而使用 ClassLoader 的 loadClass() 方法不需要执行类加载过程中的链接和初始化的步骤,这样做能有效的加快加载速度,把类的初始化工作留到实际使用到这个类的时候才去执行。

  • 18
    点赞
  • 29
    收藏
    觉得还不错? 一键收藏
  • 3
    评论
没办法,文件超出上传20M限制 Servlets和JSP核心技术 卷2 内容还是很详细的,看过卷1的人可以继续用这本书深造,呵呵 目录: Chapter 1. Using and Deploying Web Applications Section 1.1. Purpose of Web Applications Section 1.2. Structure of Web Applications Section 1.3. Registering Web Applications with the Server Section 1.4. Development and Deployment Strategies Section 1.5. The Art of WAR: Bundling Web Applications into WAR Files Section 1.6. Building a Simple Web Application Section 1.7. Sharing Data Among Web Applications Chapter 2. Controlling Web Application Behavior with web.xml Section 2.1. Purpose of the Deployment Descriptor Section 2.2. Defining the Header and the Root Element Section 2.3. The Elements of web.xml Section 2.4. Assigning Names and Custom URLs Section 2.5. Disabling the Invoker Servlet Section 2.6. Initializing and Preloading Servlets and JSP Pages Section 2.7. Declaring Filters Section 2.8. Specifying Welcome Pages Section 2.9. Designating Pages to Handle Errors Section 2.10. Providing Security Section 2.11. Controlling Session Timeouts Section 2.12. Documenting Web Applications Section 2.13. Associating Files with MIME Types Section 2.14. Configuring JSP Pages Section 2.15. Configuring Character Encoding Section 2.16. Designating Application Event Listeners Section 2.17. Developing for the Clustered Environment Section 2.18. J2EE Elements Chapter 3. Declarative Security Section 3.1. Form-Based Authentication Section 3.2. Example: Form-Based Authentication Section 3.3. BASIC Authentication Section 3.4. Example: BASIC Authentication Section 3.5. Configuring Tomcat to Use SSL Section 3.6. WebClient: Talking to Web Servers Interactively Section 3.7. Signing a Server Certificate Chapter 4. Programmatic Security Section 4.1. Combining Container-Managed and Programmatic Security Section 4.2. Example: Combining Container-Managed and Programmatic Security Section 4.3. Handling All Security Programmatically Section 4.4. Example: Handling All Security Programmatically Section 4.5. Using Programmatic Security with SSL Section 4.6. Example: Programmatic Security and SSL Chapter 5. Servlet and JSP Filters Section 5.1. Creating Basic Filters Section 5.2. Example: A Reporting Filter Section 5.3. Accessing the Servlet Context from Filters Section 5.4. Example: A Logging Filter Section 5.5. Using Filter Initialization Parameters Section 5.6. Example: An Access Time Filter Section 5.7. Blocking the Response Section 5.8. Example: A Prohibited-Site Filter Section 5.9. Modifying the Response Section 5.10. Example: A Replacement Filter Section 5.11. Example: A Compression Filter Section 5.12. Configuring Filters to Work with RequestDispatcher Section 5.13. Example: Plugging a Potential Security Hole Section 5.14. The Complete Filter Deployment Descriptor Chapter 6. The Application Events Framework Section 6.1. Monitoring Creation and Destruction of the Servlet Context Section 6.2. Example: Initializing Commonly Used Data Section 6.3. Detecting Changes in Servlet Context Attributes Section 6.4. Example: Monitoring Changes to Commonly Used Data Section 6.5. Packaging Listeners with Tag Libraries Section 6.6. Example: Packaging the Company Name Listeners Section 6.7. Recognizing Session Creation and Destruction Section 6.8. Example: A Listener That Counts Sessions Section 6.9. Watching for Changes in Session Attributes Section 6.10. Example: Monitoring Yacht Orders Section 6.11. Identifying Servlet Request Initialization and Destruction Section 6.12. Example: Calculating Server Request Load Section 6.13. Watching Servlet Request for Attribute Changes Section 6.14. Example: Stopping Request Frequency Collection Section 6.15. Using Multiple Cooperating Listeners Section 6.16. The Complete Events Deployment Descriptor Chapter 7. Tag Libraries: The Basics Section 7.1. Tag Library Components Section 7.2. Example: Simple Prime Tag Section 7.3. Assigning Attributes to Tags Section 7.4. Example: Prime Tag with Variable Length Section 7.5. Including Tag Body in the Tag Output Section 7.6. Example: Heading Tag Section 7.7. Example: Debug Tag Section 7.8. Creating Tag Files Section 7.9. Example: Simple Prime Tag Using Tag Files Section 7.10. Example: Prime Tag with Variable Length Using Tag Files Section 7.11. Example: Heading Tag Using Tag Files Chapter 8. Tag Libraries: Advanced Features Section 8.1. Manipulating Tag Body Section 8.2. Example: HTML-Filtering Tag Section 8.3. Assigning Dynamic Values to Tag Attributes Section 8.4. Example: Simple Looping Tag Section 8.5. Assigning Complex Objects as Values to Tag Attributes Section 8.6. Example: Table Formatting Tag Section 8.7. Creating Looping Tags Section 8.8. Example: ForEach Tag Section 8.9. Creating Expression Language Functions Section 8.10. Example: Improved Debug Tag Section 8.11. Handling Nested Custom Tags Section 8.12. Example: If-Then-Else Tag Chapter 9. JSP Standard Tag Library (JSTL) Section 9.1. Installation of JSTL Section 9.2. c:out Tag Section 9.3. c:forEach and c:forTokens Tags Section 9.4. c:if Tag Section 9.5. c:choose Tag Section 9.6. c:set and c:remove Tags Section 9.7. c:import Tag Section 9.8. c:url and c:param Tags Section 9.9. c:redirect Tag Section 9.10. c:catch Tag Chapter 10. The Struts Framework: Basics Section 10.1. Understanding Struts Section 10.2. Setting Up Struts Section 10.3. The Struts Flow of Control and the Six Steps to Implementing It Section 10.4. Processing Requests with Action Objects Section 10.5. Handling Request Parameters with Form Beans Section 10.6. Prepopulating and Redisplaying Input Forms Chapter 11. The Struts Framework: Doing More Section 11.1. Using Properties Files Section 11.2. Internationalizing Applications Section 11.3. Laying Out Pages with Tiles Section 11.4. Using Tiles Definitions Chapter 12. The Struts Framework: Validating User Input Section 12.1. Validating in the Action Class Section 12.2. Validating in the Form Bean Section 12.3. Using the Automatic Validation Framework Developing Applications with Apache Ant Section A.1. Summarizing the Benefits of Ant Section A.2. Installing and Setting Up Ant Section A.3. Creating an Ant Project Section A.4. Reviewing Common Ant Tasks Section A.5. Example: Writing a Simple Ant Project Section A.6. Using Ant to Build a Web Application Section A.7. Example: Building a Web Application Section A.8. Using Ant to Create a WAR File Section A.9. Example: Creating a Web Application WAR File Index
jdbc: 1.数据库连接的方式: ODBC:开放式数据库连接。 C语言实现的,提供语言和(基于SQL的)数据库进行交互的“一致性”的接口 JDBC:java版本的ODBC JDBC连接数据库的步骤: 1.注册驱动(加载驱动): 注册的方式: 1.使用类加载器(使用反射的方式) Class.forName(driverName); 2.实例化Driver Driver driver = new oracle.jdbc.driver.OracleDriver(); DriverManager.registerDriver(driver); 3.加虚拟机参数jdbc.drivers -Djdbc.drivers=oracle.jdbc.driver.OracleDriver 4.从Jdk6.0以后要求,JDBC 4.0 Drivers 必须包括 META-INF/services/java.sql.Driver 文件,有了这个文件以后不需要在显示的使用Class.forName来进行驱动的注册 Oracle数据库进行连接的时候,使用的驱动类: 1.oracle.jdbc.driver.OracleDriver 2.oracle.jdbc.OracleDriver 2.建立连接 连接方式: 1.DriverManager(中的getConnection其实也是调用的Driver.connect方法) getConnection(url);//没有用户名密码 //将用户名密码存放在java.util.Properties对象中 getConnection(url,properties); getConnection(url,user,passwd); 2.直接调用Driver.connect方法执行 Driver d = new DriverClass(); d.connect(url,properties); 3.创建Statement: Statement: 1.创建时不需要传递sql语句,但是执行时需要传递sql语句 2.如果涉及到动态参数的传递,必须使用字符串拼接 PreparedStatement: 1.创建时就需要传递sql语句,执行的时候不需要传递sql语句 2.如果涉及到动态参数的传递,可以使用字符串拼接,也可以使用?占位的形式 给?号传值使用的是 pstmt.setType(index,value); index从1开始 3.提供预编译的功能,某种程度上可以避免sql注入的问题 4.提前做语法检查,在给?赋值的过程中要求数据类型一定要匹配,这样在某种程度上可以避免因为数据类型不匹配而发生的异常 CallableStatement:主要用来执行pl/sql的一些过程,函数等。 1.写一条恒成立的select语句,无论你输入的条件是什么,总是能讲表中的所有数据输出 select id,last_name from s_emp where '1' ='1'; where 1=1; findByOption(Integer age,String province,String gender){ String sql = select * from s_emp where 1=1; if(age!=null){ sql + "and age < age"; } if(province!=null){ sql + "and province=province"; } if(gender!=null){ sql + "and gender = gender"; } } 4.执行sql语句: execute:返回boolean类型的值,代表是否有结果集返回(如果执行select操作,是有ResultSet的,返回值为true) executeUpdate:返回int类型的值,代表的是,操作执行完成后,受影响的数据库的行计数(针对于insert,update,delete) executeQuery:返回的是ResultSet ResultSet:类似于指针或者游标的东西,里边保存的不是所有的结果,而是指向结果集的正上方。所以如果一旦连接关闭那么ResultSet将取不到值 5.处理结果 如果有结果集,处理结果集 ResultSet next(),每执行一次,向下移动一次,如果有值,返回true,如果没值返回false while(rs.next()){ rs.getType(index/columnName); 如果传的是index,那么索引是从1开始的。 select id,last_name from s_emp; 那么1代表的就是id,依次类推 } 6.关闭资源 先开的后关 D:\oraclexe\app\oracle\product\10.2.0\server\jdbc\lib\ojdbc14.jar linux下启动数据库监听的命令: lsnrctl start; "select id from s_emp where name = '"+name+"'"; table s_user( id , name, age) class User{ } //分别使用Statement对象和PreparedStatement对象实现 public class JDBCTest{ //查找s_user表中所有的数据,并且返回他们的集合 public Collection<User> findAll(){ } //按照名字进行删除 public int deleteUser(String name){ } //将user对象的信息更新到数据库表中 public int updateUser(User user){ } //讲User对象保存到数据库中 public void insertUser(User user){ } } JDBC:本身自动帮我做事务管理的操作 AutoCommit = true; Connection.setAutoCommit(false); 正常: conn.commit(); 异常: conn.rollback(); JDBC批处理: addBatch executeBatch Statement PreparedStatement Statement{ 1.获取连接 getConnection(); 2.创建Statement conn.createStatement(); 3.执行sql语句 String sql .... insert delete update executeUpdate select ----- Result executeQuery 4.如果有结果集处理结果集 5.资源关闭 } Statement: update/delete/insert: stmtExecute(String sql){ 1.获取连接 getConnection(); 2.创建Statement conn.createStatement(); 3.执行sql语句 stmt.execute(sql); 4.资源关闭 } Select: stmtQuery(String sql,ResultHander handler){ 1.获取连接 getConnection(); 2.创建Statement conn.createStatement(); 3.执行sql语句 ResultSet set = executeQuery 4.如果有结果集处理结果集 handler!=null handler.handler(set); 5.资源关闭 } 结果集处理的规则: ResultHandler{ handler(ResultSet rs); } PreparedStatement update/delete/insert: pstmtExecute(String sql,PstmtSetter setter){ 1.获取连接 getConnection(); 2.创建PreparedStatement conn.prepareStatement(sql); if(setter!=null){ setter.setter(pstmt); } 3.执行sql语句 pstmt.execute(sql); 4.资源关闭 } ?设值的标准: PstmtSetter{ setter(PreparedStatement pstmt); } Select: stmtQuery(String sql,PstmtSetter setter,ResultHander handler){ 1.获取连接 getConnection(); 2.创建PreparedStatement conn.prepareStatement(); setter!=null setter.setter(pstmt); 3.执行sql语句 ResultSet set = executeQuery 4.如果有结果集处理结果集 handler!=null handler.handler(set); 5.资源关闭 } 结果集处理的规则: ResultHandler{ handler(ResultSet rs); } 表现层 业务逻辑层 持久层 java中的对象分为: 1.域对象:主要作为信息的载体 2.行为对象:注重操作 Register(User user){ } insert(User user){ String sql = "insert into s_user( user.getId()+user.getName().......)"; } insert(User user){ save(user); } ORM Object Relational Class-Object 表 名字 表名 属性 字段(列) object 记录 User s_User id id name name passwd passwd insert into s_user(id,name,passwd) values(?,?,?); Hibernate:ORM的中间件,或者说是实现了ORM的一个框架,对JDBC做了轻量级的封装。 ORM:使用元数据信息来描述对象和数据库之间的关系,并且能够自动实现java中持久化对象到关系型数据库中表的映射 脏检查:自动对缓存中的数据进行检查,并且选择在合适的时机和数据库之间进行交互,以保持数据的一致性 延迟加载:从数据库中还原对象的时候,不会立即对对象进行初始化,而是等到用到的时候才会进行初始化 Core: POJO hibernate.cfg.xml .hbm.xml Session: 1.轻量级的,创建和销毁不需要消耗很大的资源 2.非线程安全的 3.hibernate的一级缓存 4.介于Connection和Transaction之间的一个对象 5.hibernate中用来做持久化操作的 SessionFactory 1.重量级的,创建和销毁需要消耗很大的资源,不建议频繁创建和销毁 2.线程安全的,一个数据库对应一个Sessionfactory(一般一个应用程序对应一个SessionFactory就够了) 3.是一个很大的缓存,本身维护了一个可配置的二级缓存 4.用来构建Session对象 Configuration 1.启动和配置Hibernate 2.读取hibernate的配置文件和映射文件 3.构建SessionFactory对象 Transaction 1.事务管理对象 Query 1.查询对象,HQL Criteria 1.hibernate提供的更面向对象的一种查询方式。 准备工作: 1.java中的POJO对象存在 2.数据库,表得存在 3.hibernate的配置文件(hibernate.cfg.xml)得存在 4.POJO.hbm.xml文件存在 5.hibernate的jar包以及数据库的驱动包存在 Hibernate的编程: 1.构建Configuration对象读取配置文件 2.读取映射文件 3.构建SessionFactory对象 4.构建Session对象 5.开启事务 6.持久化操作 7.事务的提交(正常提交,不正常回滚) 8.关闭资源 主键增长策略: 1.increment:自动增长 select max(id) from table; 找到最大值之后+1赋给要持久化的对象 2.assigned:指派 hibernate不在自动生成主键值,需要你在插入时自己指明 3.hilo:高低值算法,由数据库表提供高值,程序提供低值 value = hi*(max_lo+1)+lo 4.sequences Cat: cid name color weight age --------------------------- 1.每个人都有一个地址 person{ id name } Address{ country province city street } table: id name country province city street Component:数据库中采用一张表的设计,java中采用两个类的设计 ----------------------------------- Employee: id name salary award amount table id name salary award formula: ---------------------------- 关系模型: 多对一: 订单和客户之间的关系 Order{ id amount customer } Customer{ id name } many-to-one:标签中对于cascade的取值delete,delete-orphan,all-delete-orphan(只用unique属性值不为true不能出现)慎用 cascade:级联属性 none:不做任何级联操作 save-update:对当前对象执行save,update, saveOrupdate,会级联操作和它相关联的对象 delete:在删除当前对象的时候,级联删除和他相关联的对象 all: save-update+delete delete-orphan:解除关联关系时,删除和当前对象失去关联的对象 all-delete-orphan:all+delete-orphan 单向的一对多的关系,在进行关联关系的操作时,会执行不必要的update语句,所以,一般情况下,我们不会做单向一对多的映射。 inverse="true":让其中一方放弃对关联关系的维护 一般在做双向多对一(一对多)关联关系映射的时候,一般会设置让一的一方放弃对关联关系的维护,以减少不必要的更新语句 一对一: 基于外键的一对一 Wife Husband id id name name h_id references Husband(id) unique 基于主键的一对一 Wife Husband id references Husband(id) id name name create table Husband( id number primary key, name varchar2(15) ); create table Wife( id number primary key references husband(id), name varchar2(15) ); 多对多: Teacher Student id id name name 桥表:s_t s_id t_id ------------------------------ 操作持久化对象: Hibernate中对象的三种状态: Transient(瞬态): 1.由new关键字创建 2.没有和Session进行关联的 3.数据库中没有对应的记录存在 4.操作不会影响数据库中的数据 Persistent(持久态): 1.和Session之间有关联 2.在数据库中有对应记录存在,并且有持久化标识 3.对持久对象的更动,会对数据库中的数据产生影响。(自动脏检查机制) Detached(托管状态): 1.和Session失去关联 2.数据库中有对应记录存在 3.对托管对象的更动,在托管期间不会影响数据库,但是将托管状态重新和数据库进行关联的时候会将托管对象重新变为持久态,那么在托管期间发生的更动也会被更新到数据库中 get()/load():从数据库中还原数据 get: 1.先从缓存中进行查找,如果找到就直接返回 2.如果找不到,get()会立即发送sql语句到数据库中查找数据,如果找到就返回,如果找不到返回null; load:(使用延迟加载策略) 1.load()方法默认要加载的对象一定存在,所以很放心的使用代理对象,等到用到的时候从缓存中查找数据,如果找到,就返回,找不到发送sql语句到数据库中查找,如果数据库中没有对应记录存在,抛ObjectNotFoundException Hibernate中的查询: 1.OID检索: get load 2.导航对象图查询: Customer ---- Order之间有对应关系 通过检索到Customer以后,想获取和Customer相关的对象,可以使用 cus.getOrders(); 3.HQL: Query sql: select name from t_cus; hql: select name from hiber.many2one.Customer query.list(); 直接发送一条select语句去表中查找所有的属性 query.iterate(); 先发送一条select语句从表中查找所有的id,然后根据id从缓存中进行查找,找到就返回,找不到再发送sql语句按id从数据库中进行查找,所以可能会产生N+1的问题 Customer order select from customer order where customer.id=order.c_id; 4.QBC(Query By Criteria) Criteria Restrictions Order Projections QBE(Query By Example) 5.sql A B 总额 《 4000 - 100 1900 2100 900 Session默认在遇到以下情况的时候会flush: 1.事务提交的时候 2.某些查询操作执行的时候(不是所有的查询) 3.当应用程序显示的调用session.flush操作的时候 悲观锁: LockMode LockMode.UPGRADE:借助于数据库的 select ... for update; 那么事务一定会等到上一个获取了锁的事务commit之后才执行,如果上一个事务一直不提交,那么它就一直等下去 LockMode.UPGRADE_NOWAIT: select ... for update nowait; nowait就是不等待,一旦在操作过程中发现要操作的数据被加了锁,那么直接抛 ORA-00054: 资源正忙, 但指定以 NOWAIT 方式获取资源 乐观锁: 版本控制(version) 时间戳(timestamp)

“相关推荐”对你有帮助么?

  • 非常没帮助
  • 没帮助
  • 一般
  • 有帮助
  • 非常有帮助
提交
评论 3
添加红包

请填写红包祝福语或标题

红包个数最小为10个

红包金额最低5元

当前余额3.43前往充值 >
需支付:10.00
成就一亿技术人!
领取后你会自动成为博主和红包主的粉丝 规则
hope_wisdom
发出的红包
实付
使用余额支付
点击重新获取
扫码支付
钱包余额 0

抵扣说明:

1.余额是钱包充值的虚拟货币,按照1:1的比例进行支付金额的抵扣。
2.余额无法直接购买下载,可以购买VIP、付费专栏及课程。

余额充值