


1.收尾式动画
nil 是啥
1>准备开始一个动画
    [UIView beginAnimations:nil context:nil];
    设置动画执行的时长
    [UIView setAnimationDuration:1.0];
2>修改控件属性的代码,就可以实现动画。
    self.imageButton.frame=frame;
3>提交动画
    [UIView commitAnimations];
加了动画效果后图片运动就会变得平滑。
接下来介绍动画
@property(nonatomic) CGAffineTransform transform;
控件的形变属性(可以设置旋转角度,比例缩放,平移等属性)
c语言的三元运算符”:
CGFloat dx = 0, dy = 0;
if (button.tag == kMovingDirTop || button.tag == kMovingDirBottom) {
dy = (button.tag == kMovingDirTop) ? -kMovingDelta : kMovingDelta;
}
if (button.tag == kMovingDirLeft || button.tag == kMovingDirRight) {
dx = (button.tag == kMovingDirLeft) ? -kMovingDelta : kMovingDelta;
}
// CGAffineTransformMakeTranslation的位移形变是相对按钮"初始"位置来变化的
    self.iconButton.transform = CGAffineTransformMakeTranslation(0, self.delta);
    // CGAffineTransformTranslate 的位移形变是对按钮的上次形变的累加
     self.iconButton.transform = CGAffineTransformTranslate(self.iconButton.transform, dx, dy);
after updating to ios8, the code may like this to works fine, but in ios7 did not work:
cgaffinetransformmaketranslation-and-cgaffinetransformscale-transforms-different
同理
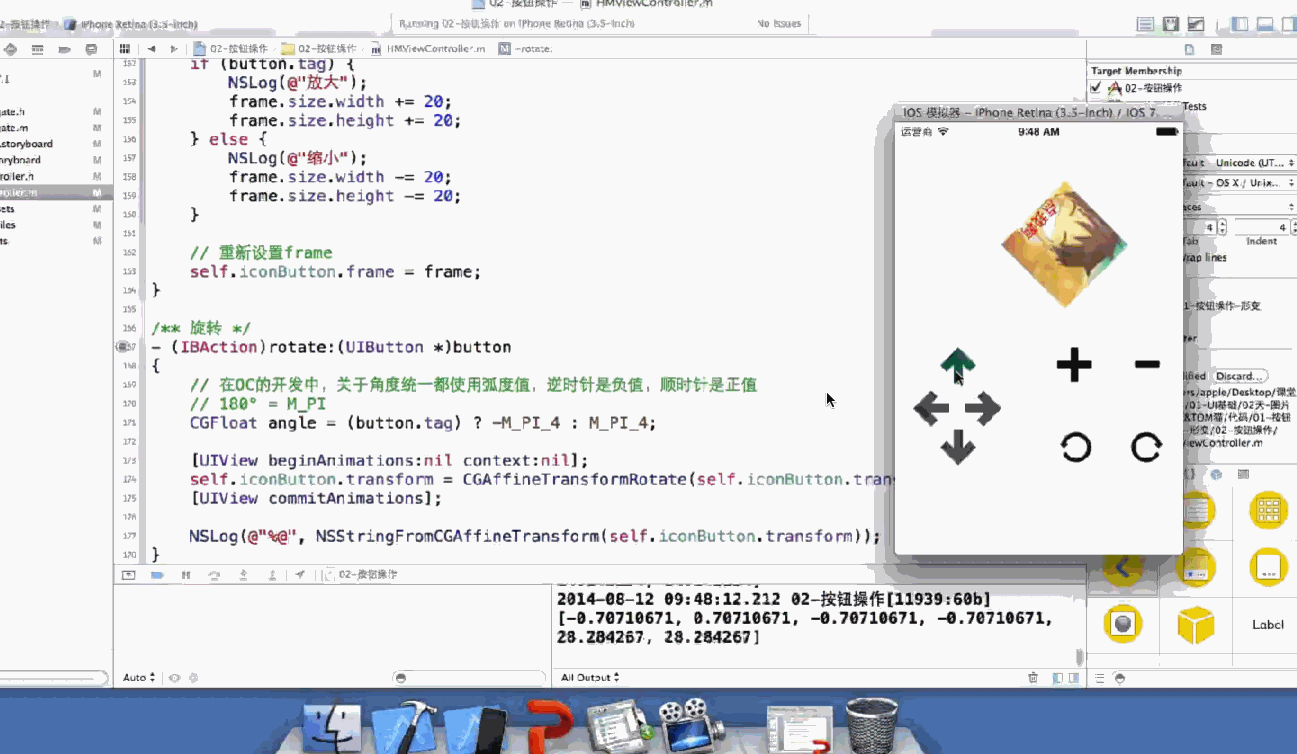
/*放大缩小*/
-(IBAction)zooms:(UIButton*)button{
    CGFloat scale=(button.tag)?1.2:0.8;
    self.imageButton.transform=CGAffineTransformScale(self.imageButton.transform,scale,scale);
}
看看系统源码
struct CGAffineTransform {
  CGFloat a, b, c, d;
  CGFloat tx, ty;
};
如果 transform 加动画会这样子
如果frame旋转加动画 会图片直接没有
frame不建议直接修改
总结:
frame 属性,通常用于实例化控件,指定初始位置
如果需要改变控件位置,可以使用center属性
如果需要改变控件大小,可以使用bounds属性
center加旋转就是我们预想的上下左右移动
旋转会改变图片大小(因为图片要被正方形框起来)
ios的布局 后加的元素层叠在上面 (Android 一样)
/*加载完成被调用*/
- (void)viewDidLoad {
    //千万不要忘记调用父类的实现方法
    [super viewDidLoad];
    // Do any additional setup after loading the view, typically from a nib.
    UIButton *btn=[[UIButton alloc] initWithFrame:CGRectMake(100, 100, 100, 100)];
    btn.backgroundColor=[UIColor redColor];
    //设置背景图片
    [btn setBackgroundImage:[UIImage imageNamed:@"btn_01"] forState:UIControlStateNormal];
    [btn setBackgroundImage:[UIImage imageNamed:@"btn_02"] forState:UIControlStateHighlighted];

    //设置文字
    [btn setTitle:@"点我啊" forState:UIControlStateNormal];
    [btn setTitle:@"摸我" forState:UIControlStateHighlighted];

    //设置按钮文字颜色
    [btn setTitleColor:[UIColor redColor] forState:UIControlStateNormal];
    [btn setTitleColor:[UIColor blueColor] forState:UIControlStateHighlighted];

    //文件垂直对齐方式
    btn.contentVerticalAlignment=UIControlContentVerticalAlignmentBottom;

    //将按钮添加到视图
     [self.view addSubview:btn];


    //这样添加的就是custom的模式
    //使用alloc init方法实例化的按钮,就是custom类型的,按钮的类型一旦指定,不能修改
    //如果创建其他类型的按钮
    UIButton *btn1=[UIButton buttonWithType:UIButtonTypeContactAdd];//显示一个蓝色加号
    btn1.center=CGPointMake(20, 40);
    [self.view addSubview:btn1];
    //当然还有很多其他的类型的button
源代码 系统还有的图片类型
    typedef NS_ENUM(NSInteger, UIButtonType) {
        UIButtonTypeCustom = 0,                         // no button type
        UIButtonTypeSystem NS_ENUM_AVAILABLE_IOS(7_0),  // standard system button

        UIButtonTypeDetailDisclosure,
        UIButtonTypeInfoLight,
        UIButtonTypeInfoDark,
        UIButtonTypeContactAdd,
       // 圆角矩形
        UIButtonTypeRoundedRect = UIButtonTypeSystem,   // Deprecated, use UIButtonTypeSystem instead
    };
 }
iPhone的UI控件UIImage和UIImageView有什么区别呢?
uiimage 是图片,不是控件;他的父类为NSObject;
UIImageView是加载图片的控件,父类为UIView
案例一:图片查看器
//
//  ViewController.m
//  0812-图片查看器
//
//  Created by susan on 16/1/12.
//  Copyright © 2016年 susan. All rights reserved.
//

#import "ViewController.h"

@interface ViewController ()
@property (nonatomic,strong) UILabel *lable;
@property (nonatomic,strong) UIImageView *Image;
@property (nonatomic,strong) UIButton *LeftButton;
@property (nonatomic,strong) UIButton *RightButton;
@property (nonatomic,strong) UILabel *describe;
/*当前显示的照片引索*/
@property (nonatomic,assign) int index;


@end

@implementation ViewController

/*
 @property
 1.创建了getter &setter 方法
 2.生成一个带_的成员变量,直接读取成员变量不会经过getter方法&setter方法。


 iPhone的UI控件UIImage和UIImageView有什么区别呢?
 uiimage 是图片,不是控件;他的父类为NSObject;
 UIImageView是加载图片的控件,父类为UIView
*/
- (void)viewDidLoad {
    [super viewDidLoad];
    // Do any additional setup after loading the view, typically from a nib.
    //1.标题
    _lable = [[UILabel alloc] initWithFrame:CGRectMake(0, 100, self.view.bounds.size.width, 40)];
    _lable.text=@"1/5";
    _lable.textAlignment=NSTextAlignmentCenter;
    [self.view addSubview:_lable];
    //2.图片
    CGFloat ImageW=200;
    CGFloat ImageH=200;
    CGFloat ImageX=(self.view.bounds.size.width-ImageW)*0.5;
    CGFloat ImageY= CGRectGetMaxY(self.lable.frame)+20;

    _Image=[[UIImageView alloc] initWithFrame:CGRectMake(ImageX, ImageY, ImageW, ImageH)];
    _Image.image=[UIImage imageNamed:@"biaoqingdi"];
    [self.view addSubview:_Image];
    //3.描述文字
    CGFloat describeY=CGRectGetMaxY(self.Image.frame);//注意此处不能写成bounds因为bounds.y一定恒等于0;
    _describe=[[UILabel alloc] initWithFrame:CGRectMake(0, describeY, self.view.bounds.size.width, 100)];
    _describe.text=@"弄啥哩!";
    _describe.textAlignment=NSTextAlignmentCenter;
    [self.view addSubview:_describe];
    //4.左边的按钮
    _LeftButton =[[UIButton alloc] initWithFrame:CGRectMake(0, 0, 40, 40)];
    CGFloat centerX=self.Image.frame.origin.x*0.5;
    CGFloat centerY=self.Image.center.y;
    _LeftButton.center=CGPointMake(centerX, centerY);
    [_LeftButton setBackgroundImage:[UIImage imageNamed:@"left_normal"]forState:UIControlStateNormal];
    [_LeftButton setBackgroundImage:[UIImage imageNamed:@"left_right_highlighted"] forState:UIControlStateHighlighted];
    [self.view addSubview:_LeftButton];
    //5.右边的按钮
    _RightButton=[[UIButton alloc] initWithFrame:CGRectMake(0, 0, 40, 40)];

    _RightButton.center=CGPointMake(self.view.bounds.size.width-centerX, centerY);
    [_RightButton setBackgroundImage:[UIImage imageNamed:@"right_normal"] forState:UIControlStateNormal];
    [self.view addSubview:_RightButton];
    //这样就连线了
    [_RightButton addTarget:self action:@selector(NextMove) forControlEvents:UIControlEventTouchUpInside];


}
-(void) NextMove{
    NSLog(@"%s",__func__);//会直接打印出方法名
    self.index++;

    //设置序号
    self.lable.text=[NSString stringWithFormat:@"%d/%d", self.index+1,5];

    switch (self.index) {
        case 0:
            self.Image.image=[UIImage imageNamed:@"biaoqingdi"];
            self.describe.text=@"表情";
            break;
        case 1:
            self.Image.image=[UIImage imageNamed:@"bingli"];
            self.describe.text=@"2";
            break;
        case 2:
            self.Image.image=[UIImage imageNamed:@"chiniupa"];
            self.describe.text=@"3";
            break;
        case 3:
            self.Image.image=[UIImage imageNamed:@"danteng"];
            self.describe.text=@"danteng";
        case 4:
            self.Image.image=[UIImage imageNamed:@"wangba"];
            self.describe.text=@"wangba";
            break;

        default:
            break;
    }

    //控制按钮状态
    _RightButton.enabled=(self.index!=4);
}

- (void)didReceiveMemoryWarning {
    [super didReceiveMemoryWarning];
    // Dispose of any resources that can be recreated.
}

@end
代码抽取
在OC中,很多方法的第一个参数,都是触发该方法的对象。
-(void)clickButton:(UIButton *)button{
//根据按钮调整当前显示图片的索引
 self.index+=button.tag;
[self showphotoInfo];
}

_leftButton.tag=-1;
_rightButton.tag=1;
调用监听方法
[_leftButton addTarget:self action:@selector(clickButton)] forControlEvents;
UIControlEventTouchUpInside];
接下来修改switch
NSDictionary *dict1=@{@"name":@"biaoqingdi",@"desc":@"表情"};
NSDictionary *dict2=@{@"name":@"bingli",@"desc:@"病历"};
NSDictionary *dict3=@{@"name":@"chiniupa","desc":@"吃牛扒"};
......
NSArray *array=@[dict1,dict2,dict3,....];

//设置图像和描述
self.image.image=[UIImage imageNamed:array[self.index][@"name"]];
self.descLabel.text=array[self.index][@"desc"];
接下来:懒加载+get方法
如果由于程序的运行顺序导致运行不一样,但是不能让团队的人也知道
就引入懒加载(延迟加载),通过getter实现
效果:让对象在最需要的时候才创建。
-(NSArray *)imageList
{
if(_imageList==nil){
NSDictionary *dict1=@{@"name":@"biaoqingdi",@"desc":@"表情"};
NSDictionary *dict2=@{@"name":@"bingli",@"desc:@"病历"};
NSDictionary *dict3=@{@"name":@"chiniupa","desc":@"吃牛扒"};
......
NSArray *array=@[dict1,dict2,dict3,....];

}return _imageList;
}
打断点
继续执行(程序会重新运行) 单步执行 单步进入(跟踪一个方法内部) 单步跳出(跳出当前跟踪方法)
plist文件
resource Property List  Plist
//”包“Bundle [NSBundle mainBundle] 编译安装之后对应的程序包。
NSString *path=[[NSBundle mainBundle] pathForResource:@"ImageList"
NSLog(@"%@",path);
xcode5之前的图片不是放在Assert.car打包的
//在OC中ContentsOfFile,通常需要完整的路径
_imageList=[NSArray arrayWithContentsOfFile:path];
NSLog(@"%@",_imageList);
UILabel源代码
// this determines the number of lines to draw and what to do when sizeToFit is called. default value is 1 (single line). A value of 0 means no limit
// if the height of the text reaches the # of lines or the height of the view is less than the # of lines allowed, the text will be
// truncated using the line break mode.

@property(nonatomic) NSInteger numberOfLines;
//需要Label具有足够的高度,不限制显示的行数
_descLabel.numberOfLines=0;//默认单行显示,但是现在要改成多行
控件的懒加载
在getter方法中,不要再使用self,否则会重复调用getter方法,造成死循环
-(UILabel *)noLabel{
if(_noLabel==nil){}return _noLabel;
}
-(void)viewDidLoad{
[super viewDidLoad];
[self noLabel];
}
还有
-(UILabel *)descLabel{
if(!_descLabel){
}return _descLabel;
}也可以
swift不允许这么写
frame的理解?
一个view的frame包含它的矩形的长宽和他在父视图中的坐标原点(origin)x和y坐标.
frame的值就是一个CGRect包含(originX,originY,width,height)
originX和originY对应着该对象在其superview中的坐标,也就是说他是一个相对坐标.
view的frame是view在它的superview的位置和尺寸.
UIview中bounds和frame的区别?
绝对坐标(x,y是相对于原点的),相对坐标
bounds是指这个view在它自己坐标系的坐标和大小,而frame指的是这个view在它superview的坐标系的坐标和大小.
主要区别在坐标系这块.
frame是相对坐标,bounds是绝对坐标.
很明显bounds的原点是(0,0),而frame的原点却是任意的.
frame如果一个按钮,是在表格中,按钮的frame的坐标也是相对的,并不是相对屏幕,也就是说相对坐标,不是绝对坐标,
很明显是一个自己为原点的坐标系,一个是以屏幕为原点的坐标系.
Strong&weak
Person.h
@property (nonatomic,copy) NSString*name
Person.m
/*ARC中dealloc主要用于调试,判断对象是否被释放*/
-(void)dealloc{
NSLog(@"person被释放");
}
main.m
/*在OC中
1.如果对象没有强引用,会被立即释放
2.默认的对象,都是强引用的
__weak 表示弱引用
*/
int main(int argc,const char*argv[]){
@autoreleasepool{
__weak Person *p=[[Person alloc] init];
Person *p=[[Person alloc] init]};
p.name=@"zhangsan";
}
return 0;
}


@property (nonatomic,weak) Personc*person;
Person*p=[[perosn alloc] init];强引用
self.peron=p//弱引用
如果一个对象时weak引用但是一旦 self.view addsubview 看源码subview是一个array,关联里面的view的是使用强引用,所以即使对象时weak被subview关联还是不会马上释放
总结
- 控件
如果是用Storyboard 拖线,控件用weak
如果用代码创建界面,控件可以用strong; - 自定义对象.需要使用Strong
- NSString,使用copy
- 数字型的int,使用assign
Tom帧动画
    //
    //  ViewController.m
    //  0812-Tom猫
    //
    //  Created by susan on 16/1/13.
    //  Copyright © 2016年 susan. All rights reserved.
    //

    #import "ViewController.h"

    @interface ViewController ()
    @property (weak, nonatomic) IBOutlet UIImageView *Tom;
    @end

    @implementation ViewController

    - (void)viewDidLoad {
        [super viewDidLoad];
        // Do any additional setup after loading the view, typically from a nib.
    }

    - (void)didReceiveMemoryWarning {
        [super didReceiveMemoryWarning];
        // Dispose of any resources that can be recreated.
    }
    - (IBAction)eatBird {
        //动画图片的数组
        NSMutableArray *arrayM=[NSMutableArray array];

        //添加动画播放的图片
        for(int i=0;i<40;i++){
            //图像名称
            NSString *imageName=[NSString stringWithFormat:@"eat_%02d.jpg",i];
            //注意%02d表示0开通,2为两位数,如果不足用0补齐

            UIImage *image=[UIImage imageNamed:imageName];
            [arrayM addObject:image];

        }
        //设置动画数组
        self.Tom.animationImages=arrayM;
        //重复1次
        self.Tom.animationRepeatCount=1;
        //动画时长
        self.Tom.animationDuration=self.Tom.animationImages.count*0.075;
        //开始动画
        [self.Tom startAnimating];

    }
    - (IBAction)knockOut {

        [self toAnimationWithName:@"knockout" count:81];

    //    //动画图片的数组
    //    NSMutableArray *arrayM=[NSMutableArray array];
    //
    //    //添加动画播放的图片
    //    for(int i=0;i<81;i++){
    //        //图像名称
    //        NSString *imageName=[NSString stringWithFormat:@"knockout_%02d.jpg",i];
    //        //注意%02d表示0开通,2为两位数,如果不足用0补齐
    //
    //        UIImage *image=[UIImage imageNamed:imageName];
    //        [arrayM addObject:image];
    //
    //    }
    //    //设置动画数组
    //    self.Tom.animationImages=arrayM;
    //    //重复1次
    //    self.Tom.animationRepeatCount=1;
    //    //动画时长
    //    self.Tom.animationDuration=self.Tom.animationImages.count*0.075;
    //    //开始动画
    //    [self.Tom startAnimating];
    }

    // 重构代码
    -(void)toAnimationWithName:(NSString *)name count:(NSInteger)count{
        //如果正在动画,直接退出
        if([self.Tom isAnimating]) return;
    //动画图片的数组
        NSMutableArray *arrayM=[NSMutableArray array];
        //添加动画播放的图片
        for(int i=0;i<count;i++){
        //图像名称


            NSString *imageName=[NSString stringWithFormat:@"%@_%02d.jpg",name,i];
            //方法一:
            //UIImage *image=[UIImage imageNamed:imageName];

            //方法二: ContentsOfFile需要全路径

            //tip:如果放在Image.xcassets中的图片,不能使用imageWithContentsOfFile;
            //Images.xcassets中不要存放大的,不常用的图片;
            NSString *path = [[NSBundle mainBundle] pathForResource:imageName ofType:nil];
            UIImage *image = [UIImage imageWithContentsOfFile:path];
            [arrayM addObject:image];

        }

        //设置动画数组
        self.Tom.animationImages=arrayM;
        //重复1次
        self.Tom.animationRepeatCount=1;
        //动画时长
        self.Tom.animationDuration=self.Tom.animationImages.count*0.075;
        //开始动画
        [self.Tom startAnimating];

        //动画结束之后,清理动画数组
        //performSelector定义在NSObject分类中
       //[self performSelector:@selector(cleanup) withObject:nil afterDelay:self.Tom.animationDuration];


        [self.Tom performSelector:@selector(setAnimationImages) withObject:nil afterDelay:self.Tom.animationDuration];


    }

-(void)cleanup{
    NSLog(@"%s",__func__);
//    self.Tom.animationImages = nil;
    //等价于
   [self.Tom setAnimationImages:nil];
}

//小技巧:
//可以设置button text clear color; tag设置为图片的数量

-(IBAction)TomAction:(UIButton *)sender{
//currentTitle 可以取出按钮当前的标题文字
    [self TomAnimationWithName:sender.currentTitle count:sender.tag];


}

    @end
- JPG:压缩比较高,通常用于照片,网页
属于有损压缩
压缩使得解压缩,对CPU消耗大,慢,费电 - PNG:压缩比较高
无损压缩
解压缩效率高,对CPU消耗小,苹果推荐使用的
jpg直接放到image 导不进去
要放到supportFile
ImageView的方法
- (void)startAnimating;
- (void)stopAnimating;
- (BOOL)isAnimating;
关于图像的实例化
UIImage是一个图像 UIImageView是显示图像的相框
imageName:系统推荐使用,但是图像实例化之后的释放是由系统负责.
但是,如果要自己释放,不能使用imageNamed方法.


 1万+
1万+

 被折叠的 条评论
为什么被折叠?
被折叠的 条评论
为什么被折叠?
 到【灌水乐园】发言


