


1、android自定义View属性,需要在res/values/下建立一个attrs.xml,在里面声明需要自定义的属性。
<?xml version="1.0" encoding="utf-8"?>
<resources>
    <attr name="titleText" format="string"/>
    <attr name="titleTextColor2" format="color"/>
    <attr name="titleTextSize" format="dimension"/>

    <declare-styleable name="CustomTitleView">
        <attr name="titleText"/>
        <attr name="titleTextColor2"/>
        <attr name="titleTextSize"/>
    </declare-styleable>
</resources>
这里自定义字体、字体大小、字体颜色三个属性,format是属性的取值类型,一共有:string,color,dimension,interger,enum,reference,float,boolean,fraction,flag,这几种类型。
2、自定义View样式:
package com.example.myapplication;

import android.content.Context;
import android.content.res.TypedArray;
import android.graphics.Canvas;
import android.graphics.Color;
import android.graphics.Paint;
import android.graphics.Rect;
import android.util.AttributeSet;
import android.util.Log;
import android.view.View;

import java.util.HashSet;
import java.util.Random;
import java.util.Set;

/**
 * Created by Administrator on 2016/7/30.
 */
public class CustomTitleView extends View {
    private String mTitleText;
    private int mTitleTextColor;
    private int mTitleTextSize;
    private Rect mBound;
    private Paint mPaint;

    public CustomTitleView(Context context) {
        this(context, null);
    }

    public CustomTitleView(Context context, AttributeSet attrs) {
        this(context, attrs, 0);
    }

    public CustomTitleView(Context context, AttributeSet attrs, int defStyleAttr) {
        super(context, attrs, defStyleAttr);
        TypedArray a = context.getTheme().obtainStyledAttributes(attrs, R.styleable.CustomTitleView, defStyleAttr, 0);
        int n = a.getIndexCount();
        for (int i = 0; i < n; i++) {
            int attr = a.getIndex(i);
            switch (attr) {
                case R.styleable.CustomTitleView_titleText:
                    mTitleText = a.getString(attr);
                    break;
                case R.styleable.CustomTitleView_titleTextColor2:
                    mTitleTextColor = a.getColor(attr, Color.BLACK);
                    break;
                case R.styleable.CustomTitleView_titleTextSize:
                    mTitleTextSize = a.getDimensionPixelSize(attr, 20);
                    break;
            }
        }
        a.recycle();
        mPaint = new Paint();
        mPaint.setTextSize(mTitleTextSize);
        mBound = new Rect();
        mPaint.getTextBounds(mTitleText, 0, mTitleText.length(), mBound);
        this.setOnClickListener(new OnClickListener() {
            @Override
            public void onClick(View view) {
                mTitleText = randomText();
                postInvalidate();
            }


        });
    }

    private String randomText() {
        Random random = new Random();
        Set<Integer> set = new HashSet<Integer>();
        Log.d("=====[CustomTitleView]:", "   set.size()=" + set.size());
        while (set.size() < 4) {
            int randomInt = random.nextInt(10);
            set.add(randomInt);
        }
        StringBuffer sb = new StringBuffer();
        for (Integer i : set) {
            sb.append("" + i);
        }
        return sb.toString();

    }

    @Override
    protected void onMeasure(int widthMeasureSpec, int heightMeasureSpec) {
        //super.onMeasure(widthMeasureSpec, heightMeasureSpec);
        int width = 0;
        int height = 0;

      /*MeasureSpec的specMode一共三种类型:
        EXACTLY:一般是设置了明确的值或者是MATCH_PARENT
        AT_MOST:表示子布局限制在一个最大值内,一般为WARP_CONTENT
        UNSPECIFIED:表示子布局想要多大就多大,很少使用*/
        int specMode = MeasureSpec.getMode(widthMeasureSpec);
        int specSize = MeasureSpec.getSize(widthMeasureSpec);
        switch (specMode) {
            case MeasureSpec.EXACTLY:
                width = getPaddingLeft() + getPaddingRight() + specSize;
                break;
            case MeasureSpec.AT_MOST:
                width = getPaddingLeft() + getPaddingRight() + mBound.width();
                break;
        }

        specMode = MeasureSpec.getMode(heightMeasureSpec);
        specSize = MeasureSpec.getSize(heightMeasureSpec);
        switch (specMode) {
            case MeasureSpec.EXACTLY:
                height = getPaddingBottom() + getPaddingTop() + specSize;
                break;
            case MeasureSpec.AT_MOST:
                height = getPaddingBottom() + getPaddingTop() + mBound.height();
                break;
        }

        setMeasuredDimension(width, height);
    }


    @Override
    protected void onDraw(Canvas canvas) {
        //super.onDraw(canvas);
        mPaint.setColor(Color.YELLOW);
        canvas.drawRect(0, 0, getMeasuredWidth(), getMeasuredHeight(), mPaint);
        mPaint.setColor(mTitleTextColor);
        canvas.drawText(mTitleText, getWidth() / 2 - mBound.width() / 2, getHeight() / 2 + mBound.height() / 2, mPaint);
    }
}
主要是在构造方法中获取自定义属性,然后重写onMeasure和onDraw两个方法。
3、在布局文件中引用自定义View
<?xml version="1.0" encoding="utf-8"?>
<RelativeLayout
    xmlns:android="http://schemas.android.com/apk/res/android"
    xmlns:tools="http://schemas.android.com/tools"
    xmlns:custom="http://schemas.android.com/apk/res/com.example.myapplication"
    android:layout_width="match_parent"
    android:layout_height="match_parent"
    tools:context="com.example.myapplication.MainActivity">

    <com.example.myapplication.CustomTitleView
        android:layout_width="200dp"
        android:layout_height="100dp"
        custom:titleText="3712"
        android:padding="10dp"
        custom:titleTextColor2="#ff0000"
        custom:titleTextSize="40sp"
        />
</RelativeLayout>
一定要引入 xmlns:custom=”http://schemas.android.com/apk/res/com.example.myapplication”我们的命名空间,后面的包路径指的是项目的包名。
效果如下:
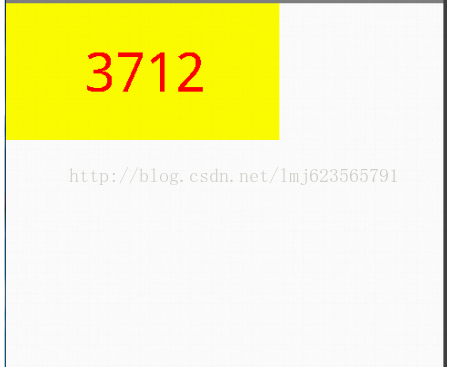
本文是学习鸿洋_Hongyang大神的自定义View所写的小笔记,感谢大神,鸿洋_博客:http://blog.csdn.net/lmj623565791/article/details/24252901


 568
568

 被折叠的 条评论
为什么被折叠?
被折叠的 条评论
为什么被折叠?
 到【灌水乐园】发言


