


 本文详细介绍了UIAlertController的三种使用方式:简单形式、带输入框和ActionSheet样式,包括Objective-C和Swift语言的实现代码。
运行环境:
Xcode7.2.1,iOS Simulator9.2
语言:
Objective-C、Swift
关于UIAlertController的使用,主要有三种不同的方式:
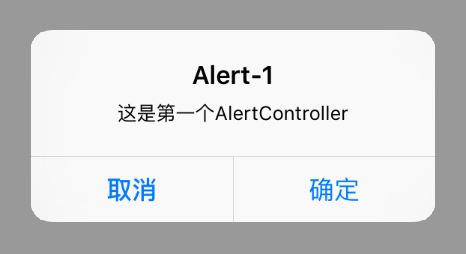
1.简单的UIAlertController形式;
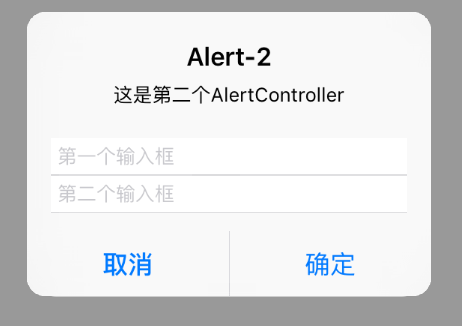
2.带有输入框的UIAlertController;
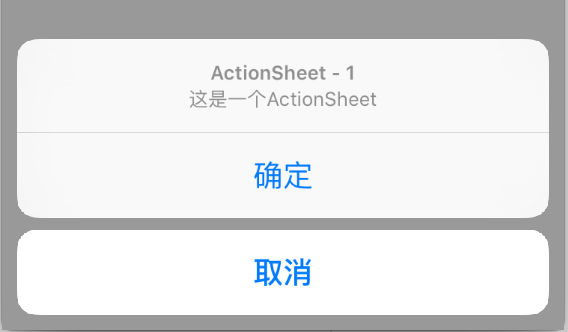
3.ActionSheet样式的UIAlertController。
下面依次说明一下三种方式的创建和使用。
1.简单的UIAlertController形式
Objective-C 版
// 创建一个UIAlertController, 命名为alertOne
UIAlertController *alertOne = [UIAlertController alertControllerWithTitle:@"Alert-1" message:@"这是第一个AlertController" preferredStyle:UIAlertControllerStyleAlert];

// 创建一个“取消”按钮
UIAlertAction *cancelAction = [UIAlertAction actionWithTitle:@"取消" style:UIAlertActionStyleCancel handler:nil];
// 创建一个“确定”按钮
UIAlertAction *confirmAction = [UIAlertAction actionWithTitle:@"确定" style:UIAlertActionStyleDefault handler:^(UIAlertAction * _Nonnull action){
    // 在此写点击“确定”按钮的触发事件
    // ......
}];
// 将两个按钮添加到alertOne
[alertOne addAction:cancelAction];
[alertOne addAction:confirmAction];

// 弹出alertOne
[self presentViewController:alertOne animated:YES completion:nil];
Swift 版
// 创建一个UIAlertController,命名为alertOne
let alertOne = UIAlertController.init(title: "Alert-1", message: "这是第一个AlertController", preferredStyle: UIAlertControllerStyle.Alert)
// 创建一个“取消”按钮
let cancelAction = UIAlertAction.init(title: "取消", style: UIAlertActionStyle.Cancel, handler: nil)
// 创建一个“确定”按钮
let confirmAction = UIAlertAction.init(title: "确定", style: UIAlertActionStyle.Default){ (action: UIAlertAction) -> Void in
    // 在此写点击“确定”按钮的触发事件
    // ......
    }
// 将两个按钮添加到alertOne
alertOne.addAction(cancelAction)
alertOne.addAction(confirmAction)

// 弹出alertOne
self.presentViewController(alertOne, animated: true, completion: nil)
2.带有输入框的UIAlertController
Objective-C 版
// 创建一个UIAlertController, 命名为alertTwo
UIAlertController *alertTwo = [UIAlertController alertControllerWithTitle:@"Alert-2" message:@"这是第二个AlertController" preferredStyle:UIAlertControllerStyleAlert];
// 给alertTwo添加一个输入框
[alertTwo addTextFieldWithConfigurationHandler:^(UITextField * _Nonnull textfield){
    textfield.placeholder = @"第一个输入框";
    textfield.clearButtonMode = UITextFieldViewModeWhileEditing;
}];
// 给alertTwo再添加一个输入框
[alertTwo addTextFieldWithConfigurationHandler:^(UITextField * _Nonnull textfield){
    textfield.placeholder = @"第二个输入框";
    textfield.clearButtonMode = UITextFieldViewModeWhileEditing;
}];
// 创建一个“取消”按钮
UIAlertAction *cancelAction = [UIAlertAction actionWithTitle:@"取消" style:UIAlertActionStyleCancel handler:nil];
// 创建一个“确定”按钮
UIAlertAction *confirmAction = [UIAlertAction actionWithTitle:@"确定" style:UIAlertActionStyleDefault handler:^(UIAlertAction * _Nonnull action){
    // 输出文本框中的内容
    NSLog([alertTwo.textFields[0] text]);
    NSLog([alertTwo.textFields[1] text]);
}];
// 将两个按钮添加到alertTwo上
[alertTwo addAction:cancelAction];
[alertTwo addAction:confirmAction];

// 弹出alertTwo
[self presentViewController:alertTwo animated:YES completion:nil];
Swift 版
// 创建一个UIAlertController,命名为alertTwo
let alertTwo = UIAlertController.init(title: "Alert-2", message: "这是第二个AlertController", preferredStyle: UIAlertControllerStyle.Alert)
// 给alertTwo添加第一个输入框
alertTwo.addTextFieldWithConfigurationHandler{ (textfield: UITextField) -> Void in
    textfield.placeholder = "第一个输入框"
}
// 给alertTwo添加第二个输入框
alertTwo.addTextFieldWithConfigurationHandler{ (textfield: UITextField) -> Void in
    textfield.placeholder = "第二个输入框"
}
// 创建一个“取消”按钮
let cancelAction = UIAlertAction.init(title: "取消", style: UIAlertActionStyle.Cancel, handler: nil)
// 创建一个“确定”按钮
let confirmAction = UIAlertAction.init(title: "确定", style: UIAlertActionStyle.Default){ (action: UIAlertAction) -> Void in
    // 在此写点击“确定”按钮的触发事件
    // ......
    print(alertTwo.textFields![0].text!)
    print(alertTwo.textFields![1].text!)
}
// 将两个按钮添加到alertTwo
alertTwo.addAction(cancelAction)
alertTwo.addAction(confirmAction)

// 弹出alertTwo
self.presentViewController(alertTwo, animated: true, completion: nil)
3.ActionSheet样式的UIAlertController
Objective-C 版
// 创建一个UIAlertController, 命名为alertThree, preferredStyle 设置为 UIAlertControllerStyleActionSheet
UIAlertController *alertThree = [UIAlertController alertControllerWithTitle:@"ActionSheet - 1" message:@"这是一个ActionSheet" preferredStyle:UIAlertControllerStyleActionSheet];
// 创建一个“取消”按钮
UIAlertAction *cancelAction = [UIAlertAction actionWithTitle:@"取消" style:UIAlertActionStyleCancel handler:nil];
// 创建一个“确定”按钮
UIAlertAction *confirmAction = [UIAlertAction actionWithTitle:@"确定" style:UIAlertActionStyleDefault handler:^(UIAlertAction * _Nonnull action){
    // 在此写点击“确定”按钮的触发事件
    // ......
}];
// 将两个按钮添加到alertThree上
[alertThree addAction:cancelAction];
[alertThree addAction:confirmAction];

// 弹出alertThree
[self presentViewController:alertThree animated:YES completion:nil];
Swift 版
// 创建一个UIAlertController, 命名为alertThree, preferredStyle 设置为 ActionSheet
let alertThree = UIAlertController.init(title: "ActionSheet - 1", message: "这是一个ActionSheet", preferredStyle: UIAlertControllerStyle.ActionSheet)
// 创建一个“取消”按钮
let cancelAction = UIAlertAction.init(title: "取消", style: UIAlertActionStyle.Cancel, handler: nil)
// 创建一个“确定”按钮
let confirmAction = UIAlertAction.init(title: "确定", style: UIAlertActionStyle.Default){ (action: UIAlertAction) -> Void in
    // 在此写点击“确定”按钮的触发事件
    // ......
}
// 将两个按钮添加到alertTwo
alertThree.addAction(cancelAction)
alertThree.addAction(confirmAction)

// 弹出alertThree
self.presentViewController(alertThree, animated: true, completion: nil)


 1794
1794

 被折叠的 条评论
为什么被折叠?
被折叠的 条评论
为什么被折叠?
 到【灌水乐园】发言


