


在很多应用中都有发照片的功能,比如从手机中选取一张照片,然后写一段描述文字,再点击完成按钮将图片和文字上传。那么能不能不通过点击按钮,而是通过手势拖动实现照片和文字上传呢?个人认为这样通过手势拖动上传的用户体验更好, 我在个人项目中就开发过这样的功能,下面就详细介绍一下。
首先看示例图片:
主页面就是一个简单的ImageView和一个自定义的可拖动的EditText:
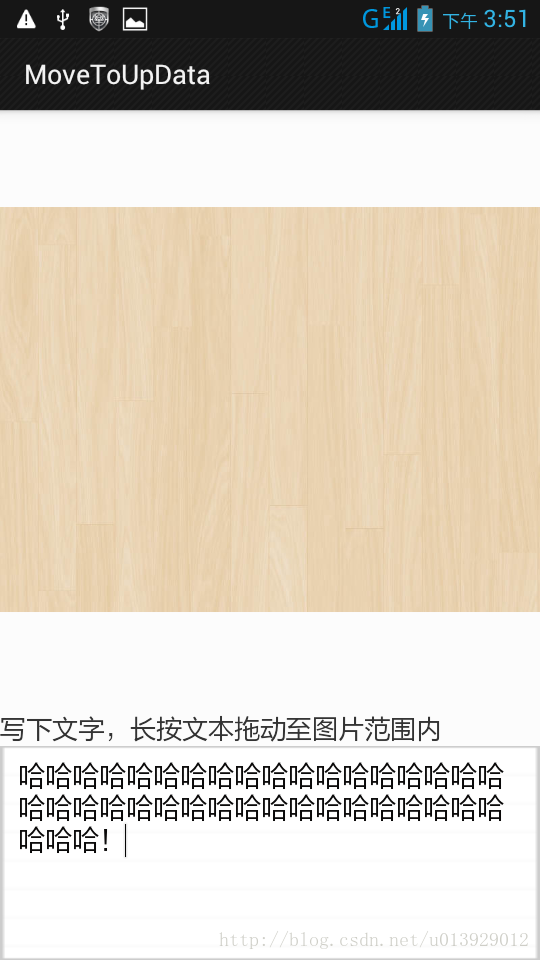
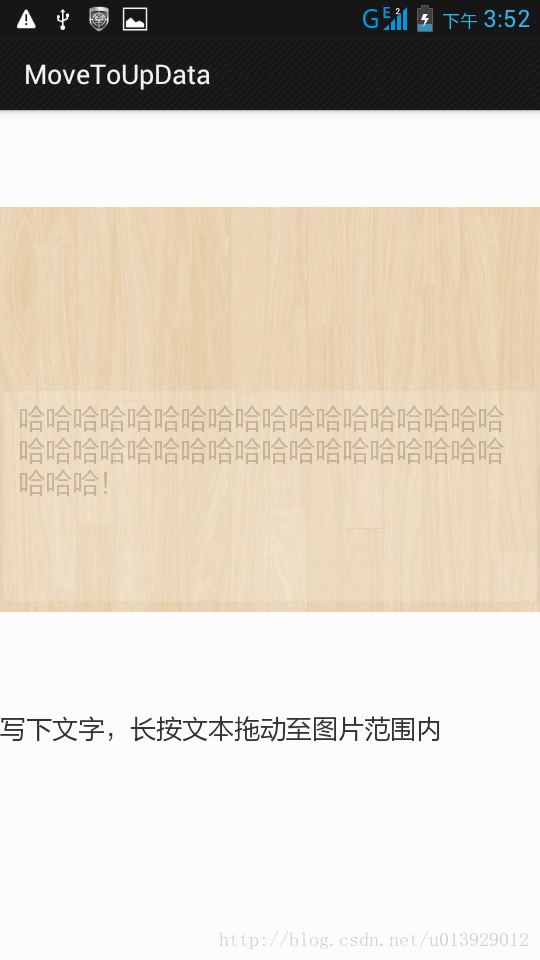
编辑文字完成后,即可拖动自定义的EditText至图片范围内:
要实现这种效果,首先自定义一个可以随手指拖动的EditText:
import android.app.Activity;
import android.app.Service;
import android.content.Context;
import android.os.Vibrator;
import android.util.AttributeSet;
import android.util.DisplayMetrics;
import android.util.Log;
import android.view.MotionEvent;
import android.view.View;
import android.view.View.OnLongClickListener;
import android.view.View.OnTouchListener;
import android.view.inputmethod.InputMethodManager;
import android.widget.EditText;
import android.widget.TextView;
import android.widget.Toast;
public class MyEditText extends EditText implements OnTouchListener,OnLongClickListener {
	private Context mContext;
	private int screenWidth, screenHeight;
    private Vibrator vibrator;
	private int lastX, lastY;
	private int downX, downY;
	private int upX, upY;
	private int rangeDifferenceX, rangeDifferenceY;
	private int mDistance = 10;
	private float maxY;
	private float top;
	private boolean flag;
	public MyEditText(Context context) {
		super(context);
		mContext = context;
		init();
	}
	public MyEditText(Context context, AttributeSet attrs) {
		super(context, attrs);
		mContext = context;
		init();
	}
	public MyEditText(Context context, AttributeSet attrs, int defStyle) {
		super(context, attrs, defStyle);
		mContext = context;
		init();
	}
	public void setMax(float maxY){
		this.maxY=maxY;
	}
	public float getMax(){
		return this.maxY;
	}
	public float getT(){
		return this.top;
	}
	public void setT(int top){
		this.top=top;
	}
		@Override
		public boolean onLongClick(View v) {
			vibrator.vibrate(100);
			//长按后变小
		    flag=true;

			return false;
		}
	public void init(){
		getDisplayMetrics();
		maxY=screenWidth;
		top=maxY+10;
		setOnTouchListener(this);
		vibrator=(Vibrator)mContext.getSystemService(Service.VIBRATOR_SERVICE);
		//this.setOnLongClickListener(new MyOnLongClickListener(mContext,this));
		this.setOnLongClickListener(this);
		this.setBackgroundResource(R.drawable.bg_s_01);

	}
	public static void hideSoftInput(Activity mContext, View view) {
		InputMethodManager imm = (InputMethodManager) mContext.getSystemService(Context.INPUT_METHOD_SERVICE);
		if (imm.isActive()) {
			imm.hideSoftInputFromWindow(view.getWindowToken(), 0);
		}
	}

	public static void showSoftInput(Activity mContext, View view) {
		InputMethodManager imm = (InputMethodManager) mContext.getSystemService(Context.INPUT_METHOD_SERVICE);
		if (imm.isActive()) {
			imm.showSoftInput(view, 0);
		}
	}


	public IOnKeyboardStateChangedListener mChangedListener;
	public void setKeyboardListener(IOnKeyboardStateChangedListener listener) {
		mChangedListener = listener;
	}
	public interface IOnKeyboardStateChangedListener{
		public void openKeyboard();
	}
	private void getDisplayMetrics() {
		DisplayMetrics dm = getResources().getDisplayMetrics();
		screenWidth = dm.widthPixels;
		screenHeight = dm.heightPixels - 50;
	}
	public boolean isTrue(){
		if(getT()<=maxY){
			return true;
		} else{
			return false;
		}
	}

	@Override
	public boolean onTouch(View v, MotionEvent event) {
		int action = event.getAction();
		switch (action) {
		case MotionEvent.ACTION_DOWN:
			downX = (int) event.getRawX();
			downY = (int) event.getRawY();
			lastX = (int) event.getRawX();
			lastY = (int) event.getRawY();
			break;
		case MotionEvent.ACTION_MOVE:
			if(!flag){
				return false;
			}
			int dx = (int) event.getRawX() - lastX;
			int dy = (int) event.getRawY() - lastY;
			int l = v.getLeft() + dx;
			int b = v.getBottom() + dy;
			int r = v.getRight() + dx;
			int t = v.getTop() + dy;
			//top=v.getTop()+dy;
			setT(t);
			if (l < 0) {
				l = 0;
				r = l + v.getWidth();
			}

			if (t < 0) {
				t = 0;
				b = t + v.getHeight();
			}

			if (r > screenWidth) {
				r = screenWidth;
				l = r - v.getWidth();
			}

			if (b > screenHeight) {
				b = screenHeight;
				top = b - v.getHeight();
			}
			v.layout(l, t, r, b);
			lastX = (int) event.getRawX();
			lastY = (int) event.getRawY();
			v.postInvalidate();
			v.setFocusable(false);
			v.setFocusableInTouchMode(false);
			hideSoftInput((Activity)mContext, v);
			break;
		case MotionEvent.ACTION_UP:
			flag=false;
			upX = (int) event.getRawX();
			upY = (int) event.getRawY();
			rangeDifferenceX = upX - downX;
			rangeDifferenceY = upY - downY;
			if (rangeDifferenceX > 0 && rangeDifferenceX <= mDistance) {
				if (rangeDifferenceY >= 0 && rangeDifferenceY <= mDistance) {
					v.setFocusable(true);
					v.setFocusableInTouchMode(true);

//					mChangedListener.openKeyboard();
				} else {
					if (rangeDifferenceY <= 0 && rangeDifferenceY >= -mDistance) {
						v.setFocusable(true);
						v.setFocusableInTouchMode(true);
//						mChangedListener.openKeyboard();
					} else {
						v.setFocusable(false);
						v.setFocusableInTouchMode(false);
					}
				}
			} else {
				if (rangeDifferenceX <= 0 && rangeDifferenceX >= -mDistance) {
					v.setFocusable(true);
					v.setFocusableInTouchMode(true);

//					mChangedListener.openKeyboard();
				} else {
					v.setFocusable(false);
					v.setFocusableInTouchMode(false);
				}
			}
			break;
		default:
			break;
		}
		return false;
	}

}
<LinearLayout xmlns:android="http://schemas.android.com/apk/res/android"
    xmlns:tools="http://schemas.android.com/tools"
    android:layout_width="match_parent"
    android:layout_height="match_parent"
    android:orientation="vertical"
    android:background="#FCFCFC">
   <FrameLayout android:id="@+id/frame"
                android:layout_height="wrap_content"
                android:layout_width="match_parent">
   <ImageView android:id="@+id/image"
              android:layout_width="match_parent"
              android:layout_height="wrap_content"
              android:src="@drawable/image"/>
   </FrameLayout>
   <TextView android:id="@+id/text"
             android:layout_width="wrap_content"
             android:layout_height="wrap_content"
             android:text="写下文字,长按文本拖动至图片范围内"
             android:textSize="17sp"/>
  <com.example.movetoupdata.MyEditText
            android:id="@+id/edit"
            android:gravity="start"
            android:layout_width="match_parent"
            android:layout_height="match_parent"
            android:hint="编辑文字,拖动至图片范围内完成上传"
            android:textColor="#0A0909"/>

</LinearLayout>
import android.os.Bundle;
import android.app.Activity;
import android.view.Menu;
import java.util.HashMap;
import java.util.Map;
import org.json.JSONObject;
import android.os.AsyncTask;
import android.os.Bundle;
import android.os.Handler;
import android.os.Message;
import android.app.Activity;
import android.content.Intent;
import android.content.SharedPreferences;
import android.graphics.Bitmap;
import android.graphics.BitmapFactory;
import android.graphics.Matrix;
import android.graphics.drawable.BitmapDrawable;
import android.view.Menu;
import android.view.View;
import android.view.View.OnClickListener;
import android.view.ViewGroup.LayoutParams;
import android.view.ViewTreeObserver;
import android.view.WindowManager;
import android.view.animation.AlphaAnimation;
import android.view.animation.Animation;
import android.view.animation.Animation.AnimationListener;
import android.widget.Button;
import android.widget.EditText;
import android.widget.FrameLayout;
import android.widget.ImageView;
import android.widget.LinearLayout;
import android.widget.Toast;
import android.widget.ImageView.ScaleType;

public class MainActivity extends Activity{
	private Bitmap bm;
	private Bitmap bitmap2;
	private FrameLayout frame;// 可以去掉
	private ImageView imageView;
	private LinearLayout back;
	private MyEditText edit;
	private AlphaAnimation alpha;
	public SharedPreferences sp;
	public SharedPreferences.Editor editor;
	public Handler handler = new Handler() {
		public void handleMessage(Message msg) {
			if (msg.arg1 == 1) {
				//edit开始动画变为不可见
				edit.setVisibility(View.GONE);
				edit.startAnimation(alpha);
			}
		}
	};

	@Override
	protected void onCreate(Bundle savedInstanceState) {
		super.onCreate(savedInstanceState);
		setContentView(R.layout.activity_main);
		init();
	}

	public void init() {
		alpha = new AlphaAnimation(1, 0);
		alpha.setDuration(3000);
		alpha.setAnimationListener(new AnimationListener() {

			@Override
			public void onAnimationStart(Animation animation) {
				// TODO Auto-generated method stub

			}

			@Override
			public void onAnimationRepeat(Animation animation) {
				// TODO Auto-generated method stub

			}

			@Override
			public void onAnimationEnd(Animation animation) {
				Toast.makeText(MainActivity.this, "正在上传", 5000)
						.show();
				new AsyncTask<Void, Void, Integer>() {
					@Override
					protected Integer doInBackground(Void... params) {
						int result = upData();
						return result;
					}

					protected void onPostExecute(Integer result) {
						if (result != null && result > 0) {
							Toast.makeText(MainActivity.this, "上传成功", 500)
									.show();
						} else {
							Toast.makeText(MainActivity.this, "上传失败,请重试",
									500).show();
						}
					}
				}.execute();

			}
		});
		imageView = (ImageView) findViewById(R.id.image);
		imageView.setScaleType(ScaleType.FIT_CENTER);
		edit = (MyEditText) findViewById(R.id.edit);
		editor = sp.edit();
		//启动该Activity的时候就启动一条线程不断监控editText是否被拖动至图片范围内,如果拖动至图片范围内
		//则发送消息,上传图片和文字
		new Thread() {
			public void run() {
				while (true) {
					if (edit.isTrue()) {
						Message msg = handler.obtainMessage();
						msg.arg1 = 1;
						handler.sendMessage(msg);
						break;
					} else {
					}
				}
			}
		}.start();
		initImage();
	}

	public void initImage() {
		WindowManager wm = this.getWindowManager();
		int window_width = wm.getDefaultDisplay().getWidth();
		int window_height = wm.getDefaultDisplay().getHeight();
	}
    //upData方法用来实现将图片和文字上传到服务器,编写代码,实现你自己的上传方式,注释是我自己写的
	//由于服务器和上传方式不同需要自己实现
	public Integer upData() {
		/*String text = edit.getText().toString();
		String imgStr = Base64Util.bitmap2Base64(bitmap2);
		int id = sp.getInt("user_id", 0);
		Map<String, String> map = new HashMap<String, String>();
		map.put("userId", id + "");
		map.put("text", text);
		map.put("imgStr", imgStr);
		String url = HttpUtil.BASE_URL + "AddCardAction";
		try {
			String result = HttpUtil.postRequest(url, map);
			if (result != null) {
				JSONObject jsonObj = new JSONObject(result);
				int i = jsonObj.getInt("result");
				return i;
			} else {
				return null;
			}
		} catch (Exception e) {
			// TODO Auto-generated catch block
			e.printStackTrace();
			return null;
		}**/
       return 1;
	}
}
以上就是示例代码,有些地方还没写清楚,这只是一个简单的示例,再结合从手机中选取图片或者调用相机拍摄照片即可实现一个类似于qq空间发动态的功能了,具体使用时可以根据自己的需要进行修改,如有疑问可在该博客下面评论留言,我会尽力及时解答。
附上源代码地址:http://download.csdn.net/detail/u013929012/7963207


 2598
2598


 被折叠的 条评论
为什么被折叠?
被折叠的 条评论
为什么被折叠?
 到【灌水乐园】发言


